Table of Contents
Advertisement
Quick Links
ARUH72TLAV2
ARUH96TLAV2
TM
INSTALLATION MANUAL
MANUEL D'INSTALLATION
MANUAL DE INSTALACIÓN
Únicamente para personal de servicio autorizado.
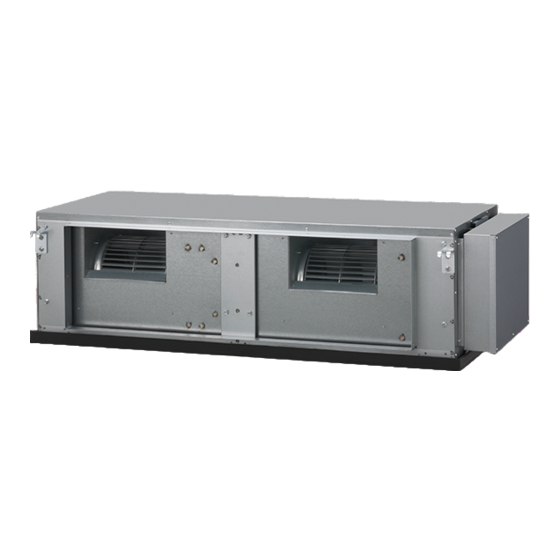
INDOOR UNIT (Duct type)
For authorized service personnel only.
UNITÉ INTÉRIEURE (Type à conduit)
Pour le personnel agréé uniquement.
UNIDAD INTERIOR (Tipo de ducto)
PART No. 9365748336
Advertisement
Table of Contents

Summary of Contents for Fujitsu AIRSTAGE ARUH72TLAV2
- Page 1 INSTALLATION MANUAL INDOOR UNIT (Duct type) For authorized service personnel only. MANUEL D’INSTALLATION UNITÉ INTÉRIEURE (Type à conduit) Pour le personnel agréé uniquement. MANUAL DE INSTALACIÓN ARUH72TLAV2 UNIDAD INTERIOR (Tipo de ducto) Únicamente para personal de servicio autorizado. ARUH96TLAV2 PART No. 9365748336...
-
Page 2: Table Of Contents
INSTALLATION MANUAL 1.2. SPECIAL PRECAUTIONS PART No. 9365748336 VRF system indoor unit (Duct type) When Wiring ELECTRICAL SHOCK CAN CAUSE SEVERE PERSONAL INJURY OR DEATH. ONLY A QUALIFIED, EXPERIENCED ELECTRICIAN SHOULD ATTEMPT TO WIRE THIS Contents SYSTEM. • Do not supply power to the unit until all wiring and tubing are completed or reconnected 1. -
Page 3: About This Product
2. ABOUT THIS PRODUCT Name and Shape Q’ty Application Special nut A For suspending the indoor (large flange) unit from ceiling 2.1. Precautions for using the R410A refrigerant WARNING Special nut B Do not introduce any substance other than the prescribed refrigerant into the refrigera- (small flange) tion cycle. -
Page 4: Installation Work
3.2.3. (For maintenance) 3. INSTALLATION WORK (1) Maintenance work of the control box is possible with the service access of the mea- surement shown in the figure. 3.1. Selecting an installation location (2) If maintenance work is to be done from the bottom side, the service access needs to be larger than the outside dimension of the indoor unit. - Page 5 3.3.2. Installing hangers 3.3.4. Mounting the duct Suspend the indoor unit by referring to the following figures. Follow the procedure in the following figure to install the ducts. Unit: in (mm) ARUH 72 ARUH 72 62-1/2 (1587) *13/16 14-9/16 9/16 17-11/16 (450) Unit: in (mm) 55-1/2 (1410)
-
Page 6: Pipe Installation
4. PIPE INSTALLATION Dimension A [in (mm)] Pipe outside diameter 0 (0) Dimension B -0.015 (-0.4) Flare tool for R410A, [in (mm)] [in (mm)] clutch type CAUTION 1/4 (6.35) 3/8 (9.1) Be more careful that foreign matter (oil, water, etc.) does not enter the piping than with 3/8 (9.52) 1/2 (13.2) refrigerant R410A models. -
Page 7: Installing Heat Insulation
Cable tie (large) (accessories) No gap Control box Coupler heat insulation (small) Rear panel (accessories) Thermistor Cable tie (large) (accessories) No gap Maintenance panel Coupler heat insulation (large) (accessories) Connection Pipe (liquid) Pipe heat insulation & Pipe rubber 5. INSTALLING DRAIN PIPES Safety drain pan •... -
Page 8: Electrical Wiring
Applying CAUTION area of Joint pipe Hard PVC side Be sure to properly insulate the drain pipes. adhesive (locally purchased) Make sure the drain water is properly drained. Drain pipe (locally purchased) Φ 3/4 in (19 mm) [I.D.], Φ 1-1/16 in (27 mm) [O.D.] 6. -
Page 9: Wiring Method
Breaker should be installed at every refrigerant system. Do not use a breaker in a different 6.3. Unit wiring refrigerant system. Refer to the table for the breaker specifications of each installation condition. Perform • Before attaching the cable to terminal block. the power crossover wiring within the range of the same refrigerant system. -
Page 10: Connection Of Wiring
6.3.2. Transmission and Remote controller cable ● Fix the conduit with the supporters as shown below. Transmission cable Remote controller cable Conduit (power supply cable) 1 in (25 mm) Supporter 1 in (25 mm) Indoor unit Shield cable 1-3/8 in (35 mm) (no film) •... -
Page 11: External Input And External Output (Optional Parts)
Wiring arrangement When connected to Apply voltage terminals of multiple indoor units with a connected unit, be sure to make a branch outside the indoor unit using a pull box, etc. as shown on below In following figure, all the possible connectors are connected for description. example. -
Page 12: Remote Sensor (Optional Parts)
● When function setting is “Emergency stop” mode. Operation behavior *If function setting “60” is set to “00” Input Connector Input signal Command Connector Output voltage Status OFF → ON Emergency stop Ch1 of CNA01 or Edge Stop CNA02 External output 1 ON →... -
Page 13: Setting The Address
7.1. Setting the address 7.3. Static pressure mode Manual address setting method CAUTION The indoor unit address and the refrigerant circuit For indoor For refrigerant address can also be set up through the wireless circuit address If the applicable static pressure does not match the static pressure mode, the static unit address remote controller. - Page 14 Allow an external controller to start 00 Start/Stop 00 Disable Emergency Enables or disable of emergency or stop the system, or to perform heat heat input. Emergency 01 Enable an emergency stop. stop 00 1 minutes * If an emergency stop is performed Fan delay Sets the fan delay time when the 01 50 seconds...
-
Page 15: Test Run
8. TEST RUN 10. ERROR CODES If you use a wired type remote controller, error codes will appear on the remote controller 8.1. Test run using Outdoor unit (PCB) display. If you use a wireless remote controller, the lamp on the photodetector unit will output error codes by way of blinking patterns.