Advertisement
Introduction
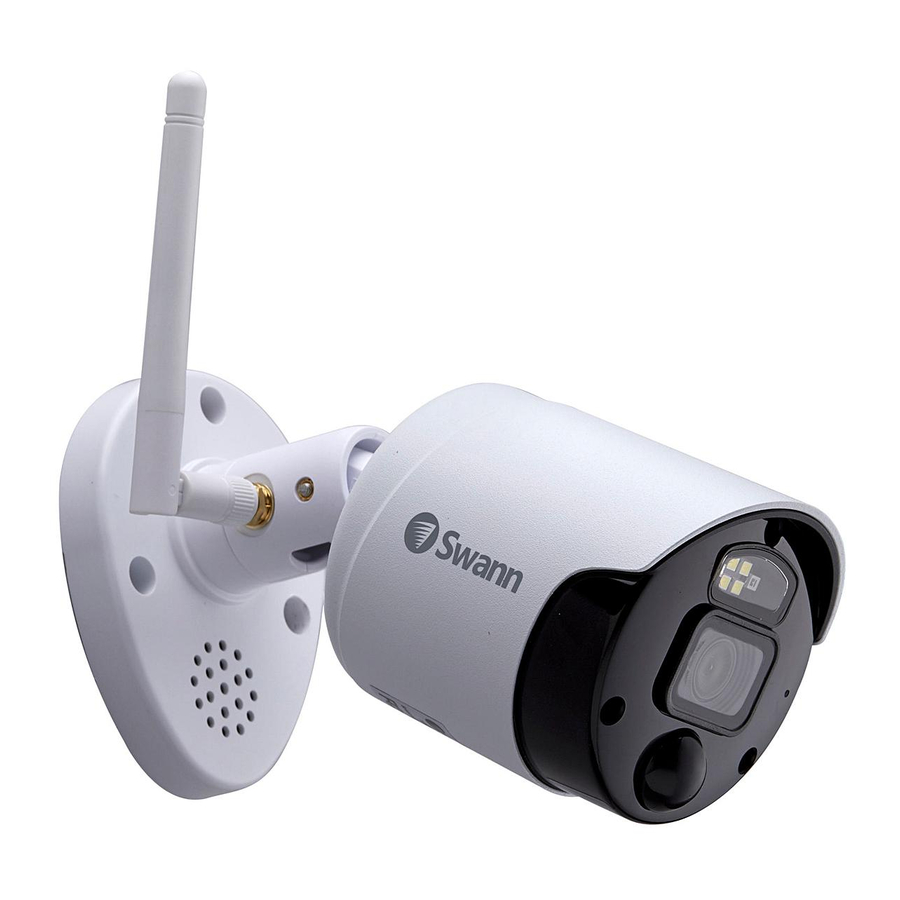
Congratulations on the purchase of your Swann Wi-Fi NVR Security Camera.
- 4K Ultra HD video with sensor spotlight, siren plus red & blue flashing lights
- True Detect™ Heat & Motion sensing for reliable alerts
- Powerful Night2Day™ color night vision
- Works in rain & snow all year round
Important instructions
- Make sure the camera is fixed correctly and stable if fastened in place.
- Never place strain of any kind on the power connection and/or power adapter.
- Do not operate if wires and terminals are exposed.

All jurisdictions have specific laws and regulations relating to the use of cameras. Before using any camera for any purpose, it is the buyer's responsibility to be aware of all applicable laws and regulations that limit the use of cameras.
About this Manual
The content in this manual is for information purposes only and is subject to change without notice. While every effort is made to ensure that this manual is accurate at the time of printing, no liability is assumed for any errors that occurred.
For instructions on how to configure your camera for motion detection, changing image settings, and other functions available, please consult the manual for your NVR. Go to support.swann.com, search for your model, then download.
Connecting the Camera
Connect the output on the power cable to the power input on the camera then connect the input on the power cable to the power adapter. The pair/reset button is used to restore factory default settings and to pair the camera to your NVR (if network settings are changed or when adding a new camera).

- Leave the antenna in a vertical position for best reception.
- ---
- Connect the power adapter to a power outlet then press the outlet's switch to the ON position to supply power.
Pairing the Camera

- In Live View mode, click a channel that you want to pair the camera to.
- A Pair button appears. Press this button to commence pairing. A message will appear stating that you need to press the pair button on the camera.
- Remove the cap covering the pair button. Press and hold the pair button for 3 seconds then release. The camera will commence pairing and the camera's IR LEDs will start flashing.
- After a short moment the camera will be paired and you will see the camera's image on-screen. If the camera fails to pair, repeat the above instructions and try again.
Mounting the Camera
The camera can be mounted onto a flat surface using the screws and wall plugs provided. The surface must have sufficient strength to hold the camera (the camera illustrated is for instructional purposes only).
- Position the camera in the location you want to mount it, and mark the screw holes on the surface to position the screws (a mounting template has been included). Then, using the appropriate screws for the surface you're fixing the camera to, secure the camera in place.
- If you're mounting to a wooden surface, then screw the camera directly to the surface.
- If you're mounting to a masonry surface (bricks, concrete or similar), then you'll need to use wall plugs.
Aiming the camera

- Loosen both screws (use a Phillips head screwdriver) to ad-just the camera's orientation. This enables you to rotate the camera so no matter what direction it is facing, your images will be the right way up. Tighten each screw to secure in place.
- Loosen the screw to tilt the camera up or down. Tighten the screw to secure in place.
- To pan the camera left or right, loosen the screw and position accordingly. Tighten the screw to secure in place.
Camera Location Tips
- Take into consideration what you want to monitor and where you'll get the best view of it.
- How you're going to connect the camera to your monitoring system; remember that cables and connections should be kept out of the weather.
- How to keep the camera out of harm's way. It's recommended to mount your camera at an elevated position.
- Place your camera as close to the area of interest as practicable. The best position is from about 13ft/4m above looking slightly down, keeping in mind the details you are looking for.
- Although the sky looks nice when you look at the live view from your camera, it is an unlikely direction for an offender to approach. Make sure your camera has minimal sky in it as the light in daylight can make the foreground of the image darker.
- Think about the most likely way a potential offend-er may approach your home, use your camera to give you the best coverage of these areas.
- The camera's casing is resistant to different weather conditions and tampering. It would take an overwhelming event to damage the housing.
- Even though the camera is weather and water-resistant, prolonged exposure to adverse weather conditions such as sunlight or excessive moisture, may eventually damage the internal components of the camera and adversely affect its performance.
- Run cables inside a wall cavity or other protected enclosure, and ensure that all wiring and connectors are insulated and protected from moisture.
- Don't put your cable near live electrical wiring. AC electricity generates radio "noise" which can interfere with the signal from your camera.
Limited Warranty - Terms & Conditions
Swann Communications warrants this product against defects in workmanship and material for a period of one (1) year from its original purchase date.
For Australia: Our goods come with guarantees which cannot be excluded under Australian Consumer Law. You are entitled to a replacement or refund for a major failure and for compensation for any other reasonably foreseeable loss or damage. You are also entitled to have the goods repaired or replaced if the goods fail to be of acceptable quality.
Helpdesk & Resources
Visit Swann Support Center at support.swann.com. You can register your product for dedicated customer support, download guides, find answers to commonly asked questions, and more.

Product Registration

Customer Support

Product Manuals

Frequently Asked Questions

Support Community
MNVW800CAMREV1E | © Swann 2021

Documents / ResourcesDownload manual
Here you can download full pdf version of manual, it may contain additional safety instructions, warranty information, FCC rules, etc.
Advertisement
Thank you! Your question has been received!


Need Assistance?
Do you have a question about the NVW-800CAMT that isn't answered in the manual? Leave your question here.