Yamaha RX-V373 Owner's Manual
Hide thumbs
Also See for RX-V373:
- Service manual (115 pages) ,
- Owner's manual (83 pages) ,
- Easy setup manual (59 pages)

Related Manuals for Yamaha RX-V373


Summary of Contents for Yamaha RX-V373
- Page 1 AV Receiver Owner’s Manual Read the supplied booklet “Safety Brochure” before using the unit. English...
- Page 2 CONTENTS Accessories ............4 9 Optimizing the speaker settings automatically (YPAO) .
- Page 3 Yamaha technologies ........
- Page 4 Accessories Operating range of the remote control Check that the following accessories are supplied with the product. • Point the remote control at the remote control sensor on the unit and remain within the operating range shown below. Remote control ...
- Page 5 FEATURES What you can do with the unit . p.44 • High-quality sound from iPod via Supports 2- to 5.1-channel speaker system. digital connection Allows you to enjoy your favorite acoustic spaces in various styles. . p.48 • Playback of music stored on USB .
- Page 6 Full of useful functions! Useful tips The combination of video/audio input jacks does not ❑ Connecting various devices (p.23) ❑ Creating high-realistic sound fields (p.36) match an external device... A number of HDMI jacks and various input/output jacks CINEMA DSP allows you to create a natural and realistic Use “Audio In”...
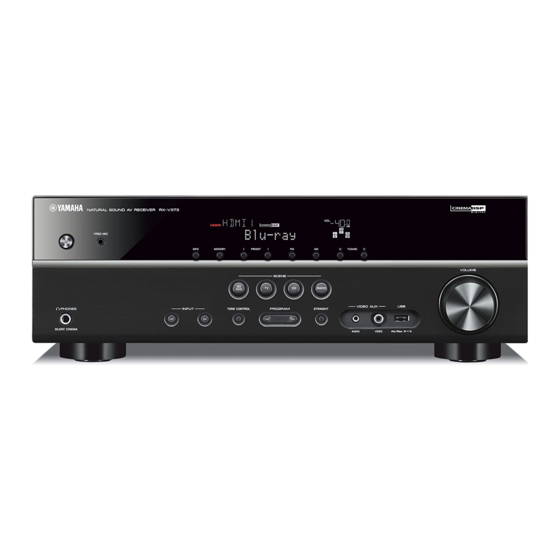
- Page 7 Part names and functions Front panel YPAO MIC INFO MEMORY PRESET TUNING VOLUME SCENE RADIO VIDEO PHONES INPUT TONE CONTROL STRAIGHT PROGRAM SILENT CINEMA AUDIO VIDEO iPod/iPhone 5V z (power) key TUNING keys PROGRAM keys Turns on/off (standby) the unit. Select the radio frequency (p.40).
- Page 8 Front display (indicators) VOL. ENHANCER ADAPTIVE DRC iPod CHARGE SLEEP STEREO TUNED MUTE > HDMI iPod CHARGE Speaker indicators Lights up when HDMI signals are being input or output. Lights up when the iPod is being charged while the unit is in Indicate speaker terminals from which signals are output.
- Page 9 Rear panel ANTENNA (BD/DVD) HDMI OUT HDMI 1 HDMI 2 HDMI 3 HDMI 4 COMPONENT VIDEO SPEAKERS FRONT SURROUND CENTER COMPONENT MONITOR OUT VIDEO MONITOR OUT VIDEO OPTICAL COAXIAL COAXIAL OPTICAL AUDIO (CD) ( TV ) SUBWOOFER * The area around the video/audio output jacks is marked in white on the actual product to prevent improper connections.
- Page 10 Remote control Remote control signal transmitter External device operation keys Transmits infrared signals. Control playback of the iPod (p.45) or USB storage device (p.48). TRANSMIT indicator TRANSMIT RECEIVER z key Lights up when remote control signals are transmitted. RECEIVER Turns on/off (standby) the unit. SLEEP SLEEP key HDMI...
- Page 11 PREPARATIONS General setup procedure Placing speakers (p.12) Select the speaker layout for the number of speakers that you are using and place them in your room. Connecting speakers (p.15) Connect the speakers to the unit. Connecting a TV (p.18) Connect a TV to the unit. Connecting playback devices (p.23) Connect video devices (such as BD/DVD players) and audio devices (such as CD players) to the unit.
- Page 12 2 3 4 5 6 7 8 9 Speaker placement Placing speakers Select the speaker layout for the number of speakers that you are using and place the speakers and subwoofer (with built-in amplifier) in your room. This section describes the representative speaker layout examples.
- Page 13 2 3 4 5 6 7 8 9 Speaker placement 5.1-channel system 3.1-channel system 10° to 30° 10° to 30° 4.1-channel system 2.1-channel system 10° to 30° 10° to 30° PREPARATIONS ➤ Placing speakers...
- Page 14 2 3 4 5 6 7 8 9 Speaker placement ■ Setting the speaker impedance (U.S.A. and Canada models only) Under its default settings, the unit is configured for 8-ohm speakers. When connecting 6-ohm speakers, set the speaker impedance to “6 MIN”. In this case, you can also use 4-ohm speakers as the front speakers.
- Page 15 3 4 5 6 7 8 9 Speaker connections Connecting speakers ■ Connect the speakers placed in your room to the unit. 5.1-channel system Connecting speaker cables The following diagrams provide connections for a Speaker cables have two wires. One is for connecting 5.1-channel system as an example.
- Page 16 3 4 5 6 7 8 9 Speaker connections (Connecting center/surround speakers) a Remove approximately 10 mm (3/8”) of insulation from the ends of the speaker cable, and twist the bare wires of the cable firmly together. b Press down the tab. c Insert the bare wires of the cable into the hole in the terminal.
- Page 17 Input/output jacks and cables ■ ❑ VIDEO jacks ❑ AUDIO jacks Video/audio jacks Transmit analog video signals. Use a video pin cable. (Stereo L/R jacks) ❑ HDMI jacks Transmit analog stereo audio signals. Use a stereo pin Transmit digital video and digital sound through a single Video pin cable cable.
- Page 18 1 2 3 4 5 6 7 8 9 TV connection Connecting a TV Connect a TV to the unit so that video input to the unit can be output to the TV. About HDMI Control You can also enjoy playback of TV audio on the unit. HDMI Control allows you to operate external devices via HDMI.
- Page 19 1 2 3 4 5 6 7 8 9 TV connection ❑ Necessary settings Configure the settings for HDMI Control. To use HDMI Control and ARC, you need to configure the following settings. a Enable HDMI Control on the TV and playback devices (such as HDMI Control- For details on settings and operating your TV, refer to the instruction manual for the TV.
- Page 20 1 2 3 4 5 6 7 8 9 TV connection ■ ❑ Necessary settings Connection Method 2 (HDMI Control-compatible TV) To use HDMI Control, you need to configure the following settings. Connect the TV to the unit with an HDMI cable and a digital optical cable. For details on settings and operating your TV, refer to the instruction manual for the TV.