Table of Contents
Advertisement
Quick Links
Day One+
MX304
IN THIS GUIDE
Step 1: Begin | 1
Step 2: Up and Running | 7
Step 3: Keep Going | 12
Step 1: Begin
IN THIS SECTION
Meet the MX304 Universal Router | 2
Install the MX304 | 2
Power On | 5
In this guide, we provide a simple, three-step path, to quickly get you up and running with your new router. We've
simplified and shortened the installation and configuration steps, and included how-to videos. You'll learn how to install
the MX304 in a rack, power it up, and configure basic settings.
This guide covers how to install an AC-powered MX304 router. For instructions on installing DC-powered and
HVAC/DC-powered MX304 routers, see the
MX304 Hardware
Guide.
Advertisement
Table of Contents

Related Manuals for Juniper Day One+ MX304


Summary of Contents for Juniper Day One+ MX304
- Page 1 Day One+ MX304 IN THIS GUIDE Step 1: Begin | 1 Step 2: Up and Running | 7 Step 3: Keep Going | 12 Step 1: Begin IN THIS SECTION Meet the MX304 Universal Router | 2 Install the MX304 | 2 Power On | 5 In this guide, we provide a simple, three-step path, to quickly get you up and running with your new router.
-
Page 2: What's In The Box
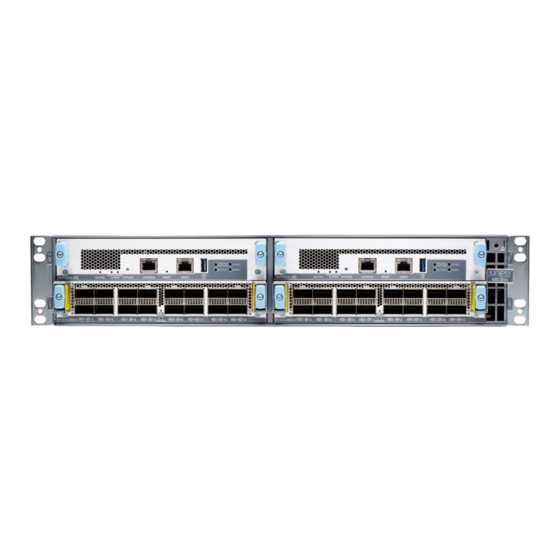
The MX304 router provides a highly compact, 2 U platform with the flexibility to scale out services with 4.8 Tbps system capacity. Based on Juniper Networks Trio 6 chipset, the MX304 router is designed and optimized for a wide range of demanding edge requirements (business, residential, mobile, cable, data center and more) anywhere in the network. -
Page 3: What Else Do I Need
• SFP transceiver dust cover and QSFP transceiver dust cover • An electrostatic discharge (ESD) grounding strap • Grounding lug (Panduit LCD6-14A-L or equivalent) and screws What Else Do I Need? • Someone to help you secure the router to the rack •... - Page 4 3. (Optional) Install the cable management brackets on each side of the front of the chassis. Secure each bracket with screws at the bottom and top of the bracket as shown: 4. Position the router in front of the four-post rack or the cabinet. 5.
- Page 5 8. Verify that the mounting brackets on each side of the rack are level. 9. (Optional) Secure the front cover with the air filter to the chassis. Tighten the four screws, turning them clockwise. Power On Now that you've mounted your router in the rack, you're ready to connect it to power. The AC-powered MX304 router comes with two AC power supplies preinstalled on the rear panel.
- Page 6 Detach the ESD grounding strap from the site ESD grounding point and connect it to one of the ESD points on the chassis. Place the grounding lug attached to the grounding cable over the grounding points on the chassis, and secure it with M6 pan head screws.
-
Page 7: Step 2: Up And Running
Step 2: Up and Running IN THIS SECTION Plug and Play | 7 Perform Initial Configuration | 7 Now that the MX304 is powered on, let’s do some initial configuration to get it up and running on the network. It’s simple to configure and manage the MX304 using the CLI. - Page 8 NOTE: You may see messages on the console relating to ZTP and DHCP. These messages stop once your remove the ZTP statements from the default configuration. Configure your serial port for 9600 bps/8-N-1, and attach the cable to the CON port of the desired Routing- Engine.
- Page 9 Remove factory default configuration statements that relate to ZTP. After you commit these initial changes the ZTP process is stopped and the related console messages are no longer displayed. [edit] root@# delete system commit root@# delete chassis auto-image-upgrade root@# delete interfaces fxp0 Configure the IP address and prefix length for the router’s management Ethernet interface (fxp0).
- Page 10 In our example we define a single default static route to provide management network reachability to all possible remote destinations. [edit] 0.0.0.0/0 next-hop destination-IP retain no-readvertise root# set routing-options static route 13. Configure the IP address of a backup router. The backup router is only used while the routing protocol is not running.
- Page 11 interfaces { fxp0 { unit 0 { family inet { address/prefix-length ; address lo0 { unit 0 { family inet { address/ 32; address routing-options { static { destination-IP ; route 0.0.0.0/0 next-hop 17. Commit the configuration to activate it on the router. [edit] root# commit commit complete...
-
Page 12: What's Next
Step 3: Keep Going IN THIS SECTION What's Next? | 12 General Information | 12 Learn with Videos | 13 Congratulations! Now that you've done the initial configuration, your MX304 is ready to use. Here are some things you can do next: What's Next? If you want to Then... - Page 13 Juniper Learning Portal Juniper Juniper Networks, the Juniper Networks logo, Juniper, and Junos are registered trademarks of Juniper Networks, Inc. in the United States and other countries. All other trademarks, service marks, registered marks, or registered service marks are the property of their respective owners.