Table of Contents
Advertisement
Quick Links
Advertisement
Table of Contents

Related Manuals for NEC N343i


Summary of Contents for NEC N343i
- Page 1 N343i Empowered by Innovation...
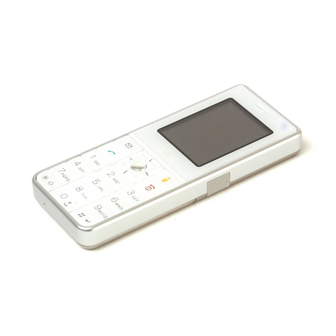
- Page 2 Your new NEC N343i phone Your new N343i is an ultra slim mobile that fits easily in your pocket. Take photos using the integrated camera, then view them on the 65K colour screen and share them with your friends over MMS. Check emails and surf the web with innovative i-mode™...
- Page 3 Important Information Safety And Precautions Before You Start Getting Started Basic Calls and Phone Use Call Options Personalizing Settings Text Entry Messages i-mode Phonebook Camera My data Java™ application Accessory Index...
-
Page 4: Table Of Contents
Non-ionizing radiations ... 7 Efficient use ... 7 Radio frequency energy ... 7 Exposure to Radio Frequency Energy ... 7 Disposing of your used NEC products ... 7 Licenses ... 7 Before You Start Cellphone system structure ... 9 Parts and functions ... 10 Display information ... - Page 5 Charge settings ... 29 Personalizing Settings Voice volume ... 30 Answer options ... 30 Minute reminder ... 30 Auto key lock ... 31 ALS setup ... 31 Time/date ... 31 Language ... 32 Phone modes ... 32 Power on greetings/animations ... 35 Wallpaper ...
-
Page 6: My Data
Calling phone numbers from phonebook ... 66 Editing phonebook entries ... 67 Camera Taking a picture ... 69 Camera (before taking a picture) ... 69 Camera option menu (after saving a picture) ... 71 My data Photos and pictures ... 72 Sounds ... -
Page 7: Important Information
Read this information before using your phone Conditions of Use Operation of this NEC mobile phone is subject to the following two conditions; (1) this device may cause harmful interference, and (2) this device must accept any interference received, including interference that may cause undesired operation. -
Page 8: Safety And Precautions
Safety And Precautions Emergency services To make an emergency call in any country: • Press 112, the worldwide emergency number. • Ask the operator for the service which you require: Police, Ambulance, Fire Brigade, Coastguard or Mountain Rescue Services. Give your location and, if possible, remain stationary to maintain phone contact. -
Page 9: Vehicles Equipped With An Air Bag
The use of third party equipment, cables or accessories, not manufactured or authorised by NEC, may invalidate the warranty of your cellphone and also adversely affect the phone's operation. For example use only the NEC mains cable supplied with the AC charger. - Page 10 and KR226206B1. People's Republic of China Pat. Application Nos. 98802801.8, 98809472.X and 96196739.0; Mexico Pat. No. 208141; Russian Federation Pat. No. 2206118; and additional patents are pending worldwide" • Java and all Java-based trademarks and logos are trademarks or registered trademarks of Sun Microsystems, Inc in the U.S.
-
Page 11: Before You Start
Before You Start Cellphone system structure Every time you use your phone, there are several components involved for the phone to operate successfully and to process a call: The people that The people that supply make your phone your SIM card and bills All the features described in this user manual are supported by your phone. -
Page 12: Parts And Functions
Parts and functions The phone supports a number of languages and the keyboard symbols have been chosen for world-wide operation. -
Page 13: Display Information
Display information LCD graphic display area This area contains the greetings graphic on power up, status graphics, as well as information when searching for networks and making calls. The standby screen shows the current network, vibrator status, current active mode, current time and date and whatever you have keyed using the phone’s keypad. -
Page 14: Main Menu
™ JAVA editor, MFE (Multi-field editor), Call control, etc. Main menu The menu structure starts with the main menu. Main menu consists of nine different display screens that indicate main functions. To access each main menu function, press key from the standby screen. When the settings screen is displayed, use the through the main menu functions or press number keys (1-9) to access the following menus. -
Page 15: Keypad Shortcuts
Keypad shortcuts The following single key shortcuts are available from the standby screen (the screen that automatically appears when the phone is on and not in use) • Press the navigation key to access the phonebook. • Press the navigation key to access •... -
Page 16: Main Phone Features
Main phone features • The GSM/GPRS phone can be used in almost any part of the world with the Tri-band (GSM 900/1800/1900 bands) features. Your phone has the following features: • 2 Softkeys • Li-ion Battery • Alternate Line Service (ALS) compatible •... -
Page 17: Displayed Icons For Lcd
Displayed icons for LCD 4 18 4 17 Indicates the battery level. Appears when charging the battery. Indicates the battery charging status (error, stopped). Indicates that there is a new SMS/EMS in your phone. Indicates that there is a new message on the network. -
Page 18: Overview Of Menu Function
Overview of menu function Standby screen Main menu 2nd Level menu Settings Phone Phone modes Display Calls Security Network T9 input Reset settings Messages Create Inbox Draft Outbox Predefined text Settings Memory status Cell broadcast Main menu screen Right Softkey Main menu 2nd Level menu i-mode... -
Page 19: Getting Started
• Fully charged battery Service activation Before you can use your new NEC phone, the service must be activated by your service provider. Please contact your local service provider regarding phone activation. Voice mail messaging and text messaging Voice mail messaging and text messaging services, when available, are provided by your service provider. Before you can receive voice or text messages with your phone, you must subscribe to these service options. -
Page 20: Inserting A Sim Card
Inserting a SIM card Before inserting a SIM card, make sure the power is switched off. 1 Press down the slit of the rear cover. 2 While pressing down the rear cover, slide the rear cover about 3 mm in the direction indicated by the arrow. 3 Remove the rear cover. -
Page 21: Preparing The Battery
Preparing the battery Using any battery pack or AC adapter not specified by NEC with this phone may be dangerous and may invalidate any warranty and approval given to the phone. Do not leave the charger connected to the power supply when it is not in use. -
Page 22: Low Battery Indication
Partial battery power Low battery power Very low battery power Battery empty Low battery indication When the battery voltage falls below the working level, a message “Battery is low” will be displayed along with an empty battery icon on the top left corner of the screen. -
Page 23: Powering On The Phone
Powering on the phone Switching the phone on Press and hold key for at least two seconds to switch on. The screen is either blank, displays an animation, or displays a greetings message during the powering on process. After the powering on process, the phone displays the standby screen. -
Page 24: Basic Calls And Phone Use
Basic Calls and Phone Use You can make a call in the same way as a normal push-button phone. Press Making an emergency call You may make an emergency call when your SIM card is not inserted in your phone. Simply power on your phone and dial the emergency number of your local region. -
Page 25: Using Handsfree
Using handsfree Insert the handsfree to the charger/earphone jack at the side of the phone. When there is an incoming call: • Under with Car mode Auto answer • Under manual answering mode, press Receiving calls When you receive a call: •... -
Page 26: Placing A Call On Hold
transmitted over the network, the number of the caller or the corresponding name will be displayed on the LCD screen. Placing a call on hold You can place a received or dialed call on hold by pressing Making a second call Dial the second call while on the first call. -
Page 27: International Dialling Service
With Auto redial activated, your phone will redial a number up to 10 times if the first attempt is not successful. For procedures to activate Auto redial, see “Auto redial” on page 38. When a dialed number cannot be connected, a tone is heard and an alert message will be shown on the display. The phone returns to the standby screen and the number will be automatically dialed again after a short delay. -
Page 28: Call Features
Call features Fast dial Fast dials can be activated in the Abbreviated Dialing Numbers by entering a number between 1 to 255 (depending on your SIM card) and pressing #. The phone details that correspond to the record number will be displayed. Press Voice mail Most service providers offer this external voice mail service to their subscribers. -
Page 29: Screen Saver
For details, see “Auto key lock” on page 31. Screen Saver The phone is designed with the screen saver function. When the standby screen is displayed for 35 seconds, the screen saver activates automatically. If the keylock/auto key lock function is also activated, the screen saver activates 35 seconds after the activation of keylock. -
Page 30: Call Options
Call Options From the main menu, select Phonebook A quick way to view received and dialed calls list from the standby screen is to press navigation keys. If you miss a call, you can check it by pressing displayed in the Softkey area. Dialed calls screen will display the date and time of the last 15 calls made on your phone. -
Page 31: Charge Settings
voice calls Total incoming Total outgoing return to the screen. Charge info Charge settings The Charge settings feature enables you to set a limit in units so your phone cannot be used once the limit is reached. The charge settings service is SIM card and network dependent. From the main menu, select Phonebook •... -
Page 32: Personalizing Settings
Personalizing Settings Voice volume To adjust the volume during a call, use the When you are not making any calls, use the following procedure: From the main menu, select > Settings • Use the navigation key to increase, or use the •... -
Page 33: Auto Key Lock
Use the navigation keys or press the field to set a for the reminder. Press Timer Auto key lock You can lock your keypad keys by activating From the main menu, select > Settings indicates that the function has been activated. If your key pad is not used for 30 seconds, the phone automatically locks the key pad. You can unlock the keys by pressing and holding # from the standby screen. -
Page 34: Language
• After editing, press the Left Softkey Set time format From the main menu, select > Settings • Use the navigation keys to highlight button. The phone returns to the Time / date Set date format From the main menu, select >... -
Page 35: Changing Phone Mode Settings
When a phone mode is selected, some of your phones settings will be altered according to the selected phone mode. The phone functions that can be altered include: • Ringer setting (On/Off) • Ringer (for Any call/Phonebook call/Alarm/Messages/Friends/Colleagues/Family/Biz partner/VIP) • Ringer volume (for Any call/Phonebook call/Alarm/Messages/Friends/Colleagues/Family/Biz partner/VIP) •... - Page 36 • Press Left Softkey to access the Sounds • Highlight the desired ringtone and press Ringer volume To change the ring volume settings, select • Highlight the type of calls to change and press Family Biz partner • The volume screen showing the level of ring volume is displayed. Use the volume setting to the level required (the level bar moves in the direction corresponding to the key pressed).
-
Page 37: Power On Greetings/Animations
• Highlight and press Auto answer Auto answer only works if your phone is working with a handsfree kit or a headset. Power on greetings/animations Two types of greeting/animation screens can be displayed when the phone is power-on: • No greeting (standard powering on screen display animation). •... -
Page 38: Animation
Animation You can select one of the two animations available in your phone: • From the main menu, select Settings • Use the navigation keys to highlight either radio button. Brightness To alter the brightness of your phone's display screen, use the following procedure: •... -
Page 39: Call Waiting
• Receiving data (Divert all data calls to a phone number with a PC connection) The divert status and details that you have selected will be stored in the network and not in your phone. (e.g., the divert status will remain even when the SIM card is changed). -
Page 40: Security
• From the main menu, select Settings • Select to set call waiting on. Active • Select to set the call waiting off. Cancel The setting is saved and a confirmation message from the network will be displayed. Checking status of call waiting •... -
Page 41: Phone Lock
The PIN will be requested most of the times when the phone is switched on. This feature can be deactivated, at the risk of unauthorized usage of your phone. Some service providers do not permit the deactivation of this control. You can set up your phone to require your incoming calls. -
Page 42: Fixed Dialing
incoming calls) Roaming allows you to use your phone in many parts of the world and to pay all charges through your home network Service Provider. Your network operator usually has agreements with named networks in other countries. The phone also allows you to set network preferences of your own. -
Page 43: Network
Network Network info • From the main menu, select Settings • Use the navigation keys to highlight the network you want to connect to and press standby mode after a confirmation message is displayed. Choose network • From the main menu, select Settings will be very useful if you are not on your home network or you need to register on a different network. -
Page 44: T9 Input
to go back to Right Softkey Network Transfer rate Select an appropriate data transfer rate for your phone. • From the main menu, select Settings or press Right Softkey 19.2Kb/s T9 input Please refer to “T9 language” on page 44 for details. Reset settings To revert your phone to its default factory settings, select Softkey... -
Page 45: Text Entry
Text Entry This section describes how you can enter text (letters, numbers and symbols). The same method of text entry can be used in all of the phone’s editing display. Mode change In the text entry screen, pressing key can change the text entry mode in the normal text input or when T9 key will toggle T9 input On/Off. -
Page 46: T9 Language
and return to the screen. Edit • Text formats like Italics and Bold cannot be applied simultaneously to your messages. Predefined text You may add a predefined text into your message editing screen. Highlihgt list of texts and press Left Softkey to open the the edit screen. -
Page 47: Numeric Input
• Press 4, 6, to display “good”, then press Other key functions • 0: To insert a space and/or complete the word. • Left Softkey: To display other words with the same combination of letters (e.g. words like home, number keys 4, 6, 6, Left Softkey). -
Page 48: Messages
Messages From the main menu, select . Using this function, you can send and receive text messages with attached sound, image files, etc. Messages Alternatively, you can press navigation key to access the The following folders in the menu have the following functions: Messages •... -
Page 49: Creating And Sending A Message
To select an option, highlight the option and press Depending on the type of message you are viewing, the available Options menu may change. SMS edit screen options menu When creating an SMS in the screen, press Edit • Send - Send the edited SMS and subsequently save it in •... -
Page 50: Predefined Text
Softkey again and choose accordingly. • Press Left Softkey to insert a number from the phonebook list. • To send, press Left Softkey to display the Outbox For more information on ‘Inserting object’ and ‘Format’, please refer to page 43 and 44. The maximum number of characters is defined as the number of single byte characters (alphanumeric characters, etc.) allowed in a field/item. -
Page 51: Message Settings
• Highlight and press Left Softkey Select or just the message. and save Save Once you edit the predefined texts, you cannot return them to the default setting even by the reset setting function. Message settings From the main menu, select Messages The following describes the setting items for SMS/EMS settings and Cell broadcast settings: Service centre... -
Page 52: Memory Status
Memory status The available memory and the used-up memory will be displayed. • With the standby screen displayed, press • Select to display the SMS memory status of the phone and the SIM memory status. Memory status Cell broadcast From the main menu, select Messages When cell broadcast service is activated, the phone operating time will be reduced. -
Page 53: I-Mode
The ring tone sounds when your phone receives an incoming call, SMS, e-mail, and multimedia message service (MMS). What is a Wallpaper? This is the picture displayed when your cell phone is in the idle or power-saving mode. You may download any of the 65536-colour pictures on the... -
Page 54: I-Mode Icon
What is an Animation? You may download 65536-colour animations on the website to your phone. What is Java™ applications? See “Java™ application” on page 76 for details. i-mode icon See “i-mode icon” on page 15 for details. i-mode Settings From the main menu, select >... -
Page 55: Imenu
iMenu From the main menu, select > i-mode i-mode You can scroll the i-mode website page by pressing and holding When connected to an i-mode website, it displays a list of options depending on the website. You can press list of browser options: Menu Add the current web page to the Bookmarks. - Page 56 file name. • Select and press to send the email. Send While you are editing or writing an email, press Send the e-mail. Send Save the e-mail that you are editing as a draft. Save Attach a file. Attach file Delete the attached file.
- Page 57 • Highlight and press Attachment Add text to the current slide. Add text Remove the text on the current slide. Remove text Add image to the current slide. Add image Remove the image on the current slide. Remove image Add audio Add audio to the current slide.
- Page 58 Add more recipients' addresses. Add To Add carbon copy recipients' addresses. Add Cc Add blind carbon copy recipients' addresses. Add Bcc Change the Cc. or Bcc recipients to To recipients. Change to To Change To or Bcc recipients to Cc recipients. Change to Cc Change to Bcc Change To or Cc recipients to Bcc recipients.
- Page 59 Sorts the messages by address Address sort Sorts the messages by the date Date sort Displaying a message, you may press menu to have the following functions: Reply to the message. Reply Reply with a quoted message. Reply quoted Reply to sender and all recipient(s) without quoted messages body. Reply all Reply to sender and all recipient(s) with quoted messages body Reply quoted all...
- Page 60 Delete all messages. Delete all • When choosing a mail/MMS, press Re-edit the message. Re-edit Delete the message. Delete Save the address of the message into the phonebook. Save address Add the phone number of the message to Phonebook. Add to phonebook Create a new message.
-
Page 61: Java™ Application
Return to the Mail menu. Back Back Return to the i-mode menu. Java™ application Please “Java™ application” on page 76 for detail. Please see“Messages overview” on page 46 and “Message settings” on page 49. Bookmarks The option shows a list of , allowing you to edit again, change the title, delete or access the webpage listed in the Bookmarks Under the i-mode screen, you may select... -
Page 62: Saved Pages
• Select the preferred URL and press • Select and press to link to the webpage. Back • Select the item to go back to the menu screen. Saved pages • Select the item to enter the Saved Pages • Press Left Softkey to have the following options:... - Page 63 The function allows you to look at the certificate details and set the certificates to either valid or invalid. Select the preferred Certificates certificate, press to either valid or invalid. You may also send the terminal information. Select either Yes or No and then select OK to confirm the selection. Send terminal info The function allows you to check the current settings of all options.
-
Page 64: Phonebook
Phonebook Lists Your phone can store up to 8 different phonebooks: • Complete (a list of all the numbers stored in the other phonebooks (Phone, SIM, FDN) except SDN numbers) • Personal directories (ADN) in SIM • Personal directories (ADN) in your phone memory (Phone) •... - Page 65 The numbers stored in the SDN phonebook are supplied, ready to use, and installed by your service provider. The SDN phonebook contains numbers and services that cannot be edited by you. You will not be able to see the number that is dialed as only the associated text title will be shown. To call numbers in the SDN directory, press scrolling or searching method to locate and call the number.
-
Page 66: Own Number
• Highlight field. Use the Record no. • Press the Left Softkey to save the changes made. You cannot save a record unless phonebook list. Phone You can set up the following information in the phonebook (Phone): • Name. • Phone number. •... - Page 67 • Highlight field, then enter the number. Own number • Highlight field, then key in the name. Name • Press Left Softkey to save and return to • To delete a saved entry, highlight the entry from and press Left Softkey to confirm the deletion.
-
Page 68: Calling Phone Numbers From Phonebook
menu. Options • Highlight and press Left Softkey Set ring tone • Use the navigation keys to scroll through the list of ringtones/melodies and press ringtone/melody for the group. The phone returns to the Change a group image To change the group image, use the following procedure: •... -
Page 69: Editing Phonebook Entries
and an 8-digit phone number is dialed, the name of the called party might not be displayed under the dialed calls list. Search a list To jump directly to names starting with a specific character, press the corresponding number key (e.g. press with or twice to jump to names beginning with K). - Page 70 • To copy all phonebook records in SIM to Phone or Phone to SIM, highlight any record in the SIM or Phone directory, press Options menu. Highlight Copy all to phone • To move a phonebook record in SIM to Phone or Phone to SIM, highlight the record in the SIM or Phone directory, press Options menu.
-
Page 71: Taking A Picture
Camera The integrated digital camera in the phone allows you to take photos and send them out via the Multimedia Messaging Service (MMS) or as an e- mail attachment. The photos will be stored in JPG format in the phone, and can be viewed by most picture viewing programs. Taking a picture To take and save a picture inside your phone, use the following procedure: •... -
Page 72: Self Timer
imposed by those copyright laws. When in camera mode, the phone returns to standby mode after 3 minutes of idling. You can display the quick keys by pressing Press Left Softkey from the camera finder screen to display the Self timer •... -
Page 73: Camera Option Menu (After Saving A Picture)
Effect • Highlight and press Left Softkey Effect • Use the navigation keys to highlight and select the different colour tint to take your photo: Change the colour tint setting by pressing Flicker control When taking pictures under a fluorescent light, flickers may occur. To prevent flickers, use the following procedure: •... -
Page 74: Photos And Pictures
My data You can use this menu function to manage all the pictures and sounds saved in the phone. You can playback sound, ringtones or display pictures/ wallpapers downloaded from the Internet, or photos captured with the built-in camera function. From the main menu, select My data You can also get to My data display screen by pressing... -
Page 75: Sounds
display list screen. Photos Pictures Rename (not for preset wallpaper) You can use the function to edit the names of the photos/pictures. Highlight Rename the picture and press Left Softkey to save the changes made. You can only input "0-9", "a-z", "A-Z" and "_" for filenames. Changing of text entry mode is not available in this menu. Delete (not for preset wallpaper) This option allows you to delete the highlighted photo/picture file. -
Page 76: Record Voice
Highlight and press Set as ringtone • Any call • Phonebook call • Alarm • Messages • Cell broadcast • Friends, Colleagues, Family, Biz partner, and VIP Highlight the type of call you want to set the ringtone and press Rename (for downloaded ringtone/melody) You can use the function to edit the file name for the selected ringtone/melody. -
Page 77: Memory Status
Record voice option menu From display screen, use Record voice menu: Options Send as MMS Highlight as MMS and press Left Softkey Send sending it out. Rename Highlight and press Left Softkey Rename Delete Highlight and press Left Softkey Delete Delete all Highlight and press... -
Page 78: Java™ Application
Java™ application Select from the main menu. Alternatively select Java™ applications is displayed. Alternatively, you can start Java™ application by pressing and holding Press Left Softkey from the Applications Select to enable or disable the function. Description setting Delete all Java™ application. Delete all Information such as Used bytes, Free bytes, and the storage of the chosen game is displayed. -
Page 79: Accessory
Accessory From the main menu, select Accessory • Organizer (Scheduler, ToDo list, Notepad) • Clock (Alarm clock, Auto off, Auto on, Countdown, Stopwatch) • Calculator (Calculator, Currency conv.) • Composer • Voice memo (Record, Play, Data rate) Scheduler From the main menu, select Accessory to view the calendar in week display. -
Page 80: Todo List
Options menu for existing agenda menu is displayed when an existing agenda is selected and Options • View Display the details of the selected agenda. • Activate/Deactivate navigation keys to change the status, either to • Edit Display an edit screen for the highlighted agenda. Use edit the agenda settings and use return to the list of agendas. -
Page 81: Notepad
• Edit the Start date Start time End date • Press Left Softkey to save appointment settings and return to Option menus for existing reminders/appointments menu is displayed when an existing reminder/appointment is selected and Options the option and press Left Softkey again. -
Page 82: Alarm Clock
• Send: Send the note via SMS to a recipient (you may select a phone number from the phonebook list or enter a recipient’s number). • Capacity: Display the memory left in your phone for saving other text notes. Up to a maximum of 10 notes can be saved. Notepad edit options menu While on screen, press... -
Page 83: Auto Off
displayed in the Softkey area. Auto off When this function is activated, the phone will be automatically switched off at the preset time everyday. • From the main menu, select Accessory • Press Right Softkey or use • navigation key to move down to the •... -
Page 84: Calculator
Calculator You can perform addition, subtraction, multiplication and division of numbers with the calculator function. You can enter up to 8 digits. The calculator can display a result of up to 9 digits, with a maximum of 6 decimal places. If a calculation results in a number exceeding the maximum, “Over range”... -
Page 85: Currency Converter
• To delete all digits input, press and hold Currency converter From the main menu, select Accessory using this function: Rate setting From the display screen, select Currency conv. enter a decimal point. Press Left Softkey Rate compute From the display screen, select Currency conv. -
Page 86: Data Rate
• Select . A message shows: Record • Press Right Softkey to start recording. To pause, press • Press Left Softkey to stop the recording. • To play and listen to the recording, press • To save the recording, press Left Softkey, edit the title if necessary, and press Play... -
Page 87: Index
Index Camera Accepting a Call ... 23 Accessory ... 77 ADN ... 62 Agenda ... 77 Alarm clock ... 80 Alternate Line Service (ALS) . 31 Any key answer ... 30 Auto answer ... 34 Auto key lock ... 31 Cell broadcast ...50 Auto network ... - Page 88 Car ...32 Sending an SMS/MMS from the Meeting ...32 phonebook ... 68 Normal ...32 SMS via GPRS ... 49 Pocket ...32 Sounds ... 73 Phonebook ...62 Stopwatch ... 81 Copying records ...67 Deleting a record ...67 Deleting all records ...67 T9®...