Table of Contents
Advertisement
Quick Links
Advertisement
Chapters
Table of Contents

Related Manuals for NEC e808n


Summary of Contents for NEC e808n
- Page 1 manual...
- Page 2 ® ® - Windows XP and Windows 2000 are either registered trademarks or trademarks of Microsoft Corporation in the United States and/or other countries. - This product contains ACCESS Co., Ltd.’s NetFront3 Internet browser software. NetFront3 is the trademark or registered trademark of ACCESS Co., Ltd. in Japan and in other countries. A portion of this software includes software modules developed by the Independent JPEG Group.
-
Page 3: Emergency Services And Safety Precautions
Emergency Services and Safety Precautions Emergency services To make an emergency call in any country Ensure that your e808 is on and in service. Press CLR to return to the standby screen if needed. Press 112 (or 999 within UK or 000 in Australia) followed by the Start key. (When the USIM card is not inserted or when the dial lock function is on, just press the SK1 (Emrgncy) key.) Follow instructions received and do not end call until told to do so. - Page 4 Li-ION recycling point. For more specific battery and power supply information, see pages 6 and 8. • Do not put the handset’s battery in your mouth, as battery electrolytes may be toxic if swallowed. • Do not attempt to dismantle the handset or any of its accessories. •...
-
Page 5: Aircraft Safety
The use of third party equipment, cables or accessories, not made or authorised by NEC, may invalidate the warranty of your cellphone and also adversely affect the phone’s safety/operation. Aircraft safety • Switch off your handset when inside or near aircraft. The use of handsets in aircraft is illegal, as it may be dangerous to the operation of the aircraft and it may disrupt the aircraft communication system. -
Page 6: Vehicles Equipped With An Air Bag
Third party equipment The use of third party equipment, cables or accessories, not made or authorised by NEC, may invalidate the warranty of your handset and also adversely affect the handset’s operation. For example, use only the NEC mains cable supplied with the AC charger. -
Page 7: Declaration Of Conformity
Telecommunications Terminal Equipment Directive requirements 3.1(a), 3.1(b), 3.2. Con la presente NEC dichiara, sotto la propria responsabilità, che il prodotto descritto in questo manuale (e in combinazione con i propri accessori), è conforme ai requisiti essenziali e alle disposizioni pertinenti stabilite dalla direttiva radio 1999/5/CE e ai requisiti 3.1(a), 3.1(b), 3.2 stabiliti dalle direttive per i terminali di... -
Page 8: Table Of Contents
Contents Emergency Services and Safety Precautions ... PL-1 What’s e808? ...1 Views, Keys, and Display of e808 ...1 Setup ...4 USIM Card ...4 Battery ...6 Charging ...6 Low Battery Alarm ...8 Power On/Off ...9 Power On/Off ...9 Entering PIN Code ...9 Setting Clock ...10 Making and Receiving Calls ...10 Making a Voice Call ... - Page 9 High-Speed Data Communications ...43 Other Features of e808 ...45 Messaging ...45 Java™ Application ...45 Images ...46 Video/Audio Player ...46 Data Transfer to/from a PC ...46 How to Use Menu Function ...47 Menu Functions Operations ...48 Menu Functions List ...52 Service (SAT) ...55 External Connect ...56 USB ...56 Message ...57...
- Page 10 Other File Type ...120 Accessories ...121 Calendar ...121 ToDo ...125 Alarm Clock ...126 Calculator ...127 Currency Calculation ...128 Voice Notes ...129 Text Notes ...130 User Data ...131 Contacts ...132 Owner Info ... 132 Calls Received ... 132 Calls Made ... 132 Ringtune ...
-
Page 11: What's E808
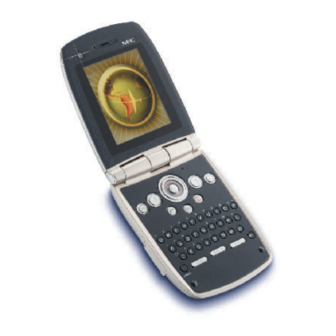
What’s e808? The e808 combines a wide range of features into a technologically advanced handset, capable of operating in both UMTS (Universal Mobile Telecommunication System), also known as 3G, as well as GSM (Global System for Mobile Communications) or 2G. 3G will allow much greater data speeds than 2G networks and will enable you to make video calls, send emails and multimedia messages and view photos and videos and much more. - Page 12 Keys Camera (Front/Towards me) Display (Refer to the next page.) 4-Way navigation Microphone (Up/Down/Left/Right) key Enter key SK1 (Softkey 1) key SK2 (Softkey 2) key Triangle key MENU key End (On-Off) key Start key CLR (Clear) key BS (Backspace) key SHIFT key CAP (Capital) key Return key...
- Page 13 Display Email/Multimedia message/Text message Voice message Call diverting Vibrate on Battery level Service provider name Operator name Remote time Local time SK1 key 4-Way navigation (Up/Down/Left/Right)** * Profile indicates the following handset operation modes: normal, meeting, pocket, and car. Pressing and holding the Q key will allow you to set a profile.
-
Page 14: Setup
Setup Before you use your handset you will need to carry out the following actions: • Valid USIM (Universal Subscriber Identity Module) card inserted • Battery charged • Set the date and time This section will guide you through this step by step. USIM Card When you become a subscriber to 3, you are issued a USIM card with a security code or PIN (Personal Identification Number). - Page 15 Open the USIM card holder. Slide and release the USIM card holder lock. Insert the USIM card into the USIM card holder. Slide and lock the USIM card holder. Insert the battery and push down Slide the back cover back in place. until it clicks into place.
-
Page 16: Battery
Slide the back cover backward and lift it away from the handset. Lift the battery away from the handset. Slide and release the USIM card holder lock. Open the USIM card holder. Slide the USIM card out of the USIM card holder. Battery To Insert the Battery Slide the back cover backward and lift it away from the handset. - Page 17 Make sure that the battery is attached to your handset. Connect the charger plug to the e808 I/O connector. See the diagram below. Plug the charger into a power socket. The red LED indicator on the outside of your e808 will light up when charging is in progress and go off when charging is completed.
-
Page 18: Low Battery Alarm
Low Battery Alarm The battery power level (3 levels) is indicated by the following icons: Low Battery Medium Battery Full Battery When the battery runs out, the following image will blink on the display. A low-power warning alarm sound will come on for approximately 10 seconds. -
Page 19: Power On/Off
Power On/Off You can use your handset after set up of the e808 is completed. This section describes how to turn the power on/off, how to enter the PIN code, the power save function and how to set the clock to use the e808. Power On/Off You can power on or off on the e808. -
Page 20: Setting Clock
Power Saver The power saver function turns the screen off when the handset is left without any operation for a certain period of time. By pressing any key except the SHIFT key, you can turn the screen on. Setting Clock You will be prompted to set the current date and time when you first use the e808. -
Page 21: Making A Voice Call
• Making a Voice Call • Receiving a Voice Call • During a Voice Call • Making and Receiving a Video Call (available in 3G mode only) • Showing and Hiding Your CLI Making a Voice Call Voice calls can be made by directly inputting numbers using the keypad, or by using the Calls Made list, Calls Received list, contact list or Quick Recall function. - Page 22 Input the phone number Dial the phone number Talk End the call Useful Tips Useful tips for making a call are shown below: Operation Making an emergency call Making an international call Making a call using the contact list Do This Input the phone number using the keypad.
-
Page 23: Receiving A Voice Call
Operation Making a call from Calls Made number list Making a call from Calls Received number list Quick Recall Pause Dial Receiving a Voice Call When a voice call is made to your 3 number, the ringtune, the illumination and the vibrate function will be activated (activation depends on the settings). - Page 24 Basic Operations The basic operations for receiving a voice call are shown below: To Receive a Call Answer the call Talk End the call Useful Tips Useful tips for receiving a call are shown below: Tips Rejecting a call When you miss a call Rejecting the second call Do This...
-
Page 25: During A Voice Call
Tips Rejecting and diverting a Voice Call (available in 3G mode only) During a Voice Call During a voice call, the following operations are possible: making and receiving a second call, putting the call on hold, call waiting, Grouptalk, adjusting earpiece volume, adding the caller’s number to the contact list, searching the contact list, recording a voice note and using the shortcut keys (when any key answer function is turned off). -
Page 26: To Receive A Second Call
End the calls To Receive a Second Call (Another call received during a call) Answer the second call Talk End the call Do This To end the current call: Press the SK2 (Submenu) key and select End call. To end the call on hold: Press the SK2 (Submenu) key and select End held call. -
Page 27: To Switch To A Grouptalk
Switch to Grouptalk Talk End the call Other Possible Operations During a Call Use the Scratchpad Adjust the earpiece volume Add the caller to the contact list Search the contact list Record a Voice Note Send DTMF Put a call on hold Making and Receiving Calls Do This (When there are two calls on-line: the current call and a held... -
Page 28: Making And Receiving A Video Call
Receive a third call Making and Receiving a Video Call (available in 3G mode only) With e808, you can make a video call to a video capable handset - the other party must have a video capable handset. You can also make a video call to a PC via an email address - the other party must have a PC equipped with a video calling application and a webcam. -
Page 29: To Make A Video Call To A Pc With Webcam
Start the video function Talk and see End the call To Make a Video Call to a PC with Webcam Video calling to PC may not be available in all countries. Select the email address from the contact list Ensure you have the stereo headset plugged in. -
Page 30: To Receive A Video Call
End the call To Receive a Video Call Receive a video call Ensure you have the stereo headset plugged in. Answer the call Talk and see End the call Useful Tips Useful tips for making a video call are shown below: Operation Making a video call using the contact list... -
Page 31: Settings During A Video Call
Operation Making a video call from Calls Received number list Making a video call from Calls Made number list Adding the caller to the contact list Settings During a Video Call The following settings can be changed during a video call: Item Turning the camera display on/off camera display off... - Page 32 Item Camera Direction Camera Zoom Mirror Image Image Quality Backlight Mute Description Press the SK2 (Submenu) key and select Camera Direction. The camera direction can be selected from Towards me (the camera facing inward, i.e. the display side) and Away from me (the camera facing outward).
-
Page 33: Showing And Hiding Your Cli
Showing and Hiding Your CLI You can show/hide your 3 number when you make or receive a call. As a default setting, your 3 number is shown to the caller or the receiver. To hide your 3 number when making a call, subscribe to the Calling Line Identification Restriction (CLIR) service. -
Page 34: Text Entry
Text Entry You can enter characters, numbers and symbols into your handset, for example, when you enter a phone number to call, add information to the contacts, write text messages or enter Internet address. The maximum number of characters allowed in an item or a field is defined as the number of single-byte characters that can be input. -
Page 35: Keys
Keys Keys on the handset enable you to enter text in the similar manner as you enter from the PC keyboard. The following shows the e808 key operations that are different from the PC keyboard keys: CAP Key You can enter a capital letter by pressing the CAP key once. To lock capital letters, press the CAP key twice. To unlock, press the CAP key again. -
Page 36: To Copy And Paste The Text
To Copy and Paste the Text To copy and paste text, proceed as described below: Specify the copy function Specify the copy starting point Specify the copy ending point Specify the paste point Paste the block Do this Press the SK2 (Submenu) key in the text mode, then select Copy. -
Page 37: To Cut And Paste The Text
To Cut and Paste the Text To cut and paste text, proceed as described below: Specify the cut function Specify the cut starting point Specify the cut ending point Specify the paste point Paste the block Text Entry Do this Press the SK2 (Submenu) key in the text mode, then select Cut. -
Page 38: Display Information
Display Information When you enter text in the contacts or a message, the text entry display shows you various information as shown below: Number of remaining characters displayed in max. of 3 digits. For 1000 or more, the number is displayed in thousands (e.g. - Page 39 Data Name Phone number Email address Ringtune Indicator Contact pictures Category Memory Number Contacts Phone contacts (32 characters max.) 4 phone numbers (32 characters max. for each), and a call type icon for each number (call type icons set voice/video call attribute) 3 email addresses and a call type icon for each email address.
- Page 40 Call Type Icons A call type icon is allocated for a phone number/email address. The following shows the call type icons: Call type icons for phone number: Mobile phone Home Office FAX Call type icons for email address: Email address Mobile phone address Phone number: •...
-
Page 41: Contacts Menu List
Contacts Menu List The following describes the functions provided by the menus on the Contacts menu list: Item Add to Contacts Switch Contacts Search Contacts Contact Entries Contacts Description Registers the following items to the contacts: For Phone Contacts List: the name, category, 4 phone numbers, phone number icons, 3 email addresses, email address icons, call ringtune, video ringtune, message ringtune, call indicator, video indicator, message indicator, and contact... - Page 42 Item Category Setting Delete All SDN Display Basic Operations The following shows the basic operations of the Contacts. To Register a New Entry in the Contacts Start the Contact function Select Phone or USIM Description Sets the following items for contact categories: Category Name: Registers and edits the contact category names (e.g.
- Page 43 Fill in the data To Use a Contact Entry Start the Contacts search function Select a search method Select the match and display the details Use the data Contacts Fill in the data. (Refer to Contact Entries on page 28 for details.) Note : To allocate multiple phone numbers or email addresses, select the <...>...
- Page 44 Useful Tips Useful tips for contacts are shown below: Operation Editing a contact entry Adding multiple phone numbers or email addresses Deleting a contact entry Writing a message from a contact entry Deleting a registered phone number/email address Deleting personal data Copying a phone number/email address Copying a USIM...
-
Page 45: Browser
Operation Adding or editing a contact entry using a shortcut key Browser (Press the “ ” key) The browser application enables you to view the latest news and weather, download games, check sports information, find locations and much more. Browser is only available in the 3G mode. Browser Menu List Pressing the SK2 (Menu) key will display a menu list of functions provided for the browser application. - Page 46 Level 1 Level 2 Bookmark list Save page Saved pages Level 3 Displays the list of Bookmarks. Press the SK2 (Menu) key, and the following submenus are provided: Edit title: Edits the bookmark’s title (24 characters max.). Send as message: Starts the message writer to edit a new message with the bookmark in the message text.
- Page 47 Level 1 Level 2 (continued) Saved pages Save image Send as message Reload Enter URL History Browser Level 3 When a Saved Page is displayed, press the SK2 (Submenu) key, and the following submenus are provided: • Save image: registers an image on the file to the Image List.
- Page 48 Level 1 Level 2 Settings Display Settings Browser settings Reset settings Character encode Page Info View title View URL Check certificate Level 3 Scroll settings Selects the number of lines per scroll from Scroll 1 line, Scroll 3 lines, and Scroll 5 lines.
- Page 49 Level 1 Level 2 Reset all Basic Operations The following describes basic operation for the browser application: To End a Browser Note : Activating the message writer, a Java™ Application, etc. will also end the browser, because they belong to the same task. Refer to page 42 for details on tasks. End a browser To Download an Image and Save it in e808 Memory Start the browser...
-
Page 50: Advanced Features
Useful Tips Operation Links and Anchors Quick play of downloaded multimedia files Advanced Features e808 invites you to a whole new world of mobile multimedia communications! In this section, we introduce the following advanced features of e808: • Video Call (make a live person to person video call to enhance your communication experience) •... -
Page 51: Photo/Video Camera
Dial and start a video call Talk and see End the video call Useful Tips • The received image and the sent image can both be displayed on the screen. You can hide/show the sent image (your image) by pressing the SK1 (Pic Off/On) key. •... -
Page 52: Multi-Call/Multi-Task
Useful Tips • Make the most of your photos and video clips: send them as attachments of a Multimedia/Video message, use an image as a standby screen, register a photo of your friend’s face as the contact picture, etc. Multi-call/Multi-task Did you ever wish you could send a message while talking on the handset? e808’s multi-call function can fulfil your wish. -
Page 53: High-Speed Data Communications
Go back to the standby screen Start another task Switch to another task High-Speed Data Communications The e808 supports high-speed data communications for your PC. Just connect the attached USB cable and install the contents of the CD-ROM to your PC. Refer to External Connect on page 56 for details. Please check that your operator allows use of your e808 as a modem to connect to the internet. - Page 54 Check cable connection Turn e808 power on Select External Connect PC Settings Connect to the Internet Start the Internet communication Useful Tips • For your PC, e808 is used as a “modem”. • Enter “Q99#” for an access point number (APN). If service conditions are changed, use the AT commands to change the APN.
-
Page 55: Other Features Of E808
Other Features of e808 e808 provides many multimedia functions: message, Java™ programs, and multimedia player. You can easily personalise e808 functions by using menu functions. (Refer to How to Use Menu Function on page 47 for details.) Messaging e808 supports four types of messaging services: Text message, Multimedia message, Video message and Email. -
Page 56: Images
Images When images are downloaded to the e808, received attached to a Video message, or there are photos taken by using e808’s camera, you can display them using the image Viewer. Such images can be used as a standby screen and contact list data. Refer to Image on page 114 for details. Video/Audio Player You can play video and audio data saved in e808’s Play List using the Video/Audio Player. -
Page 57: How To Use Menu Function
How to Use Menu Function You can use various e808 functions by using menu functions. By selecting icons, menus and items/options, you can access the numerous functions and their settings. • ICON LIST An icon is a graphic image with a name that represents and links to a category of functions or a particular function. -
Page 58: Menu Functions Operations
Menu Functions Operations The following describes the operations performed by using the menu functions. Operation Outlines The following shows an outline of performing operations by using the menu functions: • Display Task Menu. • Select an icon from the Task Menu. •... - Page 59 Select Display Select Contrast Adjust the contrast level To Select the Standby Screen Image Display Task Menu Highlight Settings icon Select Settings icon Select Display How to Use Menu Function • Press the Up and Down keys to move the highlight (a highlighted menu will appear in reverse highlight) to Display and press the SK1 (Select) key or Enter key, or •...
- Page 60 Select Screen Display Select Standby Screen Select the image To Turn On/Off the Any Key Answer Function Display Task Menu Highlight Settings icon Select Settings icon • Press the Up and Down keys to move the highlight (a highlighted menu will appear in reverse highlight) to Screen Display and press the SK1 (Select) key or Enter key, or •...
- Page 61 Select Phone Select Any Key Answer Turn on/off the function How to Use Menu Function • Press the Up and Down keys to move the highlight (a highlighted menu will appear in reverse highlight) to Phone and press the SK1 (Select) key or Enter key, or •...
-
Page 62: Menu Functions List
Menu Functions List The following table lists the menu functions under the Task Menu: Level 1 Message External Connect Service (SAT) Java™ Settings Level 2 Level 3 Create Message Text Message Multimedia Message Video Message Email Inbox Draft Sent Items Email Create Email Email Inbox... - Page 63 Level 1 (continued) Settings How to Use Menu Function Level 2 Level 3 (continued) Image Quality VT Settings Backlight Mute Profile Normal Meeting Pocket Time Call Time Display Setting Total Reset Call Time Display Display Contrast Screen Display Language Font Screen Colour Clock Clock Display Format...
- Page 64 Level 1 Level 2 (continued) (continued) Settings Services Provisioning Network Other Multimedia Video Image Audio Player Voice Recorder Other File Type Accessories Calendar ToDo Alarm Clock Level 3 Call Waiting Diverts Call Rejection Owner name Change Password Direct Input Service MMS Server HTTP Proxy Host APN...
-
Page 65: Service (Sat)
Level 1 (continued) Accessories User Data Data Transfer Service (SAT) (Press the “MENU” key → Select “Service (SAT)”) You can use the SAT (Subscriber Identity Module Application Toolkit) provided by 3 from Service (SAT). SAT provides an authentication to the mobile network so you can use your rights: change personal setting options, give a digital signature, etc. -
Page 66: External Connect
External Connect (Press the “Menu” key → Select “External Connect”) You can connect e808 with a USB cable and establish a dialup connection for the PC through e808. This function is only available in the 3G mode. Please check that your operator allows use of your e808 as a modem to connect to the internet. Connecting e808 to a PC with an USB cable enables the PC to use e808 just like the modem to establish a PPP connection to the Internet service provider by dialup. -
Page 67: Message
Message (Press the “SK1 (Message)” key, or press the “MENU” key → Select “Message”) You can send and receive text messages, with attached photo, ringtune, video files, etc. The following items are described in this section: • Overview • Writing and Sending a Message •... -
Page 68: Message Memory Maintenance
Email service is only available in the 3G mode. Refer to Email on page 76 for details. Message Memory Maintenance When the memory allocated for the message function is full, e808 cannot receive new messages until you move or delete the old messages. To prevent the message memory from being full, it is recommended to regularly move or delete unwanted messages. - Page 69 Operation Adding a phone number/email address in the message text to the contact list Adding an URL in the message text to the Bookmarks Adding the sender/receiver’s email address to the contact list Attaching a header/footer Attaching a video, and image, an audio file, or a ringtune Copying a message to USIM card memory or the phone memory Copying an attachment to a PC Copying message data to a PC...
-
Page 70: Message Menu List
Operation Replying to a message with quotes from the original message Saving an attachment Saving an unfinished and unsent message Sending a message to more than one addressee Setting the addressee from the contact entries Setting the delivery date and time Setting the message sorting order Setting the priority Message Menu List... -
Page 71: Message Settings
Message Settings The following describes the settings under Message Settings: Item Text Msg Settings Message Description Changes the following settings for Text messaging function: Status Report: Selects whether to request a status report of the sent Text messages. Press the Enter key to place/remove a checkmark to/from Requested, and press the SK1 (OK) key to confirm the check. - Page 72 Item Description Multimedia Msg Changes the following settings for the Multimedia messaging Settings functions: Set Receive Mode: Selects whether to receive the Multimedia messages manually or automatically. Default setting is Auto Receive. When Manual Receive is selected, the contents of the Multimedia messages will stay in the MMS centre until you request a download, or the expiry date has arrived.
-
Page 73: Writing And Sending A Message
Item Reset Settings Reset Message Writing and Sending a Message The following describes the operations related to writing and sending a message. Basic Operations The basic operations for writing and sending a message are shown below: To Write and Send a New Text Message Start the message function Display Create Msg for Text message... - Page 74 Start the message function Start the composer Compose a slide show Input the subject Set the addressee Send the message Do this Press the SK1 (Message) key, or press the MENU key and select Message. Select Create Message. On the Create Msg displayed, select Multimedia Message. Composer is displayed.
- Page 75 Start the message function Display Create Message for Video message Attach files Input the message text Input the subject Set the addressee Send the message Message Do this Press the SK1 (Message) key, or press the MENU key and select Message. Select Create Message.
- Page 76 Start the message function Display the received message to reply Select message Display Reply Message Input the message text Input the subject Send the message Do this Press the SK1 (Message) key, or press the MENU key and select Message. Select Inbox.
- Page 77 Start the message function Display the received message to forward Select the message Display Forward Set the addressee Input the subject Input the message text Send the message Message Do this Press the SK1 (Message) key, or press the MENU key and select message.
- Page 78 Useful Tips The useful tips for writing and sending a message are shown below. The availability of each function is shown by the following abbreviations: T: Text message M: Multimedia message V: Video message Operation Procedure Setting the addressee Press the SK2 (Submenu) key and select Search contacts. from the contact entries Search and select the addressee’s phone number/email address.
- Page 79 Operation Procedure Hiding an addressee Press the SK2 (Submenu) key and select Hide/Clear address. Attaching a video, and Press the SK2 (Submenu) key and select Attach video, image, an audio file, or a Attach image, Attach audio, or Attach ringtune. ringtune Editing a message saved Select Draft from the message menu list.
-
Page 80: Receiving And Reading A Message
You can edit the slide show for Multimedia messaging using the submenus on Composer. Operation Editing the text Changing the layout of the text Adding a slide Inserting a slide in between slides Attaching an image or an audio file Deleting a slide, text, an image, or an audio file Setting the slide time... - Page 81 Basic Operations The basic operations for receiving and reading a message are shown below: To Receive a Multimedia Message or Video Message Check the notification message Download the contents of the Multimedia message or Video message To Receive a Multimedia Message or Video Message Manually Start the message function Display Inbox Select the notification message...
- Page 82 Start the message function Display Inbox Select the message Useful Tips The useful tips for receiving and reading a message are shown below: Operation Displaying the next/previous message Filtering the received messages Setting the message sorting order Protecting a message Do this Press the SK1 (Message) key, or press the MENU key and select Message.
- Page 83 Operation Displaying detailed information on a message Making a call to a phone number in the message text Displaying an URL in the message text Adding the sender/receiver’s email address to the contact list Message Procedure Select the message, press the SK2 (Submenu) key and select Details.
- Page 84 Operation Adding a phone number /email address in the message text to the contact list Adding an URL in the message text to the Bookmarks Downloading an attachment Procedure Select the message and press the Enter key to display the message text.
-
Page 85: Message Memory Maintenance
Operation Saving an attachment Message Memory Maintenance The following describes the operations related to message memory maintenance: Operation Moving a message between USIM card memory and the phone memory Copying a message to USIM card memory or the phone memory Moving message data to a PC Copying message data to a PC Moving an attachment to a PC... -
Page 86: Email
Operation Deleting all messages Deleting an attachment Email Email allows you to send messages to email addresses with attachments. A maximum of 60 attachments are allowed per email, with the total data size not exceeding 100 KB, including the message text. Attachable files include ringtunes (MID), images (GIF, JPEG, BMP), audio (AAC, WMA), video (MPEG4) and any other types of files. -
Page 87: Email Menu List
manually send the unsent email. Refer to To Write and Send a New Email on page 80 for details. Email Menu List Pressing the MENU key and selecting Message and Email displays the Email menu list. The following describes the functions provided by the menu items on the Email menu list: •... - Page 88 Operation Adding the sender/receiver’s email address to the contact list Attaching a header/footer Attaching a video, an image, an audio file, ringtune, or other types of files Changing the read/unread status Checking newly received emails Copying an attachment to a PC Copying email data to a PC Deleting an email Deleting all emails...
-
Page 89: Email Settings
Operation Saving a received email Saving an attachment Saving an unfinished and unsent email Sending an email to more than one addressee Sending all pending emails at the same time Setting the addressee from the contact entries Setting the email sorting order Setting the priority Writing an email to an email address in the message text Email Settings... -
Page 90: Email Basic Operations
Item Username Email Basic Operations The following describes the basic operations related to the email service: To Write and Send a New Email Start the message function Display New messages Attach files Input the message text Input the subject Description Edits the IMAP4 username used for the authentication to the server (32 characters max.). - Page 91 Set the addressee Set the addressee to send a Carbon Copy Set the addressee to send a Blind Carbon Copy Message Do this Select To, input the address and press the Enter key (90 characters max. for an addressee). Add more addressees if necessary.
-
Page 92: To Reply To A Received Email
Send the email To Reply to a Received Email Start the message function Select the received email to reply to and Replay Add the addressees Do this Press the SK1 (Send) key. • Inside the 3G service area: e808 automatically becomes online and the email is sent and saved in the Email Outbox. -
Page 93: To Forward A Received Email
Input the message text Input the subject Send the email To Forward a Received Email Start the message function Display the received email to forward Message Do this Select Message, input the message and press the Enter key. If necessary, select Subject and edit the title (50 characters max.). - Page 94 Display Forward Set the addressee Input the subject Input the message text Send the message Do this Press the SK2 (Submenu) key and select Forward. Forward will be displayed with the text contents, attached files and Fw: original subject. Note : If the email to forward contains attachments not yet downloaded, a download confirmation message will be displayed.
-
Page 95: To Receive And Read An Email
Start the message function Display Email Inbox Receive and read the email content Message Do this Press the SK1 (Message) key, or press the MENU key and select Message. Select Email. On the Email menu list displayed, select Email Inbox. Press the SK1 (Yes) key to check the newly received emails and add them to the list in the Email Inbox. -
Page 96: Useful Tips
Useful Tips The useful tips for the email service are shown below: For Writing, Sending, Replying and Forwarding an Email Operation Setting the addressee from the contact entries Previewing an email before sending Saving a finished email to send it later Press the SK2 (Submenu) key and select Send later. Saving an unfinished and unsent email Attaching a header/footer... -
Page 97: Editing An Email Saved In The Draft Email
Operation Editing an email saved in the Draft Email Editing and resending an email saved in the Email Outbox Replying to an email with quotes from the original email Replying to an email with multiple addressees Message Procedure Select Draft Email from the email menu list. Select the saved email and press the Enter key. -
Page 98: Displaying The Next/Previous Email
Operation (continued) Replying to an email with multiple addressees For Receiving and Reading an Email Operation Displaying the next/previous email Filtering the received emails Setting the email sorting order Procedure • When there are 10 addressees in To or Cc field, you cannot add any more addressees. -
Page 99: Adding The Sender/Receiver's Email Address To The Contact List
Operation Saving a received email Displaying detailed information on an email Making a call to a phone number in the message text Writing an email to an email address in the message text Displaying an URL in the message text Adding the sender/receiver’s email address to the contact list Message... -
Page 100: Adding A Phone Number/Email Address In The Message Text To The Contact List
Operation Adding a phone number/email address in the message text to the contact list Adding an URL in the email text to the Bookmarks Downloading an attachment Saving an attachment Procedure Select the email and press the Enter key to display the message text. The phone number/email address will be displayed in reverse highlight. -
Page 101: Email Memory/Cash Maintenance
Operation Changing the read/unread status Checking newly received emails Press the SK2 (Submenu) key and select Check for new Email. Refreshing the list in the Email Inbox Email Memory/Cache Maintenance When the cache area or the memory allocated for the email function is full, e808 cannot receive new emails until you move or delete the old emails. -
Page 102: Copying An Attachment To A Pc
Operation Moving an attachment to a PC Copying an attachment to a PC Deleting an email Deleting all emails Procedure Save the attachment. (Refer to page 90 for details.) Press the MENU key and select Data Transfer. Refer to Data Transfer on page 134 for details. Save the attachment. -
Page 103: Java
Deleting cache memory of an email Deleting all cache memory Java™ You can run Java™ application programs downloaded through the browser. Java™ is only available in the 3G mode. The following menus are provided: • Applications • Set Backlight • Set Downl. - Page 104 Select a title Do any of the following: • End the application program • Pause the application program • Resume after pause • End after pause Pressing the SK2 (Menu) key from the Applications screen will display the following items on the Application Menu screen: Item Edit application name...
- Page 105 Set Backlight (press "MENU" key "Enter" key in standby mode → You can choose phone backlight setting or Java backlight setting. If you choose the phone backlight setting, the backlight setting made by using the Settings icon from the Task Menu applies. If you choose the Java backlight setting, the backlight setting depends on the Java Application program, and the setting made by using the Settings icon is ignored.
-
Page 106: Settings
Settings e808 function settings can be changed from Settings. The following menus are provided: • Phone • VT Settings • Profile • Time • Display • Clock • Security • Services • Provisioning • Network • Other Phone (press the “MENU“ key Phone allows you to change the settings for the following functions/services: quality alarm, any key answer, switch to earphones, pause dial and ALS. - Page 107 Item Switch to Earphones Pause Dial Entry Select ALS Line (available when USIM supports Alternate Line Service) Settings Description Selects the ringtune output from the handset. Ringtune can be output from both the earphones on the stereo headset and the speaker, or only from the earphones.
-
Page 108: Vt Settings
VT Settings (press the “MENU“ key VT Settings allows you to change various settings for video telephony. Item Camera Picture Position Mirror Image Image Quality Backlight Mute Profile (press the “MENU“ key Profile allows you to customise the handset operation mode to suit different situations: Normal, Meeting (quiet surroundings), Pocket (when carrying e808 in a pocket or a bag) and Car (while driving). -
Page 109: Time
Item Call Indicator, Video Indicator, Message Indicator Vibrate Auto-Answer Backlight Key Sound Service Tone Time → (press the “MENU“ key Time allows you to turn the call time display on/off, display and reset the total call time. Item Call Time Display Setting Total Reset Call Time Display... -
Page 110: Display
Display (press the “MENU“ key Display allows you to adjust the display contrast and select the standby and wake-up screen image, language, font and the color pattern. Item Contrast Screen Display Language Font Screen Colour → → select “Settings“ icon select “Display“) Description Adjusts e808’s display contrast levels from 1 (light) to 11 (dark). -
Page 111: Clock
Clock → (press the “MENU“ key Clock allows you to select the clock display format, set the local/remote time and turn the summer time function on/off. Item Clock Display Format Display Format Date & Time Summer Time Security (press the “MENU“ key Security allows you to change the code number, PIN1 and PIN2, and turn on/off the dial lock, and start-up lock. - Page 112 Item Description Lock now Turns the dial lock function on. This function cancels any key operation except emergency calls, answering a call by the Start key, turning off the ringtune by the CLR key, rejecting a call by the End key, pressing and holding the End key to turn e808 on/ off, earpiece volume control by the Up or Down key while talking, and turning off the alarm by any key.
-
Page 113: Services
Services (press the “MENU“ key Network side service settings can be changed while in standby mode. This setting cannot be changed during a call or communication. Service settings are set individually for 2G and 3G. If a setting is changed while e808 is in 3G mode, then the setting becomes valid for 3G. - Page 114 Item Description Call Barring Turns the call barring service on/off, makes an enquiry and displays the current service status. Services: All Outgoing>: BAOC (Call Barring of ALL Outgoing Calls service. Prohibits all outgoing calls except emergency calls) >International: BOIC (Call Barring of Outgoing International Calls.
- Page 115 Item Diverts Call Rejection Owner Name (available only in 3G mode) Settings Description Registers and deletes call diverting destination phone number and service settings. Settings: On Busy: CFB (Call Forwarding when Busy. Forwards calls received while answering another call) No Answer: CFNRy (Call Forwarding on No Reply. Forwards calls when you cannot answer incoming calls.) Unconditional: CFU (Call Forwarding Unconditional.
-
Page 116: Provisioning
Item Change Password Direct Input Service Provisioning (press the “MENU“ key Provisioning allows you to change the MMS server, HTTP proxy, and Host APN settings. This requires the Code Number to avoid accidental operation. Refer to page 102 for details on the Code Number. Item MMS Server HTTP Proxy... -
Page 117: Network
Network (press the “MENU“ key Network allows you to change the area mode and PLMN settings, and display the USIM list. Item Set Area Mode (available only when Dual USIM is inserted) PLMN Setting Change USIM List Settings → → select “Settings“... -
Page 118: Other
Other → (press the “MENU“ key The function settings and the memory can be returned to the factory settings. Item Setting Reset Memory Reset Multimedia You can use your e808 as a video camera, tape recorder, and audio player. You can capture video clips, voice and still images, save them in files, view and play those files. -
Page 119: Video
Video → (press "MENU" key select “Multimedia” The Video feature allows you to make and view motion videos. You can create 7 Play Lists, each containing up to 20 files, with the total not exceeding 100 files. The Video feature has the following items: Item Make Video Viewer... - Page 120 Select Make Video from the Video screen. Press the Enter key to start recording. When the self-timer is turned on, the recording starts after the set time. You can change various settings before recording by pressing the SK1 (Normal/Zoom) key or SK2 (Submenu) key. You can change zoom and camera direction also during recording by pressing the SK1 (Normal/Zoom) key and SK2 (Front/Back) key, respectively.
- Page 121 Set self-timer Display a mirror image After 12 seconds, the handset generates a message indicating that the captured video is saved as a file. Press the SK1 (OK) key to confirm, or the SK2 (Send) key to send the saved video as a Video message (Refer to To Write and Send a New Video Message on page 65 for details).
- Page 122 Select a video or a Play List Do any of the following: • Adjust volume level • Seek forward/backward • Skip forward/backward in a Play List • Pause video • Stop video Select the video file or Play List you want to play and press the SK1 (Play) key.
- Page 123 Select the video file or Play List you want to edit and press the SK2 (Submenu) key. The following submenus are provided for the Library: Item Edit Album Name Edit title Edit Artist Name Delete Delete All The following submenus are provided for the Play List: Item Edit title Edit List...
-
Page 124: Image
Select Settings on the Video screen. You can change the following settings: Item Camera Direction Image Quality Mirror Image Camera Zoom Image → (press "MENU" key select “Multimedia” The Image feature has the following items. Item Take Photo Viewer Settings Description Changes the camera direction. - Page 125 Select Take Photo from the Image screen. Press the Enter key to take a photo. When the self-timer is turned on, a photo is taken after the set time. You can zoom in on the image by pressing the SK1 (Zoom) key before taking the picture, except when the Picture Size is set to Full Size.
- Page 126 Select Viewer Select an image To Send or Edit an Image File Select Viewer from the Image screen. Select the image file you want to send or edit and press the SK2 (Submenu) key. The following submenus are provided: Item Send image Edit title Delete...
-
Page 127: Audio Player
Item Mirror Image Camera Zoom Picture Size Audio Player (press "MENU" key The Audio Player feature allows you to play AAC or WMA audio files downloaded from a browser. You can choose to play either a particular audio file on the Library or several audio files saved in a Play List. You can create 7 Play Lists, each containing up to 20 files, with the total not exceeding 100 files. - Page 128 Do any of the following: • Adjust volume level • Seek forward/backward Skip forward/backward in a Play List Repeat playing file(s) in a Play List Pause audio Stop audio Press the Up and Down keys. To seek forward or backward in a file, press and hold the Right or Left key.
- Page 129 Select the audio file or Play List you want to edit and press the SK2 (Submenu) key. The following submenus are provided for the Library: Item Edit Album Name Edit Title Edit Artist Name Delete Delete All The following submenus are provided for the Play List: Item Edit Title Edit List...
-
Page 130: Voice Recorder
Voice Recorder (press "MENU" key The voice recorder feature allows you to record voice. The recording time is 60 seconds. The recorded voice is automatically saved as an AMR file which can be attached to a multimedia message or an email. The voice files can be transferred to/from a PC (refer to To/From PC on page 137). -
Page 131: Accessories
Accessories You can use your e808 as a calendar with appointments and to do tasks, as an alarm clock, calculator, etc. which can be used at work or home. There are seven features available in the Accessories: • Calendar • ToDo •... - Page 132 • Display number of calendar entries To Add a New Schedule To add a new schedule, press the SK1 (Create) key from the Month View or Week View screen. Set date and time Set repeat setting Set clock alarm tune Edit contents Select an icon Press the SK2 (Submenu) key.
- Page 133 End the setting Schedule icons: Appointment Meal Doctor Date Train Journey Private Travel Accessories Press the SK1 (Select) key or Enter key to end the editing. The Day View screen shows all the schedules set for the date. Tennis Car Journey Party Meeting Plane Journey...
- Page 134 Useful Tips You can use an old appointment as a template to create a new appointment. Select a date from the Month View or Week View screen and press the Enter key. The Day View screen shows all the schedules set for the selected date.
-
Page 135: Todo
ToDo → (press "MENU" key select “Accessories” This feature allows you to set up ToDo tasks that should be finished by a certain date. You can save up to 100 ToDo entries, together with their calendar entries. To Add a New ToDo Task To add a new ToDo task, press the SK2 (Submenu) key from ToDo List and select New Entry. -
Page 136: Alarm Clock
You can delete a particular ToDo task, all completed ToDo tasks or all ToDo tasks. Delete a task Delete all completed tasks Delete all tasks To Display ToDo List or Filter List When you select ToDo, you are presented with ToDo List which lists all tasks (both finished and unfinished) in chronological order. -
Page 137: Calculator
You can set only one time. You can set a recurrent alarm to ring at a specific time on several days of week. Set alarm clock to on Set time Set repeat setting Set clock alarm tune To Edit an Alarm You can cancel an alarm clock setting, change setting time, etc. -
Page 138: Currency Calculation
In this example, we are going to multiply 10.5 by 10. Enter 10.5 Multiply Enter 10 Get the answer Clear the display Currency Calculation Calculation”) This feature allows you to convert an amount of money in one currency to another currency by using the exchange rate which is built in or which you enter. -
Page 139: Voice Notes
Modify exchange rate Enter amount of money Get calculation result Useful Tips You can choose a currency or converted currency by using the Left or Right key with the cursor on the abbreviation of currency unit or converted currency unit on the Currency Calc screen. To Reset Rate or All Rates You can reset the exchange rate between particular currencies or all exchange rates you have set. -
Page 140: Text Notes
Select a voice note to play Start playing To Delete a Voice Note Select deleting voice note Delete Text Notes (press "MENU" key The Text Notes feature allows you to keep notes and other useful information, such as agendas and minutes of meetings, shopping lists and other items you need not forget. -
Page 141: User Data
Select the text note you want to edit Edit a text message To Delete a Text Note You can delete a particular text note or all text notes. Delete a text note Delete all text notes User Data The user’s personal data including the contact list, owner’s information, memories of calls made and received, and downloaded/attached ringtunes can be accessed from User Data. -
Page 142: Contacts
Contacts (press the” MENU” key Contacts manages the list of contact entries: registered names, phone numbers and email addresses. From this menu, you can select the e808 or the USIM card contact list to use as a default, search through the entries by different keys, and put the entries into categories (e.g. -
Page 143: Ringtune
Item Delete All Ringtune (press the “MENU“ key Ringtune displays the registered ringtune files as a list. Downloaded/attached ringtune files can be edited, played and deleted. To Download a Ringtune File on the Browser Select the title/file name and press the SK1 (YES) key. The ringtune file will be downloaded and registered. -
Page 144: Used Memory
Used Memory (press the “MENU“ key Used Memory displays the amount of memory used and the number of registered files for different e808 data. The following items are displayed: • Image • Audio • Video • Voice • File • Message (Message, Sent, and Draft) •... - Page 145 Basic Operations The basic operations for transferring data between the e808 and the USIM card are shown below: To Transfer Contact List Data between the Phone and the USIM When there is no more space left for storing email addresses in the USIM card and the requested contact entry to be transferred includes an email address, the transfer of the contact entry itself will be rejected.
- Page 146 Start moving/copying To Transfer Text Messages between the Phone and the USIM Protected Text messages cannot be moved. The USIM card can hold maximum of 20 Text message data (data size: 176 byte max.) Start data transfer Display To/From USIM Select the data type Select the operation Select the direction...
-
Page 147: To/From Pc
Select the Text messages to move or copy from the search result Start moving/copying Useful Tips: • To quit the transfer, press the SK2(Quit) key on data transfer screen. To/From PC (press the” MENU” key By connecting the e808 and a PC with an USB cable, data can be copied between the e808 and the PC. Between e808 and the PC, the following data can be transferred: contact list data (VCF), calendars (VCS), ringtunes (MID), video clips (MP4), audio files (AAC/WMA), image files (JPG, GIF, BMP), voice data (AMR), and other types of file received attached to emails. - Page 148 question mark icon. They can be saved in the Other File Type list in Multimedia menu, and attached to an email as "file." For details on the data types and size, refer to the relevant manuals on PC data transfer application. This operation can only be controlled from the data transfer software installed in a PC.
-
Page 149: Shortcut Keys
Shortcut Keys Shortcut keys can help you easily access certain functions. The table below lists the shortcut keys and their functions available in different modes of operation. In the table, "long" means pressing and holding of a key. Mode On standby Shortcut Keys Function Message... - Page 150 Mode While dialing Down Triangle Triangle (long) MENU MENU (long) End (long) CLR (long) 0 (long) # (after entering 3 digits or less) # (long) Function Calls the number (video) Save contacts Category list of the contacts Alphabetical list of the contacts 3 sites Switches to 3G mode Note : Available only when Dual USIM is...
- Page 151 Mode While receiving During a call Shortcut Keys Function Answers the call Submenu MENU Displays Menu MENU (long) Switches tasks (when multi-task activated) Start Answers the call Rejects a call End (long) Rejects a call and turns power off Turns ringtune off Other than above Any key answer Voice note...
- Page 152 Mode Text entry(standby) End (long) CLR (long) BS (long) SYMBOL (long) Text entry (while entering) Down Left Right End (long) CLR (long) BS (long) Text entry using numeric mode End (long) CLR (long) BS (long) 0 (long) SYMBOL (long) Function Discards the text Turns power off Deletes one digit to the right of the cursor...
-
Page 153: Index
Index Accessories 121 Alarm 122 Alarm clock 126 All incoming 104 Any key answer 15, 50, 96 Area mode 107 Audio player 117 Auto-answer 99 Backlight 22, 95, 98, 99 BAIC 104 BAOC 104 Bar Calls In 104 Bar Calls Out 104 Battery 6 BIC-Roam 104 BOIC 104... - Page 154 Data transfer 134 Dial lock 3, 102 Direct input service 106 DTMF 17 Earpiece volume 17 Email 28, 30, 34, 45, 57, 76, 134 External Connect 56 Filter list 126 Font 100 Host APN 106 HTTP proxy 106 Icon 3, 8, 30, 123 Image 37, 39, 41, 65, 86, 98, 108, 110, 114 Image quality 22, 98, 110, 114, 115, 116 Indicator 7, 29, 99...
- Page 155 Other File Type 120 Outgoing call barring 11, 104 Overwrite mode 25, 28 Owner Info 132 Owner name 105 Pause dial 13, 97 Phone 96 ALS line 11, 97 Any key answer 15, 50, 96 Earphone 10, 97 Pause dial 13, 97 Quality alarm 96 Phone to USIM 135, 136 Picture position 98...
- Page 156 SMS (see text message) Standby screen 100 Start-up lock 102 Summer time 101 Task menu 52 Text edit 25 CAP key 25 Insert/overwrite mode 25 SHIFT key 25 SYMBOL key 25 Text entry 24 Copy and paste 26 Cut and paste 27 Numeric 24 Symbol 25 Text mode 24...
- Page 157 UK v5.0 MDS-000049-EAA0 Apr 2003 5 edition...
- Page 158 Copyright © 2003 NEC Corporation. All rights reserved. Copyright © 2003 NEC Corporation. All rights reserved. NEC is a registered trademark of NEC Corporation, Japan. NEC is a registered trademark of NEC Corporation, Japan.