
Related Manuals for Mustek MDC-800


Summary of Contents for Mustek MDC-800
- Page 1 MDC-800 USER’S MANUAL Getting Started Camera Operation Getting Connected Software Applications ViewFun Appendices...
-
Page 2: Copyright Information
Copyright Information All rights reserved. No part of this publication may be reproduced, transmitted, stored in a retrieval system, or translated into any language in any form by any means, mechanical, optical, electronic, recording, or otherwise, without the written permission of the Manufacturer. -
Page 3: Table Of Contents
Chapter 1: Getting Started Supported Computer Systems ... 7 Package Contents ... 7 Your Video Digital Camera ... 7 Power Supply ... 9 Installing the Batteries ... 9 Using an AC Adapter ... 9 Low-Battery Indicator ... 9 Segment LCD Display Panel ... 9 Compact Flash Card ... - Page 4 Chapter 3: Getting Connected Connecting to the TV ...21 Viewing Images ... 21 Viewing Real-time Video ... 21 Connecting to the VCR ...22 Recording Real-time Video ... 22 Connecting to the PC ...22 Chapter 4: Software Applications Software Installation ...24 Windows 95/NT 4.0/98 ...
-
Page 5: Chapter 1: Getting Started
Preface Thank you for your purchase of the MDC-800. This guide covers all of the features and functions of the camera. In this user guide you will find the following topics: Chapter 1: Getting Started This chapter explains how to make your camera operational. -
Page 6: Getting Started
Chapter Supported Computer Systems ...7 Package Contents ...7 Your Video Digital Camera ...7 Power Supply ...9 Installing the Batteries ... 9 Using an AC Adapter ... 9 Low-Battery Indicator ... 9 Segment LCD Display Panel ...9 Compact Flash Card ... 10 Installing/removing the Compact Flash Card ... -
Page 7: Supported Computer Systems
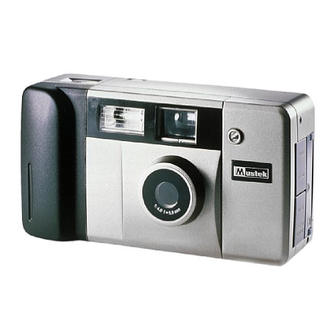
• 120 MB available hard disk space for software installation • VGA or Super VGA color monitor • CD-ROM Drive Package Contents • MDC-800 camera including 4 AA batteries • USB and RS232 connection cables • NTSC and PAL video output cable • 7.5V DC, 1.3A Power Adapter •... - Page 8 1. Viewfinder: Allows you to position the subject in the image that will be captured. 2. Lens: Allows the camera to focus on the subject and to capture the image once the shutter button has been pressed. 3. LED Indicator: Alerts you when the self-timer is about to take the picture.
-
Page 9: Power Supply
Power Supply Installing the Batteries The camera comes with 4 AA alkaline batteries. Please refer to the inside of the battery compartment lid or the following illustration to properly install the batteries. Using an AC Adapter To save battery power, you may also use a standard (7.5v/1.3 amp) AC power adapter. -
Page 10: Compact Flash Card
Formatting the Compact Flash Card All Mustek Brand CF cards are pre-formatted for use in this camera and do not require additional formatting before using. Once you insert an unformatted CF card into the CF card slot you will be prompted with a message if it is not formatted. - Page 11 Chapter Camera Operation The LCD Menu- Camera Mode ...12 Functions ...12 Flash ... 13 Quality ... 13 Self-timer ... 13 Exposure Mode ... 13 White Balance ... 13 Filters ... 14 Video Record ... 14 Continuous Shooting ... 14 Auto-Off ... 14 Exposure Value ...
-
Page 12: Camera Operation
Camera Operation This chapter explains how to use the camera and its operational features and settings The camera has two modes, Camera and Playback. Both modes offer various functions specific to that particular mode. The LCD Menu- Camera Mode • Power on the camera. •... -
Page 13: Flash
(1) FLASH: The camera is equipped with five flash modes: ON: the flash will fire with every image capture. ON-R: the same as ON, preceded by a flash which reduces red- eye. AUTO: whenever there is insufficient light, the camera automatically detects and fires the flash. -
Page 14: Filters
Note: If the image color is not accurate when using the Auto mode, try moving the camera to acclimate the Auto white balance sensor. (6) Filters: This feature allows you to add color imaging filters that are applied to your images after capturing them. There are six (6) filter modes to choose from and they appear in the following order: 1. -
Page 15: Display Brightness Control
(12) Information Display: This feature uses icons (e.g. flash, counter, etc.) to display camera information and settings on the camera LCD. The information displayed is from one of two sources. In Camera mode the number that appears reflects how many images it is possible to capture before the memory is full, as well as the current Quality setting. -
Page 16: Capturing Images
Capturing Images There are several factors that should be considered when captur- ing quality images. Proper positioning, distance, lighting, even hold- ing the camera in just the right way can make all of the difference when capturing quality images. To capture an image: 1. -
Page 17: The Lcd Menu- Playback Mode
The LCD Menu- Playback Mode This mode offers functions specific to captured images and allows you to view your captured images on the LCD or TV. When you switch to this mode, the LCD automatically turns on in single pic- ture mode and the last image captured appears. -
Page 18: Delete All
Note: When you delete an image, if there are any other images that are in the camera’s memory after that image, they will move up in place. before after To delete a protected image: 1. Select the protected image that you wish to Delete. 2. -
Page 19: Digital Zoom
(7) Digital Zoom: (On/Off) This feature enables you to enlarge an image for viewing up to 4X its original size. • Menu button: Returns you to the playback main menu. • Select Up button: Allows you to move horizontally across the picture. -
Page 20: Getting Connected
Chapter Connecting to the TV ...21 Viewing Images ... 21 Viewing Real-time Video ... 21 Connecting to the VCR ...22 Recording Real-time Video ... 22 Connecting to the PC ...22 Getting Connected... -
Page 21: Connecting To The Tv
Connecting to the TV 1. Plug one end of the included video cable into the VIDEO IN terminal of your television. 2. Open the cable panel and plug the other end of the cable into the camera’s VIDEO terminal. Viewing Images In order to view images on the TV after connecting, please refer to the following: 1. -
Page 22: Recording Real-Time Video
Connecting to the VCR 1. Plug one end of the included video cable into the VIDEO IN terminal at the back of your VCR. 2. Plug the other end of the cable into the camera’s VIDEO terminal. Note: Ensure that your TV and VCR are properly connected. Recording Real-time Video 1. - Page 23 Chapter Software Installation ...24 Windows 95/NT 4.0/98 ... 24 Transferring Images to the PC ...24 Acquiring the Camera Software ...25 Previewing Images ...25 The Photo Album ...26 The Setting Functions ... 27 Selecting Images ... 27 Protecting Images ... 28 Deleting Images ...
-
Page 24: Software Installation
Software Installation Windows 95/NT 4.0/98 1. Insert the installation CD into your CD-ROM drive. 2. Click on Start and select Run. 3. In the Run dialog box, type “drive:\run.exe” where drive is your CD- ROM drive and click 4. Follow the on-screen instructions. Windows 98 User’s Note: For Plug n’... -
Page 25: Acquiring The Camera Software
2. From the File menu, choose Acquire and select Digital Camera, Click the Camera icon. The Select data source box appears in the right margin. 3. Choose Mustek MDC-800 and click the Acquire button at the bottom of the window. 4. If you are transferring images from the camera’s... -
Page 26: The Photo Album
Marked Image: Has a flag sym- bol displayed. Displayed Image: An image trans- ferred to the Photo Album displayed with it’s image number and resolution. Protected Image: Has a locked symbol displayed. Selected Image: A displayed image in a blue box. Internal Memory: Images are from the internal memory (default). -
Page 27: The Setting Functions
The Photo Album (1) The Setting Functions To access this information, click the Settings icon, and select Information. This feature displays or allows you to adjust the settings used to communicate with the camera. (i) Baud Rate This is the rate at which the camera and computer communicate with each other through the serial port. -
Page 28: Protecting Images
(3) Protecting Images To Protect/Unprotect an image in the Photo Album: • Right-click on the image and a pop-up box will display. • Click the Protect/Unprotect icon to engage or disengage the lock function. (4) Deleting Images To delete an image: 1. -
Page 29: Using The Status Bar Button
(9) Using the Status Bar Button The Status Bar Button allows you to change the color of the text that appears in the Status Bar window. To change the text color: 1. Click the Status Bar Button. 2. Click one of the colored icons that appears in Status Bar window, and the status text will appear in that color. -
Page 30: Using The Control Panel
Using The Control Panel This panel allows you to control certain camera functions while the camera is hooked up to the computer. (i) Camera Mode: Camera Mode (displayed) Playback Mode (not active) Quality Exposure Mode Flash Mode Red-eye reduction Exposure Value Saturation The Shutter button Control Panel: Camera Mode... -
Page 31: Playback Mode
(ii) Playback Mode: This mode allows you to preview your images in either single or 4 picture mode before transferring them to the computer. 1. Select the display type (single or 4 picture mode). 2. Use the Up/Down buttons to scroll through the pictures. 3. - Page 32 Chapter Hardware Installation ... 33 Starting ViewFun ... 33 Functions ... 34 View Window and Display ... 34 The Video Album ... 35 The Photo Album ... 35 Settings ... 36 The Advanced Settings ... 37 The Video Folder ... 37 The Picture Folder ...
-
Page 33: Hardware Installation
ViewFun for Windows 98 ViewFun is specially designed software that makes the camera’s image and video capabilities simple to use. Hardware Installation • Connect the USB cable to the USB port at the back of the computer. • Connect the USB cable to the camera’s USB terminal. -
Page 34: Functions
Functions The most important part of ViewFun are the controls. These but- tons allow you to control ViewFun’s functions. Record Video In Video Mode, clicking here starts the recording of a video clip (.AVI file) and sends it to the Video Album as a numbered Thumb- nail. -
Page 35: The Video Album
The Video Album Once you have located the Video Thumbnail that you would like to view, simply double-click it and it will automatically open in the video displaying software, Media Player. Video Thumbnail To Open (View), Save, E-mail, or Delete your cap- tured video clips right-click the desired video thumb- nail. -
Page 36: Settings
Settings The settings are accessed by clicking the tab on the left side of the Settings panel. These settings are used to alter the images or the video that you capture. They must be set before capturing an image or video to have an effect. Exposure Value This setting allows you to control the amount of light captured with images. -
Page 37: The Advanced Settings
The Advanced Settings The Advanced Settings contains four folders: Video, Picture, E- mail, and Language. To return to the main screen after making changes to a particular folder, click OK to accept the changes, or Cancel to ignore the changes. The Video Folder Size This setting controls the frame size (160x120, 320x240) of the... -
Page 38: The Picture Folder
The Picture Folder Size This setting controls the frame size (320x240, 640x480, 1024x768) of the image you are going to capture. Smaller image frame sizes require less memory space to store the image. Auto Snap Checking this box enables the user to automatically capture im- ages at regular intervals (e.g. -
Page 39: Recording A Video Clip
Recording a Video Clip 1. Open the Video Album by clicking the Video Mode Icon, and set the recording type, duration etc. 2. Aim the camera at the subject. 3. Click the Record button. 4. Click the Stop button when you want to finish recording, or it will automatically stop (if set in step 1). -
Page 40: Appendices
Appendices Trouble Shooting Specifications Glossary Technical Support Appendices ONTENTS... -
Page 41: Trouble Shooting
Symptom 1. Batteries not loaded correctly No Power 2. Dead batteries 3. Wrong AC adapter 1. Low battery power Sudden power failure 2. Auto Power Off function engaged 1. Memory is full. No capture when shutter is pressed 1. Indoor fluorescent lighting Inaccurate color 2. - Page 42 Symptom No Image is present Cannot open the Photo Album Cannot transfer data CF Card error Cannot delete image “Device not ready” Connection Failure Cannot connect at startup or cannot transfer image/thumbnail Cause 1. Operation Mode Selector is set to camera mode 2.
-
Page 43: Specifications
Multi-function Digital camera/USB PC-camera/Video camera Picture Interpolated to 1024 x 768 (XGA) Memory Optional CF memory card interface Digital Ports (2) RS-232-baud rate USB PC-camera Continuous video capturing: max. size (320*240) Video Capturing Capability Stores 320KB (up to 30 seconds) -
Page 44: Glossary
The following represents terms used throughout the manual, and are defined here for your convenience. Baud rate: Is the speed at which the computer and camera com- municate with each other. It is sometimes necessary to decrease the baud rate because the computer cannot process image information at high speed. - Page 45 PAL: A Phase Alternative Line television is one that uses 625-line common system used in most European countries. Pixels: or out of which the displayed image is constructed. RS232: connect the camera to the computer. TWAIN: try standard protocol that allows external devices to communicate with your computer.
-
Page 46: Technical Support
If you need help installing or using the digital camera, please call Technical Support. Mustek, Inc. 121 Waterworks Way, Suite 100 Irvine, CA 92618, USA TEL: 1-949-788-3600 FAX: 1-949-788-3670 http://www.mustek.com Mustek Computer GMBH Hellersbergstr. 2a 41460 Neuss, Germany TEL: 49-2131-162840...
Need help?
Do you have a question about the MDC-800 and is the answer not in the manual?
Questions and answers