Advertisement
Quick Links
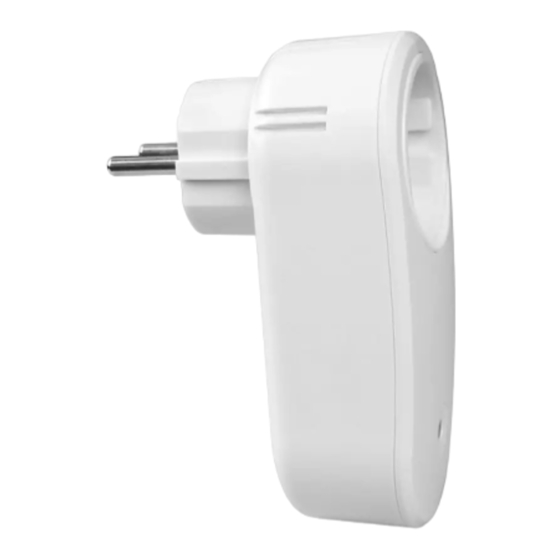
NAMRON ZIGBEE PLUGG MED TERMOSTAT
Importan t: Read All Ins tructions P rior to Ins tallation
F u n c tio n i n tro du c tio n
P rogra m button,
short press to
switch on/off loa d
Pro du c t Data
Z igbee profile
Device ID
R a dio F requency
Input Volta ge
Ma x. Loa d
Over C urrent Protection
Opera ting tempera ture
R ela tive humidity
Dimensions
LE D Indica tor S ta te
F la shes red slowly
S ta ys solid ora nge
S ta ys solid yellow
S ta ys solid green
S ta ys solid cya n
S ta ys solid blue
F la shes purple slowly
S ta ys solid white a t a low brightness
• Z igBee sma rt plug ba sed on la test ZigBee 3.0 protocol
• E na bles to control ON/OF F o f the loa d, supports ma x. 16 scenes
• Z igBee end device tha t supports Touchlink commissioning
• S upports find a nd bind mode to bind a Z igBee remote
• Supports zigbee green power and can bind max. 20 zigbee green power switches
• S upports tempera ture mea surement
• S upports over current protection a nd power metering, ena bles to report power consumption to ga tewa y
• Wa terproof gra de: IP 20
70110005
LED indicator
0x0104( Z HA)
0x000A( P lug- in Unit)
2.4G Hz
AC 200- 240V, 50/60Hz
16A
16.1A
0 to 40°C
8% to 80%
114.8×54.8×74.7( mm)
Definition ( 16.1A Over C urrent)
Over current
Loa d power > 2200W
Loa d power 2001- 2200W
Loa d power 1501- 2000W
Loa d power 1001- 1500W
Loa d power <= 1000W
F irmwa re upda ting via O TA
Loa d switched off
S afety & Warn in gs
• DO NOT insta ll with power a pplied to device.
• DO NOT expose the device to moisture.
Operation
1 . Plu g th e s mart plu g i n to AC p o wer s ou rc e.
2. Th is Z igB ee d evic e i s a w ireles s r ec eiver th at c o mmu n ic ates w ith a v ariety o f ZigB ee c o mpatible
s ys tems . T h is r ec eiver r ec eives a n d i s c on tro lled b y wireles s r adio s ign als f rom th e c o mpatible Z igB ee
s ys tem.
3. Z igbee Netwo rk P airin g th ro u gh C oo rdin ato r o r Hu b ( Added to a Zigbee Netwo rk)
S tep 1 : R emove the device from previous z igbee network if it ha s a lrea dy been a dded to, otherwise pa iring will
fa il. P lea se refer to the pa rt " F ac to ry Res et Man u ally".
S tep 2 : F rom your Z igBee C ontroller or hub interfa ce, choose to a dd lighting device a nd enter P a iring mode a s
instructed by the controller.
S tep 3 : S hort press "P rogra m" button 5 times continuously to set the device to network pa iring mode, LE D
indica tor will fla sh white fa st.
4. T ou c h Lin k to a Zigbee Remo te
S tep 1 : S hort press "P rog" button 4 times ( Or re- power on the device 4 times) to sta rt Touchlink commissioning,
180S timeout. Once timeout, repea t the opera tion.
AC P ower
50/60Hz
< 10cm
Z igbee
R emote
S tep 2 : Bring the remote or touch pa nel within 10cm of the lighting device.
S tep 3 : S et the remote or touch pa nel into Touchlink commissioning,
plea se refer to corresponding remote or touch pa nel ma nua l to lea rn how .
No te: 1 ) D irec tly To u c h Lin k ( bo th n o t added to a Z igB ee n etwork), e ac h d evic e c an l in k with 1 r emo te.
2 ) To u c h Lin k after b o th added to a Z igB ee n etwo rk, e ac h d evic e c an l in k w ith m ax. 3 0 remo tes .
3 ) To c o n tro l b y b o th g ateway an d r emo te, add r emo te an d d evic e to n etwo rk firs t th en T o u c h Lin k.
4 ) After To u c h Lin k, th e d evic e c an b e c o n tro lled b y th e l in ked r emo tes .
Step 4: LE D indica tor will fla sh white 6 times to
indica te successful pa iring. LE D indica tor will
ma inta in the sta tus before entering into network
pa iring mode if pa iring fa ils.
S tep 4: T here sha ll be indica tion
on the remote for successful link
a nd LE D indica tor of the plug will
fla sh white twice.
Advertisement

Related Manuals for Namron 70110005


Summary of Contents for Namron 70110005
- Page 1 NAMRON ZIGBEE PLUGG MED TERMOSTAT S afety & Warn in gs 70110005 • DO NOT insta ll with power a pplied to device. • DO NOT expose the device to moisture. Operation Importan t: Read All Ins tructions P rior to Ins tallation 1 .
- Page 2 5. R emo ved from a Z igbee Network th ro u gh C o ordin ator o r Hu b I n terfac e 8. F in d an d B in d Mode No te: M ake s u re b o th th e d evic e an d r emo te are added to th e s ame g ateway th at s u pports f in d an d b in d. S tep 1 : S hort press “P rog.”...
- Page 3 11 . S etu p a Z igbee Network & Add O th er Devic es t o th e Network ( No C o ordin ator R equ ired) S tep 1 : S hort press “P rogra m” button 4 times to ena ble the device to setup a z igbee network ( LE D indica tor fla shes white twice) to discover a nd a dd other devices, 180 seconds timeout, repea t the opera tion.