Table of Contents
Advertisement
Quick Links
Advertisement
Table of Contents

Related Manuals for Bosch CDG714 1 Series


Summary of Contents for Bosch CDG714 1 Series
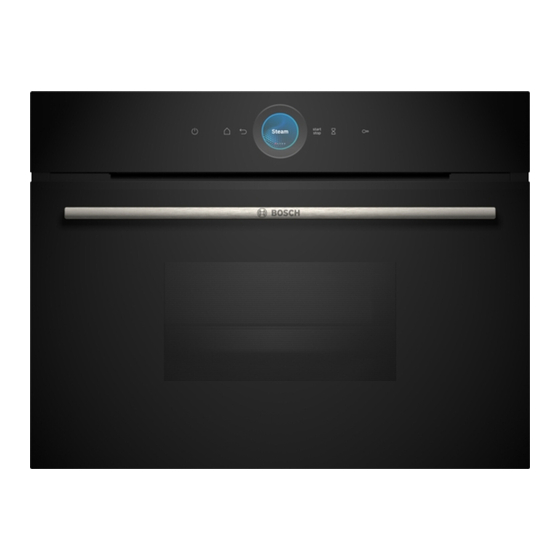
- Page 1 Steamer CDG714X.1 User manual and installation instructions [en]...
-
Page 2: Table Of Contents
en Safety Futher information and explanations are available online: Table of contents ¡ Keep the instruction manual and the product information safe for future refer- ence or for the next owner. INFORMATION FOR USE ¡ Do not connect the appliance if it has been Safety .............. 2 damaged in transit. -
Page 3: Safety
Safety en WARNING ‒ Risk of burns! WARNING ‒ Risk of fire! The appliance and its parts that can be Due to the hot surfaces, vapours from flam- touched become hot during use. mable liquids may catch fire in the cooking compartment (explosion). The appliance door ▶... -
Page 4: Avoiding Material Damage
en Avoiding material damage Children may breathe in or swallow small parts, causing them to suffocate. ▶ Keep small parts away from children. ▶ Do not let children play with small parts. 2 Avoiding material damage If the seal is very dirty, the appliance door will no ATTENTION! longer close properly during operation. -
Page 5: Familiarising Yourself With Your Appliance
Familiarising yourself with your appliance en 4 Familiarising yourself with your appliance 4.1 Control panel Symbol Meaning Remote start with Home Connect is ac- You can use the control panel to configure all functions tivated. of your appliance and to obtain information about the → "Home Connect ", Page 16 operating status. - Page 6 en Operating modes In most operating modes, the interior lighting switches Shelf positions on as soon as operation starts. The interior lighting The shelf positions are numbered from bottom to top. switches off again when the operation stops. You can specify whether you want the interior lighting to switch on during operation in the basic settings.
-
Page 7: Accessories
Accessories en Symbol Name Temperature Reheating 80-100 °C Suitable for plated meals. The steam type of heating gently warms cooked food. The steam ensures that the food does not dry out. Dough proofing 30-50 °C Suitable for yeast dough. The yeast dough proves more quickly than at room tem- perature. -
Page 8: Before Using For The First Time
You will find a comprehensive range of products for your appliance in our brochures and online: www.bosch-home.com Accessories vary from one appliance to another. When purchasing accessories, always quote the exact product number (E no.) of your appliance. -
Page 9: Basic Operation
Basic operation en Remove the product information and the accessor- 7.2 Performing initial start-up ies from the cooking compartment. Remove any After connecting the appliance to the power supply, leftover packaging, such as polystyrene pellets, and you must configure the settings for its initial start-up. any adhesive tape that is in or on the appliance. - Page 10 en Basic operation Swipe right or left to scroll through the menu and Remove the water tank from the tank recess. ‒ other setting options. Swipe down or up to scroll through selection ‒ lists. To select a function, press the function on the dis- play.
-
Page 11: Time-Setting Options
Time-setting options en Press on the display. 8.7 Refilling the water tank Press the temperature. If the water tank runs dry during operation, steaming Change the temperature with the setting ring. will be paused. To confirm the change, press on the display. Open the appliance door carefully. - Page 12 en Time-setting options Changing the end time a When the time has elapsed, a signal sounds. A noti- fication appears on the display confirming that the To achieve good cooking results, only change the set operation has finished. time before the operation starts and before the cooking Once the cooking time has elapsed: time starts counting down.
- Page 13 Dishes en 10 Dishes You can use "Dishes" mode to very easily cook food. 10.4 Cancelling settings The appliance will choose the optimal setting for you. The settings cannot be changed once cooking is in progress. 10.1 Setting a dish To delete all settings, press ...
- Page 14 en Favourites ¡ Stir cereal products after cooking so that the re- After making the yoghurt, leave it to cool in the refri- maining water is more quickly absorbed. gerator. Making rice pudding Fish ¡ Grease the perforated steaming tray. Weigh the rice. ¡...
-
Page 15: Dishes
Childproof lock en 12 Childproof lock You can secure your appliance to prevent children a When the appliance is switched on, lights up. from accidentally switching it on or changing the set- When the appliance is switched off, does not light tings. -
Page 16: Home Connect
en Home Connect Press the required basic settings area. To exit the basic settings, use to go back to the Press the required basic setting. main menu or switch off the appliance using . Press to select the required basic setting. a The changes are saved. - Page 17 Home Connect en Basic setting Possible settings Explanation Wi-Fi You can use the Wi-Fi to switch off the network connection for your appliance. When you have connected successfully once, you can deactivate the Wi-Fi and not lose your detailed data. As soon as you activate Wi-Fi again, the appliance connects automatically.
- Page 18 en Cleaning and servicing Note: Please note that the Home Connect functions can only be utilised with the Home Connect app. In- formation on data protection can be retrieved in the Home Connect app. 15 Cleaning and servicing To keep your appliance working efficiently for a long time, it is important to clean and maintain it carefully. 15.1 Cleaning agents Do not use limescale remover on the door handle or Only use cleaning agents that are suitable for the differ-...
-
Page 19: Cleaning And Servicing
Cleaning and servicing en Dry the seal in the tank lid and the tank recess in 15.2 Microfibre cloth the appliance. The microfibre cloth removes liquids and grease. Slot the water tank back into the water tank recess. This microfibre cloth has a honeycomb structure and is Close the appliance door. - Page 20 en Cleaning and servicing Close the appliance door. Close the appliance door fully . Grab hold of the Press . appliance door with both hands (on the left and right) and pull it upwards and out . a The appliance rinses itself for 2 minutes.
- Page 21 Cleaning and servicing en The hinges on the appliance door move when the door If required, remove the condensate trough for clean- is opened and closed, which could trap your fingers. ing. Keep your hands away from the hinges. Open the appliance door. ▶...
-
Page 22: Troubleshooting
en Troubleshooting Slide in the inner panel . Push the inner panel in at the top . When doing this, ensure that the smooth, glossy Put the cover back in place and press on it until you side of the panel is on the outside and the cut-outs hear it click into place ... - Page 23 Troubleshooting en Fault Cause and troubleshooting Appliance does not Demo mode is switched on. heat up. Briefly disconnect the appliance from the power supply by switching the circuit breaker in the fuse box off and then on again. Switch off demo mode in the basic settings within approx. 5 minutes. → "Changing the basic settings", Page 15 There has been a power cut.
-
Page 24: Disposal
en Disposal Fault Cause and troubleshooting A message that Water tank half full. reads "Fill water For longer operations, completely fill the water tank. ▶ tank?" appears on the display when the appliance is in opera- tion. "Appliance heating Automatic calibration values are not optimal. up"... - Page 25 How it works en 18 How it works Here, you can find the ideal settings for various dishes When cooking food in the perforated steaming tray, al- as well as the best accessories and cookware. We ways insert the unperforated steaming tray below it. have tailored these recommendations to your appli- The unperforated steaming tray will catch any liquid ance.
- Page 26 en How it works 18.3 Vegetables Place the vegetables into the perforated steaming tray and insert at position 2. Insert the unperforated steaming tray underneath at position 1. The unperforated steaming tray will catch any liquid that drips down. Recommended settings for vegetables Food Piece size Accessories/...
- Page 27 How it works en Food Piece size Accessories/ Heating function Temperature in Cooking time in cookware °C Brussels sprouts Florets Perforated + un- 10 - 20 perforated steam- ing tray Beetroot Whole Perforated + un- 40 - 50 perforated steam- ing tray Red cabbage Shredded Perforated + un- 25 - 35 perforated steam-...
- Page 28 en How it works Food Ratio Accessory/ Shelf position Type of heat- Temperature in Cooking time cookware °C in mins Dumplings Perforated + 2 + 1 15 - 25 unperforated steaming tray Pasta, fresh, Unperforated 5 - 15 chilled steaming tray Add a little water to the food. 18.5 Poultry and meat Recommended settings for poultry and meat.
- Page 29 How it works en Food Amount Accessories/ Shelf position Heating func- Temperature in Cooking time cookware tion °C in min Trout, whole 0.2 kg each Perforated + 2 + 1 80 ‑ 90 12 ‑ 15 unperforated steaming tray Cod fillet 0.15 kg each Perforated + 2 + 1 80 ‑ 90 10 ‑ 14 unperforated steaming tray Salmon fillet...
- Page 30 en How it works Recommended settings for desserts and compote Food Accessory/cookware Shelf pos- Type of Temperature in °C Cooking time in mins ition heating Yeast dumplings Unperforated steam- 20 - 30 ing tray Crème caramel Ramekins + perfor- 25 - 35 ated steaming tray Rice pudding Bowl + perforated 30 - 40...
- Page 31 How it works en Recommended settings for defrosting Food Amount Accessories/ Shelf position Heating func- Temperature in Cooking time cookware tion °C in min Berries 0.5 kg Perforated + 2 + 1 50 ‑ 55 15 - 20 unperforated steaming tray Vegetables 0.5 kg Perforated + 2 + 1 40 - 50 15 ‑ 50 unperforated steaming tray Pour the berries into the perforated steaming tray...
- Page 32 en How it works You may use whichever shelf position you like for 18.13 Dough proving the perforated steaming tray. Recommended settings for proving dough. Place the mixing bowl with the dough into the per- You can prove yeast dough more quickly in your appli- forated steaming tray.
-
Page 33: Customer Service
Customer Service en 18.15 Test dishes The information in this section is provided for test institutes to facilitate testing of the appliance in accordance with EN 60350‑1. Recommended settings for test dishes Food Accessories Height Type of heating Temperature in Cooking time in °C mins Broccoli, fresh,... -
Page 34: Declaration Of Conformity
2014/53/EU. A detailed Declaration of Conformity can be found on- A detailed RED Declaration of Conformity can be found line at www.bosch-home.co.uk among the additional online at www.bosch-home.com among the additional documents on the product page for your appliance. - Page 35 Installation instructions en ¡ Dimensions of the figures in mm. 22.3 Installation below a worktop Observe the installation dimensions and the installation WARNING ‒ Risk of fire! instructions when installing below a worktop. It is dangerous to use an extended power cord and non-approved adapters. ▶...
- Page 36 en Installation instructions Hob type a raised in mm a flush in mm b in mm Induction hob Full-surface induction hob Gas hob Electric hob ¡ The fuse protection must correspond to the power 22.5 Installation in a tall unit rating specified on the appliance's rating plate and Observe the installation dimensions and the installation to the local regulations.
- Page 37 Installation instructions en 22.8 Installing the appliance Slide the appliance in fully and centre it. Screw the appliance into place. For handleless kitchens with vertical bar handle strips: Attach a suitable filling piece in order to cover ‒ any sharp edges and to guarantee a safe install- ation.
- Page 40 Expert advice for your Bosch home appliances, help with problems or a repair from Bosch experts. Find out everything about the many ways Bosch can support you: www.bosch-home.com/service Contact data of all countries are listed in the attached service directory.