Advertisement
Available languages
Available languages
Quick Links
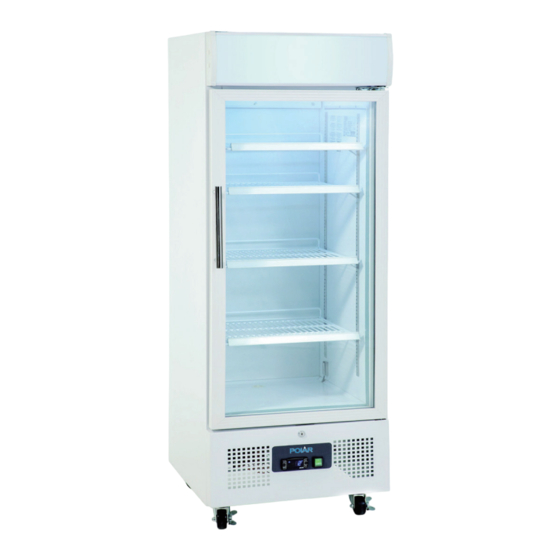
Display fridge
EN
Instruction manual
Koeling met Glasdeur
NL
Handleiding
Présentoir réfrigéré
FR
Mode d'emploi
Model • Modèle • Modell • Modello • Modelo • Malli:
DM075 / DM076 / GH426 / GH427
DM075-DM076_GH426-GH427_ML_A5_v9_20221125.indb 1
DM075-DM076_GH426-GH427_ML_A5_v9_20221125.indb 1
Display-Kühlschrank
2
DE
Bedienungsanleitung
Frigorifero da esposizione
10
IT
Manuale di istruzioni
Frigorífico exhibidor
18
ES
Manual de instrucciones
Display fridge
Instruction manual
26
34
42
2022/11/25 11:49
2022/11/25 11:49
Advertisement

Related Manuals for Polar Electro DM075


Summary of Contents for Polar Electro DM075
- Page 1 Frigorifero da esposizione Handleiding Manuale di istruzioni Présentoir réfrigéré Frigorífico exhibidor Mode d'emploi Manual de instrucciones Model • Modèle • Modell • Modello • Modelo • Malli: DM075 / DM076 / GH426 / GH427 DM075-DM076_GH426-GH427_ML_A5_v9_20221125.indb 1 DM075-DM076_GH426-GH427_ML_A5_v9_20221125.indb 1 2022/11/25 11:49 2022/11/25 11:49...
- Page 2 • If the power cord is damaged, it must be replaced by a POLAR agent or a recommended qualified technician in order to avoid a hazard. • Children should be supervised to ensure that they do not play with the appliance. DM075-DM076_GH426-GH427_ML_A5_v9_20221125.indb 2 DM075-DM076_GH426-GH427_ML_A5_v9_20221125.indb 2 2022/11/25 11:49 2022/11/25 11:49...
- Page 3 Introduction Please take a few moments to carefully read through this manual. Correct maintenance and operation of this machine will provide the best possible performance from your POLAR product. DM075-DM076_GH426-GH427_ML_A5_v9_20221125.indb 3 DM075-DM076_GH426-GH427_ML_A5_v9_20221125.indb 3 2022/11/25 11:49 2022/11/25 11:49...
- Page 4 Mounting the door handle 1. Pull the door gasket aside to expose the 2 pre- drilled holes. Insert the screws. 3. Cut the slot on the front panel and install the Screw hinge inside. Gasket DM075-DM076_GH426-GH427_ML_A5_v9_20221125.indb 4 DM075-DM076_GH426-GH427_ML_A5_v9_20221125.indb 4 2022/11/25 11:49 2022/11/25 11:49...
- Page 5 6. Disassemble the right upper hinge. on the left lower side. 7. Install the left upper hinge. 5. Reverse the door. 8. At last, install the front panel. Now the door handle is on the right side. DM075-DM076_GH426-GH427_ML_A5_v9_20221125.indb 5 DM075-DM076_GH426-GH427_ML_A5_v9_20221125.indb 5 2022/11/25 11:49 2022/11/25 11:49...
- Page 6 4. Insert the new lamp and replace the cover. warranty: hot food, hot liquids, acidic fluids, acidic products. • Wrap or cover food where possible. DM075-DM076_GH426-GH427_ML_A5_v9_20221125.indb 6 DM075-DM076_GH426-GH427_ML_A5_v9_20221125.indb 6 2022/11/25 11:49 2022/11/25 11:49...
- Page 7 The appliance has not been Check installation position and change if installed in a level or stable necessary position The display lamp does Lamp needs replacing Replace the lamp not illuminate DM075-DM076_GH426-GH427_ML_A5_v9_20221125.indb 7 DM075-DM076_GH426-GH427_ML_A5_v9_20221125.indb 7 2022/11/25 11:49 2022/11/25 11:49...
- Page 8 The Model Identifier can usually be found on the inside wall and on the reverse of the unit. Note: Polar offers a 2 year minimum warranty, please contact the authorised representative for more details. DM075-DM076_GH426-GH427_ML_A5_v9_20221125.indb 8 DM075-DM076_GH426-GH427_ML_A5_v9_20221125.indb 8 2022/11/25 11:49...
- Page 9 POLAR. Every effort is made to ensure all details are correct at the time of going to press, however, POLAR reserve the right to change specifications without notice. DM075-DM076_GH426-GH427_ML_A5_v9_20221125.indb 9 DM075-DM076_GH426-GH427_ML_A5_v9_20221125.indb 9 2022/11/25 11:49...
- Page 10 • Indien de stroomkabel beschadigd raakt, dient men deze door een POLAR monteur of een aanbevolen vakman te laten vervangen om gevaarlijke situaties te voorkomen. DM075-DM076_GH426-GH427_ML_A5_v9_20221125.indb 10 DM075-DM076_GH426-GH427_ML_A5_v9_20221125.indb 10 2022/11/25 11:49 2022/11/25 11:49...
- Page 11 Neem de tijd om deze handleiding aandachtig door te lezen. Met het correcte gebruik en onderhoud levert dit product van POLAR de beste resultaten op. Verpakkingsinhoud De verpakking bevat het volgende: POLAR Koeling met Glasdeur Lades Sleutels x 2 Handleiding Deurkruk DM075-DM076_GH426-GH427_ML_A5_v9_20221125.indb 11 DM075-DM076_GH426-GH427_ML_A5_v9_20221125.indb 11 2022/11/25 11:49 2022/11/25 11:49...
- Page 12 1. Trek de deurpakking opzij om de 2 voorgeboorde gaten bloot te leggen. Plaats de schroeven. 3. Snij de groef op het voorpaneel en installeer Schroef het scharnier aan de binnenkant. Pakking DM075-DM076_GH426-GH427_ML_A5_v9_20221125.indb 12 DM075-DM076_GH426-GH427_ML_A5_v9_20221125.indb 12 2022/11/25 11:49 2022/11/25 11:49...
- Page 13 6. Demonteer het bovenste scharnier rechts. installeer het aan de linker onderkant. 7. Installeer het linker bovenste scharnier. 5. Keer de deur om. 8. Installeer uiteindelijk het voorpaneel. Nu is het handvat geïnstalleerd aan de rechterzijde. DM075-DM076_GH426-GH427_ML_A5_v9_20221125.indb 13 DM075-DM076_GH426-GH427_ML_A5_v9_20221125.indb 13 2022/11/25 11:49 2022/11/25 11:49...
- Page 14 Voedsel afdekken en inwikkelen wanneer 4. Plaats een nieuwe lamp en plaats het mogelijk. afschermkapje opnieuw. • Niet de interne ventilatoren in het apparaat blokkeren. • Laat de deuren niet al te lang openstaan. DM075-DM076_GH426-GH427_ML_A5_v9_20221125.indb 14 DM075-DM076_GH426-GH427_ML_A5_v9_20221125.indb 14 2022/11/25 11:49 2022/11/25 11:49...
- Page 15 Het product is niet op een vlakke Controleer de positie en verander deze of stabiele ondergrond geplaatst indien nodig De displaylamp gaat Lamp vervangen Vervang de lamp niet aan DM075-DM076_GH426-GH427_ML_A5_v9_20221125.indb 15 DM075-DM076_GH426-GH427_ML_A5_v9_20221125.indb 15 2022/11/25 11:49 2022/11/25 11:49...
- Page 16 De modelaanduiding staat meestal op de binnenwand en op de achterkant van het toestel. Toelichting: Polar biedt een garantie van minimaal 2 jaar. Neem voor meer informatie contact op met de bevoegde vertegenwoordiger. DM075-DM076_GH426-GH427_ML_A5_v9_20221125.indb 16 DM075-DM076_GH426-GH427_ML_A5_v9_20221125.indb 16 2022/11/25 11:49 2022/11/25 11:49...
- Page 17 Wij hebben er alles aan gedaan om er zeker van te zijn dat op publicatiedatum van de handleiding alle details correct zijn, desondanks, behoudt Polar het recht voor om specificaties zonder aankondiging te wijzigen. DM075-DM076_GH426-GH427_ML_A5_v9_20221125.indb 17 DM075-DM076_GH426-GH427_ML_A5_v9_20221125.indb 17 2022/11/25 11:49...
- Page 18 • Gardez les emballages hors de portée des enfants. Débarrassez-vous des emballages conformément aux règlements des autorités locales. • Un cordon d’alimentation endommagé doit être remplacé par un agent POLAR ou un technicien qualifié recommandé, pour éviter tout danger. DM075-DM076_GH426-GH427_ML_A5_v9_20221125.indb 18 DM075-DM076_GH426-GH427_ML_A5_v9_20221125.indb 18 2022/11/25 11:49 2022/11/25 11:49...
- Page 19 POLAR. Contenu Les éléments suivants vous sont fournis de série : Présentoir réfrigéré POLAR étagères 2 clés Mode d’emploi Assemblage de la poignée de porte DM075-DM076_GH426-GH427_ML_A5_v9_20221125.indb 19 DM075-DM076_GH426-GH427_ML_A5_v9_20221125.indb 19 2022/11/25 11:49 2022/11/25 11:49...
- Page 20 1. Tirez le joint de porte sur le côté pour exposer les 2 trous pré-percés. Insérez les vis. 3. Couper la fente sur le panneau avant et installer la charnière à l’intérieur. Joint d’étanchéité DM075-DM076_GH426-GH427_ML_A5_v9_20221125.indb 20 DM075-DM076_GH426-GH427_ML_A5_v9_20221125.indb 20 2022/11/25 11:49 2022/11/25 11:49...
- Page 21 6. Démontez la charnière supérieure droite. installez-la du côté inférieur gauche. 7. Installez la charnière supérieure gauche. 5. Inverser la porte. 8. Enfin, installer le panneau avant. La poignée de la porte est sur le côté droit. DM075-DM076_GH426-GH427_ML_A5_v9_20221125.indb 21 DM075-DM076_GH426-GH427_ML_A5_v9_20221125.indb 21 2022/11/25 11:49 2022/11/25 11:49...
- Page 22 Autant que faire se peut, enveloppez ou culot. couvrez les aliments. 4. Insérez une ampoule neuve et remettez le • Veillez à ne pas obstruer les ventilateurs à couvercle. l’intérieur de l’appareil. DM075-DM076_GH426-GH427_ML_A5_v9_20221125.indb 22 DM075-DM076_GH426-GH427_ML_A5_v9_20221125.indb 22 2022/11/25 11:49 2022/11/25 11:49...
- Page 23 Vérifier la position d'installation et la a été posé n'est pas de niveau ou changer si nécessaire l'appareil n'est pas stable L’ampoule du comptoir Changer l’ampoule Remplacer la lampe ne s’allume pas DM075-DM076_GH426-GH427_ML_A5_v9_20221125.indb 23 DM075-DM076_GH426-GH427_ML_A5_v9_20221125.indb 23 2022/11/25 11:49 2022/11/25 11:49...
- Page 24 L’identifiant du modèle se trouve généralement sur la paroi intérieure et au dos de l’appareil. Remarque : Polar offre une garantie minimale de 2 ans, veuillez contacter le représentant agréé pour plus de détails. DM075-DM076_GH426-GH427_ML_A5_v9_20221125.indb 24 DM075-DM076_GH426-GH427_ML_A5_v9_20221125.indb 24 2022/11/25 11:49...
- Page 25 Nous nous efforçons, par tous les moyens dont nous disposons, de faire en sorte que les détails contenus dans le présent mode d’emploi soient corrects en date d’impression. Toutefois, POLAR se réserve le droit de changer les spécifications de ses produits sans préavis. DM075-DM076_GH426-GH427_ML_A5_v9_20221125.indb 25 DM075-DM076_GH426-GH427_ML_A5_v9_20221125.indb 25 2022/11/25 11:49...
- Page 26 Netzstecker aus der Steckdose ziehen. • Verpackungsmaterial außerhalb der Reichweite von Kindern aufbewahren und gemäß den lokalen Vorschriften entsorgen. • Aus Sicherheitsgründen muss ein beschädigtes Stromkabel von einem POLAR-Mitarbeiter oder einem empfohlenen qualifizierten Elektriker erneuert werden. DM075-DM076_GH426-GH427_ML_A5_v9_20221125.indb 26 DM075-DM076_GH426-GH427_ML_A5_v9_20221125.indb 26 2022/11/25 11:49 2022/11/25 11:49...
- Page 27 Bitte nehmen Sie sich einige Minuten Zeit und lesen Sie dieses Handbuch sorgfältig durch. Nur bei korrekter Wartung und vorschriftsgemäßem Betrieb kann Ihr POLAR-Produkt optimale Leistung erzielen. Lieferumfang Folgende Teile befinden sich in der Verpackung: POLAR Display-Kühlschrank Ablagen 2 Schlüssel Bedienungsanleitung Montage des Türgriffs DM075-DM076_GH426-GH427_ML_A5_v9_20221125.indb 27 DM075-DM076_GH426-GH427_ML_A5_v9_20221125.indb 27 2022/11/25 11:49 2022/11/25 11:49...
- Page 28 1. Ziehen Sie die Türdichtung zur Seite, um die 2 vorgebohrten Löcher freizulegen. Setzen Sie die Schrauben ein. 3. Schneiden Sie den Schlitz an der Frontplatte ab und installieren Sie das Scharnier innen. Schraube Dichtung DM075-DM076_GH426-GH427_ML_A5_v9_20221125.indb 28 DM075-DM076_GH426-GH427_ML_A5_v9_20221125.indb 28 2022/11/25 11:49 2022/11/25 11:49...
- Page 29 Sie es auf der linken unteren Seite. 7. Installieren Sie das linke obere Scharnier. 5. Drehen Sie die Tür um. 8. Zuletzt installieren Sie die Frontplatte. Der Türgriff befindet sich auf der rechten Seite. DM075-DM076_GH426-GH427_ML_A5_v9_20221125.indb 29 DM075-DM076_GH426-GH427_ML_A5_v9_20221125.indb 29 2022/11/25 11:49 2022/11/25 11:49...
- Page 30 Lebensmittel, heiße Flüssigkeiten, säurehaltige abschrauben. Flüssigkeiten, säurehaltige Produkte. 3. Die Lampe aus der Fassung drehen. • Nahrungsmittel nach Möglichkeit einwickeln 4. Die neue Lampe einsetzen und die Abdeckung oder bedecken. wieder aufsetzen. DM075-DM076_GH426-GH427_ML_A5_v9_20221125.indb 30 DM075-DM076_GH426-GH427_ML_A5_v9_20221125.indb 30 2022/11/25 11:49 2022/11/25 11:49...
- Page 31 Alle Muttern und Schrauben überprüfen ungewöhnlich laut lose und anziehen Das Gerät steht nicht eben oder Position überprüfen und bei Bedarf ändern stabil Die Display-Lampe Die Lampe muss ausgewechselt Ersetzen Sie die Lampe leuchtet nicht werden DM075-DM076_GH426-GH427_ML_A5_v9_20221125.indb 31 DM075-DM076_GH426-GH427_ML_A5_v9_20221125.indb 31 2022/11/25 11:49 2022/11/25 11:49...
- Page 32 Die Modellbezeichnung befindet sich in der Regel an der Innenwand und auf der Rückseite des Geräts. Hinweis: Polar bietet eine Mindestgarantie von 2 Jahren. Bitte kontaktieren Sie Ihren autorisierten Fachhändler für weitere Informationen. DM075-DM076_GH426-GH427_ML_A5_v9_20221125.indb 32 DM075-DM076_GH426-GH427_ML_A5_v9_20221125.indb 32 2022/11/25 11:49 2022/11/25 11:49...
- Page 33 Fotokopieren, Aufnahme oder andere Verfahren - vervielfältigt oder übertragen werden. Es werden alle Anstrengungen unternommen um sicherzustellen, dass alle Angaben bei der Drucklegung korrekt sind. POLAR behält sich jedoch das Recht vor, Spezifikationen ohne Vorankündigung zu ändern. DM075-DM076_GH426-GH427_ML_A5_v9_20221125.indb 33 DM075-DM076_GH426-GH427_ML_A5_v9_20221125.indb 33 2022/11/25 11:49...
- Page 34 • Tenere lontano l’imballaggio dalla portata dei bambini. Smaltire l’imballaggio in conformità alle normative locali. • Se danneggiato, il cavo di alimentazione deve venire sostituito da un agente POLAR o da un tecnico qualificato al fine di prevenire eventuali rischi. DM075-DM076_GH426-GH427_ML_A5_v9_20221125.indb 34 DM075-DM076_GH426-GH427_ML_A5_v9_20221125.indb 34 2022/11/25 11:49 2022/11/25 11:49...
- Page 35 Leggere con attenzione il presente manuale. La manutenzione e l’utilizzo corretti di questo apparecchio consentiranno di ottenere le massime prestazioni da questo prodotto POLAR. Contenuto dell’imballaggio L’imballaggio contiene quanto segue: Vetrina refrigerata per vini POLAR Ripiani 2 chiavi Manuale di istruzioni Gruppo maniglia porta DM075-DM076_GH426-GH427_ML_A5_v9_20221125.indb 35 DM075-DM076_GH426-GH427_ML_A5_v9_20221125.indb 35 2022/11/25 11:49 2022/11/25 11:49...
- Page 36 Montaggio della maniglia della porta 1. Tirare la guarnizione della porta da parte per esporre i 2 fori preforati. Inserire le viti. 3. Tagliare lo slot sul pannello frontale e installare Vite la cerniera all’interno. Guarnizione DM075-DM076_GH426-GH427_ML_A5_v9_20221125.indb 36 DM075-DM076_GH426-GH427_ML_A5_v9_20221125.indb 36 2022/11/25 11:49 2022/11/25 11:49...
- Page 37 6. Smontare la cerniera superiore destra. installarla sul lato inferiore sinistro. 7. Installare la cerniera superiore sinistra. 5. Invertire la porta. 8. Infine, installare il pannello frontale. Ora la maniglia della porta si trova sul lato destro. DM075-DM076_GH426-GH427_ML_A5_v9_20221125.indb 37 DM075-DM076_GH426-GH427_ML_A5_v9_20221125.indb 37 2022/11/25 11:49 2022/11/25 11:49...
- Page 38 3. Rimuovere la lampadina ruotandola nel • Se possibile, avvolgere o coprire i cibi. portalampada. • Non ostruire le ventole all’interno 4. Inserire la nuova lampadina e riposizionare la dell’apparecchio. protezione. DM075-DM076_GH426-GH427_ML_A5_v9_20221125.indb 38 DM075-DM076_GH426-GH427_ML_A5_v9_20221125.indb 38 2022/11/25 11:49 2022/11/25 11:49...
- Page 39 L'apparecchio non è stato installato Controllare la posizione di installazione e eccessiva in una posizione in piano o stabile modificarla se necessario La lampadina della Sostituire la lampadina Sostituire la lampada vetrina non si accende DM075-DM076_GH426-GH427_ML_A5_v9_20221125.indb 39 DM075-DM076_GH426-GH427_ML_A5_v9_20221125.indb 39 2022/11/25 11:49 2022/11/25 11:49...
- Page 40 Le informazioni sul modello possono essere trovate sul prodotto: L’identificativo del modello si trova solitamente sulla parete interna e sul retro dell’unità. Nota: Polar offre una garanzia minima di 2 anni, contattare un rappresentante autorizzato per maggiori dettagli. DM075-DM076_GH426-GH427_ML_A5_v9_20221125.indb 40 DM075-DM076_GH426-GH427_ML_A5_v9_20221125.indb 40 2022/11/25 11:49 2022/11/25 11:49...
- Page 41 POLAR. Le informazioni contenute sono corrette e accurate al momento della stampa, tuttavia POLAR si riserva il diritto di modificare le specifiche senza preavviso. DM075-DM076_GH426-GH427_ML_A5_v9_20221125.indb 41 DM075-DM076_GH426-GH427_ML_A5_v9_20221125.indb 41 2022/11/25 11:49 2022/11/25 11:49...
- Page 42 Deshágase del embalaje de acuerdo con las normativas de las autoridades locales. • Si el cable eléctrico está dañado, debe ser reemplazado por un agente de POLAR o un técnico cualificado recomendado para evitar cualquier riesgo. DM075-DM076_GH426-GH427_ML_A5_v9_20221125.indb 42 DM075-DM076_GH426-GH427_ML_A5_v9_20221125.indb 42 2022/11/25 11:49 2022/11/25 11:49...
- Page 43 POLAR. Contenido del Conjunto Se incluye lo siguiente: Frigorífico Exhibidor POLAR Estantes Llaves x 2 Manual de instrucciones Montaje de la manilla de la puerta DM075-DM076_GH426-GH427_ML_A5_v9_20221125.indb 43 DM075-DM076_GH426-GH427_ML_A5_v9_20221125.indb 43 2022/11/25 11:49 2022/11/25 11:49...
- Page 44 1. Tire de la junta de la puerta a un lado para dejar al descubierto los 2 agujeros preperforados. Inserte los tornillos. 3. Corte la ranura en el panel frontal e inserte la bisagra adentro. Tornillo Junta DM075-DM076_GH426-GH427_ML_A5_v9_20221125.indb 44 DM075-DM076_GH426-GH427_ML_A5_v9_20221125.indb 44 2022/11/25 11:49 2022/11/25 11:49...
- Page 45 7. Instale la bisagra superior izquierda. 5. Invierta la puerta. 8. Por último, instale el panel frontal. Ahora la manija de la puerta está instalada en el lado derecho. DM075-DM076_GH426-GH427_ML_A5_v9_20221125.indb 45 DM075-DM076_GH426-GH427_ML_A5_v9_20221125.indb 45 2022/11/25 11:49 2022/11/25 11:49...
- Page 46 • Envuelva o cubra la comida siempre que sea portalámpara. posible. 4. Ponga la bombilla nueva y vuelva a poner la • No obstruya los ventiladores en el interior del cubierta. aparato. DM075-DM076_GH426-GH427_ML_A5_v9_20221125.indb 46 DM075-DM076_GH426-GH427_ML_A5_v9_20221125.indb 46 2022/11/25 11:49 2022/11/25 11:49...
- Page 47 El aparato no se ha instalado en Compruebe la posición de la instalación y una posición estable o nivelada cámbiela si es necesario No se enciende la Debe cambiarse la bombilla Sustituir la lámpara bombilla del visualizador DM075-DM076_GH426-GH427_ML_A5_v9_20221125.indb 47 DM075-DM076_GH426-GH427_ML_A5_v9_20221125.indb 47 2022/11/25 11:49 2022/11/25 11:49...
- Page 48 Margen de Dimensiones Modelo Tensión Potencia Potencia Refrigerante Temperaturas a x a x p mm DM075/GH426 220-240V~ 146W 2°C ~ 8°C R600a 1692 x 530 x 575 50Hz DM076/GH427 146W 1,3A 2°C ~ 8°C...
- Page 49 Se ha hecho todo lo posible para garantizar que todos los datos son correctos en el momento de su publicación; sin embargo,POLAR se reserva el derecho a modificar las especificaciones sin que medie notificación previa. DM075-DM076_GH426-GH427_ML_A5_v9_20221125.indb 49 DM075-DM076_GH426-GH427_ML_A5_v9_20221125.indb 49 2022/11/25 11:49...
- Page 50 • Tipo di apparecchiatura • Tipo de equipo • Modelo G-Series Upright Display Fridge White - 218Ltr G-Series Upright Display Fridge Black - 218Ltr DM075 (-E & -A) GH426 (-E & -A) G-Series Upright Display Fridge White - 350Ltr G-Series Upright Display Fridge Black - 350Ltr DM076 (-E &...
- Page 51 +44 (0)845 146 2887 Eire 040 – 2628080 01 60 34 28 80 BE-NL 0800-29129 BE-FR 0800-29229 0800 – 1860806 901-100 133 DM075-DM076_GH426-GH427_ML_A5_v9_20221125.indb 51 DM075-DM076_GH426-GH427_ML_A5_v9_20221125.indb 51 2022/11/25 11:49 2022/11/25 11:49...
- Page 52 DM075-DM076_GH426-GH427_ML_A5_v9_2022/11/25 DM075-DM076_GH426-GH427_ML_A5_v9_20221125.indb 52 DM075-DM076_GH426-GH427_ML_A5_v9_20221125.indb 52 2022/11/25 11:49 2022/11/25 11:49...