JVC KD-R201 Instructions Manual
Hide thumbs
Also See for KD-R201:
- Installation & connection manual (4 pages) ,
- Instructions manual (74 pages)
Table of Contents
Advertisement
Available languages
Available languages
Quick Links
CD RECEIVER
RÉCEPTEUR CD
KD-R201
For canceling the display demonstration, see page 5.
Pour annuler la démonstration des affichages, référez-vous à la page 5.
For installation and connections, refer to the separate manual.
Pour l'installation et les raccordements, se référer au manuel séparé.
INSTRUCTIONS
MANUEL D'INSTRUCTIONS
GET0583-003A
[EX]
Advertisement
Chapters
Table of Contents

Related Manuals for JVC KD-R201


Summary of Contents for JVC KD-R201
- Page 1 CD RECEIVER RÉCEPTEUR CD KD-R201 For canceling the display demonstration, see page 5. Pour annuler la démonstration des affichages, référez-vous à la page 5. For installation and connections, refer to the separate manual. Pour l’installation et les raccordements, se référer au manuel séparé.
- Page 2 Thank you for purchasing a JVC product. Please read all instructions carefully before operation, to ensure your complete understanding and to obtain the best possible performance from the unit. IMPORTANT FOR LASER PRODUCTS 1. CLASS 1 LASER PRODUCT 2. CAUTION: Do not open the top cover. There are no user serviceable parts inside the unit; leave all servicing to qualified service personnel.
-
Page 3: Table Of Contents
How to use the M MODE button CONTENTS If you press M MODE, the unit goes into functions mode, ∞ then the number buttons and buttons will work Control panel ........4 as different function buttons. Getting started ........ 5 Ex.: When number button 2 works as Basic operations ........... -
Page 4: Control Panel
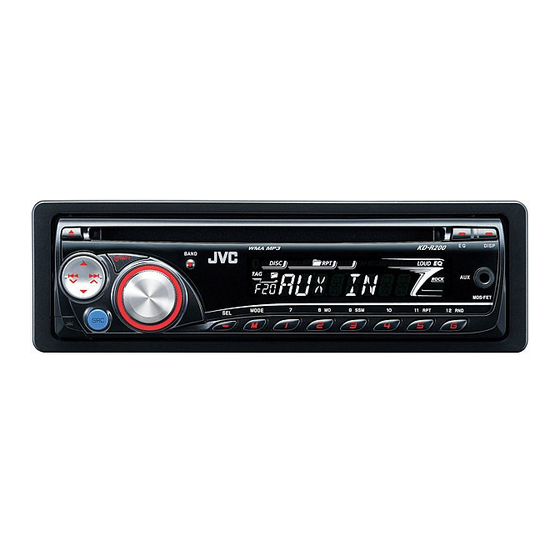
Control panel Parts identification Display window (eject) button RPT (repeat) button ¢ buttons RND (random) button Loading slot AUX (auxiliary) input jack (standby/attenuator) button Disc information indicator BAND button DISC indicator Display window Playback mode / item indicators—RND (random), T/P (traffic programme/programme type) button (disc), RPT (repeat) DISP (display) button Radio Data System indicators—AF, REG, TP, PTY... -
Page 5: Getting Started
Getting started Basic settings • See also “General settings — PSM” on Basic operations pages 12 – 14. Turn on the power. Ÿ * You cannot select “CD” as the playback source if there is no disc in the unit. Canceling the display demonstrations Select “DEMO,”... -
Page 6: Radio Operations
When an FM stereo broadcast is hard to Radio operations receive Lights up when monaural mode is activated. Ÿ Reception improves, but the stereo effect will be lost. Lights up when receiving an FM stereo To restore the stereo effect, repeat the same broadcast with sufficient signal strength. -
Page 7: Fm Radio Data System Operations
Manual presetting FM Radio Data System Ex.: Storing the FM station of 92.5 MHz into preset operations number 4 of the FM1 band. What you can do with Radio Data System Radio Data System allows FM stations to send an additional signal along with their regular programme signals. - Page 8 Using the standby receptions Start searching for your favorite programme. TA Standby Reception TA Standby Reception allows the unit to switch temporarily to Traffic Announcement (TA) from any source other than AM. If there is a station broadcasting a programme The volume changes to the preset TA volume level if the of the same PTY code as you have selected, that current level is lower than the preset level (see...
-
Page 9: Disc Operations
To deactivate the PTY Standby Reception, select To check the current clock time while “OFF” for the PTY code (see page 13). The PTY indicator listening to an FM Radio Data System station goes off. Station name (PS) Station Frequency Programme Tracing the same programme—... - Page 10 To stop play and eject the disc • Press SRC to listen to another playback source. To fast-forward or reverse Prohibiting disc ejection the track You can lock a disc in the loading slot. To go to the next or previous track To locate a particular track directly To select a number from 01 –...
-
Page 11: Sound Adjustments
Sound adjustments Selecting the playback modes You can use only one of the following playback modes You can select a preset sound mode suitable to the at a time. music genre (c-EQ: custom equalizer). Select your desired playback mode. Repeat play Preset values Mode Plays repeatedly... -
Page 12: General Settings - Psm
General settings — PSM Adjusting the sound You can adjust the sound characteristics to your You can change PSM (Preferred Setting Mode) items preference. listed on pages 13 and 14. Select a PSM item. Adjust the PSM item selected. Indication, [Range] BAS* (bass), [–06 to +06] Adjust the bass. - Page 13 Indications Item Selectable settings, [reference page] : Initial) DEMO • DEMO ON : Display demonstration will be activated automatically if no Display demonstration operation is done for about 20 seconds, [5]. • DEMO OFF : Cancels. CLK DISP * • ON : Clock time is shown on the display at all times when the power is Clock display turned off.
- Page 14 Indications Item Selectable settings, [reference page] : Initial) TA VOL * VOL 00 [Initial: VOL 15] Traffic – VOL 50 announcement (or VOL 00 volume – VOL 30)* P-SEARCH * • ON : Activates Programme Search, [9]. Programme search • OFF : Cancels.
-
Page 15: Other External Component Operations
Maintenance Other external component operations How to clean the connectors Frequent detachment will deteriorate the connectors. You can connect an external component to the AUX To minimize this possibility, periodically wipe the (auxiliary) input jack on the control panel. connectors with a cotton swab or cloth moistened with alcohol, being careful not to damage the connectors. -
Page 16: More About This Unit
To keep discs clean More about this unit A dirty disc may not play correctly. If a disc does become dirty, wipe it with Basic operations a soft cloth in a straight line from center Turning on the power to edge. •... - Page 17 Disc operations Changing the source • If you change the source, playback also stops Caution for DualDisc playback (without ejecting the disc). • The Non-DVD side of a “DualDisc” does not comply Next time you select “CD” for the playback source, with the “Compact Disc Digital Audio”...
-
Page 18: Troubleshooting
Troubleshooting What appears to be trouble is not always serious. Check the following points before calling a service center. Symptoms Remedies/Causes • Sound cannot be heard from the speakers. • Adjust the volume to the optimum level. • Check the cords and connections. •... -
Page 19: Specifications
Specifications AUDIO AMPLIFIER SECTION CD PLAYER SECTION Maximum Power Output: Type: Compact disc player Front/Rear: 50 W per channel Signal Detection Non-contact optical pickup System: (semiconductor laser) Continuous Power Output (RMS): Number of Channels: 2 channels (stereo) Front/Rear: 19 W per channel into 4 Ω, 40 Hz to 20 000 Hz at no more Frequency Response: 5 Hz to 20 000 Hz than 0.8% total harmonic... - Page 20 Merci pour avoir acheté un produit JVC. Veuillez lire attentivement toutes les instructions avant d’utiliser l’appareil afin de bien comprendre son fonctionnement et d’obtenir les meilleures performances possibles. IMPORTANT POUR PRODUITS LASER 1. PRODUIT LASER CLASSE 1 2. ATTENTION: N’ouvrez pas le couvercle supérieur. Il n’y a aucune pièce réparable par l’utilisateur à l’intérieur de l’appareil;...
- Page 21 Comment utiliser la touche M MODE TABLE DES MATIERES Si vous appuyez sur M MODE, l’autoradio entre en mode de fonction, et les touches numériques et les touches Panneau de commande ....4 ∞ fonctionnent comme touches de fonction. Pour commencer ......5 Ex.: Quand la touche numérique 2 fonctionne Opérations de base ..........
-
Page 22: Panneau De Commande
Panneau de commande Identification des parties Fenêtre d’affichage Touche (éjection) Touche RPT (répétition) ¢ Touche RND (aléatoire) Touches Prise d’entrée AUX (auxiliaire) Fente d’insertion Touche (attente/atténuation) Indicateur d’informations du disque Touche BAND Indicateur DISC Fenêtre d’affichage Indicateurs de mode de lecture / indicateurs d’option—RND (aléatoire), (disque), RPT Touche T/P (programme d’informations routières/... -
Page 23: Pour Commencer
Pour commencer Réglages de base • Référez-vous aussi aux “Réglages généraux — PSM” Opérations de base aux pages 12 – 14. Mise sous tension de l’appareil. Ÿ * Vous ne pouvez pas choisir “CD” comme source de lecture s’il n’y a pas de disque dans l’appareil. -
Page 24: Fonctionnement De La Radio
Quand une émission FM stéréo est difficile à Fonctionnement de la recevoir radio S’allume quand le mode monophonique est mis en service. Ÿ La réception est améliorée, mais l’effet stéréo est perdu. S’allume lors de la réception d’une émission Pour rétablir l’effet stéréo, répétez la même FM stereo avec un signal suffisamment fort. -
Page 25: Utilisation Du Système Fm Radio Data System
Préréglage manuel Utilisation du système FM Ex.: Mémorisation de la station FM de fréquence 92,5 Radio Data System MHz sur le numéro de préréglage 4 de la bande FM1. Présentation du système Radio Data System Le système Radio Data System permet aux stations FM d’envoyer un signal additionnel en même temps que le signal de leur programme ordinaire. - Page 26 Utilisation de l’attente de réception Démarrez la recherche de votre programme préféré. Attente de réception TA L’attente de réception TA permet à l’appareil de commuter temporairement sur des informations routières (TA) à partir de n’importe quelle source autre que AM. S’il y a une station diffusant un programme du Le volume change sur le niveau de volume TA préréglé...
-
Page 27: Opérations Des Disques
Pour mettre hors service l’attente de réception Pour vérifier l’heure actuelle pendant PTY, choisissez “OFF” pour le code PTY (référez-vous à l’écoute d’une station FM Radio Data System la page 13). L’indicateur PTY s’éteint. Nom de la station (PS) Fréquence de la station Poursuite du même programme—... - Page 28 Pour arrêter la lecture et éjecter le disque • Appuyez sur SRC pour écouter une autre source de lecture. Interdiction de l’éjection du disque Pour faire avancer ou Vous pouvez verrouiller un disque dans la fente reculer rapidement la d’insertion. plage Pour aller à...
-
Page 29: Ajustements Sonores
Ajustements sonores Sélection des modes de lecture Vous pouvez utiliser un des modes de lecture suivants Vous pouvez sélectionner un mode sonore préréglé à la fois. adapté à votre genre de musique (c-EQ: égaliseur personnalisé). Choisissez le mode de lecture souhaité. Lecture répétée Mode Reproduit répétitivement... -
Page 30: Réglages Généraux-Psm
Réglages généraux — Ajustement du son Vous pouvez ajuster les caractéristiques du son comme vous le souhaitez. Vous pouvez changer les options PSM (mode des réglages préférés) des pages 13 et 14. Choisissez une option PSM. Indication, [Plage] Ajustez l’option PSM choisie. BAS* (graves), [–06 à... - Page 31 Indications Élément Réglages pouvant être choisis, [page de référence] : Réglage initial) DEMO • DEMO ON : La démonstration des affichages entre en service si aucune Démonstration des opération n’est réalisée pendant environ 20 secondes, [5]. affichages • DEMO OFF : Annulation.
- Page 32 Indications Élément Réglages pouvant être choisis, [page de référence] : Réglage initial) TA VOL * VOL 00 – VOL 50 [Réglage initial: VOL 15] Volume des (ou VOL 00 informations – VOL 30)* routières P-SEARCH * • ON : Met en service la recherche de programme, [9]. Recherche de •...
-
Page 33: Utilisation D'un Autre Appareil Extérieur
Entretien Utilisation d’un autre appareil extérieur Comment nettoyer les connecteurs Un détachement fréquent détériorera les connecteurs. Vous pouvez connecter un appareil extérieur à la prise Pour minimiser ce problème, frottez périodiquement les d’entrée AUX (auxiliaire) sur le panneau de commande. connecteurs avec un coton tige ou un chiffon imprégné... -
Page 34: Pour En Savoir Plus À Propos De Cet Autoradio
Pour garder les disques propres Pour en savoir plus à Si le disque est sale, sa lecture risque propos de cet autoradio d’être déformée. Si un disque est sale, essuyez-le avec un Opérations de base chiffon doux, en ligne droite du centre vers les bords. - Page 35 Opérations des disques Changement de la source • Si vous changez la source, la lecture s’arrête aussi Précautions pour la lecture de disques à (sans éjecter le disque). double face La prochaine fois que vous choisissez “CD” comme • La face non DVD d’un disque à “DualDisc” n’est pas source de lecture, la lecture du disque reprend à...
-
Page 36: Guide De Dépannage
Guide de dépannage Ce qui apparaît être un problème n’est pas toujours sérieux. Vérifiez les points suivants avant d’appeler un centre de service. Symptôme Remèdes/Causes • Aucun son n’est entendu des enceintes. • Ajustez le volume sur le niveau optimum. •... -
Page 37: Spécifications
Spécifications SECTION DE L’AMPLIFICATEUR AUDIO SECTION DU LECTEUR CD Puissance de sortie maximum: Type: Lecteur de disque compact Avant/Arrière: 50 W par canal Système de détection Capteur optique sans contact du signal: (laser semi-conducteur) Puissance de sortie en mode continu (RMS): Nombre de canaux: 2 canaux (stéréo) Avant/Arrière:... - Page 38 électromagnétique et à la sécurité électrique. European representative of Victor Company of Japan, Limited Représentant européen de la société Victor Company of Japan, Limited: JVC Technical Services Europe GmbH JVC Technical Services Europe GmbH Postfach 10 05 04 Postfach 10 05 04...