
Related Manuals for Beko DRXS712W


Summary of Contents for Beko DRXS712W
- Page 1 Asciugatrice Manuale utente Dryer User Manual DRXS712W IT / EN 2960312460_IT/270120.1643...
-
Page 2: Spiegazione Dei Simboli
AVVERTENZA! Gentile cliente, grazie per aver scelto di acquistare un • Avvertenza superfici calde. prodotto Beko. Speriamo che il suo prodotto, realizzato con un alto livello qualitativo tecnologico, le posso offrire risultati ottimali. Le AVVERTENZA! consigliamo di leggere questo manuale nella sua interezza oltre ai documenti allegati, prima di iniziare a utilizzare il prodotto. -
Page 3: Istruzioni Importanti Per La Sicurezza E L'ambiente
1 Istruzioni importanti per AVVERTENZA ! la sicurezza e l’ambiente • I piedini regolabili non dovrebbero essere rimossi. Lo spazio fra l’asciugatrice e il pavimento non va NOTA ridotto servendosi di materiali quali ad esempio tappeti, legno e nastro. • Questa sezione contiene istruzioni Ciò... - Page 4 AVVERTENZA ! PERICOLO ! • Non aprire l’oblò quando sono in • Collegare l’asciugatrice a una presa funzione i programmi a vapore. dotata di messa a terra protetta L’acqua calda potrebbe essere da uno fusibile del valore indicato espulsa. dall’etichetta. Fare in modo che la •...
-
Page 5: Norme Di Sicurezza Generali
PERICOLO ! PERICOLO ! • Non usare prolunghe, ciabatte • Punti da prendere in considerazione o adattatori per collegare per limitare il rischio di incendio: l’asciugatrice alla presa di corrente I capi di seguito indicati non vanno al fine di ridurre il rischio di incendio messi in asciugatrice dato che e scosse elettriche. - Page 6 PERICOLO ! NOTA Oggetti quali ad esempio accendini, • Usare ammorbidenti e altri prodotti fiammiferi, monete, parti metalliche, in conformità con le istruzioni dei ago, ecc. possono danneggiare rispettivi produttori. il cestello o portare a problemi Pulire sempre il filtro lanugine prima sul piano funzionale.
-
Page 7: Impiego Conforme Allo Scopo Previsto
1.3. Impiego conforme allo scopo AVVERTENZA ! previsto • L’asciugatrice è stata pensata per un • Verificare che gli animali uso domestico. Non è adatta per usi commerciali e non va usata al di fuori del domestici non entrino all’interno suo ambito di utilizzo previsto. -
Page 8: Conformità Alla Direttiva Weee E Allo Smaltimento Dei Rifiuti
1.5 Conformità alla direttiva WEEE e 1.8 Specifiche tecniche allo smaltimento dei rifiuti: Questo apparecchio è conforme alla Direttiva UE WEEE (2012/19/EU). Questo apparecchio Altezza (regolabile) 84,7 cm / 86,6 cm* riporta il simbolo di classificazione per i rifiuti Larghezza 59,7 cm delle apparecchiature elettriche ed elettroniche (WEEE). -
Page 9: Installazione
3 Installazione 2 La tua asciugatrice 2.1 Panoramica Prima di contattare il Centro Assistenza Autorizzato più vicino per l’installazione dell’asciugatrice, verificare che l’impianto elettrico e lo scarico dell’acqua siano adeguati consultando il manuale dell’utente.Qualora risultino idonei, contattare un elettricista e un tecnico qualificati per prendere gli accordi del caso. -
Page 10: Regolazione Dei Piedini
3.3 Collegamento allo scarico di contatto con altri oggetti (rubinetto, presa, ecc.). Sarà possibile scaricare l’acqua accumulata • Posizionare l’asciugatrice ad almeno 1 cm direttamente tramite il tubo dell’acqua fornito dai bordi di altri mobili. in dotazione col prodotto anziché scaricare •... - Page 11 4 Procedimento 3.5 Trasporto dell’asciugatrice. • Scaricare tutta l’acqua rimasta all’interno dell’asciugatrice. 4.1 Bucato adatto per essere messo • Se viene eseguito un collegamento diretto in asciugatrice allo scarico sarà necessario rimuovere i Rispettare sempre le istruzioni fornite collegamenti del tubo. nelle etichette degli indumenti.
- Page 12 cosa non sia necessaria. Qualora sia necessario aprire la porta di carico, non tenerla aperta a lungo. • Non aggiungere bucato bagnato mentre l’asciugatrice è in funzione • Per modellPer i mPer i modelli dotati di unità condensatore: pulire il condensatore una volta al mese o dopo 30 operazioni.
-
Page 13: Funzionamento Del Prodotto
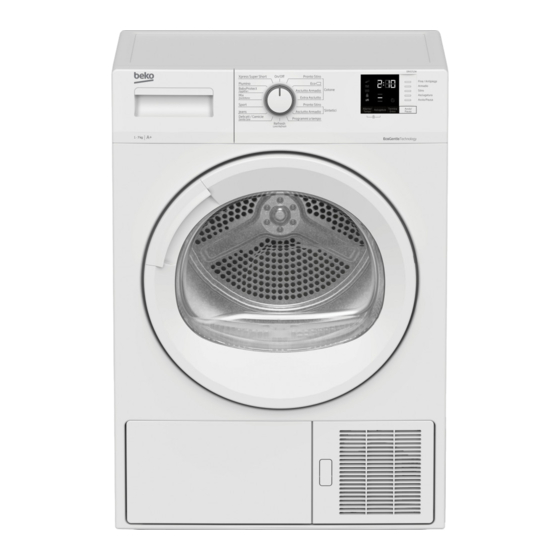
5 Funzionamento del prodotto 5.1 Pannello di controllo 1. Manopola selezione Acceso/Spento/ 4. Pulsante Livello di Asciugatura Programma 5. Pulsante di selezione volume del cicalino / 2. Pulsante Start/Stand-by Programmi a tempo 3. Pulsante tempo fine 5.2 Simboli Ventila Cestello Pulizia del Blocco a Disattiva... - Page 14 5.4 Selezione programma e tabella di consumo Programmi Descrizione del programma Con questo programma si può asciugare il bucato in cotone da stirare in modo che sia leggermente Cotone Pronto Stiro 1000 umido al fine di facilitare la stiratura. (camicie, magliette, tovaglie, ecc.) Con questo programma si può...
- Page 15 Servendosi di questo programma sarà possibile Quotidiano asciugare sia bucato in cotone che sintetico.Questo 1000 programma è adatto a capi sportivi e da fitness. Si tratta di un programma di lunga durata che potete utilizzare per i capi (vestiti dei bambini, asciugamani, Hygiene+ intimo, ecc.) che desiderate igienizzare.
- Page 16 5.5 Funzioni ausiliarie Cicalino / tempo NOTA L’asciugatrice emette un suono al termine del programma. Qualora non si desideri sentire • Sarà possibile aggiungere o togliere il l’emissione di un segnale udibile, premere il bucato entro il tempo di fine. Il tempo pulsante “Buzzer / Time”...
-
Page 17: Avvio Del Programma
Cassetto filtro / Pulizia dello scambiatore di calore NOTA Al termine del programma, il simbolo della pulizia dello scambiatore di calore oppure del • Quando l’asciugatrice è in funzione e cassetto filtro si potrebbero illuminare. il blocco bambini è attivo, emette due 5.7 Avvio del programma bip quando viene ruotata la manopola Premere il pulsante Start / Stand-by per... -
Page 18: Fine Del Programma
5.11 Fine del programma Al termine del programma l’avvertenza Fibre NOTA Filter Cleaning (Pulizia filtro fibra) e Water Tank (Serbatoio dell’acqua) sulla spia di • L’aggiunta di bucato dopo l’inizio osservazione programma si accendono. Sarà della fase di asciugatura può causare possibile aprire l’oblò... -
Page 19: Manutenzione E Pulizia
6 Manutenzione e pulizia • Aprire entrambi i pezzi del filtro anti- pelucchi a due pezzi (filtro interno ed esterno) e pulire i pelucchi, le fibre e i La durata di vita del servizio aumenta e i problemi saranno ridotti se l’apparecchiatura grumi di cotone con la mano umida o con viene pulita a intervalli regolari. - Page 20 6.2 Pulizia dei sensori Serbatoio Acqua lampeggia. Qualora ciò avvenga, scaricare il serbatoio dell’acqua e premere il pulsante Start / Pause per riprendere il ciclo di asciugatura. Per scaricare il serbatoio dell’acqua: 1.Togliere il serbatoio dell’acqua nel cassetto o nel contenitore facendo attenzione. •...
- Page 21 • Pulire i pelucchi sulla superficie dell’evaporatore con un panno umido/con la spazzola di un aspirapolvere dall’alto verso il basso e viceversa. • Dopo aver terminato le operazioni di pulizia montare il coperchio del convogliatore dell’aria, chiuderlo spostando la sua chiusura e chiudere lo zoccolo.
-
Page 22: Guida Alla Risoluzione Dei Problemi
7 Guida alla risoluzione dei La biancheria si è ristretta, infeltrita o danneggiata. problemi Puo’ essere stato utilizzato un programma non adatto al tipo di biancheria. >>> Controllare l’etichetta di manutenzione Il processo di asciugamento dura troppo tempo. del capo e selezionare un programma adatto al tipo di biancheria. - Page 23 AVVERTENZA ! • Se non è possibile risolvere il problema anche se avete seguito le istruzioni fornite in questa sezione, contattare il rivenditore da cui è stato acquistato il prodotto o il Centro di Assistenza Autorizzato. Non tentare mai di riparare da soli un prodotto non funzionante.
- Page 24 SCHEDA PRODOTTO Conforme al Regolamento delegato della commissione (UE) N. 392/2012 Beko Nome fornitore o marchio commerciale DRXS712W Nome modello 7188301220 Capacità nominale (kg) Ventilato ad aria Tipo di asciugatrice a tamburo Condensatore Classe di efficienza energetica Consumo energetico annuale (kWh)
-
Page 26: Please Read This User Manual First
Please read this user manual first! Dear Customer, WARNING! Thank you for prefering a Beko product. We hope that your product which has been • Warning against hot surfaces. manufactured with high quality and technology will give you the best results. We advise you... -
Page 27: Important Instructions For Safety And Environment
1 Important instructions for safety and environment WARNING! NOTE Always have the installation and • This section contains safety repairing procedures carried instructions that will help protect out by the Authorized Service. from risk of personal injury or Manufacturer shall not be held property damage. -
Page 28: Electrical Safety
1.1.1 Electrical safety DANGER! DANGER! • Do not use extension cords, multi- plugs or adaptors to connect the • Electrical safety instructions dryer to power supply in order to should be followed while electrical decrease the risk of fire and electric connection is made during the shock. - Page 29 DANGER! WARNING! Never stop your dryer before the Points to be taken into programme completes. If you must consideration for fire hazard: do this, remove all laundry quickly Below specified laundry or items and lay them out to dissipate the must not be dried in the dryer heat.
-
Page 30: Mounting Over A Washing Machine
1.2 Mounting over a washing machine WARNING! • A fixing device should be used between the two machines when installing the • Never attempt to repair the dryer dryer above a washing machine. The by yourself. Do not perform any fitting device must be installed by the repair or replacement procedures authorized service agent. -
Page 31: Compliance With The Weee Regulation And Disposing Of The Waste Product
1.8 Technical Specifications them tamper with the dryer. Use the child- proof lock in order to prevent the children to tamper with the dryer. Height (Min. / Max.) 84,7 cm / 86,6 cm* NOTE Width 59,7 cm Child-proof lock is on the control panel. Depth 50,8 cm (See Child lock) -
Page 32: Your Dryer
3 Installation 2 Your Dryer 2.1 Overview Before the calling the nearest Authorized Service for the installation of the dryer, ensure that electrical installation and water drain is appropriate referring to the user’s manual. If they are not suitable, contact a qualified electrician and technician to make necessary arrangements. -
Page 33: Removing The Transportation Safety Assembly
3.3 Connecting to the drain • The rear surface of the tumble dryer shall be placed against a wall. You can directly drain accumulated water through the water drain hose supplied with DANGER! the product instead of periodically draining the water collected in the water tank. -
Page 34: Transportation Of The Dryer
3.5 Transportation of the dryer Drain all water that has remained in the dryer. If direct water drain connection is made, then remove the hose connections. WARNING! • We recommend carrying the dryer in upright position. If it is not possible to carry the machine in the upright position, we recommend carrying it by tilting towards the right side when looked from... -
Page 35: Laundry Not Suitable For Drying In The Dryer
4 Preparation • Do not add wet laundry while the dryer is in operation 4.1 Laundry suitable for drying in the • For models with a condenser unit: clean the condenser once in a month or after dryer every 30 operations regularly. . Always obey the instructions given on the garment tags. -
Page 36: Operating The Product
5 Operating the product 5.1 Control Panel On/Off/Program selection button End Time button Start/Stand-by button Drying Level Button Buzzer volume/Time programs selection 5.2 Symbols button Filter drawer / Filter Child-proof Mute Volume up Tank Express Delicates Shirts Sport Freshen Up Cottons Heat exchanger lock... -
Page 37: Program Selection And Consumption Chart
5.4 Program selection and consumption chart Programmes Programme Description You may dry your cotton laundry to be ironed Cottons Iron Dry in this program to have them slightly damp for 1000 ease of ironing. (Shirt, T-shirt, tablecloth, etc.) You may dry all your cotton laundry in this program. - Page 38 Energy consumption values Programmes Capacity (kg) Cottons Eco * 1000 2,29 Cottons Iron dry 1000 1,80 Synthetics cupboard 0,80 "Cottons Eco programme" used at full and partial load is the standard drying programme to which the information in the label and the fiche relates, that this programme is suitable for drying normal wet Cottons laundry and that it is the most efficient programme in terms of energy consumption for Cottons.
-
Page 39: Warning Indicators
5.7 Starting the program NOTE Press the Start/Stand-by button to start the program. • You can add or remove laundry within Start/Stand-by and Drying indicators will end time. Displayed time is the sum of illuminate to indicate that program started. normal drying time and end time. -
Page 40: Cancelling The Program
• Press the Start/Stand-by button to start the program. WARNING! Adding and removing clothes during stand-by • Do not touch the inner surface of the If you want to add or remove clothes to/from drum while adding or removing clothes the drying machine after the drying program during a continuing program. -
Page 41: Maintenance And Cleaning
6 Maintenance and cleaning 6.1 Loading Door Inner Surface The hair and fibres that are separated from the laundry during drying process is collected by the Fibre Filter. • Clean both filters under water running in reverse direction of fibre accumulation NOTE or with a soft brush. -
Page 42: Cleaning The Sensors
6.2 Cleaning the sensors If you forget to drain the water tank, the machine will stop during the subsequent drying cycles when the water tank is full and the Water Tank warning symbol will flash. If this is the case, drain the water tank and press Start / Pause button to resume the drying cycle. - Page 43 • Clean the fibres on the evaporator with a damp cloth / vacuum cleaner with a brush by moving upwards and downwards. • After the cleaning process is completed, place the air router door to its place, move the latches to close it and close the toe board.
-
Page 44: Troubleshooting
7 Troubleshooting Water tank warning symbol is on/flashing. Water tank may be full. >>> Empty the water tank. Water discharge hose might have collapsed. >>> If the Drying operation takes too long. product is connected directly to the water drain check the water discharge hose. - Page 45 PRODUCT FICHE Complying Commission Delegated Regulation (EU) No 392/2012 Supplier name or trademark Beko DRXS712W Model name 7188301220 Rated capacity (kg) Air Vented Type of Tumble Dryer Condenser Energy efficiency class 276,5 Annual Energy Consumption (kWh) Automatic Type of Control...