
Related Manuals for A&D BM-5


Summary of Contents for A&D BM-5
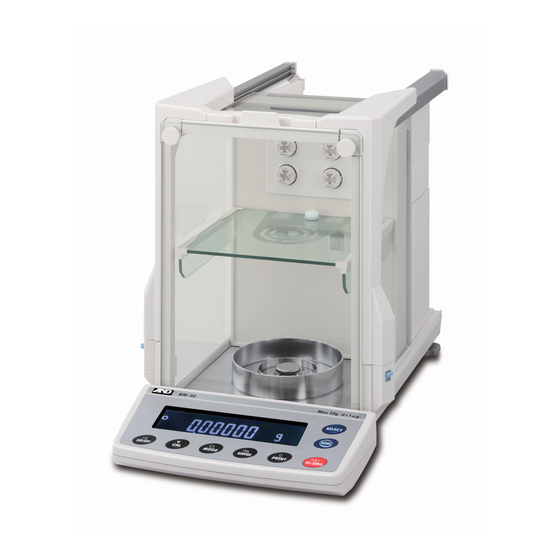
- Page 1 Analytical Balance BM-5 BM-5D BM-20 BM-22 BM-252 BM-200 BM-300 BM-500 1WMPD4002195E...
- Page 2 © 2019 A&D Company, Limited. All rights reserved. No part of this publication may be reproduced, transmitted, transcribed, or translated into any language in any form by any means without the written permission of A&D Company, Limited. The contents of this manual and the specifications of the instrument covered by this manual are subject to change for improvement without notice.
-
Page 3: Table Of Contents
Contents Basic Operation Introduction..........................3 1.1. Features..........................4 1.2. Compliance.......................... 5 Unpacking the Balance ......................7 Installing the Balance and Precautions................. 10 3.1. Installing the Balance......................10 3.2. Precautions Before Use..................... 13 3.3. Precautions During Use..................... 15 3.4. Precautions After Use ......................16 3.5. - Page 4 10.5. Description of the Item "Data Format" ................53 10.6. Data Format Examples...................... 56 10.7. Clock and Calendar Function .................... 58 ID Number and GLP Report....................59 11.1. Setting the ID Number ....................... 59 11.2. GLP Report ........................60 Data Memory......................... 66 12.1.
-
Page 5: Basic Operation
1. Introduction This manual describes how the BM series balances work and how to get the most out of them in terms of performance. Read this manual thoroughly before using the balance and keep it at hand for future reference. About this manual This manual consists of the following five parts: Basic operation ...... -
Page 6: Features
The BM-5D and BM-22 are equipped with a smart range function to weigh in the precision range (readability: 1 μg) after zeroing a tare weight, if within the weighing capacity. The micro tube holder is included in the accessories of the BM-5, BM-5D, BM-20 and BM-22. Density mode for calculating the density of a solid. -
Page 7: Compliance
Compliance 1.2. Compliance with FCC Rules 1.2.1. Please note that this equipment generates, uses and can radiate radio frequency energy. This equipment has been tested and has been found to comply with the limits of a Class A computing device pursuant to Subpart J of Part 15 of FCC rules. These rules are designed to provide reasonable protection against interference when equipment is operated in a commercial environment. - Page 8 BM series...
-
Page 9: Unpacking The Balance
15, 0.8 mL 12, 0.3 mL 8, 0.05 mL Dust plate Large Medium Small Round aluminum analytical pans (10 pieces each) Slide breeze break AX-BM-035 * Provided only for the BM-20 and BM-22, excluding the BM-5 and BM-5D BM series... - Page 10 Common accessories Positions to place the AC adapter labels Attach the AC adapter labels to the AC adapter as shown in the illustration. D-sub 9 pins AC adapter AC adapter labels Data logger AD-1688 Notes The weighing data can be Please confirm that the AC adapter type is correct for your local voltage and receptacle type.
- Page 11 LED of the ionizer Glass door handle Ionizer Neutralization Electrode unit of the area ionizer Example of BM-20 Separation plate If unnecessary, remove it. Weighing chamber Leveling foot Joint handle When jointed to the right (left) glass Display door handle, the right (left) glass door can be opened or closed with Keys the left (right) joint handle.
-
Page 12: Installing The Balance And Precautions
The micro tube holder is approximately 2 g heavier than the standard pan (weighing pan and pan support). When a micro tube holder is used for the BM-5 and BM-5D, the available weighing range will be up to approximately 3 g including the tare such as a micro tube and test tube. - Page 13 Assembling the parts in the weighing chamber BM-252, BM-200 BM-252 BM-300, BM-500 BM-5, BM-5D, BM-20, BM-22 Leveling foot Bubble spirit level BM-20, BM-22 Separation plate 3 If the separation plate is not necessary, remove the Screw screw and take the plate off. Refer to "3.1.2.
- Page 14 Installing the slide breeze break BM-20 / BM-22 3.1.1. The slide breeze break improves weighing precision by reducing the negative effects from the surrounding environment. It is installed inside the weighing chamber of the BM-20 / BM-22. 1 Determine positioning of the slide breeze break to align the slide breeze break (base) hole with the weighing pan/pan support mounted section while pressing the sponge, located at the rear of the slide breeze break (base), at an angle to the BM-20 or BM-22 wall surface.
-
Page 15: Precautions Before Use
We recommend that you use the anti-vibration table (AD- 1671) and the remote controller (AD-8922A) for the BM-5, BM-5D, BM-20 and BM-22. Do not install the balance where it will be subject to vibration. Corners of rooms on the first floor are best. - Page 16 Adjusting the level When the bubble is off to the left: When the bubble is off to the right: Turn the leveling foot on the rear right in the Turn the leveling foot on the rear left in the clockwise direction. clockwise direction.
-
Page 17: Precautions During Use
BM-5 BM-5D attach the slide breeze break to the weighing chamber. BM-20 The weighing value of the BM-5, BM-5D, BM-20 and BM-22 BM-22 may change after the stabilization indicator is displayed. We Slide breeze break recommend that you set a certain amount of wait time (approx. 10... -
Page 18: Precautions After Use
When the AC adapter is connected, the balance is in the standby mode if the standby indicator is on. This is a normal state and does not harm the balance. For accurate weighing, we recommend that the AC adapter be kept connected, especially for the BM-5, BM-5D, BM-20 and BM-22. -
Page 19: Display Symbols And Key Operation
4. Display Symbols and Key Operation Display The amount of stored data with data memory function Humidity (%) Response indicator for approx. 30 seconds when weighing starts. Processing indicator Right and left glass door indicator Barometric pressure (hPa) Stabilization indicator Standby indicator of Standby indicator interval memory function... -
Page 20: Weighing Units
5. Weighing Units Units 5.1. The units and weighing modes can be selected and stored in the function table as described in "5.2. Storing Active Units". The sequence of displaying them can be arranged to fit the frequency of use. They are stored and are maintained in non-volatile memory, even if the AC adapter is removed. - Page 21 Capacity and readability for the BM-252, BM-200, BM-300, BM-500 The tables below indicate the weighing capacity and the readability for each balance. BM-200 BM-300 BM-500 Unit Capacity Readability Gram 0.0001 Milligram 220000 320000 520000 Ounce (Avoir) 7.76 11.2 18.3 0.00001 Troy Ounce 7.07 10.2...
- Page 22 Capacity and readability for the BM-5 and BM-5D The BM-5D is equipped with the precision range and standard range of the smart range function. BM-5 Unit Precision range Capacity Readability Gram 5.20 0.000001 Milligram 5200 0.001 Ounce (Avoir) 0.183 0.0000001 Troy Ounce 0.167...
- Page 23 Capacity and readability for the BM-20 and BM-22 The BM-22 is equipped with the precision range and standard range of the smart range function. BM-20 Unit Precision range Capacity Readability Gram 22.0 0.000001 Milligram 22000 0.001 Ounce (Avoir) 0.776 0.0000001 Troy Ounce 0.707 0.0000001...
-
Page 24: Storing Active Units
Storing Active Units 5.2. The units and modes can be selected and stored in the function table. The sequence of displaying them can be arranged to fit the frequency of use. The units stored are maintained in non-volatile memory, even if the AC adapter is removed. 1 In the weighing mode, press and hold the RANGE key (for approx. -
Page 25: Selecting Units And Weighing Modes
BM-20 BM-300 BM-22 BM-500 For the BM-5, BM-5D, BM-20 and BM-22, the units preset at the factory, (Milligram) (Gram), are displayed in this order. For the BM-252, BM-200, BM-300 and BM- 500, the units preset at the factory, (Gram) (Milligram), are displayed in this order. - Page 26 Unit Setting Example 5.3.1. The example below sets the units in the order with g (gram) as the first unit followed by PC (counting mode). 1 In the weighing mode, press and hold the RANGE (for approx. 2 seconds) until is displayed, and ba5fnc Press and hold...
-
Page 27: Weighing
For precision weighing, keep the AC adapter connected to the balance. Calibrate periodically to maintain weighing accuracy. Refer to "8. Calibration". For the BM-5, BM-5D, BM-20 and BM-22, perform pre-weighing of the container (tare) so that precision weighing can be performed. - Page 28 When exceeded in the negative direction, is displayed. Model Power on zero range Zero range -E display range BM-5 Approx. ±0.1 g Approx. -3.0 g to +0.1 g Less than approx. -3 g BM-5D BM-20 Approx. ±2.2 g Approx.
-
Page 29: Smart Range
Smart Range 6.2. The smart range for the BM-5D and BM-22 consists of the standard range and precision range (high resolution). Smart range function The range switches automatically, depending on the value displayed. Pressing the key allows weighing in the precision range, regardless of the tare value. RE-ZERO The range can be fixed to the standard range by pressing the key. -
Page 30: Counting Mode (Pc)
Counting Mode (PC) 6.3. This is the mode to determine the number of objects in a sample based on the standard sample unit mass. The unit mass means an average mass of the samples. The smaller the variation in the samples is, the more accurate the count will be. The balance is equipped with the Automatic Counting Accuracy Improvement (ACAI) function to improve the counting accuracy. - Page 31 Counting mode using the ACAI function The ACAI is a function that improves the accuracy of the unit mass automatically by increasing the number of samples as the counting process. ACAI: Automatic Counting Accuracy Improvement Proceed to Step 8 after storing a unit mass on the previous page. From Step 6 on the previous page 8 If a few more samples are added, the processing...
-
Page 32: Percent Mode (%)
100% mass 5 Press the key to store the reference mass. PRINT The balance displays 100. 0 0 % Notes The readability depends on the 100% mass. BM-5, BM-5D BM-252, BM-200 BM-300, BM-500 BM-20, BM-22 Readability Readability 100% mass 100% mass 0.0100 g to 0.0999 g 1 %... -
Page 33: Ionizer (Neutralization Device)
The neutralization will stop after the preset time of "Neutralization time (ion)" in the function table (the factory setting is 3 seconds). The readability of the BM-5, BM-5D, BM-20, BM-22 and BM-252 is switched to 0.1 mg while performing the Press neutralization. - Page 34 Controlling the Ionizer Externally 6.5.2. It is possible to control the BM ionizer function by connecting the remote controller (AD-8922A) or the foot switch (AX-SW137-PRINT, AX-SW137-REZERO). When specifying "on" to “AD-8922A control (8922)” in the function table (ionfnc 8922 on), the balance assigns the key on the AD- function of the key to the...
-
Page 35: Monitoring The Clock And Environmental Sensors
Monitoring the Clock and Environmental Sensors 6.6. In the weighing mode, the built-in clock and environmental sensors (temperature, humidity, barometric pressure) can be monitored and temperature data can be output in the function settings. Specifications of the environmental sensors Sensor Resolution Measurement range Applicable range... -
Page 36: Repeatability Test
The repeatability test uses the internal mass. Therefore, the obtained standard deviation may disagree with that of the repeatability of "20. Specifications". Regard the standard deviation as a reference. Model Internal mass BM-5, BM-5D Approx. BM-20, BM-22 Approx. 20 g BM-252, BM-200, BM-300, BM-500 Approx. -
Page 37: Response Adjustment
7. Response Adjustment This function stabilizes the weight value by reducing the influence on weighing that is caused by drafts and/or vibration at the place where the balance is installed. The adjustment of the function can be performed by analyzing the environment automatically or hand-operation. The state of the function has three stages as follows : Response indicator Indicator... -
Page 38: Manual Response Adjustment
Manual Response Adjustment 7.2. Press and hold 1 Press and hold the key (for approx. 2 seconds) (approx. 2 seconds) MODE until is displayed, and then release the key. RESPONSE Press the key again immediately. MODE Release and 2 Select a setting for the response adjustment using the press again immediately key. -
Page 39: Calibration
The accuracy of an external weight can influence the accuracy of weighing. Select a weight for calibration and calibration test from the following table. Model Usable weight Adjustable range BM-5 5 g* BM-5D 5 g* -3.000 mg to +3.099 mg... -
Page 40: Automatic Self Calibration
About the internal mass The internal mass may change due to corrosion or other damage caused by the operating environment, or due to aging. Check the internal mass periodically and correct the internal mass value if necessary. Refer to "8.7. Correcting the Internal Mass Value". Display This indicator means that the balance is measuring calibration data. -
Page 41: Calibration Using The Internal Mass
Calibration Using the Internal Mass 8.3. This function calibrates the balance using the internal mass. The only operation required is to press the key. 1 Connect the AC adapter and warm up the balance for at least one hour with nothing on the weighing pan. 2 Press the key to display Cal in... -
Page 42: Calibration Test Using The Internal Mass
Prevent vibration and drafts to affect the balance. 6 The value of the internal mass is displayed. The normal range of the value is as follows: Model Internal mass Normal range BM-5, BM-5D 5.00000 g ±0.02 mg BM-20, BM-22 20.00000 g ±0.02 mg BM-252, BM-200 200.0000 g... -
Page 43: Calibration Using An External Weight
Calibration Using an External Weight 8.5. This function calibrates the balance using an external weight. Note Automatic self calibration (due to changes in temperature) is enabled in the factory setting. Therefore, even after calibration using an external weight, the balance may perform automatic self calibration whenever it detects changes in temperature. -
Page 44: Calibration Test Using An External Weight
Calibration Test Using an External Weight 8.6. This function checks the accuracy of weighing using an external weight. This is available only when the "GLP output (info)" parameter is set to "1", "2" or "3". Calibration test does not perform adjustment. 1 Connect the AC adapter and warm up the balance for at least one hour with nothing on the weighing pan. -
Page 45: Correcting The Internal Mass Value
200. 0 000 memory even if the AC adapter is removed. The internal mass value is corrected as follows: Corrected value Model Correction reference value Correction range BM-5, BM-5D ±1.5 mg 5.00000 g BM-20, BM-22 ±1.5 mg 20.00000 g BM-252, BM-200, BM-300, BM-500 ±1.5 mg... -
Page 46: Function Switch And Initialization
9. Function Switch and Initialization Permit or Inhibit 9.1. The balance stores parameters that must not be changed unintentionally. Example: Calibration data for accurate weighing, Data for adapting to the operating environment, Control data for the RS-232C interface. The balance is equipped with five switches for the purpose of protecting parameters as shown above. Each switch can select either "permit"... -
Page 47: Initializing The Balance
Initializing the Balance 9.2. This function restores the following parameters to the factory settings. Calibration data Function table (excluding the time and date) Sample unit mass value (counting mode), 100% reference mass value (percent mode) The data that is stored in the balance using the data memory function External weight value Function switch settings ("9.1. -
Page 48: Function Table
10. Function Table The function table reads or rewrites the parameters that are stored in the balance. These parameters are maintained in non-volatile memory, even if the AC adapter is removed. The function table menu consists of two layers. The first layer is the "Class" and the second layer is the "Item". - Page 49 Setting example This example sets the "Data memory (data)" parameter to " " (To store the weighing data) and the "Interval time (int)" parameter to “5" (1 minute). Weighing mode Start Step 1 Press and hold (for approx. 2 seconds) Step 2 Press several times Class...
-
Page 50: Details Of The Function Table
Details of the Function Table 10.2. Class Item and Parameter Description 0 Fast response, sensitive value FAST Cond Can be changed by MID. response adjustment. Condition 2 Slow response, stable value SLOW 0 Stable range is ±1 digit The stabilization indicator 5t-b illuminates when the display ±2 digit #1... - Page 51 Class Item and Parameter Description 0 Every measurement 1 2 seconds 2 5 seconds 3 10 seconds Interval time in the interval 4 30 seconds memory mode when using Interval time prt 3, , data 1 5 1 minute 6 2 minutes 7 5 minutes 8 10 minutes off No output...
-
Page 52: Description Of The Class "Environment, Display
Class Item and Parameter Description off No limit t-Up Selects the wait time to receive a command. Timeout on 1 second Serial off No output erCd interface AK: ASCII code 06h AK, Error code on Output d5 fnc 0 Water temperature ldin Available only when density Density... - Page 53 Stability band width ( 5t-b ) This item controls the width to regard a mass value as a stable value. When the fluctuation per second is less than the parameter, the balance displays the stabilization indicator and outputs or stores the data. The parameter influences the "Auto print mode". 5t-b 0 This parameter is used for sensitive response of the stabilization indicator.
-
Page 54: Description Of The Item "Data Output Mode
Description of the Item "Data Output Mode" 10.4. The parameter setting of "Data output mode ( )" applies to the performance when the "Data memory ( )" parameter is set to " " (to store the weighing data) and when the data is data transmitted using the RS-232C interface. -
Page 55: Description Of The Item "Data Format
Description of the Item "Data Format" 10.5. A&D standard format 5if type 0 This format is used when the peripheral equipment can receive the A&D format. With an AD-8121B printer, use MODE 1 or 2. With an AD-8127 printer, use the external key printing mode, manual printing mode, auto printing mode or interval printing mode. - Page 56 MT format 5if type 3 This format is used when the peripheral equipment of other manufacturer is connected. Please note that the connection is not guaranteed. A header of two characters indicates the balance condition. The polarity sign is used only for negative data. The weighing data uses spaces in place of the leading zeros.
- Page 57 Data number dout d-no on This format outputs the data number just before the data is transmitted using the RS-232C interface. This format consists of six characters excluding the terminator. When CSV format ( ) is selected, the period ( . ) is replaced with a comma ( , ). 5if type 5 Data number Terminator...
-
Page 58: Data Format Examples
Data Format Examples 10.6. Stable Unstable Overload Positive error Overload Negative error Space, ASCII 20h Carriage Return, ASCII 0Dh Line Feed, ASCII 0Ah BM series... - Page 59 Units A&D D.P. Counting mode Percent mode Ounce (Avoir) Troy Ounce Metric Carat Momme Pennyweight Grain Tael (HK general, Singapore) Tael (HK, jewelry) Tael (Taiwan) Tael (China) Tola (India) Messghal Density Space, ASCII 20h BM series...
-
Page 60: Clock And Calendar Function
Clock and Calendar Function 10.7. The balance is equipped with a clock and calendar function. When "GLP output ( )" and "Time/Date output ( )" are used, the time info 5-td and date can be added to the output data. The operation is as follows: Press and hold Operation (approx. -
Page 61: Id Number And Glp Report
11. ID Number and GLP Report The ID number is used to identify the balance when Good Laboratory Practice (GLP) or Good Manufacturing Practice (GMP) is used. The output format for GLP/GMP compliant report is selected in "GLP output ( )"... -
Page 62: Glp Report
GLP Report 11.2. To output the GLP/GMP compliant report to an AD-8121B printer, AD-8127 printer or to a personal computer, set the "GLP output ( )" parameter of the function table to " " (AD-8121 info format), " " (General format using the balance built-in clock data) or " "... - Page 63 Outputting the clock data of the external device “info 3” When the "GLP output (info)" parameter of the function table is set to "3", the clock data of external devices such as a printer or a personal computer can be used instead of the balance built-in clock data for the GLP/GMP compliant report.
- Page 64 Calibration test report using the internal mass Note Calibration test does not perform adjustment. If the data memory function is used (except ), the "Title block" and "End data 0 block" cannot be output. Key operation 1 Press and hold the key to display and release the key.
- Page 65 Calibration report using an external weight Note If the data memory function is used (except ), the "Title block" and "End block" data 0 cannot be output. Key operation 1 Press and hold the key to display and release the key. Cal out is displayed.
- Page 66 Calibration test report using an external weight Note Calibration test does not perform adjustment. If the data memory function is used (except ), the "Title block" and "End block" data 0 cannot be output. Key operation 1 Press and hold the key to display and release the key.
- Page 67 Title block and end block When the weight values are recorded as GLP data, a "Title block" is inserted at the beginning and an "End block" is inserted at the end of a group of weight values in the GLP report. Note If the data memory function is used (except ), the "Title block"...
-
Page 68: Data Memory
12. Data Memory Data memory is a function to store weighing data and calibration data in memory. The data stored in memory are available for outputting at one time to a printer or personal computer. Excluding the time and date Up to 200 sets Weighing data Including the time and date... - Page 69 Storing the weighing data Note If " " blinks in the upper left of the display, delete the data in memory. 1 Set the "Data memory ( )" parameter to " " (To store the weighing data). data 2 Specify whether or not to add the time and date using the "Time/Date output ( )"...
- Page 70 Display symbols for data memory Number of data Interval memory in memory standby indicator Weighing data being displayed Memory full Interval memory active indicator Data number of the data currently displayed Memory data being displayed Notes When weighing data is being stored in memory, the data can be output to a personal computer using the RS-232C interface at the same time.
- Page 71 Recalling the memory data Confirm that the "Data memory ( )" parameter is set to " ". data Indicators 1 Press and hold the key (for approx. 2 seconds) until reCall PRINT is displayed, and then release the key. The type of data appears in Weighing data the upper left of the display as shown to the right.
-
Page 72: Data Memory For Calibration And Calibration Test Data
Deleting all memory data at one time 1 Press and hold the key (for approx. 2 seconds) PRINT Press and hold until is displayed, and then release the key. reCall (approx. 2 seconds) 2 Press the key several times to display RANGE Press several times Clear... - Page 73 Transmitting the memory data Notes Confirm that the "Serial interface ( )" parameters are set properly. Refer to "10. Function Table" and "16.2. Connecting to Peripheral Equipment". Confirm that the "Data memory ( )" parameter is set to " ". data 1 Press and hold the key (for approx.
-
Page 74: Underhook
13. Underhook The underhook can be used for magnetic materials or density measurement. The built-in underhook is revealed by removing the cap on the bottom of the balance. Use the underhook as shown below. Caution Do not apply excessive force to the underhook. When not in use, attach the cap to prevent dust from getting into the balance. -
Page 75: Density Measurement (Specific Gravity)
14. Density Measurement Specific gravity The balance is equipped with a density mode. It calculates the density of a solid using the weight of a sample in air and the weight in liquid. We recommend the use of the AD-1653 Density Determination Kit. - Page 76 Entering the density of a liquid Two ways to set the density of a liquid are available in the function table, "Liquid density input ( ): by ldin entering the water temperature or by entering the density directly. 1 Press the key as necessary to select the density mode.
- Page 77 Measuring the density specific gravity Note If the liquid temperature or the type of liquid is changed during measurement, input the value of the liquid density again as necessary. The density display is four decimal places. The readability cannot be changed with the key.
-
Page 78: Password Function
15. Password Function The password function can be used to restrict balance use or functions. It is useful for preventing the time and date setting from being falsified and preventing users from changing other function settings. Password: Four digits (4 x 4 x 4 x 4 = 256 outcomes) using the MODE RANGE PRINT... -
Page 79: Balance Software Version 1.660 Or Later
Balance Software Version 1.660 or later 15.2. Three settings are available in “Password function (LocFnc) ” of the function table. No password function. pA55 0 Entering a password is required before starting weighing. pA55 1 Logging in by the administrator password is required before making changes. pA55 2 pA55 0 (No password function) No password is required. -
Page 80: Using The Password Function
Using the Password Function 15.3. The password function can be switched among “Not used(0)”, “Used(1)” and “Used(2)” in “Password function (locfnc) ” of the function table. 0.0000 Press and hold 1 In the weighing mode, press and hold the key (for RANGE (approx. -
Page 81: Entering The Password Before Weighing
Entering the Password Before Weighing 15.4. pA55 1 (Entering a password is required before starting weighing) 15.4.1. 1 In the standby mode, press the key. ON:OFF 2 After is displayed to prompt PA55 WD , PA55 U5ER ---- you to enter a password. U5ER 3 Enter a four-digit password using the following keys. - Page 82 pA55 2 (Logging in by the administrator password is required before making changes) 15.4.2. Logging in as an administrator (ADMIN) 1 In the standby mode, while holding down the key, press While holding down key. ON:OFF ADMIN 2 Enter a four-digit password using the following keys. The display will turn off automatically after ten minutes of PA55 WD non-operation.
-
Page 83: Logging Out
Logging Out 15.5. 1 To log out, press the key to turn the display off. ON:OFF 0.0000 With the function pA55 1 set, the password will need to be Weighing mode entered again to enter the weighing mode from the standby mode. -
Page 84: Storing Or Changing The Password
Storing or Changing the Password 15.6. The password can be changed in "Password (loc no. . ) " of the function table. 0.0000 1 In the weighing mode, press and hold the key (for RANGE Press and hold approx. 2 seconds) until ba5fnc is displayed, and then (approx. -
Page 85: Changing The Password
Changing the Password 15.7. Refer to “15.6. Storing or 1 Refer to “15.6. Storing or Changing the Password” Changing the Password”. to display the login level to be changed. ADM IN 2 Press the key to display the current password. PRINT The default password set at the factory is (press... -
Page 86: Deleting The Password (U5Er 0 1~10)
Deleting the Password(U5ER 0 1~10) 15.8. Refer to “15.7. Changing the Password”. 1 Refer to “15.7. Changing the Password” to select the user whose password to be deleted and display the PA55 password. M5P2 Press and hold 2 Press and hold the key (for approx. -
Page 87: Standard Input And Output Interface
16. Standard Input and Output Interface RS-232C Interface 16.1. The balance is a DCE device. Connect the balance to a personal computer (DTE) using a straight through cable. Transmission system : EIA RS-232C Transmission form : Asynchronous, bi-directional, half duplex Transmission rate : 10 times/second or 5 times/second (same as data refresh rate) Data format... -
Page 88: Connecting To Peripheral Equipment
Connecting to Peripheral Equipment 16.2. Connecting to the AD-8121B Printer 16.2.1. When connecting the AD-8121B printer to the balance for printing weighing data, configure the printer and the balance as follows Factory AD-8121B AD-8121B AD-8121B Class Item and Parameter settings MODE 1 MODE 2 MODE 3... - Page 89 Connecting to the AD-8127 Printer 16.2.2. When connecting the AD-8127 printer to the balance for printing weighing data, configure the printer and the balance as follows according to the usage examples. Function settings of the printer AD-8127 Usage example Multi printer Printing mode settings When printing the balance weighing data with the balance’s...
- Page 90 Connecting to a Computer Using the RS-232C Interface 16.2.3. Features The balance is of the DCE type (Data Communication Equipment), which can be connected to a personal computer using the RS-232C interface. Before connection, read the personal computer manual thoroughly. Use a standard DCE cable for connection (cable type: straight-through). Using Windows Communication Tools Software (WinCT) When Windows is used as an operating system in a personal computer, the WinCT software can be used to transmit the weighing data to the personal computer.
- Page 91 Connecting to a Computer Using the USB Interface 16.2.4. Features The weighing data can be transmitted to a personal computer when connecting the balance and personal computer via the USB interface. The applicable operating system is Windows 7 or later, as of December 2018.
-
Page 92: Commands
Commands 16.3. Command List 16.3.1. Note Before transmitting a command, add the terminator that is specified in the “Terminator (Crlf)” parameter of “Serial interface (5if)” in the function table. Commands to query weighing data Cancels the S or SIR command. Requests the weighing data immediately. - Page 93 Acknowledge Code and Error Codes 16.3.2. When the " AK, Error code (erCd)" parameter of "Serial interface function (5if)" is set to "on", the balance outputs <AK> code or error code to each command as follows: <AK> (06h) Acknowledge in ASCII code. When the balance receives a command to request data and cannot process it, the balance transmits an error code (EC, Exx).
- Page 94 Command Examples 16.3.4. This example uses " " of " " so that the <AK> (06h) code is output. erCd on ON command (turning the display on) Computer Time Balance Standby mode ON command Command received All segments All segments are displayed Command completed Zero display R command (Re-zeroing the display)
- Page 95 Error code This example is of an error using the R command. " " is used. The balance transmits an error erCd on code when the received command cannot be achieved. Computer Time Balance R command Weighing mode (unstable) Command received In process When the R command cannot be achieved due to unstable weighing:...
- Page 96 Setting a negative target value and filling with a sample until the display becomes zero This example uses " " of " " so that the <AK> (06h) code is output. erCd on Computer Time Balance Place a container Before command R command execution Command received...
-
Page 97: Key Lock Function
17. Key Lock Function Sending specified commands to the balance will lock the keys on the balance to disable the key functions. This is useful for controlling the balance only by an external device such as a personal computer. Even if the keys are locked, key operations using commands are available. For details on commands to operate the keys, refer to “16.3. -
Page 98: Locking The Specified Keys
Locking the Specified Keys 17.2. Entering numerical values to the LK command will lock specified keys on the balance to disable their key functions. Set the numerical values by adding the decimal numbers converted from bits assigned to each key as shown below. Bits Decimal Keys... -
Page 99: Maintenance
19. Maintenance Cleaning and Handling the Balance 19.1. Clean the balance with a lint free cloth that is moistened with warm water and a mild detergent. Do not use organic solvents to clean the balance. Do not disassemble the balance. Contact the local A&D dealer if the balance needs service or repair. Use the original packing material for transportation. - Page 100 Display Error code Description Unit mass error The sample unit mass for the counting mode is too light. Storing and using it for counting will cause a counting error. Add samples to reach the specified number and press the key. PRINT Pressing the key without adding samples will shift the balance to...
-
Page 101: Other Display
Display Error code Description Not ready A received command cannot be processed. Examples: The balance received a "Q" command, but not in the weighing mode. EC,E02 The balance received a "Q" command while processing a RE-ZERO command. Adjust the delay time to transmit a command. Timeout error When the timeout parameter is set to "... -
Page 102: Checking The Balance Performance And Environment
Is the fine range ring and small fine range ring installed for weighing with a readability of 0.001 mg for the BM-5, BM-5D, BM-20 and BM-22? Is the slide breeze break installed for weighing with a readability of 0.001 mg for the BM-20 and... -
Page 103: Specifications
20. Specifications BM-5 BM-5D BM-20 BM-22 5.2 g 22 g Weighing capacity 5.2 g 22 g 2.1 g 5.1 g 5.20008 g 22.00008 g Maximum display 5.200084 g 22.000084 g 2.100009 g 5.100009 g 0.01 mg 0.01 mg Readability 0.001 mg 0.001 mg... - Page 104 BM-252 BM-200 BM-300 BM-500 Weighing capacity 250 g 220 g 320 g 520 g Maximum display 250.00084 g 220.0084 g 320.0084 g 520.0084 g Readability 0.01 mg 0.0 mg Repeatability 0.03 mg 0.1 mg 0.2 mg (Standard deviation) Linearity ±0.10 mg ±0.2 mg ±0.3 mg ±0.5 mg...
-
Page 105: External Dimensions
45 Opening 141 Opening Opening 30 Above pan 21 140 Opening Opening Unit: mm BM-5, BM-5D BM-252, BM-200 BM-300, BM-500 BM-20, BM-22 Weighing pan: 25 Weighing pan: 90 A: Diameter of the weighing pan Weighing pan for filter: 50, 95... -
Page 106: Options And Peripheral Equipment
The stored data can be used with Microsoft EXCEL (if installed). Pipette Accuracy Tester BM-014 Note This option cannot be used for the BM-5 and BM-5D. This option can be used to inspect the volume dispensed from the pipette. The accessory evaporation trap is used to prevent the evaporation of the test liquid inside it. - Page 107 0.05 mL 100 pieces AX-ROUND-PAN-S 8 Round aluminum analytical pan (S) AD-1653 Density Determination Kit Note This option cannot be used for the BM-5, BM-5D, BM-20 and BM-22. Weight in air x liquid density = sample density Weight in air - Weight in liquid 10.0000 g...
- Page 108 Option AD-8127: Multi printer Small dot impact printer that connects to the balance via the RS-232C interface. Statistical calculation mode, calendar/clock function, interval printing mode, chart printing mode, dump printing mode AD-1691: Balance environment analyzer During the routine inspection, repeatability and the minimum weighing value can be easily checked. Also, this calculates measurement uncertainty and supports environmental evaluation of the balance.
- Page 109 The foot switch has the same function as the key. RE-ZERO AX-HOLDER-SET: Sample cup holder Note This option cannot be used for the BM-5, BM-5D, BM-20 and BM-22. A set of holders to secure a sample cup such as a test tube, centrifuge tube or micro tube.
-
Page 110: Terms/Index
21. Terms/Index Terms 21.1. Calibration Adjustment of the balance so that it can weigh accurately. Calibration weight A weight used for calibration. Data number Numbers assigned sequentially when weighing data or unit weight is stored. Digit The minimum weighing value available. Used for the balance, one digit is the smallest mass that can be displayed. -
Page 111: Index
Index 21.2. Left, Upper, Li g hti n g Stabilization indicator .. 17, 25, 46 ar-d Zero after output......49, 52 Left, Upper, Li g hti n g Process indicator..... 17 at-f Auto feed ........49, 86 Left, Upper, Bl i n ki n g Density mode ...... - Page 112 Cl adj Clock........... 48, 55, 58 erCd AK, Error code ....50, 91, 92, 93, 94 Clear Delete memory data......70, 71 Memory data error........98 Initializing the balance....45, 66, 70 Error code .......... 50, 91, 93, 97 Memory type error........98 External control Input ......
- Page 113 Leveling foot ..........9, 11, 14 RsKey Data output mode for WinCT ....88 Line feed .....56, 60, 62, 63, 64, 65 rtc pf Clock battery error ......58, 98 Linearity ..........101, 102 LK command ............ 95, 96 Sensitivity drift..........101, 102 Sample mass error......
- Page 114 Pennyweight.......18, 19, 23, 57 Calibration weight......41, 63, 101, 102, 108 Grain (UK)........18, 19, 23, 57 External weight ..........41, 42, 108 Tael (preset in the factory) ..18, 19, 23, 57 Internal mass......34, 38, 39, 40, 43, 108 Tola (India)........18, 19, 23, 57 Internal mass correction ..........
- Page 116 3-23-14 Higashi-Ikebukuro, Toshima-ku, Tokyo 170-0013, JAPAN Telephone: [81] (3) 5391-6132 Fax: [81] (3) 5391-1566 A&D ENGINEERING, INC. 1756 Automation Parkway, San Jose, California 95131, U.S.A. Telephone: [1] (408) 263-5333 Fax: [1] (408)263-0119 A&D INSTRUMENTS LIMITED Unit 24/26 Blacklands Way, Abingdon Business Park, Abingdon, Oxfordshire OX14 1DY United Kingdom Telephone: [44] (1235) 550420 Fax: [44] (1235) 550485 A&D AUSTRALASIA PTY LTD...