Table of Contents
Advertisement
Quick Links
Advertisement
Table of Contents

Related Manuals for A&D BA-T Series


Summary of Contents for A&D BA-T Series
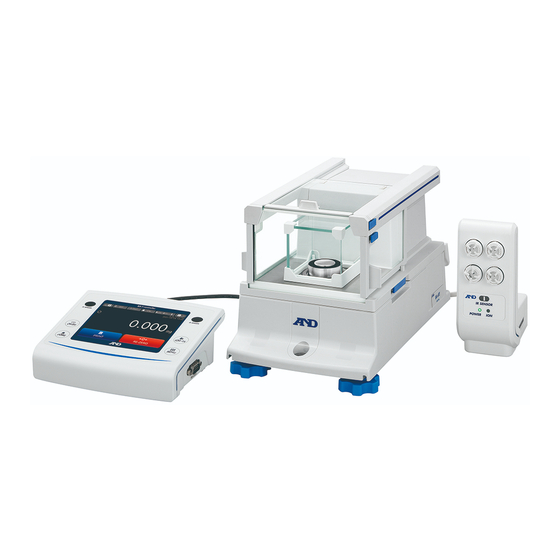
- Page 1 BA-6TE BA-6DTE BA-225TE BA-225DTE BA-125DTE 1WMPD4004315C...
- Page 2 © 2021 A&D Company Ltd. All rights reserved. No part of this publication may be reproduced, transmitted, transcribed, or translated into any language in any form by any means without the written permission of A&D Company Ltd. The contents of this manual and the specifications of the instrument covered by this manual are subject to change for improvement without notice.
-
Page 3: Table Of Contents
Contents Introduction ............................ 8 Part Names, Installation and Precautions ..................9 Screens and Operations (Keys and Buttons) ................19 IR Sensors and Auto Doors ......................25 Application ........................... 27... - Page 4 Quick Performance Check [Repeatability Measurement] Screen ..........81 Communication device ........................ 82 Password Function ........................84 Menu Screen ..........................94 [Sensitivity adjustment] screen....................95...
- Page 5 Calibration test/check ........................ 101 Filter Settings ..........................135 System settings ......................... 137...
- Page 6 Underhook ..........................167 Interface Specifications (Standard) ................... 168 Connection with Peripheral Devices ..................174 Printing Weighing Value Data with a Printer ................177 Connecting to a Personal Computer ..................180 Data Output ..........................183...
- Page 7 Command ..........................193 UFC Function ..........................199 Key Lock Function ........................201 Error Codes ..........................203 Ionizer ............................206 Maintenance ..........................208 Troubleshooting ........................209 Specifications ..........................211 Compliance ..........................218...
-
Page 8: Introduction
WinCT or WinCT-Plus installed. The software can be downloaded from our website https://www.aandd.jp The BA-T series is equipped with a DC type ionizer (static eliminator) that does not generate wind, and eliminates static electricity from charged objects before weighing in order to reduce errors due to static electricity. -
Page 9: Part Names, Installation And Precautions
Make sure that the AC adapter is unplugged before you connect the breeze break unit and the ionizer. BA-T series analytical balance is composed of the weighing unit and display unit. It is not possible to replace just one of the units. - Page 10 Unpacking Packing contents common to BA-T series Display unit Breeze break Weighing unit protection cover Breeze break top door bottom plate Quick Start Guide Tweezers Spatula Display unit USB cable Cable A (approx. 1.8 m) (approx. 0.2 m) Ionizer AC adapter...
- Page 11 Assembly and installation The BA-6TE is used here for the example of assembly. Other models can be assembled in the same way. Breeze break unit Step 1. Pull out the breeze break locking handles. Step Step 2. Place the breeze break unit on the weighing unit.
- Page 12 Top pane Step 5. Assemble the glass breeze break. Side panes (3 pieces) Assemble the BA-6TE / BA-6DTE glass breeze break in the weighing chamber. Align the side panes with the notch of the base stand. Step Base stand Side pane Example of the small breeze break with the right side open.
- Page 13 Step 9. Using the included cable A and cable B, connect the "weighing unit" and "breeze break unit" (with the cable A) and the "display unit" and "weighing unit" (with the cable B) respectively, paying attention to the direction of the arrow on each cable (on the connector). Make sure to unplug the AC adapter before connecting.
- Page 14 BA-6TE / BA-6DTE BA-225TE / BA-225DTE / BA-125DTE Installation considerations, preparation and precautions Prepare the following installation conditions in order to bring out the full performance of the balance. Note that the installation environment needs to be taken into consideration for the highly sensitive BA- 6TE / BA-6DTE.
- Page 15 Be sure to warm up the balance before use for at least an hour, or at least four hours for BA-6TE/BA- 6DTE, with the AC adapter connected to the power supply. Adjust the sensitivity of the balance before using it for the first time or after having moved it to another location so that accurate weighing can be performed.
- Page 16 Ground the balance and perform the following as needed. A DC type ionizer that produces no currents of air is available for the BA-T series balances. Refer to “24. Ionizer” and remove static electricity from the charged sample directly.
- Page 17 For weighing where impurities will be a problem, it is advisable to prepare samples outside the weighing chamber in order to prevent the substance from scattering inside the weighing chamber. When pressing the touch screen or keys, do not press with a sharp object such as a pen. Instead, press the center of the key with your finger.
- Page 18 Connection terminals of the display unit RS-232C connector Wired LAN USB mini B connector External input switch 1 USB Type A connector dedicated for flash drives External input switch 2 Terminal for Cable B AC adapter input Ground terminal Name Description Wired LAN For configuration details, refer to...
-
Page 19: Screens And Operations (Keys And Buttons)
Screens and Operations (Keys and Buttons) Standby screen When you touch the ON:OFF key or the touch screen in the standby screen, the weighing screen is displayed. When you select a key other than the ON:OFF key, the corresponding screen is displayed. ON:OFF key HOME screen (weighing screen) The HOME screen is displayed when you touch the HOME key... - Page 20 The P-TEST button performs a quick performance test. The quick performance test automatically checks the performance of the P-TEST button balance by loading and unloading the internal weight. Refer to “6. Quick Performance Check”. The APP button displays the application setting screen and saves the settings related to weighing.
- Page 21 Displays the log-in screen. The LOG-IN key is active at any time, and LOG-IN key pressing the LOG-IN key during operation always displays the log-in screen. For details, refer to “8. Password Function”. Displays the MENU screen. The MENU key is active during any MENU key operation.
- Page 22 Input Screen Numerical value input screen A numerical value input screen is displayed when you need to input numerical values. Numerical value display Back button Numerical value input button Clear button Esc button Enter button Name Description Back button Deletes the number right before the cursor. Clear button Deletes all input numbers.
- Page 23 Character input screen A character input screen is displayed when you need to input characters. On the character input screen, you can input alphanumerics and symbols. Screen for alphanumerics Screen for symbols Caps button Back button Esc button Enter button Cursor move buttons Symbol button Alphanumeric button...
- Page 24 Password input screen A password input screen is displayed when you need to input a password. On the password input screen, you can input alphanumerics and symbols. Basic operations are the same as with the character input screen, but the input characters are displayed as “...
-
Page 25: Ir Sensors And Auto Doors
[IR sensors] settings screen Auto doors BA-T series analytical balances are equipped with auto doors that allow you to open/close the breeze break without touching the doors. At factory settings, each breeze break door opens to the position it was previously opened to. - Page 26 Operation example Left IR sensor: Opens/closes the right breeze break door. Opens/closes the left Right IR sensor: breeze break door. Example for BA-6TE / BA-6DTE...
-
Page 27: Application
Application Application settings screen The [Application] settings screen saves the settings related to weighing. Display settings: HOME key APP button [Application] settings screen Name Description Setting value (setting range) Normal weighing, Counting mode, Percent mode, Select the application to be used in the Application selection Minimum weight alert function weighing screen. - Page 28 Unit of measure Available units of measure are configured before shipment. For details about units of measure, refer to the table below. Conversion factor Name (unit, mode) Abbrev. 1 g = Gram Milligram 0.001 g Ounce (Avoir) 28.349523125 g Troy Ounce 31.1034768 g Metric Carat 0.2 g...
- Page 29 BA-6DTE Unit Precision range Standard range Capacity Readability Capacity Readability Gram 2.10 0.000001 6.20 0.00001 Milligram 2100 0.001 6200 0.01 Once (Avoir) 0.0740 0.0000001 0.218 0.000001 Troy Once 0.0675 0.0000001 0.199 0.000001 Metric Carat 10.5 0.00001 31.0 0.0001 Momme 0.56 0.000001 1.65 0.00001...
- Page 30 BA-225DTE Unit Precision range Standard range Capacity Readability Capacity Readability Gram 51.0 0.00001 0.0001 Milligram 51000 0.01 220000 Once (Avoir) 1.79 0.000001 7.76 0.00001 Troy Once 1.63 0.000001 7.07 0.00001 Metric Carat 0.0001 1100 0.001 Momme 13.6 0.00001 58.6 0.0001 Pennyweight 32.7 0.00001...
- Page 31 Normal weighing Basic weighing Example weighing in g for BA-6TE Step 1. Press the ON:OFF key ON:OFF key or HOME key the HOME key to enter weighing mode. Weighing pan Step 2. Place a container (tare) on the weighing Container (tare) pan if necessary.
- Page 32 Zero-point, tare, and weighing range Entering the weighing mode The balance will determine the reference zero point when the ON:OFF key is pressed to enter the weighing mode. Depending on the load condition at that time, the balance automatically judges whether to set the zero- point or to tare.
- Page 33 Smart range function For BA-6DTE / BA-225DTE / BA-125DTE, there are two types of ranges: the standard range and precision range (high resolution). Smart range function The range can switch automatically between the standard range and precision range (high resolution), depending on the value displayed.
- Page 34 Counting mode (PCS) If you configure this display, the [HOME] screen changes to Counting mode. Display settings: HOME key APP button [Application] settings screen Application selection button Select [Counting mode]. HOME key [Counting mode] screen Counting mode display Unit for counting Unit weight setting button Name Description...
- Page 35 Storing a unit weight [Counting mode setting] screen Display settings: HOME key APP button [Application] settings screen Application selection button Select [Counting mode]. HOME key [Counting mode] screen Unit weight setting button Unit weight [Counting mode setting] screen Name Description Displays the unit weight through the direct input or input by weighing Unit weight display samples.
- Page 36 Counting mode sample input [Sample input mode] screen Display settings: HOME key APP button [Application] settings screen Application selection button Select [Counting mode]. HOME key [Counting mode] screen Unit weight setting button Input by weighing samples button Counting mode [Sample input mode] screen Sample input mode display Number of samples input button Back button...
- Page 37 ACAI function The ACAI function automatically improves the counting accuracy each time the number of sample pieces is increased. Errors will be reduced as variations in sample weight are averaged. Step 1. After storing the unit weight through the input by weighing samples and adding some sample pieces in the Counting mode screen, “Now performing...
- Page 38 Unit weight list Display settings: HOME key APP button [Application] settings screen Application selection button Select [Counting mode]. HOME key [Counting mode] screen Unit weight setting button UW list button [Unit weight list] screen Page navigation buttons Unit weight list Page number change button Back button Settings button...
- Page 39 Editing and storing a unit weight [Counting mode setting] screen Display settings: HOME key APP button [Application] settings screen Application selection button Select [Counting mode]. HOME key [Counting mode] screen UW list button Edit button [Counting mode setting] screen for editing and storing a unit weight. Name input button Unit weight display field Unit weight registration button...
- Page 40 Percent weighing [Percent weighing] screen If you configure this display, the HOME screen changes to the Percent mode. Display settings: HOME key APP button [Application] settings screen Application selection button Select [Percent mode]. HOME key [Percent mode] screen Percent mode display Unit for the Percent mode Percent mode setting button Name...
- Page 41 Percent mode sample input [Sample input mode] screen Display settings: HOME key APP button [Application] settings screen Application selection button Select [Percent mode] HOME key Percent mode screen Percent mode setting button Sample input button [Sample input mode] screen Sample input mode display SAVE button Back button Name...
- Page 42 Decimal separator Model 100% reference mass position 0.0010 g - 0.0099 g BA-6TE / BA-6DTE 0.0100 g - 0.0999 g 0.1 % 0.1000 g - 0.01 % 0.0100 g - 0.0999 g BA-225TE / BA-225DTE / BA-125DTE 0.1000 g - 0.9999 g 0.1 % 1.0000 g -...
- Page 43 Minimum weight setting Display settings: HOME key APP button [Application] settings screen Application selection button Select [Minimum weight alert function]. HOME key Weighing screen with the minimum weight alert function Minimum weight setting button [Minimum weight setting] screen Setting Description Name value Minimum weight display...
- Page 44 Minimum weight setting for measurement Display settings: HOME key APP button [Application] settings screen Application selection button Select [Minimum weight alert function] HOME key Weighing screen with the minimum weight alert function Minimum weight setting button Input by measuring repeatability button [Minimum weight setting] screen Measurement method Measurement tolerance...
- Page 45 Manual (external weight) For this setting, measurement is performed with your weight to compute the minimum weight. The procedure is displayed in the message field. Weighing example for BA-6DTE Weighing pan Step 1. Press the RE-ZERO button RE-ZERO button Step 2. Place a weight on the weighing pan.
- Page 46 Minimum weight measurement result Display settings: HOME key APP button [Application] settings screen Application selection button Select [Minimum weight alert function] HOME key Weighing screen with the minimum weight alert function Minimum weight setting button Input by measuring repeatability button [Minimum weight setting] screen Measure button [Minimum weight measurement result] screen.
- Page 47 Formulation function Formulation function usage This is the function to store a recipe consisting of the sample to be weighed, the target weight, and the tolerance of the amount to be weighed with the balance, and to weigh according to the recipe. If you configure this display, the HOME screen changes to formulation mode.
- Page 48 Selecting a recipe Display settings: HOME key APP button [Application] settings screen Application selection button Select [Formulation mode] HOME key [Formulation mode] screen Go to the recipe list button [Recipe list] screen Recipe registration list Page navigation button Page number Back button USB flash drive button Search button...
- Page 49 Searching a recipe Display settings: HOME key APP button [Application] settings screen Application selection button Select [Formulation mode] HOME key [Formulation mode] screen Go to the recipe list button Search button [Recipe search] screen Search box Search result list Page navigation buttons Back button Page number Edit button...
- Page 50 Editing a recipe Display settings: HOME key APP button [Application] settings screen Application selection button Select [Formulation mode] HOME key [Formulation mode] screen Go to the recipe list button Select a recipe Edit button [Recipe edit] screen With the recipe to be edited selected on the [Recipe list] or [Recipe search] screen, pressing the Edit button displays the [Recipe edit] screen.
- Page 51 Editing a sample Display settings: HOME key APP button [Application] settings screen Application selection button Select [Formulation mode] HOME key [Formulation mode] screen Go to the recipe list button Select the recipe Edit button Edit button [Sample edit] screen Pressing the Edit button on the [Recipe edit] screen displays the [Sample edit] screen. Sample name field Selection button Target value...
- Page 52 Registering a sample Display settings: HOME key APP button [Application] settings screen Application selection button Select [Formulation mode] HOME key [Formulation mode] screen Go to the recipe list button Select the recipe Edit button Edit button Add sample button [Sample registration] screen Pressing the Add sample button on the [Sample edit] screen displays the [Sample registration] screen.
- Page 53 Sample weighing screen Display settings: HOME key APP button [Application] settings screen Application selection button Select [Formulation mode] HOME key [Formulation mode] screen Skip button (or SAVE button [Formulation mode - Sample weighing] screen Name Description Sample name display Displays the name of the sample to be weighed. Target value display Displays the target value of the registered sample.
- Page 54 Tare weighing screen Display settings: HOME key APP button [Application] settings screen Application selection button Select [Formulation mode] HOME key [Formulation mode] screen SAVE button [Formulation mode - Tare weighing] screen Message display SAVE button Skip button Name Description Weighs the tare value and displays the [Formulation mode - Sample weighing] screen.
- Page 55 Measurement results screen Display settings: HOME key APP button [Application] settings screen Application selection button Select [Formulation mode] HOME key [Formulation mode] screen Skip button (or SAVE button SAVE button [Formulation mode results] screen Measurement results Back button PRINT button Name Description Displays measurement results.
- Page 56 Recipe registration example The following are used for this recipe registration example. Recipe name: Test Samples to be Sample name Description Target value Tolerance registered: Sample1 Sample 1 1.000000 g 10.000 % Sample2 Sample 2 1.000000 g 10.000 % Step 1 Press the Go to the recipe list button on the [Formulation mode] screen to display the [Recipe list] screen.
- Page 57 Step 5. Enter the [Sample name] and [Details] to be registered. The figure on the right shows an input example on the [Sample registration] screen. After inputting, press the Back button to display the [Sample edit] screen. Enter the fields then press the Back button Step 6.
- Page 58 Measurement example Select a recipe to perform measurement according to the recipe. The registration example below is described here as an example. Recipe name: Test Samples to be Sample name Description Target value Tolerance registered: Sample1 Sample 1 1.000000 g 10.000 % Sample2 Sample 2...
- Page 59 Exporting/importing recipes (with the touch panel software version 1.019 or later) Display settings: HOME key [Formulation mode] screen Go to the recipe list button USB flash drive button [Export/import recipe] screen Export recipes button Import recipes button Back button Name Description Export recipes button Exports recipes that are registered in the USB flash drive.
- Page 60 HPLC function HPLC function usage The HPLC function allows you to register in the recipe the sample to be weighed and the molarity (mol/L, mmol/L) or the target value in unit of mass (g) and the tolerance for the target value, and to perform weighing according to the recipe.
- Page 61 Selecting a recipe Display settings: HOME key APP button [Application] settings screen Application selection button Select [HPLC mode] HOME key [HPLC mode] screen Go to the recipe list button [Recipe list] screen Recipe registration list Page navigation button Page number Back button USB flash drive button Search button...
- Page 62 Searching a recipe Display settings: HOME key APP button [Application] settings screen Application selection button Select [HPLC mode] HOME key [HPLC mode] screen Go to the recipe list button Search button [Recipe search] screen Search box Search result list Page navigation buttons Back button Page number Edit button...
- Page 63 Editing a recipe Display settings: HOME key APP button [Application] settings screen Application selection button Select [HPLC mode] HOME key [HPLC mode] screen Go to the recipe list button Select a recipe Edit button [Recipe edit] screen With the recipe to be edited selected on the [Recipe list] or [Recipe search] screen, pressing the Edit button displays the [Recipe edit] screen.
- Page 64 Editing a sample Display settings: HOME key APP button [Application] settings screen Application selection button Select [HPLC mode] HOME key [HPLC mode] screen Go to the recipe list button Select the recipe Edit button Edit button [Sample edit] screen Pressing the Edit button on the [Recipe edit] screen displays the [Sample edit] screen. Molecular formula field Selection button Target value...
- Page 65 Registering a sample Display settings: HOME key APP button [Application] settings screen Application selection button Select [HPLC mode] HOME key [HPLC mode] screen Go to the recipe list button Select the recipe Edit button Edit button Add sample button [Sample registration] screen Pressing the Add sample button on the [Sample edit] screen displays the [Sample registration] screen.
- Page 66 Sample weighing screen Display settings: HOME key APP button [Application] settings screen Application selection button Select [HPLC mode] HOME key [HPLC mode] screen Skip button (or SAVE button [HPLC mode - Sample weighing] screen Name Description Sample name display Displays the name of the sample to be weighed. Target value display Displays the target value of the registered sample.
- Page 67 Tare weighing screen Display settings: HOME key APP button [Application] settings screen Application selection button Select [HPLC mode] HOME key [HPLC mode] screen SAVE button [HPLC mode - Tare weighing] screen Message display SAVE button Skip button Name Description Weighs the tare value and displays the [HPLC mode - Sample weighing] screen. SAVE button If the recipe is incomplete, the SAVE button is disabled.
- Page 68 Example of HPLC mode results Title Date Time Recipe number Recipe information Solution volume Molecular formula, Target value Tare weight Measurement result Molecular formula, Weighing value, Molarity Remarks Signature...
- Page 69 Recipe registration example The following are used for this recipe registration example. Recipe name PBS(-) Sample name Target value Tolerance Target value unit mmol/L Disodium hydrogen phosphate 10.000 mmol/L 10.000 % Solution volume Potassium dihydrogen phosphate 2.000 mmol/L 10.000 % Sodium chloride 137.000 mmol/L 10.000 %...
- Page 70 Step 5. Enter the [Molecular formula] and [Sample name] to be registered. The figure on the right shows an input example on the [Sample registration] screen. After inputting, press the Back button to display the [Sample edit] screen. Enter the fields then press the Back button Step 6.
- Page 71 Measurement example Select a recipe to perform measurement according to the recipe. The registration example below is described here as an example. Recipe name PBS(-) Sample name Target value Tolerance Target value unit mmol/L Disodium hydrogen phosphate 10.000 mmol/L 10.000 % Solution volume Potassium dihydrogen phosphate 2.000 mmol/L...
- Page 72 Exporting/importing recipes (with the touch panel software version 1.019 or later) Display settings: HOME key [HPLC mode] screen Go to the recipe list button USB flash drive button [Export/import recipe] screen Export recipes button Import recipes button Back button Name Description Export recipes button Exports recipes that are registered in the USB flash drive.
- Page 73 Statistical calculation function Usage This mode processes weighing values statistically and displays/outputs the result. Calculation items available for display/output include the number of data, sum, maximum, minimum, range (Max-Min), mean, standard deviation, coefficient of variation and relative error. You can select these output data in four steps on the [Statistical calculation setting] screen.
- Page 74 Statistical calculation results Display settings for statistical calculation results Display settings: HOME key APP button [Application] settings screen Statistical calculation function button Select [ON]. HOME key Weighing screen with the statistical calculation function Statistical calculation results button Name Description Statistical calculation Displays the statistical calculation results.
- Page 75 Display settings for the statistical calculation setting Display settings: HOME key APP button [Application] settings screen Statistical calculation function button Select [ON]. HOME key Weighing screen with the statistical calculation function Statistical calculation results button Statistical calculation setting button Statistical display output Name Setting value Description...
- Page 76 Statistical calculation output example Registering data Step Press the PRINT button in the weighing screen. ST,+1.000000 Press Outputting results Step Press the PRINT button in the [Statistical calculation results] screen. Statistical display output: Number of data, Sum, Maximum, Minimum, Range, Mean, Standard deviation, Coefficient of variation, Relative error +10.000000 MAX +1.010000...
- Page 77 Capacity indicator If you configure this display, the HOME screen changes to the weighing screen with the capacity indicator. Display settings: HOME key APP button [Application] settings screen Capacity indicator button Select [ON]. HOME key Weighing screen with the capacity indicator Capacity indicator Name Description...
- Page 78 Gross/Net/Tare Function Gross/net/tare function usage The net/gloss/tare functions allow you to output data for the gross weight, net weight and tare weight by optionally subtracting the tare. Change to the Gross weight/Tare weight display as follows: Display settings: HOME key APP button [Application] settings screen Gross weight/Tare weight display button...
- Page 79 Warning display Two types of warnings can be displayed according to the situation. Enable the warning display as follows: Display settings: HOME key APP button [Application] settings screen Warning display button Select [ON]. (Factory setting) HOME key Weighing screen with the warning display function Warning display Name Description...
- Page 80 Impact shock detection (ISD) function This function detects impact shocks to the mass sensor section, displays the impact level, and records it. (Available with display unit software versions 1.010 or later) By lowering the impact level at the time of loading, it is possible not only to alleviate variation in the weighing value but also to reduce the risk of failure of the mass sensor section.
-
Page 81: Quick Performance Check [Repeatability Measurement] Screen
Quick Performance Check [Repeatability Measurement] Screen You can access the quick performance check from the weighing screen with a single touch. Display the quick performance check as follows: Display settings: HOME key P-TEST button [Repeatability measurement] screen Quick performance check usage The quick performance check screen is common to the repeatability check screen described in “11.3. -
Page 82: Communication Device
USB flash drive usage For the BA-T series, you can connect the USB flash drive through the USB host interface. You can save weighing data, etc. in the USB flash drive and import the data into Windows or macOS... - Page 83 [Communication device] - [USB device] settings Display the [USB device tab in the [Communication device] screen as follows: Display settings: Weighing screen Communication device button USB device button USB function mode USB flash drive button Name Setting value (setting range) Description Selects the communication method between USB function mode...
-
Page 84: Password Function
Password Function Intended use The password function allows you to restrict the use and functions of the balance. It is effective in preventing falsification of date and time settings or preventing changes in the function table by the user. Operation To log in, press the LOG-IN key when the display is on, input the user name and password in the [Log-in] screen, and press the Log-in button... - Page 85 Log-in screen Display the [Log-in] screen as follows: Display settings: Weighing screen LOG-IN key [Log-in] screen Name Description Input the user name for login. The length of user names is up to 20 User name input field characters. Input the set password. The password consists of alphanumerics with a Password input field length of 4 characters.
- Page 86 User authorization - Change to settings not allowed If changes to settings are not allowed in user authorization, the following buttons are disabled. MENU screen - System settings Display settings: MENU key [Menu] screen Disabled button Sensitivity adjustment - Settings Display settings: MENU key Sensitivity adjustment button...
- Page 87 Weighing screen with the minimum weight alert function - Minimum weight setting Display settings: HOME key APP button [Application] settings screen Application selection button Select [Minimum weight alert function]. HOME key Weighing screen with the minimum weight alert function Disabled button Statistical calculation results screen - Setting Display settings: HOME key APP button...
- Page 88 HPLC mode - Recipe list Display settings: HOME key APP button [Application] settings screen Application selection button Select [HPLC mode] HOME key [HPLC mode] screen Go to the recipe list button [Recipe list] screen Disabled button HPLC - Recipe search Display settings: HOME key APP button [Application] settings screen...
- Page 89 User authorization - Ext. sensitivity adjustment not allowed If external calibration adjustment is not allowed in user authorization, the following buttons are disabled. Sensitivity adjustment - Ext. sensitivity adjustment Display settings: MENU key Sensitivity adjustment button [Sensitivity adjustment] screen Disabled button Sensitivity adjustment/calibration Test - Ext.
- Page 90 User authorization - Int. sensitivity adjustment not allowed If internal sensitivity adjustment is not allowed in user authorization, the following buttons are disabled. In addition, when a user at a user level where the internal sensitivity adjustment is not allowed is logged in, the [Automatic sensitivity adjustment] button is also not allowed and no automatic sensitivity adjustment is performed.
- Page 91 User management Display the [User management] screen as follows: Display settings: Weighing screen LOG-IN key User management button [User management] screen User list Edit user button Add user button Delete user button Name Description Displays the registered users. Only Admin is registered at the factory setting. Up to 100 users can be User list registered.
- Page 92 User management for registration Display the [User management] screen for registration as follows: Display settings: Weighing screen LOG-IN key User management button Add user button [User management] screen for registration User name input field Password input field User level selection field Register user button Edit user button Delete user button...
- Page 93 User management for edit Display the [User management] screen for edit as follows: Display settings: Weighing screen LOG-IN key User management button Edit user button [User management] screen for edit User name Password input field User level selection field Modify user button Register user button Delete user button Name...
-
Page 94: Menu Screen
Menu Screen Display the [Menu] screen as follows: Display settings: MENU key [Menu] screen Calibration test/check button Sensitivity adjustment button Filter settings button System settings button Back button Information button Name Description Displays the [Sensitivity adjustment] screen. Sensitivity adjustment button You can configure the operation and settings for the internal sensitivity adjustment and external sensitivity adjustment. -
Page 95: 10. [Sensitivity Adjustment] Screen
10. [Sensitivity adjustment] screen Display the [Sensitivity adjustment] screen as follows: Display settings: MENU key Sensitivity adjustment button [Sensitivity adjustment] screen Int. sensitivity adjustment button Automatic sensitivity adjustment button Ext. sensitivity adjustment button Sensitivity adjustment setting button Name Description Displays the [Internal sensitivity adjustment] screen to execute the internal sensitivity adjustment. - Page 96 Internal sensitivity adjustment Display settings 1: MENU key Sensitivity adjustment button Int. sensitivity adjustment button [Internal sensitivity adjustment] screen Display settings 2: HOME key CAL button Int. sensitivity adjustment button [Internal sensitivity adjustment] screen Date Time Weight used Back button PRINT button Name Description...
- Page 97 External sensitivity adjustment Display settings 1: MENU key Sensitivity adjustment button Ext. sensitivity adjustment button [External sensitivity adjustment] screen Display settings 2: HOME key CAL button Ext. sensitivity adjustment button [External sensitivity adjustment] screen Name Description Instruction display Displays the instruction for external sensitivity adjustment. Input the external weight value.
- Page 98 Procedure for external sensitivity adjustment Weighing example for BA-6DTE Weighing pan Step 1. Make sure that nothing is on the weighing pan and press the Confirm button Confirm button The balance measures the zero point. Do not apply vibration and the like to the balance. You can input the external weight value before input.
- Page 99 Automatic sensitivity adjustment Display settings: MENU key Sensitivity adjustment button Automatic sensitivity adjustment button [Automatic sensitivity adjustment] settings screen Name Setting value (setting range) Description Set the automatic sensitivity adjustment OFF, Temperature change , Automatic sensitivity execution condition. Preset time 1, adjustment execution If you select the preset time or interval, the Preset time 1&2,...
- Page 100 Sensitivity adjustment setting Display settings: MENU key Sensitivity adjustment button Settings button [Sensitivity adjustment setting] screen External weight value input Enter the correct internal weight value button Setting value Name Description (setting range) Input the external weight value. This is common to the “Adjustment weight value”...
- Page 101 11. Calibration test/check Display settings: MENU key Calibration test/check button [Calibration test/check] screen Periodic check button Repeatability check button Daily check button AND-MEET button* Calibration test/check Settings button External calibration test button Internal calibration test button Name Description Periodic check button Executes the periodic check.
- Page 102 Daily check Display settings: MENU key Calibration test/check button Daily check button [Daily check] screen, [Environmental conditions] screen (From this screen, display check items in sequence) Daily check details During daily check, you check the minimum required items for using the balance to make sure that there is no serious error with the balance.
- Page 103 2. Balance handling level Check the balance handling level. The balance handling level is calculated based on the following data. The number of times the balance has detected an impact since the last periodic check Impact level detected by the balance Balance handling level Description No potentially damaging impact on the balance has been detected.
- Page 104 3. External condition check Make sure that the area around the weighing pan in the breeze break is clean. If it is dirty, clean it. Contamination may result. Make sure that the balance body is not damaged or deformed. Damage or deformation may result in malfunction of the balance or injury to users. Check item Check details Skip button...
- Page 105 5. Weighing pan check Make sure that there is nothing on the weighing pan. Skip button Back button Confirm button Name Description Skip button Skips this check item and proceeds to the next item. Back button Returns to the previous screen. Confirm button Considers this check item as OK and proceeds to the next item.
- Page 106 7. Daily Check Results The results of all daily check items are displayed. Daily check results display Scroll buttons Exit button PRINT button Save to USB button Name Description Daily check results Shows the results of the daily check. display Exit button Exits the daily check and displays the [Calibration test/check] screen.
- Page 107 Output example for daily check output results Daily check output results Daily check PDF results...
- Page 108 Periodic check Display settings: MENU key Calibration test/check button Periodic check button [Periodic check] screen, [Environmental conditions] screen (From this screen, display check items in sequence) Periodic check details During the periodic check, a weight is used to check basic properties of the balance including the repeatability, linearity and eccentricity and manage how weighing values perform against the specifications.
- Page 109 2. External condition check Make sure that the area around the weighing pan in the breeze break is clean. If it is dirty, clean it. Contamination may result. Make sure that the balance body is not damaged or deformed. Damage or deformation may result in malfunction of the balance or injury to users. Check item Check details Skip button...
- Page 110 4. Weighing pan check Make sure that there is nothing on the weighing pan. Skip button Back button Confirm button Name Description Skip button Skips this check item and proceeds to the next item. Back button Returns to the previous screen. Confirm button Considers this check item as OK and proceeds to the next item.
- Page 111 6. Sensitivity Adjustment The sensitivity adjustment is performed. When the adjustment is complete, the [Sensitivity adjustment result] screen is automatically displayed. Be sure to warm up the balance with nothing on the weighing pan for at least an hour, or at least four hours for BA-6TE/BA-6DTE, with the AC adapter connected to the power supply.
- Page 112 7. Pre-loading Select the weight to be used for execution. For the internal weight, the pre-loading is automatically performed. For an external weight, the instruction is displayed on the screen. Setting value Name Description (setting range) Weight to be Internal weight , Select the weight to be used.
- Page 113 8. Repeatability Load and unload the weight multiple times to obtain the standard deviation. Follow the instruction to load and unload the weight as many times as the specified measurement count. The setting in the [Repeatability] screen is common to the standard value setting for the daily/periodic check settings.
- Page 114 9. Sensitivity Test The sensitivity test is performed with the selected loading points. Follow the instruction for measurement operations. The setting in the [Sensitivity test] screen is common to the standard value setting for the daily/periodic check settings. When the test is complete, the [Sensitivity test result] screen is automatically displayed. Setting value Name Description...
- Page 115 10. Eccentricity The eccentricity is measured. Follow the instruction for measurement. The setting in the [Sensitivity test] screen is common to the standard value setting for the daily/periodic check settings. When the measurement is complete, the [Eccentricity measurement result] screen is automatically displayed.
- Page 116 11. Periodic check results The results of all periodic check items are displayed. Periodic check results display Scroll buttons Operator name Exit button PRINT button Save to USB button Name Description Periodic check results Shows the results of the periodic check. display Displays the name of the user that performed the periodic check.
- Page 117 Output example for periodic check output results Periodic check output results...
- Page 118 Periodic check results (PDF)
- Page 119 Repeatability check Display settings: MENU key Calibration test/check button Repeatability check button [Repeatability measurement] screen Measurement method Measurement count Tolerance (standard deviation) Measure button Name Setting value (setting range) Description Automatic (internal weight) , Measurement Select the measurement method. method Manual (external weight) Measurement count Displays the measurement count.
- Page 120 Repeatability measurement with an external weight Display settings: MENU key Calibration test/check button Repeatability check button [Repeatability measurement] screen. In this screen, with [Manual (external weight)] selected for the measurement method, select Measure button [Repeatability measurement] screen with an external weight Name Description Back button...
- Page 121 Internal calibration test Display settings: MENU key Calibration test/check button Internal calibration test button [Calibration test] screen Name Description Back button Returns to the previous screen. Calibration test result display Displays the measurement result. Outputs the measurement result to the device connected to the balance.
- Page 122 External calibration test Display settings: MENU key Calibration test/check button External calibration test button [External calibration test] screen Name Description Input the external weight value. Input range: Input range External weight value input This is common to the external weight value input field in the [Sensitivity adjustment setting] screen.
- Page 123 AND-MEET (with the touch panel software version 1.019 or later) Display settings: MENU key Calibration test/check button AND-MEET button [AND-MEET] screen Start button Back button Name Description Start button Starts AND-MEET and displays [AND-MEET] screen. Back button Returns to the [Calibration test/check] previous screen. AND-MEET Measurement Environment Evaluation Tool High-sensitivity analytical balances detect minute environmental changes that users cannot detect.
- Page 124 The temperature fine fluctuation occurs: The air from the air conditioner may be blown directly to the balance. Use a breeze break or change the balance installation site to avoid the direct airflow to the balance from the air conditioner. The repeatability is bad even if changes in temperature are small: The air from the air conditioner may be strong.
- Page 125 [AND-MEET weighing] screen Display settings: MENU key Calibration test/check button AND-MEET button Start button [AND-MEET] screen Cancel button List button Graph button Name Description Cancel button Cancels AND-MEET and displays the [AND-MEET result] screen. List button Displays the [AND-MEET result list] screen. Graph button Displays the [AND-MEET graph] screen.
- Page 126 Description of a graph: temperature/zero point change/span Name Description Indicates the temperature. The temperature scale is on the right side of the Y- Temperature (red) axis. Indicates the changes in zero point. Although the actual value is near zero, the Zero point change value in the graph has the offset value as large as the span value added to plot (green)
- Page 127 [AND-MEET result list] screen Display settings: MENU key Calibration test/check button AND-MEET button Start button List button [AND-MEET list] screen Name Description AND-MEET Displays the temperature, zero point, span, the standard deviation’s maximum value, minimum value, range, and average value. result table Cancel button Cancels AND-MEET and displays the [AND-MEET result] screen.
- Page 128 [AND-MEET result] screen Name Description Displays either ‘Exit’ or ‘Cancel.’ Also displays the time to start and exit the AND-MEET status AND-MEET. Exit button Exits the AND-MEET. Span/zero point change Refer to ”11.6.3 Description of a graph: temperature/zero point graph change/span”.
- Page 129 AND-MEET analysis graph example...
- Page 130 Daily/periodic check settings Display settings: MENU key Calibration test/check button Settings button [Daily/periodic check settings] screen Standard value setting button Daily/periodic check reminder button Report data button Back button Name Description Standard value setting button Displays the [Standard value setting] screen. Daily/periodic check reminder button Displays the [Daily/periodic check reminder] screen.
- Page 131 Startup screen when the daily check reminder is set to ON Display settings: MENU key Calibration test/check button Settings button Daily/periodic check reminder button Daily check reminder before the start of weighing button Select [ON] Use the ON:OFF key to turn on the display [Daily/periodic check reminder] screen for daily check Daily check reminder...
- Page 132 Standard value setting Display settings: MENU key Calibration test/check button Settings button Standard value setting button [Standard value setting] screen Sensitivity test button Repeatability button Eccentricity button Back button Name Description Sensitivity test button Displays the [Standard value setting: Sensitivity test] screen. Repeatability button Displays the [Standard value setting: Repeatability] screen.
- Page 133 Standard value setting: Sensitivity test Display settings: MENU key Calibration test/check button Settings button Standard value setting button Sensitivity test button [Standard value setting: Sensitivity test] screen Number of loading points for measurement Measuring load 1 Measuring load 2 Back button Setting value Name Description...
- Page 134 Report data Display settings: MENU key Calibration test/check button Settings button Report data button [Report data] screen Measurement location input Weight used input Back button Name Description Measurement location Input the measurement location. input Weight used input Input the weight used. Back button Returns to the previous screen.
- Page 135 12. Filter Settings Display settings: MENU key Filter settings button [Filter settings] screen Name Setting value (setting range) Description You can set the level of the response to external Response FAST, MID. , SLOW characteristics disturbances that affect the balance. Sets the fluctuation range where the stabilization Stability ±1 d, ±2 d , ±3 d...
- Page 136 Commentary on filter settings Response characteristics The display shows an acute response to weight variation. Reduce the setting value when FAST weighing powder or liquid, weighing extremely lightweight samples, or prioritizing the operating efficiency over the stability of the weighing value. The display shows a gradual response to weight variation.
- Page 137 13. System settings Display settings: MENU key System settings button [System settings] screen Name Description Display settings button Displays the [Display settings] screen. Displays the [IR sensor] settings screen. You can configure the settings regarding the sensitivity and IR sensors button opening/closing of the breeze break doors for the left and right IR sensors.
- Page 138 Display settings Display settings: MENU key System settings button Display settings button [Display settings] screen Backlight brightness Auto power OFF Auto power ON Display refresh rate Back button Setting value (setting Name Description range) Level 1, Level 2, Level 3, Level 4, Backlight Selects the brightness of the backlight of the display.
- Page 139 Settings in the red box are default values (factory settings). * Supported with the touch panel software version 1.019 or later BA-T series analytical balances are equipped with IR sensors that allow operation without directly touching the balance display. At factory settings, the IR sensors on the left and right of the display are assigned to open and close the breeze break doors.
- Page 140 Returns to the previous screen. Settings in the red box are default values (factory settings). BA-T series analytical balances are equipped with auto doors that allow you to open/close the breeze break without touching the doors. The positions of the breeze break auto doors are automatically detected by the IR sensors on the breeze break side surfaces.
- Page 141 Date/time setting Display settings: MENU key System settings button Date/time button [Date/time setting] screen Current date and time Date and time setting Set button Date format Back button Setting value (setting range) Name Description Current date and Displays the currently set date and time. time Date and time Input the date and time that you want to set.
- Page 142 Buzzer Display settings: MENU key System settings button Buzzer button [Buzzer] settings screen Buzzer sound Back button Setting value Name Description (setting range) Selects ON/OFF for the built-in buzzer that sounds when a key is Buzzer sound OFF, operated or the state changes. Back button Returns to the previous screen.
- Page 143 Communication Display settings: MENU key System settings button Communication button [Communication] screen Name Description Displays the [Data output] screen. You can select the output Data output button mode and configure the data to be added, output settings and command settings. Displays the [Data output settings] screen.
- Page 144 Data output mode Display settings: MENU key System settings button Communication button Data output button Data output mode button [Data output mode] screen Name Setting value (setting range) Description Selects the output timing for the selected Data output Key mode , Auto print mode, mode Stream mode, Interval output mode data.
- Page 145 Data to be added Display settings: MENU key System settings button Communication button Data output button Data to be added button [Data to be added] screen Setting value (setting Name Description range) OFF , ON Whether or not to add ID to the output data. Date OFF , ON Whether or not to add the date to the output data.
- Page 146 Data Output settings Display settings: MENU key System settings button Communication button Data output button Data output settings button [Data output settings] screen Pause between data outputs Auto feed Auto re-zero after data output Back button Setting value (setting Name Description range) Pause between data...
- Page 147 Command settings Display settings: MENU key System settings button Communication button Data output button Command settings button [Command settings] screen Terminator AK (acknowledge), error code Command time out Back button Setting value Name Description (setting range) Terminator Selects the terminator for the output data. AK (acknowledge), Select the response (received, processing or process OFF , ON...
- Page 148 GLP output Display settings: MENU key System settings button Communication button GLP output button [GLP output] screen GLP output Clock to be used Back button Setting value Name Description (setting range) GLP output OFF , ON Change the setting to output GLP. Clock to be Balance internal clock , Sets the clock for GLP output.
- Page 149 Output examples of sensitivity adjustment with the internal weight The GLP output when the sensitivity of the balance is adjusted using the internal weight is shown below. Clock to be used : Balance internal clock. Outputs data with the internal clock of the balance. Printer format (AD-8127) PC format (RsCom) Manufacturer...
- Page 150 Outputting external device clock data (clock to be used: external device clock) By setting an external device clock for the clock to be used for outputting GLP/GMP data, you can use the clock data from an external device such as a personal computer or printer for the balance instead of the internal clock data.
- Page 151 Output examples of sensitivity adjustment with an external weight The GLP output when the sensitivity of the balance is adjusted using an external weight is shown below. Clock to be used : Balance internal clock. Outputs data with the internal clock of the balance. Printer format (AD-8127) PC format (RsCom) Manufacturer...
- Page 152 Output examples of calibration test with an external weight The GLP output when the weighing accuracy of the balance is checked using your own external weight is shown below. (No sensitivity adjustment is performed.) Clock to be used : Balance internal clock. Outputs data with the internal clock of the balance. Printer format (AD-8127) PC format (RsCom) Manufacturer...
- Page 153 Title block and End block Application/Operation A “Title block” and “End block” can be added before and after a series of weighing values for data management. Pressing the GLP button outputs the "Title block" and "End block" alternately. Output method using the keys Step 1.
- Page 154 RS-232C interface Display settings: MENU key System settings button Communication button RS-232C interface button [RS-232C interface] screen Baud rate Data bit, Parity bits RS-232C data format Back button Name Setting value (setting range) Description 600 bps, 1200 bps, 2400 bps , 4800 bps, Selects the baud rate for the serial Baud rate 9600 bps, 19200 bps, 38400 bps...
- Page 155 USB interface Display settings: MENU key System settings button Communication button USB interface button [USB interface] screen USB device mode USB data format Format the USB flash drive button Back button Setting value Name Description (setting range) Quick USB , Selects the connection method when USB device mode USB Virtual COM...
- Page 156 Wired LAN Display settings: MENU key System settings button Communication button Wired LAN button [Wired LAN] screen Name Setting value (setting range) Description IP address Displays the IP address of the balance. Displays the subnet mask of the Subnet mask For setting values, contact your LAN balance.
- Page 157 Bluetooth Display settings: MENU key System settings button Communication button Bluetooth button [Bluetooth] screen Bluetooth mode Connection status Bluetooth data format Back button Name Setting value (setting range) Description You can change the communication Bluetooth keyboard mode, Bluetooth Bluetooth mode serial mode mode.
- Page 158 UFC format Display settings: MENU key System settings button Communication button UFC format button [UFC format] screen Name Description UFC program command file Displays the UFC program command file being configured. being configured Files saved in internal You can view or select the UFC program command files stored in the memory balance's memory.
- Page 159 Language Display settings: MENU key System settings button Language button [Language] screen Language Back button Name Setting value (setting range) Description Japanese, English , Korean, Russian, Chinese, Spanish, Language Selects the language used for the display. German, French, Italian, Dutch, Portuguese Back button Returns to the previous screen.
- Page 160 External input switch Display settings: MENU key System settings button External input switch button [External input switch settings] screen External input switch 1 External input switch 2 Back button Name Setting value (setting range) Description RE-ZERO / PRINT , External input switch 1 Open/close the right breeze break You can change the settings for the door, Open/close the left breeze...
- Page 161 Balance status Display settings: MENU key Information button [Balance status] screen Balance information button Software version button History button Back button Name Description Balance information button Displays the [Balance information] screen. Software version button Displays the [Software version] screen. History button Displays the [History] screen.
- Page 162 Software version Display settings: MENU key Information button Software version button [Software version] screen Touch screen Device Weight sensor Breeze break Back button Name Description Touch screen Device Display the software version of each function used for the balance. Weight sensor Breeze break Back button Returns to the previous screen.
- Page 163 Log-in/log-out history Display settings: MENU key Information button History button Log-in/log-out history button [Log-in/log-out history] screen Name Description Time Displays the time when log-in/log-out operations were detected. User name Displays the user that performed the detected log-in/log-out operation. Displays the user level of the user that performed the log-in/log-out operation. Level 0: Operator 1: Supervisor...
- Page 164 Operation history Display settings: MENU key Information button History button Operation history button [Operation history] screen Name Description Time Displays the time when settings were changed. User name Displays the logged in user when the operation was detected. Item Displays the item for which settings were changed. Detail Displays the details of how settings were changed.
- Page 165 Sensitivity adjustment history Display settings: MENU key Information button History button Sensitivity adjustment history button [Sensitivity adjustment history] screen Name Description Time Displays the time when sensitivity adjustment was performed. User name Displays the logged in user when the operation was detected. Item Displays the results detected by sensitivity adjustment.
- Page 166 Impact shock detection history Display settings: MENU key Information button History button Impact shock detection history button [Impact shock detection history] screen Name Description Date/time Displays the time when the impact was detected. User name Displays the user who was logged in at the time of impact detection. Level Displays the impact detection level.
- Page 167 14. Underhook The built-in underhook is used for underhook weighing such as measurement of magnetic materials and the like. To use the underhook, open the cap on the bottom of the balance. Caution Do not apply excessive force to the underhook part. Do not open the cap unless necessary.
- Page 168 15. Interface Specifications (Standard) RS-232C specifications Connector D-Sub 9-pin (male) Transmission system EIA RS-232C Transmission form Asynchronous, bi-directional, all half duplex Transmission rate 5 times/second, 10 times/second Signal format Baud rate 600, 1200, 2400, 4800, 9600, 19200, 38400 bps Data bits 7 bits or 8 bits Parity EVEN or ODD ....
- Page 169 USB specifications Connector Mini-B USB (female), (dedicated for USB flash drives) USB Type A Standards USB 2.0 Device class (Human Interface Device) : Quick USB CDC (Communication Device Class) : Virtual COM Mini-B USB pin assignment USB Type A connector for USB flash drives Signal Pin No.
- Page 170 USB flash drive (USB host) In the BA-T series, you can connect a USB flash drive to the USB type A connector. You can save weighing data, etc. in the USB flash drive and import the data into Windows or macOS computers easily.
- Page 171 External input terminal (external input switch) The external input terminal provides the functions " RE-ZERO key input on the balance", " PRINT key input" and "opening and closing the breeze break doors" to the "contact input" via the wire extended from the connected plug.
- Page 172 Wired LAN specifications Connector RJ45 Protocol TCP/IP Display unit Wired LAN terminal To use the wired LAN terminal, you must select the setting value in the [Wired LAN] screen. Refer to “13.15. Wired LAN”. Settings in a red box are default values (factory settings). Display settings: MENU key System settings button Communication button...
- Page 173 To make the LAN connection, the settings of the IP address and subnet mask for a computer and the BA-T series need to be set. For the IP address allocation, ask your network administrator. The factory settings for the BA-T series are as follows. The port number is fixed. IP address...
- Page 174 16. Connection with Peripheral Devices BA-T series analytical balances are equipped with an RS-232C connector and a mini-B USB connector that allow connection to peripherals, personal computers, PLCs, etc. Cables required to connect to peripheral devices The connection cables that match the interface used with the peripheral device are as follows.
- Page 175 Data output method The operation of the balance can be changed by setting the function table to the settings suitable for the intended use. For details on the function table, refer to “13.7. Data output”. Display settings: MENU key System settings button Communication button Data output button [Data output] screen...
- Page 176 Examples: Connecting multiple peripheral devices Printer and personal computer connection Table of settings by connection method Connection method Function table for the connection interface/connected device Interface Device Class Description Selects the data output mode suitable for the intended use (Common settings) and settings of the printer/personal computer Serial Selects the data output format suitable for the settings of the...
- Page 177 17. Printing Weighing Value Data with a Printer Refer to the following setting examples for the printer settings and the balance's function table according to the printer to be used and the method of printing weighing data. For an AD-8127 multi-functional compact printer Printing only weighing value data Common settings for the balance when printing only weighing value data with the AD-8127 Item...
- Page 178 Printing weighing value data with the ID number and timestamp using the clock/calendar function of the balance Common settings of the balance to print weighing value data and other information with the AD-8127 Item Description Data format DP format Settings of the balance to print weighing value data and other information with the AD-8127 Balance function table AD-8127 function table Printing method...
- Page 179 Printing information other than weighing value data To print sensitivity adjustment/calibration test reports (GLP compliant output) or to perform output of the statistical calculation result calculated by the balance, change the setting of the printer to the dump print mode. Settings to print information other than weighing value data with the AD-8127 PRN .MODE Description...
- Page 180 18. Connecting to a Personal Computer Quick USB mode The quick USB mode is a function where a balance connected to a personal computer with a USB cable and inputs the output of the balance directly to the software on the personal computer, such as Excel or Word.
- Page 181 Virtual COM mode Virtual COM mode is a function where a balance connected to a personal computer with the included USB cable, creates a COM port on the personal computer and performs bidirectional communication. The supported OS is Windows 7 or later. When using the mode for the first time on a personal computer running anything other than Windows 10, it is necessary to install the dedicated driver on the personal computer.
- Page 182 Data communication software WinCT (USB Virtual COM mode or RS-232C) WinCT is data communication software for Windows that allows you to easily receive data on your computer the weighing data of the balance. Use the Virtual COM mode via USB interface or the RS- 232C interface for the communication settings of the personal computer.
- Page 183 19. Data Output Data output mode The timing of data output of the balance can be changed by using the [Data output mode] screen in the function table. You can configure the [Key mode], [Auto print mode], [Interval output mode] and [Stream mode] settings in the following screen.
- Page 184 Stream mode Regardless of whether the stabilization indicator is on or not, the weighing value will be output at the display refresh rate. Caution Depending on the display refresh rate and baud rate, all data may not be transmitted unless the baud rate is increased.
- Page 185 Weighing data format Selecting weighing data format You can select the output format for the RS-232C connection in the [RS-232C interface] screen. For configuration details, refer to “13.13. RS-232C interface”. MENU key System settings button Communication button RS-232C interface button In the [RS-232C interface] screen, select the output format.
- Page 186 If the gross/tare weight is added in the [Data to be added] screen of the function table, the second header corresponding to the output data is appended to the header. 2nd header Data Unit Terminator Net weight : Carriage return, ASCII 0Dh Gross weight : Line feed,...
- Page 187 MT format Used when connecting to devices manufactured by other companies. Note that there is no guarantee of compatibility. The length of data depends on the length of the unit. Has a two-character header. The data is zero-suppressed (leading zeros are replaced with spaces). Data Unit Terminator...
- Page 188 CSV format The data part and unit part of the A&D standard format are separated by a separator ",". Outputs the unit even when overloaded. When the decimal comma (,) is set, a semicolon (;) will be used instead as a separator. Unit Terminator Header...
- Page 189 Output examples of weighing data format When stable 1.234567 A&D When unstable -0.012345 A&D When overloaded (positive) A&D...
- Page 190 When overloaded (negative) A&D Unit code Unit A&D ct stands for “carat” and mom stands for “momme”. ASCII code symbols CR : Carriage return, ASCII 0Dh LF : Line feed, ASCII 0Ah : Space, ASCII 20h TAB : Horizontal tab, ASCII 09h...
- Page 191 Other data formats In addition to weighing data, various data can be added. Change the ON/OFF of each setting in the function table as necessary. ASCII code symbols : Carriage return, ASCII 0Dh : Space, ASCII 20h LF : Line feed, ASCII 0Ah Data number output When the statistical calculation function is used, the data number is output.
- Page 192 Date Outputs the date from the clock data of the balance. The order of YYYY/MM/DD can be changed in the setting. Consists of 10 characters (not including the terminator). When the NU or NU2 format is selected with the Quick USB mode, " ." is output instead of " / ". Date Terminator Quick USB connection (outputting the numerical values only)
- Page 193 20. Command By sending the specified commands from a personal computer or a PLC to the balance, it is possible to control the balance to perform "weighing data request", "key operations", "setting value change", etc. To send a command to the balance, add a terminator (CR LF or CR) to the command character string. You can set the terminator in the [Command settings] screen described in “13.11.
- Page 194 Commands to preset the tare value Command Description Sets the preset tare value. Add the unit in the A&D standard format (3 characters). If the display unit is PCS or percent (%), set the value in gram. PT: . In the case of setting the preset tare value to 1.23456 g, the input will be PT:1.23456 Values exceeding the weighing capacity cannot be set.
- Page 195 Commands to request other data Command Description Requests the tare weight value. Outputs the tare value set with the T or TR command. Requests the ID number. Requests the serial number. Requests the device name.
- Page 196 AK code and error codes When [AK (acknowledge), error code] is set to ON in the [Command settings] screen described in “13.11. Command settings”, the balance always responds to reception of all commands sent from a personal computer or a PLC. Checking the code that is responded improves the reliability of the communication.
- Page 197 Command usage examples In the following command examples, [AK (acknowledge), error code] is set to ON in the [Command settings] screen described in “13.11. Command settings” so that the balance outputs an AK code (acknowledgment, ASCII 06h) when it processes the command successfully. ASCII code symbols : Carriage return, ASCII 0Dh...
- Page 198 Example of weighing with tare function Personal computer side Time Balance side 0.000012 Before execution R command Command received AK C - - - - - - - - - Waiting for re-zero stability (processing) Process completed AK C Zero display Action: Place the container on the weighing pan.
- Page 199 21. UFC Function The UFC (Universal Flex Coms) function allows you to output contents of your choice when outputting the weighing data. You can also output a character string when printing a barcode with a label printer or the like. In order to use the UFC function, it is necessary to set the output data format used to [UFC format].
- Page 200 Enclose an ASCII code string of your choice in single quotation marks. Character strings that can be output are comprised of alphanumeric characters and symbols. The single quotation mark is represented by two single quotation marks. Example. Character string for outputting A'BC'D is ’A’’BC’’D’. To output the ASCII control code, enter "# + 2 hexadecimal characters"...
- Page 201 22. Key Lock Function The key switches of the balance and the IR sensor functions can be locked by sending a specified command to the balance. This is a useful function when you want to control the balance only with an external device such as a personal computer.
- Page 202 Sensitivity adjustment while the keys are locked The following commands are enabled on the sensitivity adjustment screen while the keys are locked. Command string Description Confirms the current input and proceeds to the next instruction. NEXT Operates the same as the Enter button Displays the [HOME] screen.
- Page 203 23. Error Codes Error code list Error Display Error Code Description and possible countermeasure Communications error EC, E00 A protocol error occurred in communications. Check the format, baud rate, and parity. Undefined command error EC, E01 An undefined command was found. Check the transmitted command.
- Page 204 Error Display Error Code Description and possible countermeasure Internal weight error Error 6 EC,E16 Applying the internal weight does not yield a change in the mass value as specified. Confirm that there is nothing on the pan and perform the operation from the beginning.
- Page 205 Error Display Error Code Description and possible countermeasure Overload error Weighing display E A sample beyond the balance weighing capacity has been placed on the pan. Remove the object from the pan. Weighing pan error Weighing display -E The weighing value is too light. Check that the weighing pan is installed correctly.
- Page 206 24. Ionizer The ionizer removes static electricity by irradiating the target object with positive or negative ions that are generated from four discharge electrodes by DC corona discharge. Ordinarily, insulators such as powders, filters, or weighing paper, tend to be charged when the humidity is 45% RH or less, and an error of a few milligrams may occur during weighing.
- Page 207 Optimizing the Ionizer Static elimination method can be optimized with the switches on the rear. Refer to the following table for the functions of switches. Change the settings of switch 1 and switch 2 as shown in the table when eliminating static electricity out of the effective range.
- Page 208 25. Maintenance Treatment of the balance When cleaning the balance, wipe it with a lint free cloth that is moistened with a little neutral detergent. Do not use organic solvents or chemical cleaning cloths to clean the balance. Do not disassemble the balance. When transporting the balance, use the packing material and box that the balance was contained at the time of purchase.
- Page 209 26. Troubleshooting Checking the balance performance and environment Since the balance is a precision instrument, in some cases it may not be able to measure correct values due to adverse effects of the measurement environment or measurement method. If repeatability is poor when the sample is loaded and unloaded several times, or if the balance seems to be operating abnormally, check the following items.
- Page 210 Asking for repair If the balance needs service or repair, contact your local A&D dealer. The balance is a precision instrument. Use much care when handling the balance when transporting the balance. Use the packing material and box that the balance was contained in at the time of purchase. Remove the weighing pan and pan support from the main unit of the balance.
- Page 211 27. Specifications Common specifications Function BA-6TE, BA-6DTE :approx. 5 g Internal weight BA-225TE, BA-225DTE, BA-125DTE : approx. 100 g Ionizer (static eliminator) Detached type Sensitivity drift (10 °C to 30 °C) ±2 ppm/°C (Automatic sensitivity adjustment OFF) Operating environment 5 °C to 40 °C, 85%RH or less (no condensation) Measurement accuracy: Temperature ±1.5 °C, relative Environment sensor humidity ±10 %, barometric pressure ±10 hPa...
- Page 212 Individual Specifications BA-6TE BA-6DTE 6.2 g Capacity 6.2 g 2.1 g 6.20008 g Maximum display 6.200084 g 2.100009 g 0.01 mg Readability 0.001 mg 0.001 mg Repeatability 0.01 mg (6 g) 0.0010 mg (1 g) Standard deviation 0.0030 mg (6 g) 0.0025 mg (1 g) (measuring point) ±0.02 mg...
- Page 213 BA-225TE BA-225DTE BA-125DTE 220 g 120 g Capacity 220 g 51 g 51 g 220.0008 g 120.0008 g Maximum display 220.00084 g 51.00009 g 51.00009 g 0.1 mg 0.1 mg Readability 0.01 mg 0.01 mg 0.01 mg Repeatability 0.1 mg (200 g) 0.1 mg (100 g)
- Page 214 (Unit: mm) Weighing unit/breeze break unit for BA-6TE / BA-6DTE Inside: 104 Opening: 106 Opening: 102 Inside: 64 Opening (inside): 67 Inside: 62 Opening: 46 Opening: 95 Weighing unit/Breeze break unit for BA-225TE / BA-225DTE / BA-125DTE Inside: 104 Opening: 106 Opening: 102 Inside: 132 Opening: 95...
- Page 215 (Unit: mm) Display unit Ionizer...
- Page 216 Peripherals AD-1671: Anti-vibration table for balances This anti-vibration table with a weight of approx. 27 kg and cushioning rubber reduces vibration from the floor and stabilizes the balance’s weighing display. AD-1684A: Electrostatic field meter Measures the electrostatic charge of measured objects, or the peripheral equipment such as a container or breeze break for the balance (on automated measuring lines and the like) and displays the measurement result.
- Page 217 AX-BA-31: Display cover for the BA series (5 pcs) Supplied display cover. AX-BM-NEEDLESET: Discharge electrode units for the ionizer (a set of 4 pcs) Electrode replacement unit for the ionizer. When replacing, replace the four pieces at the same time. The instruction manual can be downloaded from our website ( https://www.aandd.jp AX-KO2466-200: RS-232C cable 2m (D-sub 9-pin female - D-sub 9-pin female)
- Page 218 28. Compliance Compliance with FCC Rules This device contains transmitter module FCC ID: RYYEYSHCN This device complies with Part 15 of the FCC rules. Operation is subject to the following two conditions: (1) this device may not cause harmful interference, and (2) this device must accept any interference received, including interference that may cause undesired operation.
- Page 220 • Back cover: A&D Global A&D Company, Limited 3-23-14 Higashi-Ikebukuro, Toshima-ku, Tokyo 170-0013, JAPAN Telephone: [81] (3) 5391-6132 Fax: [81] (3) 5391-1566 A&D ENGINEERING, INC. 47747 Warm Springs Blvd, Fremont, California 94539, U.S.A. Tel: [1] (800) 726-3364 Weighing Support:[1] (888) 726-5931 Inspection Support:[1] (855) 332-8815 A&D INSTRUMENTS LIMITED Unit 24/26 Blacklands Way, Abingdon Business Park, Abingdon, Oxfordshire OX14 1DY United Kingdom...