
Related Manuals for Marantz DV3002


Summary of Contents for Marantz DV3002
-
Page 1: Dvd Player
CLASS 1 LASER PRODUCT LUOKAN 1 LASERLAITE KLASS 1 LASERAPPARAT Model DV3002 User Guide DVD Player... -
Page 2: Copy Protection
CONGRATULATIONS ON YOUR PURCHASE OF THIS FINE MARANTZ PRODUCT. MARANTZ is on the leading edge of DVD research for consumer products and this unit incorporates the latest technological developments. We are sure you will be fully satisfi ed with the DVD player. -
Page 3: Important Safety Instructions
IMPORTANT SAFETY INSTRUCTIONS READ BEFORE OPERATING EQUIPMENT (for U. S. A only) This product was designed and manufactured to meet strict quality and safety standards. There are, however, some installation and operation precautions which you should be particularly aware of. Read Instructions –... -
Page 4: Disc Storage
- The equipment shall be installed near the power supply so that the power supply is easily accessible. WARRANTY For warranty information, contact your local Marantz dis- trib u tor. RETAIN YOUR PURCHASE RECEIPT Your purchase receipt is your permanent record of a valua- ble purchase. -
Page 5: Table Of Contents
Table Of Contents 1 Before You Start Features...6 What’s in the box...7 Putting the batteries in the remote control ...7 Using the remote control ...7 Discs compatible with this player ...8 DVD-Video regions...9 General Information ...9 MP3 compatibility information ...9 WMA compatibility information...9 JPEG compatibility information ...9 DivX compatibility information ...9... -
Page 6: Before You Start
Before You Start Features An HDCP-compatible HDMI* terminal is provided to ensure the very highest picture and digital sound quality by fully digital transmission. This unit is equipped with an HDCP- compatible digital image output terminal (HDMI) to provide copyright protection. Direct digital transmission without analog conversion of DVD image data makes it possible to enjoy real-life images without... -
Page 7: What's In The Box
Before You Start What’s in the box Thank you for buying this MARANTZ prod uct. Please confi rm that the following accessories are in the box when you open • Remote control • AAA/R03 dry cell batteries x2 • Audio/Video cable (yellow/red/white) •... -
Page 8: Discs Compatible With This Player
DivX fi les. *Some copy-controlled CDs may not conform to offi cial CD standards. They are special discs and may not play on the DV3002. *The DV3002 does not support the non-DVD side of a Dual Disc. Video CD compatibility: • Logo: •... -
Page 9: Dvd-Video Regions
Before You Start DVD-Video regions All DVD-Video discs carry a region mark on the case somewhere that indicates which region(s) of the world the disc is com pat i ble with. Your DVD player also has a region mark, which you can fi nd on the rear panel. -
Page 10: Connecting Up
Connecting Up Easy setup This easy setup is the minimum set of connections you need to start watching DVD-Video discs. Both sound and picture are fed directly to your TV using the sup plied audio/video cables. For other possible con nec tions, see pages 1 1 and 12. Connect to a pair of stereo audio inputs on your TV using the sup plied Audio/Video cable. -
Page 11: Home Theater Video Connections
Connecting Up Home theater video con nec tions This player outputs video in a number of different ways. Choose the one most suit able for your system using the guide below. If your TV has a component video input, we rec om mend using it to connect directly to the COM PO NENT VIDEO OUT of this player. -
Page 12: Home Theater Audio Connections
Connecting Up Home theater audio connections This player outputs multi-channel audio in digital form. Check the manual for your amplifi er/receiver to see what equipment it is com pat i ble with (especially which digital formats such as Dolby Digital, DTS, etc. It can decode). -
Page 13: Controls & Displays
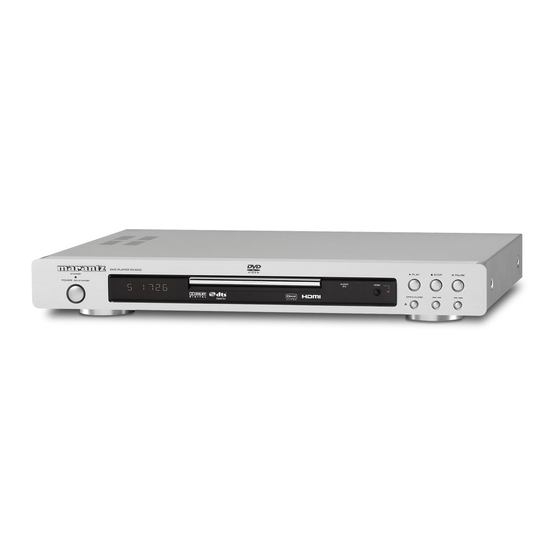
Controls & Displays Front panel DVD PLAYER DV3002 STANDBY POWER ON/STANDBY STANDBY indicator • Lights when the unit is in standby. Disc tray • Place the disc here. AUDIO EX indicator • Lights when the AUDIO EX is activated using the AUDIO EX button on the remote control. -
Page 14: Remote Control
ANGLE – page 23 INPUT ( % / fi ) button – These buttons can switch between devices compatible with Marantz receivers. Refer to the receiver instruction manual for further details. • Applicable models: PM-1 1S1, PM-15S1, PM6001, PM7001, PM8001, SR9600. -
Page 15: Getting Started
Getting Started Playing discs The basic playback controls for playing discs are cov ered here. Further func tions are detailed in the next chapter. Note • Throughout this manual, the term “DVD” means DVD-Video, and DVD R/RW. If a function is specifi c to a par tic u lar kind of DVD disc, it is specifi... -
Page 16: Navigating Dvd Disc Menus
Getting Started Navigating DVD disc menus Many DVD discs contain menus. Sometimes these are displayed automatically when you start playback; others only appear when you press MENU or TOP-M. Button What it does TOP-M Displays the “top menu” of a DVD disc. This varies with the disc. -
Page 17: Playing Discs
Playing Discs Introduction • Many of the functions covered in this chapter apply to DVD discs, Video CDs and CDs, although the exact operation of some varies slightly with the kind of disc loaded. • When playing DVD discs, if the appears on-screen when you try to use a particular function, either the player or the disc doesn’t allow the use of that... - Page 18 Playing Discs • Use ( 2 / 3 / 5 / ∞ ) to select a track or use the numeric buttons to enter the selected track number. • To go to the previous or next page, press 4 / ¢ . •...
-
Page 19: Fast Forward/Fast Reversed
Playing Discs Fast Forward/Fast Reverse DVD-Video Video-CD The video images on DVD and VCD can be viewed as a Fast Forward and Fast Reverse with no sound. In case of CD, the sound can be listened as a Fast Forward and Fast Reverse with sound. Viewing in Fast Forward/Fast Reversed Press and hold ¢... -
Page 20: Still Frame/Slow Play/Frame Advance Playback
Playing Discs Still Frame/Slow Play/Frame Advance Playback DVD-Video Video-CD The video images on DVD and Video CD can be viewed as a still frame, played back at slow speeds and even advanced frame by frame (Forward only). Viewing a Paused Picture Press 8 (PAUSE). -
Page 21: Using The Repeat Play
Playing Discs Using the Repeat Play DVD-Video Video-CD JPEG DivX You can set the player to repeat individual tracks on CDs or Video CDs, chapters or titles on DVD discs, or the whole disc. It’s also possible to loop a section of a disc. You can’t use any repeat mode or looped play with a Video CD playing in PBC mode. -
Page 22: Looping A Section Of A Disc
Playing Discs Looping a section of a disc Video-CD Press A-B once at the start of the section you want to repeat, then again at the end. Playback immediately jumps back to the start point and plays the loop round and round. •... -
Page 23: Switching Camera Angles
Playing Discs Switching Camera Angles DVD-Video Some DVD-Video discs feature scenes shot from two or more angles. Check the disc box for details: it should be marked with a icon if it contains camera-angle scenes. • To switch the camera angle, press ANGLE. Note •... -
Page 24: Switching The Audio Language
Playing Discs Switching the Audio Language DVD-Video When playing a DVD-Video disc recorded with dialog in two or more languages, you can switch the audio language at anytime during playback. • To display/switch the audio language, press AUDIO repeatedly. The current audio language is shown on-screen. •... -
Page 25: Play Back Information
Playing Discs Play back Information This DVD system can display the disc playback information (for example, title or chapter number, elapsed playing time, audio/subtitle language) and a number of operations can be done without interrupting disc playback. DVD-Video Video-CD During playback, press DISP. A list of available disc information appears •... -
Page 26: Time Display
Playing Discs Angle Press 5 / ∞ to highlight “Angle”, then press ENTER to access. Use the numeric keypad (0-9) to enter in a valid number. Press ENTER to confi rm. Playback will go to the selected angle. Time Display Video-CD Press 5 / ∞... -
Page 27: Playing An Mp3/Divx/Jpeg/Windows Media Audio Disc
Playing Discs Playing an MP3/DivX/JPEG/ ™ Windows Media Audio disc This DVD system can playback most of the ™ MP3, JPEG and Windows Media recorded on a CD-R/RW disc or commercial Insert a disc. The disc reading time may exceed 30 •... -
Page 28: Playing A Jpeg Image Fi Le (Slide Show)
Playing Discs Playing a JPEG image fi le (slide show) Insert a Picture disc (Kodak Picture CD, • JPEG). For a Kodak disc, the slide show will begin automatically. For a JPEG disc, the picture menu will appear on the TV. -
Page 29: Playing Mp3/Wma Music And Jpeg Pictures Simultaneously
Playing Discs Playing MP3/WMA music and JPEG pictures simultaneously You can create a musical slide show if the disc contains both the MP3/WMA music and JPEG picture fi les. Insert an MP3/WMA disc that contains music and pictures. Select an MP3/WMA track in the menu and press PLAY 3 to start playback. -
Page 30: Playing A Divx Disc
Playing Discs Playing a DivX disc This DVD system supports the playback of DivX movies which you can copy from your computer onto a CD-R/RW, DVD R/ RW disc (see page 9 for more information). Insert a DivX disc. Press PLAY to start playback. -
Page 31: Using The Setup Menu
Playing Discs Using the Setup Menu Before using the player, you should specify the settings to be used in accordance with the conditions under which the player is to be used. Note that once changed, the settings will be saved and remain the same even after the power has been turned off until the settings are changed again. -
Page 32: Dvd Setup Menu
DVD Setup Menu A black dot ( ) in di cates the default setting * It can be set only during STOP. OSD LANGUAGE DIVX(R) VOD CODE DISC LOCK * GENERAL DISPLAY DIM PROGRAM * SETUP SCREEN SAVER SLEEP AUTO STANDBY AUDIO OUT DIGITAL AUDIO AUDIO SETUP... -
Page 33: Setting Up The General Setup Page
Selects the preferred language for the DVD system on-screen display menu. DivX(R) VOD CODE MARANTZ provides you with the DivX (Video On Demand) registration code that allows you to rent and purchase videos using VOD service. Press 3 to see the ®... - Page 34 DVD Setup Menu DISC LOCK • Default setting: UNLOCK Not all discs are rated or coded by the disc maker. You can prevent a specifi c disc from playing by locking the disc. Up to 40 discs can be locked. •...
-
Page 35: Setting Up The Audio Setup Page
DVD Setup Menu Setting up the AUDIO SETUP page Press the SETUP button. Select AUDIO SETUP PAGE using the cursor buttons ( 2 / 3 ), then press the ENTER button. Use the cursor buttons ( 5 / ∞ ) to select the desired item, then press the cursor ( 3 ) or ENTER button. - Page 36 DVD Setup Menu LPCM OUT • Default setting: 48kHz If you connect the DVD Player to a PCM compatible receiver via the digital terminals, such as coaxial, you may need to adjust “LPCM Output”. Discs are recorded at a certain sampling rate. The higher the sampling rate, the better the sound quality.
-
Page 37: Setting Up The Video Setup Page
DVD Setup Menu Setting up the VIDEO SETUP page Press the SETUP button. Select VIDEO SETUP PAGE using the cursor buttons ( 2 / 3 ), then press the ENTER button. Use the cursor buttons ( 5 / ∞ ) to select the desired item, then press the cursor ( 3 ) or ENTER button. -
Page 38: Home Theater Video Connections 1
DVD Setup Menu CHANGING PAL TO NTSC 1.ENSURE THAT YOUR TV SYSTEM SUPPORTS NTSC STANDARD. 2.IF THERE IS A DISTORTED PICTURE DISPLAYED ON THE TV.WAIT IS SECONDS FOR AUTO RECOVER Video output format Disc Format system YCbCr NTSC PAL Progressive NTSC NTSC Progressive MULTI... - Page 39 DVD Setup Menu To deactivate Progressive manually: 1) Press OPEN CLOSE 0 to open the disc tray. 2) Press 2 (LEFT) on the remote control. Press AUDIO on the remote control. The DVD background screen appears on the TV. • There are some progressive scan TVs and high- defi...
- Page 40 DVD Setup Menu HDMI VIDEO • Default setting: AUTO Selects a suitable video resolution depending on the capability of the connected TV/device to enhance the HDMI video output. • 480P/525P – Progressive output in 480 lines for NTSC TV • 576P/625P – Progressive output in 576 lines for PAL TV •...
- Page 41 DVD Setup Menu DVI OUTPUT RANGE • Default setting: STANDARD When connecting the DVI unit, black may rise to the surface depending on the display. • ENHANCED – Image data values between 0 (black) and 255 (white) • STANDARD – Image data values between 16 (black) and 235 (white) COMPONENT (Euro model only)
-
Page 42: Setting Up The Preference Page
DVD Setup Menu Setting up the PREFERENCE page Press 7 (STOP) twice to stop playback (if any), then press SETUP. Select PREFERENCE PAGE using the cursor buttons ( 2 / 3 ), then press the ENTER button. Use the cursor buttons ( 5 / ∞ ) to select the desired item, then press the cursor ( 3 ) or ENTER button. - Page 43 DVD Setup Menu DISC MENU Selects the preferred disc menu language for DVD playback. • Default setting: ENGLISH Use the 5 / ∞ keys to select a language and press ENTER to confi rm. Note • For some discs, selection can be made using the DVD menu.
- Page 44 DVD Setup Menu Previewing VR format During playback, press SCAN. Press 5 / ∞ to highlight either TITLE DIGEST or TITLE INTERVAL. SELECT DIGEST TYPE TITLE DIGEST TITLE INTERVAL Press ENTER to select the function. • TITLE DIGEST – This function will display thumbnail pictures of titles on the screen.
- Page 45 DVD Setup Menu DEFAULT This feature enables you to reset all the setup menu options and your personal settings to the factory defaults, except your password for Parental Control and Disc Lock. Press ENTER to confi rm the default reset.
-
Page 46: Additional Information
Additional Information Language Codes This page is used to select other languages. This does not affect the options in AUDIO, SUBTITLE or DISC MENU. Abkhazian 6566 Afar 6565 Afrikaans 6570 Albanian 8381 Amharic 6577 Arabic 6582 Armenian 7289 Assamese 6583 Avestan 6569 Aymara... -
Page 47: Handling Discs
The DVD player’s lens should not become dirty in normal use, but if for some reason it should mal func tion due to dust or dirt, consult your nearest MARANTZ-authorized service center. Al though lens cleaners for CD players are com mer cial ly available, we do not recommend using them since some may damage the lens. -
Page 48: Hints On Installation
Additional Information Hints on installation We want you to enjoy using this unit for years to come, so please bear in mind the following points when choos- ing a suitable location for it: Do... Use in a well-ventilated room. Place on a solid, fl at, level surface, such as a table, shelf or stereo rack. -
Page 49: Troubleshooting
If the trouble cannot be rectifi ed after checking the items below, ask your nearest MARANTZ authorized service center or your dealer to carry out repair work. The disc is ejected automatically after loading. - Page 50 Additional Information The remote control doesn't seem to work. • The remote control is too far from the player, or the angle with the remote sensor is too wide. Use the remote control within its operating range (page • The batteries are exhausted. Put in new batteries (page 7).
- Page 51 Additional Information A disc containing the MP3 tracks won’t play. • If the disc is a recordable CD, make sure that the disc had been fi nalized. Check that the track(s) are in the MPEG1 Audio Layer 3 format. Some MP3 tracks appear to be missing from a disc. •...
-
Page 52: Specifi Cations
Additional Information Specifi cations General System DVD-Video, DVD R/RW, Video CD, CD, MP3 fi les, JPEG fi les, DviX and WMA Power requirements (U.S.A.)... 120 V, 60Hz Power requirements (Europe) ...230 V, 50/60Hz Power consumption...12 W Power consumption in standby mode...0.9 W Weight...3 kg (6 lb 10 oz) Dimensions ... - Page 53 Additional Information...
- Page 54 Printed in China 2007/05 00M39CW851250...