Makita DC18RA Manual
Fast charger
Hide thumbs
Also See for DC18RA:
- Instructions manual (57 pages) ,
- Manual (40 pages) ,
- User manual (37 pages)
Table of Contents
Advertisement
Available languages
Available languages
Fast Charger
Chargeur rapide
Cargador rápido
Symbols
The followings show the symbols used for the charger and battery. Be sure that you understand their meaning before
use.
Symboles
Nous donnons ci-dessous les symboles utilisés pour le chargeur et la batterie. Assurez-vous que vous en avez bien
compris la signification avant d'utiliser l'outil.
Símbolos
A continuación se muestran los símbolos utilizados con el cargador y la batería. Asegúrese de que entiende su signifi-
cado antes de usarla.
• Ready to charge
• Prêt à recharger
• Preparación para la carga
• Charging
• En charge
• Cargando
• Charging complete
• Recharge terminée
• Completada la carga
• Delay charge (Battery cooling or too cold battery)
• Charge différée (Batterie en cours de refroidissement ou batterie trop froide)
• Retraso de la carga (La batería se está enfriando o está muy fría)
• Defective battery
• Batterie défectueuse
• Batería defectuosa
• Conditioning
• Recharge normale
• Acondicionamiento
• Cooling abnormality
• Problème de refroidissement
• Anormalidad en la carga
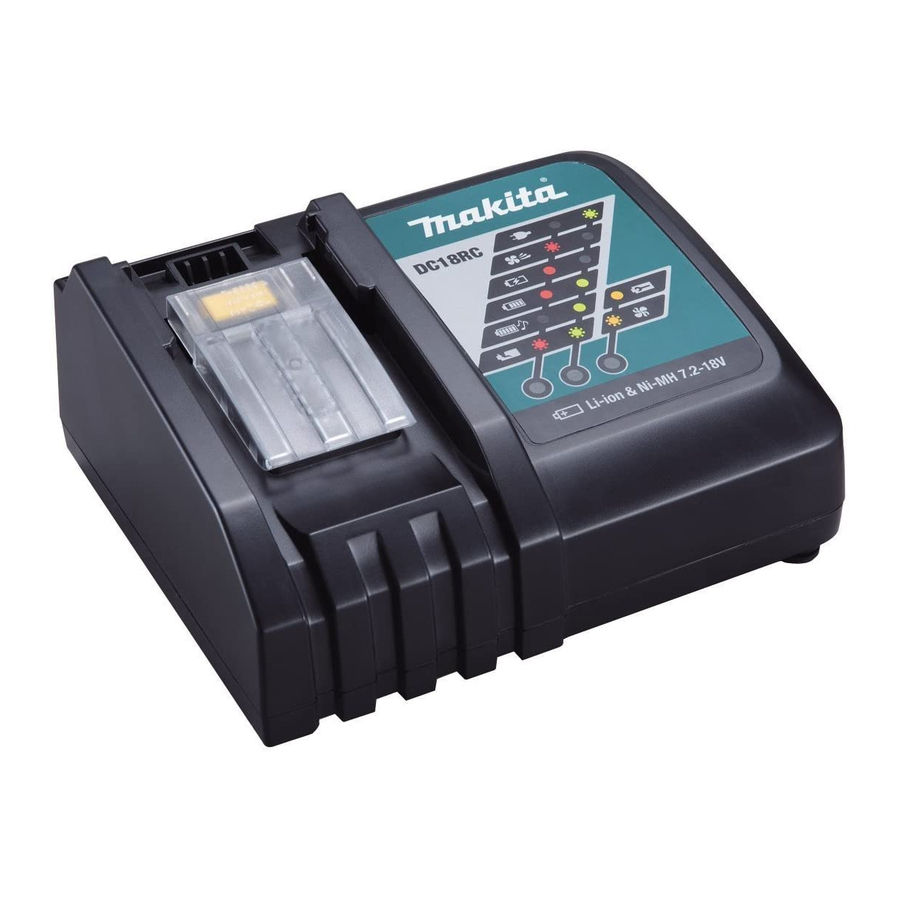
DC18RA
DC18RC
Advertisement
Table of Contents

Related Manuals for Makita DC18RA


Summary of Contents for Makita DC18RA
- Page 1 DC18RA DC18RC Fast Charger Chargeur rapide Cargador rápido Symbols The followings show the symbols used for the charger and battery. Be sure that you understand their meaning before use. Symboles Nous donnons ci-dessous les symboles utilisés pour le chargeur et la batterie. Assurez-vous que vous en avez bien compris la signification avant d’utiliser l’outil.
- Page 2 • Do not short batteries. • Ne jamais court-circuiter les bornes d’une batterie. • No provoque un cortocircuito en las baterías. IMPORTANT: Read Before Using. IMPORTANT : Lire ce qui suit avant d’utiliser cet outil. IMPORTANTE: Leer antes de usar.
-
Page 3: Important Safety Instructions
10. Make sure cord is located so that it will not be stepped on, tripped over, or otherwise subjected to damage or stress. 11. Do not operate charger with damaged cord or plug. If the cord or plug is damaged, ask Makita authorized service center to replace it in order to avoid a hazard. - Page 4 6. Preset melody sound remains stored even when the charger is unplugged. NOTE: • The battery charger is for charging Makita-battery cartridge. Never use it for other purposes or for other manufacturer’s batteries. • When you charge a battery cartridge which is new or has not been used for a long period of time, it may not accept a full charge until after discharging it completely and recharging a couple of times.
- Page 5 (1) le chargeur de batterie, sur (2) la batterie et sur (3) le produit utilisant la batterie. ATTENTION — Pour réduire le risque de blessure, ne chargez que les batteries rechargeables MAKITA qui figurent sur l’étiquette du chargeur. Les autres types de batteries peuvent causer des blessures et entraî- ner des dommages en explosant.
- Page 6 6. La mélodie préréglée demeure en mémoire même lorsque vous débranchez le chargeur. NOTE : • Le chargeur de batterie est conçu pour les batteries Makita. Ne jamais l’utiliser à d’autres fins ou avec les batteries d’autres fabricants. • Lorsque vous chargez une cartouche de batterie neuve ou restée inutilisée pendant une période prolongée, il se peut que vous deviez la recharger et la décharger à...
- Page 7 Tension 9,6 V 12 V 14,4 V Capacité (Ah) Temps de charge (en minutes) Nombre de cellules — — — BH9020A — — — BH1220/C BH1420 Cartouche de batterie au Ni-MH — — — BH9033A — — — BH1233/C BH1433 Tension 14,4 V 18 V...
-
Page 8: Instrucciones De Seguridad Importantes
(1) el cargador de baterías, (2) la batería, y (3) el producto con el que se utilice la batería. PRECAUCION — Para reducir el riesgo de sufrir heridas, cargue solamente las baterías recargables MAKITA marcadas en la etiqueta de cargador. Otros tipos de baterías podrán explotar y ocasionar heridas personales y daños. - Page 9 6. El sonido de melodía permanecerá almacenado aunque desenchufe el cargador. NOTAS: • El cargador de baterías es sólo para cargar cartuchos de batería Makita. No lo utilice nunca con otros fines ni para baterías de otros fabricantes. • Cuando cargue un cartucho de batería que sea nuevo o que no haya sido utilizado durante un largo periodo de tiempo, es posible que no acepte una carga completa hasta después de haberlo descargado completamente y...
- Page 10 Tensión 9,6 V cc 12 V cc 14,4 V cc Capacidad (Ah) Tiempo de carga (minutos) Número de celdas — — — 1,7 Ah 20 min BH9020A — — 2,0 Ah 20 min — BH1220/C BH1420 2,0 Ah 15 min Cartucho de batería Ni-MH —...
- Page 12 Makita Corporation 3-11-8, Sumiyoshi-cho, Anjo, Aichi 446-8502 Japan 884676H946 www.makita.com...
- Page 13 INSTRUCTION MANUAL MANUAL DE INSTRUCCIONES Cordless Hammer Driver Drill Rotomartillo Atornillador Inalámbrico XPH12 IMPORTANT: Read Before Using. IMPORTANTE: Lea antes de usar.
-
Page 14: Specifications
ENGLISH (Original instructions) SPECIFICATIONS Model: XPH12 Drilling capacities Masonry 13 mm (1/2") Steel 13 mm (1/2") Wood 38 mm (1/1/2") Fastening capacities Wood screw 10 mm x 90 mm (3/8" x 3-1/2") Machine screw M6 (1/4") No load speed (RPM) High (2) 0 - 2,000 /min Low (1) - Page 15 Remove any adjusting key or wrench before Under abusive conditions, liquid may be turning the power tool on. A wrench or a key left ejected from the battery; avoid contact. If con- attached to a rotating part of the power tool may tact accidentally occurs, flush with water. If result in personal injury.
-
Page 16: Functional Description
Use of non-genuine Makita batteries, or batteries that have been altered, may result in the battery bursting direct current causing fires, personal injury and damage. It will also void the Makita warranty for the Makita tool and charger. no load speed Tips for maintaining maximum battery life revolutions or reciprocation per minute Charge the battery cartridge before completely discharged. -
Page 17: Overload Protection
To remove the battery cartridge, slide it from the tool NOTE: Depending on the conditions of use and the while sliding the button on the front of the cartridge. ambient temperature, the indication may differ slightly To install the battery cartridge, align the tongue on the from the actual capacity. battery cartridge with the groove in the housing and slip it into place. -
Page 18: Electric Brake
This tool is equipped with an electric brake. If the tool age the tool. consistently fails to quickly stop after the switch trigger CAUTION: is released, have the tool serviced at a Makita service When not operating the tool, center. always set the reversing switch lever to the neu- tral position. - Page 19 CAUTION: Always set the speed change lever fully to the correct position. If you operate the tool with the speed change lever positioned halfway between the "1" side and "2" side, the tool may be damaged. CAUTION: Do not use the speed change lever while the tool is running. The tool may be damaged.
-
Page 20: Installing Hook
Installing driver bit holder ASSEMBLY Optional accessory CAUTION: Always be sure that the tool is switched off and the battery cartridge is removed before carrying out any work on the tool. Installing or removing driver bit/ drill bit Optional accessory ► 1 . -
Page 21: Drilling Operation
NOTICE: Never use gasoline, benzine, thinner, alcohol or the like. Discoloration, deformation or cracks may result. To maintain product SAFETY and RELIABILITY, repairs, any other maintenance or adjustment should be performed by Makita Authorized or Factory Service Centers, always using Makita replacement parts. ► 1 . Blow-out bulb After drilling the hole, use the blow-out bulb to clean the dust out of the hole. 9 ENGLISH... -
Page 22: Optional Accessories
Should any trouble develop during this one year period, return the COMPLETE tool, freight prepaid, to one of Makita’s Factory or Authorized Service Centers. If inspection shows the trouble is caused by defective workmanship or material, Makita will repair (or at our option, replace) without charge. This Warranty does not apply where: • repairs have been made or attempted by others: •... -
Page 23: Especificaciones
ESPAÑOL (Instrucciones originales) ESPECIFICACIONES Modelo: XPH12 Capacidades de taladrado Mampostería 13 mm (1/2") Acero 13 mm (1/2") Madera 38 mm (1/1/2") Capacidades de fijación Tornillo para madera 10 mm x 90 mm (3/8" x 3-1/2") Tornillo de máquina 6 mm (1/4") Velocidad sin carga (RPM) Alta (2) 0 - 2 000 r/min Baja (1) 0 - 500 r/min... - Page 24 Seguridad personal Realice el mantenimiento a las herramientas eléctricas. Compruebe que no haya partes Manténgase alerta, preste atención a lo que móviles desalineadas o estancadas, piezas está haciendo y utilice su sentido común rotas y cualquier otra condición que pueda cuando opere una herramienta eléctrica.
- Page 25 Makita. El uso de baterías no originales revoluciones o alternaciones por minuto, frecuencia de rotación de Makita, o de baterías alteradas, puede ocasionar que las baterías exploten causando un incendio, lesiones número de percusiones personales y daños. Asimismo, esto invalidará la garan- tía de Makita para la herramienta y el cargador Makita. 13 ESPAÑOL...
-
Page 26: Descripción Del Funcionamiento
Consejos para alargar al máximo Para colocar el cartucho de batería, alinee la lengüeta sobre el cartucho de batería con la ranura en la carcasa la vida útil de la batería y deslice en su lugar. Inserte por completo hasta que se fije en su lugar con un pequeño clic. Si puede ver el Cargue el cartucho de batería antes de que indicador rojo del lado superior del botón, esto indica... -
Page 27: Protección Contra Sobrecarga
Cuando la capacidad de la batería no es suficiente, la la herramienta falla constantemente en detenerse tras herramienta se detiene automáticamente. En este caso, soltar el gatillo interruptor, lleve la herramienta a mante- retire la batería de la herramienta y cárguela. nimiento a un centro de servicio Makita. NOTA: La protección contra sobrecalentamiento Iluminación de la luz delantera (para la batería) funcionará únicamente con baterías con marca de estrella. ► 1 . Luz ► 1 . -
Page 28: Cambio De Velocidad
NOTA: Cuando la herramienta se sobrecaliente, ésta PRECAUCIÓN: Coloque siempre la palanca se detendrá automáticamente y la lámpara comen- de cambio de velocidad exactamente en la posi- zará a destellar. En este caso, suelte el gatillo inte- ción correcta. Si usted utiliza la herramienta con la rruptor. La lámpara se apagará en un minuto. palanca de cambio de velocidad puesta a medias NOTA: Utilice un paño seco para quitar la suciedad de entre la posición “1” y “2”, la herramienta puede la lente de la lámpara. Tenga cuidado de no rayar la lente... -
Page 29: Montaje
Esta herramienta cuenta con tres modos de • Modo de atornillado (rotación con embrague) accionamiento. Seleccione el modo apropiado para el trabajo en • Modo de taladrado (rotación solamente) cuestión. Gire el anillo de cambio de modo de acciona- miento y alinee la marca que haya seleccionado con la • Modo de taladrado y martilleo (rotación con flecha en el cuerpo de la herramienta. percusión) Ajuste de la torsión de apriete La torsión de apriete puede ajustarse en 21 niveles girando el anillo de ajuste. Alinee las graduaciones con la flecha en el cuerpo de la herramienta. Puede conse- guir una fijación de torsión mínima en 1 y una torsión máxima en 21. Antes de la operación real, coloque un tornillo de prueba en el material o algún duplicado del material para determinar qué nivel de torsión se requiere para la aplicación particular. A continuación se muestra una idea general de la relación entre el tamaño del tornillo y... -
Page 30: Operación
Instalación del gancho OPERACIÓN PRECAUCIÓN: Siempre inserte completa- mente el cartucho de batería hasta que quede asegurado en su lugar. Si puede ver el indicador rojo del lado superior del botón, esto indica que no ha quedado completamente asegurado. Insértelo por completo hasta que el indicador rojo no pueda verse. De lo contrario, podría salirse accidentalmente de la herramienta y ocasionarle lesiones a usted o a alguien a su alrededor. -
Page 31: Mantenimiento
Para mantener la SEGURIDAD y FIABILIDAD del pro- limpiar el polvo del agujero. ducto, las reparaciones, y cualquier otra tarea de man- Operación de taladrado tenimiento o ajuste deberán ser realizadas en centros de servicio autorizados o de fábrica Makita, empleando siempre repuestos Makita. Primero, gire el anillo de cambio de modo de accio- namiento de tal forma que la flecha apunte hacia la marca . Después proceda como sigue. Taladrado en madera Cuando taladre en madera, podrá obtener mejores resultados si utiliza brocas para madera equipadas con un tornillo guía. El tornillo guía facilita el taladrado... -
Page 32: Accesorios Opcionales
GARANTÍA LIMITADA DE UN AÑO DE MAKITA Ésta Garantía no aplica para México Política de garantía Cada herramienta Makita es inspeccionada y probada exhaustivamente antes de salir de la fábrica. Se garan- tiza que está libre de defectos de mano de obra y mate- riales por el período de UN AÑO a partir de la fecha ori- ginal de compra. Si durante este período de un año se desarrollara algún problema, devuelva la herramienta COMPLETA, con el envío prepagado, a un centro de... - Page 36 Para reducir la exposición a estos productos químicos: trabaje en un área bien ventilada y póngase el equipo de seguridad indicado, tal como las máscaras contra polvo que están especialmente diseñadas para filtrar partículas microscópicas. Makita Corporation 3-11-8, Sumiyoshi-cho, Anjo, Aichi 446-8502 Japan 885509-948...
- Page 37 INSTRUCTION MANUAL MANUAL DE INSTRUCCIONES Cordless Impact Driver Atornillador de Impacto Inalámbrico XDT13 IMPORTANT: Read Before Using. IMPORTANTE: Lea antes de usar.
-
Page 38: Specifications
ENGLISH (Original instructions) SPECIFICATIONS Model: XDT13 Fastening capacities Machine screw 4 mm - 8 mm (5/32" - 5/16") Standard bolt 5 mm - 16 mm (3/16" - 5/8") High tensile bolt 5 mm - 14 mm (3/16" - 9/16") No load speed (RPM) 0 - 3,400 /min Impacts per minute 0 - 3,600 /min... - Page 39 Do not overreach. Keep proper footing and Service balance at all times. This enables better control Have your power tool serviced by a qualified of the power tool in unexpected situations. repair person using only identical replacement Dress properly. Do not wear loose clothing or parts. This will ensure that the safety of the power jewellery.
-
Page 40: Functional Description
CAUTION: Always install the battery cartridge also void the Makita warranty for the Makita tool and fully until the red indicator cannot be seen. If not, charger. it may accidentally fall out of the tool, causing injury to you or someone around you. -
Page 41: Overheat Protection
This tool is equipped with an electric brake. If the tool consistently fails to quickly stop after the switch trigger When the battery is operated in a manner that causes is released, have the tool serviced at a Makita service it to draw an abnormally high current, the tool automat- center. ically stops without any indication. In this situation, turn the tool off and stop the application that caused the tool to become overloaded. Then turn the tool on to restart. - Page 42 Lighting up the front lamp ASSEMBLY CAUTION: Always be sure that the tool is switched off and the battery cartridge is removed before carrying out any work on the tool. Installing or removing driver bit/ socket bit 12 mm 9 mm ► 1 .
-
Page 43: Operation
Proper fastening torque for standard bolt NOTE: If the driver bit is not inserted deep enough into the sleeve, the sleeve will not return to its original N•m position and the driver bit will not be secured. In this (ft•lbs) case, try re-inserting the bit according to the instruc- tions above. -
Page 44: Maintenance
Operating the tool at low speed will cause a reduc- workmanship or material, Makita will repair (or at our tion in the fastening torque. option, replace) without charge. This Warranty does not apply where: •... -
Page 45: Especificaciones
ESPAÑOL (Instrucciones originales) ESPECIFICACIONES Modelo: XDT13 Capacidades de apriete Tornillo de máquina 4 mm - 8 mm (5/32" - 5/16") Tornillo estándar 5 mm - 16 mm (3/16" - 5/8") Tornillo de alta resistencia 5 mm - 14 mm (3/16" - 9/16") Velocidad sin carga (rpm) 0 - 3 400 r/min Impactos por minuto 0 - 3 600 ipm... - Page 46 Seguridad personal Realice el mantenimiento a las herramientas eléctricas. Compruebe que no haya partes móvi- Manténgase alerta, preste atención a lo que les desalineadas o estancadas, piezas rotas y está haciendo y utilice su sentido común cualquier otra condición que pueda afectar al cuando opere una herramienta eléctrica.
- Page 47 PRECAUCIÓN: Utilice únicamente baterías número de percusiones originales de Makita. El uso de baterías no origina- les de Makita, o de baterías alteradas, puede ocasio- nar que las baterías exploten causando un incendio, lesiones personales y daños. Asimismo, esto inva- Instrucciones importantes de lidará la garantía de Makita para la herramienta y el seguridad para el cartucho de cargador Makita.
-
Page 48: Descripción Del Funcionamiento
Indicación de la capacidad restante DESCRIPCIÓN DEL de la batería FUNCIONAMIENTO Sólo para cartuchos de batería con una “B” al final del número de modelo PRECAUCIÓN: Asegúrese siempre de que la herramienta esté apagada y el cartucho de batería haya sido extraído antes de realizar cualquier ajuste o comprobación en la herramienta. - Page 49 Si de manera consistente la herramienta no logra dete- caso, permita que la batería se enfríe antes de volver a nerse rápidamente después de soltar el gatillo interrup- encender la herramienta. tor, lleve la herramienta a un centro de servicio Makita para que le den mantenimiento. Protección en caso de Iluminación de la luz delantera sobredescarga Cuando la capacidad de la batería no es suficiente, la...
-
Page 50: Montaje
Accionamiento del conmutador de Instalación o extracción de la punta inversión de giro de destornillador/punta de atornillar 12 mm 9 mm (15/32”) (3/8”) ► 1 . Palanca del interruptor de inversión Utilice únicamente la punta de destornillador/punta de atornillar que se muestra en la figura. No utilice ninguna otra punta de destornillador/punta de atornillar. PRECAUCIÓN: Confirme siempre la direc- ción de rotación antes de la operación. -
Page 51: Operación
Torsión de apriete apropiada para un tornillo NOTA: Si la punta de destornillador no se encuentra estándar insertada hasta el fondo en el mandril, éste no regre- sará a su posición original y la punta de destornillador N•m no quedará asegurada. En este caso, procure inser- (ft•lbs) tar la broca de nuevo siguiendo las instrucciones de 140 N•m arriba. -
Page 52: Mantenimiento
DE MAKITA Perno • Incluso si el coeficiente de torsión y la clase de tornillo son los mismos, la adecuada Ésta Garantía no aplica para México torsión de apriete variará en función del Política de garantía diámetro del tornillo. Cada herramienta Makita es inspeccionada y probada • Incluso si el diámetro del tornillo o perno exhaustivamente antes de salir de la fábrica. Se garan- es el mismo, la torsión de apriete correcta tiza que está libre de defectos de mano de obra y mate- variará de acuerdo con el coeficiente de riales por el período de UN AÑO a partir de la fecha ori- torsión, la clase y la longitud del perno o ginal de compra. Si durante este período de un año se tornillo. - Page 53 EN NINGÚN CASO MAKITA SE HARÁ RESPONSABLE DE NINGÚN DAÑO INDIRECTO, INCIDENTAL, O DERIVADO DE LA VENTA O USO DEL PRODUCTO. ESTE DESCARGO DE RESPONSABILIDAD APLICA DURANTE Y DESPUÉS DEL PLAZO DE ESTA GARANTÍA. MAKITA RENUNCIA A LA RESPONSABILIDAD POR CUALQUIER GARANTÍA IMPLÍCITA, INCLUYENDO GARANTÍAS DE “COMERCIABILIDAD” Y “ADECUACIÓN PARA UN PROPÓSITO ESPECÍFICO”, DESPUÉS DEL PLAZO DE UN AÑO DE ESTA GARANTÍA. Esta garantía le concede derechos legales específicos y usted podrá tener también otros derechos que varían de un estado a otro. Algunos estados no permiten la exclusión o limitación de daños incidentales o con- secuentes, por lo que la limitación o exclusión arriba mencionada podría no aplicar para usted. Algunos estados no permiten la limitación sobre la duración de una garantía implícita, por lo que la limitación arriba mencionada podría no aplicar para usted. 17 ESPAÑOL...
- Page 56 Para reducir la exposición a estos productos químicos: trabaje en un área bien ventilada y póngase el equipo de seguridad indicado, tal como las máscaras contra polvo que están especialmente diseñadas para filtrar partículas microscópicas. Makita Corporation 3-11-8, Sumiyoshi-cho, Anjo, Aichi 446-8502 Japan 885505-946...
- Page 57 INSTRUCTION MANUAL MANUAL DE INSTRUCCIONES Cordless Recipro Saw Sierra Recíproca Inalámbrica XRJ05 IMPORTANT: Read Before Using. IMPORTANTE: Lea antes de usar.
-
Page 58: Specifications
ENGLISH (Original instructions) SPECIFICATIONS Model: XRJ05 Length of stroke 32 mm (1-1/4″) Strokes per minute High (2) 0 - 3,000 /min Low (1) 0 - 2,300 /min Max. cutting capacities Pipe 130 mm (5-1/8″) Wood 255 mm (10″) Rated voltage D.C. - Page 59 Dress properly. Do not wear loose clothing or Service jewellery. Keep your hair, clothing, and gloves Have your power tool serviced by a qualified away from moving parts. Loose clothes, jewel- repair person using only identical replacement lery or long hair can be caught in moving parts. parts.
-
Page 60: Functional Description
The followings show the symbols used for tool. have been altered, may result in the battery bursting causing fires, personal injury and damage. It will volts also void the Makita warranty for the Makita tool and charger. direct current Tips for maintaining maximum... -
Page 61: Battery Protection System
To remove the battery cartridge, slide it from the tool Indicating the remaining battery while sliding the button on the front of the cartridge. capacity To install the battery cartridge, align the tongue on the battery cartridge with the groove in the housing and slip Only for battery cartridges with "B"... -
Page 62: Adjusting The Shoe
Electric brake This tool is equipped with an electric brake. If the tool consistently fails to quickly stop after the switch trigger is released, have the tool serviced at a Makita service center. ► 1. Shoe 2. Shoe adjusting lever NOTE: The shoe cannot be adjusted without opening the shoe adjusting lever fully. - Page 63 Hook CAUTION: When hanging the tool, set the lock/speed change lever in position to lock the switch trigger. (See the section titled “Switch action” .) CAUTION: Never hang the tool at high or potentially unstable location. ► 1. Blade clamp lever 2. Released position 3. Fixed position Insert the recipro saw blade into the blade clamp as far as it will go.
-
Page 64: Operation
COMPLETE tool, freight prepaid, to one to continue cutting. of Makita’s Factory or Authorized Service Centers. If inspection shows the trouble is caused by defective workmanship or material, Makita will repair (or at our option, replace) without charge. This Warranty does not apply where: •... -
Page 65: Especificaciones
ESPAÑOL (Instrucciones originales) ESPECIFICACIONES Modelo: XRJ05 Extensión de la carrera 32 mm (1-1/4″) Carreras por minuto Alta (2) 0 cpm - 3 000 cpm Baja (1) 0 cpm - 2 300 cpm Capacidad máxima de corte Tubo 130 mm (5-1/8″) Madera 255 mm (10″) Tensión nominal... - Page 66 Use equipo de protección personal. Póngase eléctrica. Si la herramienta eléctrica está siempre protección para los ojos. El equipo dañada, haga que se la reparen antes de protector tal como máscara contra el polvo, zapa- utilizarla. Muchos accidentes son ocasionados tos de seguridad antiderrapantes, casco rígido y por herramientas eléctricas con mantenimiento protección para oídos utilizado en las condiciones...
- Page 67 Use siempre gafas de seguridad o protectoras. Instrucciones importantes de Los anteojos comunes o para el sol NO son seguridad para el cartucho de gafas de seguridad. batería Evite cortar clavos. Revise la pieza de trabajo y quite todos los clavos antes de utilizar la herramienta.
-
Page 68: Descripción Del Funcionamiento
Makita, o de baterías alteradas, puede ocasio- nar que las baterías exploten causando un incendio, lesiones personales y daños. Asimismo, esto inva- lidará la garantía de Makita para la herramienta y el cargador Makita. Consejos para alargar al máximo la vida útil de la batería... - Page 69 Sobrecarga: Accionamiento del interruptor La herramienta se está utilizando de una manera que causa que consuma una cantidad de corriente inusual- PRECAUCIÓN: mente alta. Antes de insertar el cartucho En este caso, apague la herramienta y detenga la apli- de batería en la herramienta, compruebe siem- cación que causó...
- Page 70 La herramienta está equipada con un freno eléctrico. Si la herramienta falla constantemente en detenerse tras soltar el gatillo interruptor, lleve la herramienta a mante- nimiento a un centro de servicio Makita. Iluminación de la luz delantera ► 1. Zapata 2. Palanca de ajuste de la zapata NOTA: La zapata no podrá...
-
Page 71: Operación
Para extraer la segueta recíproca, gire la palanca de la Instalación o extracción de la abrazadera de la segueta completamente en la direc- segueta recíproca ción de la flecha. Una vez extraída la segueta recí- proca, la palanca de la abrazadera de la segueta queda fija en la posición liberada PRECAUCIÓN: Limpie siempre las astillas y... -
Page 72: Mantenimiento
Makita. Si la inspección muestra que el problema ha sido a causa de un defecto de mano de obra o material, Makita hará la reparación (o a su discreción, el reemplazo) sin ningún cargo. Esta garantía no aplica cuando: •... - Page 76 Para reducir la exposición a estos productos químicos: trabaje en un área bien ventilada y póngase el equipo de seguridad indicado, tal como las máscaras contra polvo que están especialmente diseñadas para filtrar partículas microscópicas. Makita Corporation 3-11-8, Sumiyoshi-cho, Anjo, Aichi 446-8502 Japan 885449A940...
- Page 77 INSTRUCTION MANUAL Cordless Angle Grinder XAG03 XAG04 015078 IMPORTANT: Read Before Using.
-
Page 78: General Power Tool Safety Warnings
ENGLISH (Original instructions) SPECIFICATIONS Model XAG03 XAG04 Wheel diameter 115 mm (4-1/2") 125 mm (5") Max. wheel thickness 6 mm (1/4") 6 mm (1/4") Spindle thread 5/8" Rated speed (n) / No load speed (n 8,500 /min With battery cartridge BL1815N, BL1820 348 mm (13-3/4") Overall length With battery cartridge BL1830, BL1840, BL1850... - Page 79 13. Remove any adjusting key or wrench before Battery tool use and care turning the power tool on. A wrench or a key 24. Recharge only with the charger specified by left attached to a rotating part of the power tool the manufacturer.
- Page 80 The outside diameter and the thickness of 12. Do not run the power tool while carrying it at your accessory must be within the capacity your side. Accidental contact with the spinning rating of your power tool. Incorrectly sized accessory could snag your clothing, pulling the accessories cannot be adequately guarded or accessory into your body.
- Page 81 Safety Warnings Specific for Grinding and Abrasive d) Do not restart the cutting operation in the Cutting-Off Operations: workpiece. Let the wheel reach full speed and a) Use only wheel types that are recommended carefully re-enter the cut. The wheel may bind, for your power tool and the specific guard walk up or kickback if the power tool is restarted in designed for the selected wheel.
- Page 82 ENC007-8 22. Do not leave the tool running. Operate the tool only when hand-held. IMPORTANT SAFETY 23. Do not touch the workpiece immediately after INSTRUCTIONS operation; it may be extremely hot and could burn your skin. FOR BATTERY CARTRIDGE 24. Observe the instructions of the manufacturer for correct mounting and use of wheels.
- Page 83 FUNCTIONAL DESCRIPTION 1. Slide switch CAUTION: Always be sure that the tool is switched off and the • battery cartridge is removed before adjusting or checking function on the tool. Installing or removing battery cartridge 015082 1. Button To start the tool, slide the slide switch toward the "I 2.
- Page 84 Releasing protection lock Automatic speed change function When the protection system works repeatedly, the tool is locked and the battery indicator shows the following state. 1. Mode indicator Battery indicator Blinking Protection lock works 015200 In this situation, the tool does not start even if turning the tool 015142 off and on.
- Page 85 For tool with locking screw type wheel guard Installing or removing wheel guard (For depressed center wheel, multi disc / 1. Wheel guard abrasive cut-off wheel, diamond wheel) 2. Bearing box 3. Screw WARNING: When using depressed center grinding • wheel/Multi-disc, wire wheel brush, cut-off wheel or diamond wheel, the wheel guard must be fitted on the tool so that the closed side of the guard...
- Page 86 Grinding and sanding operation Installing or removing abrasive disc (optional accessory) 1. Sanding lock nut 2. Abrasive disc 3. Rubber pad 015097 ALWAYS hold the tool firmly with one hand on housing 015092 and the other on the side handle. Turn the tool on and Mount the rubber pad onto the spindle.
- Page 87 Operation with abrasive cut-off / diamond wheel (optional accessory) 1. Lock nut 2. Abrasive cut-off wheel/diamond wheel 3. Inner flange 4. Wheel guard for abrasive cut-off wheel/diamond wheel 010855 Remove the battery cartridge from the tool and place it upside down allowing easy access to spindle. Mount the inner flange and abrasive cut-off / diamond wheel onto the spindle.
- Page 88 Continuing operation with a clogged dust cover may damage the tool. To maintain product SAFETY and RELIABILITY, repairs, any other maintenance or adjustment should be performed by Makita Authorized or Factory Service Centers, always using Makita replacement parts. 015094...
- Page 89 A diamond wheel and cut-off wheel are also available and should only be used with the appropriate optional guard for cutoff wheels. If you decide to use your Makita grinder with approved accessories which you purchase from your Makita distributor or factory service...
- Page 90 115 mm (4-1/2") model 125 mm (5") model Grip 36 Wheel Guard (for grinding wheel) Inner flange 45 Inner flange 45 Depressed center wheel/Multi-disc Lock nut 5/8-45 Lock nut 5/8-45 Rubber pad 100 Rubber pad 115 Abrasive disc Sanding lock nut 5/8-48 Sanding lock nut 5/8-48 Wire wheel brush Wire cup brush...
- Page 91 COMPLETE tool, freight prepaid, to one of Makita’s Factory or Authorized Service Centers. If inspection shows the trouble is caused by defective workmanship or material, Makita will repair (or at our option, replace) without charge. This Warranty does not apply where:...
- Page 92 Para reducir la exposición a estos productos químicos: trabaje en un área bien ventilada y póngase el equipo de seguridad indicado, tal como las máscaras contra polvo que están especialmente diseñadas para filtrar partículas microscópicas. Makita Corporation 3-11-8, Sumiyoshi-cho, Anjo, Aichi 446-8502 Japan www.makita.com...
- Page 93 INSTRUCTION MANUAL MANUEL D'INSTRUCTION MANUAL DE INSTRUCCIONES Cordless Multi Tool Outil Multi-Fonctions Sans Fil Multitool Inalámbrica XMT03 014551 IMPORTANT: Read Before Using. IMPORTANT: Lire avant usage. IMPORTANTE: Leer antes de usar.
- Page 94 ENGLISH (Original instructions) SPECIFICATIONS Model XMT03 Oscillation per minute 6,000 - 20,000 /min 1.6 ゚ (3.2 ゚ total) Oscillation angle, left/right Standard battery cartridge BL1830/BL1840 BL1815/BL1815N * Overall length 340 mm (13-3/8") 326 mm (12-7/8") Net weight 2.2 kg (4.9 lbs) 2.0 kg (4.4 lbs) Rated voltage D.C.
- Page 95 15. Dress properly. Do not wear loose clothing or 26. When battery pack is not in use, keep it away jewellery. Keep your hair, clothing, and gloves from other metal objects, like paper clips, away from moving parts. Loose clothes, coins, keys, nails, screws or other small metal jewellery or long hair can be caught in moving objects, that can make a connection from one...
- Page 96 Do not leave the tool running. Operate the tool 23. Do not run the power tool while carrying it at only when hand-held. your side. Accidental contact with the accessory 10. Always switch off and wait for the blade to could snag your clothing, pulling the accessory come to a complete stop before removing the into your body.
- Page 97 If electrolyte gets into your eyes, rinse them FUNCTIONAL DESCRIPTION out with clear water and seek medical attention right away. It may result in loss of your eyesight. WARNING: Do not short the battery cartridge: Always be sure that the tool is switched off •...
-
Page 98: Indication Lamp
Battery protection system CAUTION: (Lithium-ion battery with star marking) Before installing the battery cartridge into the tool, • always check to see that the tool is switched off. To start the tool, slide the slide switch toward the "I 1. Star marking (ON)"... - Page 99 ASSEMBLY CAUTION: Always be sure that the tool is switched off and the • battery cartridge is removed before carrying out any work on the tool. Installing or removing application tool (optional accessory) 014564 When using sanding application tool, mount the WARNING: application tool on the sanding pad so that it matches Do not install application tool upside down.
- Page 100 Dust extraction attachment (optional accessory) 014559 Put the application tool on the workpiece. And then move the tool forward so that the application tool movement does not slow down. NOTE: Forcing or excessive pressure on the tool may • reduce efficiency. Before cutting operation, it is recommended to •...
- Page 101 To maintain product SAFETY and RELIABILITY, repairs, inspection shows the trouble is caused by defective carbon brush inspection and replacement, any other workmanship or material, Makita will repair (or at our maintenance or adjustment should be performed by option, replace) without charge.
-
Page 102: Consignes De Sécurité Générales Pour Outils Électriques
FRANÇAIS (Mode d’emploi original) SPÉCIFICATIONS Modèle XMT03 Oscillation par minute 6 000 - 20 000 /min 1,6 ゚ (3,2 ゚ total) Angle d’oscillation gauche/droite Batterie standard BL1830/BL1840 BL1815/BL1815N * Longueur totale 340 mm (13-3/8") 326 mm (12-7/8") Poids net 2,2 kg (4,9 lbs) 2,0 kg (4,4 lbs) Tension nominale C.C. - Page 103 Portez dispositifs protection 20. Après l'utilisation d'un outil électrique, personnelle. Portez toujours un protecteur rangez-le hors de portée des enfants et ne pour la vue. Les risques de blessure seront laissez aucune personne l'utiliser si elle n'est moins élevés si vous utilisez des dispositifs de pas familiarisée avec l'outil électrique ou les protection tels qu'un masque antipoussières, des présentes instructions d'utilisation.
- Page 104 Réparation Ne touchez ni l’outil ni la pièce immédiatement 28. Faites réparer votre outil électrique par un après la coupe. Ils risquent d'être extrêmement réparateur qualifié qui utilise des pièces de chauds et de vous brûler la peau. rechange identiques aux pièces d'origine. Le 12.
- Page 105 23. Ne faites pas fonctionner l’outil lorsque vous l'outil utilisant la batterie. le transportez. Un contact accidentel avec Ne démontez pas la batterie. l’accessoire pourrait accrocher vos vêtements et Cessez immédiatement l'utilisation si le temps l’entraîner vers votre corps. de fonctionnement devient excessivement 24.
- Page 106 Système de protection de la batterie DESCRIPTION DU (batterie lithium-ion marquée d’une étoile) FONCTIONNEMENT 1. Étoile AVERTISSEMENT: Assurez-vous toujours que l’outil est hors • tension et la batterie retirée avant d'effectuer un réglage ou de vérifier le fonctionnement de l’outil. Si vous ne respectez pas cette précaution, vous risquez de graves blessures dues à...
- Page 107 ATTENTION: ASSEMBLAGE Avant d’installer la batterie dans l’outil, vérifiez • toujours que ce dernier est hors tension. ATTENTION: Pour démarrer l’outil, faites glisser l’interrupteur sur la Assurez-vous toujours que l'outil est hors tension position « I (ON) ». • et que sa batterie est retirée avant d'effectuer tout Pour arrêter l’outil, faites glisser l’interrupteur sur la travail dessus.
- Page 108 Insérez le boulon de retenue jusqu’à ce qu’il bord tranchant. Cela risque d’endommager l’outil. s’arrête. Ramenez ensuite levier verrouillage à sa position de départ. 014559 Mettez l'outil d'application sur l'ouvrage. Déplacez ensuite l’outil vers l’avant, pour que le 014564 Lorsque vous utilisez un outil d’application destiné au ponçage, mouvement de l’outil d’application ne ralentisse pas.
- Page 109 ACCESSOIRES EN OPTION ATTENTION: Ces accessoires ou pièces complémentaires sont • recommandés pour l'utilisation avec l'outil Makita spécifié dans ce mode d'emploi. L'utilisation de tout autre accessoire ou pièce complémentaire peut comporter un 1. Bande de distributeur risque de blessure. N'utilisez les accessoires ou pièces 2.
- Page 110 GARANTIE LIMITÉE D’UN AN MAKITA Politique de garantie Chaque outil Makita est inspecté rigoureusement et testé avant sa sortie d’usine. Nous garantissons qu’il sera exempt de défaut de fabrication et de vice de matériau pour une période d’UN AN à partir de la date de son achat initial.
-
Page 111: Advertencias De Seguridad Generales Para Herramientas Eléctricas
ESPAÑOL (Instrucciones originales) ESPECIFICACIONES Modelo XMT03 Oscilaciones por minuto 6 000 - 20 000 r/min 1,6 ゚ (3,2 ゚ en total) Ángulo de oscilación, izquierda/derecha Cartucho de batería estándar BL1830/BL1840 BL1815/BL1815N * Longitud total 340 mm (13-3/8") 326 mm (12-7/8") Peso neto 2,2 kg (4,9 lbs) 2,0 kg (4,4 lbs) - Page 112 cansado o bajo la influencia de drogas, 20. Guarde la herramienta eléctrica que no use alcohol o medicamentos. Un momento de fuera del alcance de los niños y no permita distracción mientras opera la máquina puede dar que las personas que no están familiarizadas como resultado heridas personales graves.
- Page 113 29. Siga las instrucciones para la lubricación y 13. Siempre utilice el respirador/máscara indicado cambio de accesorios. para protegerse del polvo que corresponda 30. Mantenga las agarraderas secas, limpias y sin con la aplicación o material con el que trabaje. aceite o grasa.
- Page 114 24. No opere la herramienta motorizada cerca de En caso de que ingresen electrolitos en sus ojos, materiales inflamables. Las chispas podrían enjuáguelos bien con agua limpia y consulte de inflamar estos materiales. inmediato a un médico. Podría perder la visión. 25.
-
Page 115: Protección Contra El Sobrecalentamiento
Sistema de protección de batería DESCRIPCIÓN DEL (batería de ión de litio con marca de estrella) FUNCIONAMIENTO 1. Marca de estrella ADVERTENCIA: Asegúrese siempre de que la herramienta esté • apagada y el cartucho de batería extraído antes de realizar cualquier ajuste o revisión del funcionamiento de la herramienta. -
Page 116: Luz Indicadora
Cuando la capacidad restante de la batería llega a Accionamiento del interruptor • reducirse, indicadora batería parpadeará. 1. Interruptor Cuando la capacidad restante de la batería llega a deslizable • un nivel mucho más reducido, la herramienta se detiene durante la operación y la luz indicadora se ilumina por alrededor de diez segundos. - Page 117 OPERACIÓN 1. Perno sujetador 2. Orificios en la pieza de ADVERTENCIA: aplicación Antes de arrancar la herramienta, así como • 3. Protuberancias durante la operación, mantenga sus manos y en la brida de la rostro alejados de la herramienta de la aplicación. herramienta PRECAUCIÓN: No aplique carga excesiva a la herramienta lo cual...
- Page 118 Centros o Servicios de fábrica Autorizados por Makita, empleando siempre piezas de repuesto de Makita. ACCESORIOS OPCIONALES PRECAUCIÓN: Estos accesorios o aditamentos (incluidos o no) •...
- Page 119 Fieltro delta para pulido antelación, a una de las fábricas o centros de servicio • Llave hexagonal autorizados Makita. Si la inspección muestra que el • problema ha sido causado por mano de obra o Aditamento de extracción de polvo •...
- Page 120 Para reducir la exposición a estos productos químicos: trabaje en un área bien ventilada y póngase el equipo de seguridad indicado, tal como las máscaras contra polvo que están especialmente diseñadas para filtrar partículas microscópicas. Makita Corporation 3-11-8, Sumiyoshi-cho, Anjo, Aichi 446-8502 Japan www.makita.com...