Makita DUR191U Instruction Manual
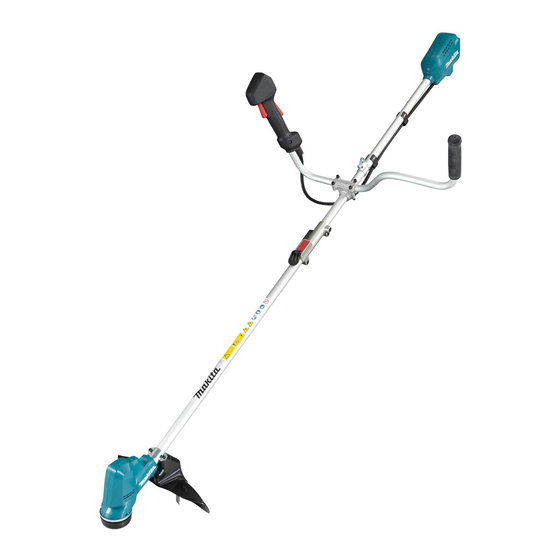
Cordless grass trimmer
Hide thumbs
Also See for DUR191U:
- Instruction manual (152 pages) ,
- Instruction manual (25 pages) ,
- Instruction manual (136 pages)

Related Manuals for Makita DUR191U


Summary of Contents for Makita DUR191U
- Page 1 INSTRUCTION MANUAL Cordless Grass Trimmer DUR190U DUR190L DUR191U DUR191L Read before use.
-
Page 2: Specifications
SPECIFICATIONS Model: DUR190U DUR190L DUR191U DUR191L Type of handle Bike handle Loop handle Bike handle Loop handle No load speed 3: 6,000 min 2: 5,100 min 1: 3,500 min Overall length 1,775 mm (without cutting tool) Nylon cord diameter 2.0 - 2.4 mm... -
Page 3: General Power Tool Safety Warnings
Power tools can produce electromagnetic fields Only for EU countries Ni-MH (EMF) that are not harmful to the user. However, Li-ion Do not dispose of electric equipment or battery users of pacemakers and other similar medical pack together with household waste material! In observance of the European Directives, devices should contact the maker of their device and/ on Waste Electric and Electronic Equipment... -
Page 4: General Instructions
Power tool use and care Do not use a battery pack or tool that is dam- aged or modified. Damaged or modified batteries Do not force the power tool. Use the correct may exhibit unpredictable behaviour resulting in power tool for your application. The correct fire, explosion or risk of injury. -
Page 5: Personal Protective Equipment
Personal protective equipment Electrical and battery safety Do not expose the tool to rain or wet condi- tions. Water entering the tool will increase the risk of electric shock. Do not use the tool if the switch does not turn it on and off. -
Page 6: Cutting Tools
The cutting attachment continues to rotate for 21. Before starting the tool, be sure that the cut- a short period after turning the tool off. Don't ting tool is not touching the ground and other rush to contact the cutting attachment. obstacles such as a tree. - Page 7 To avoid kickback: Always wear protective gloves when handling the cutting blade. Apply the segment between 8 and 11 Always clean dust and dirt off the tool. Never o'clock. use gasoline, benzine, thinner, alcohol or the Never apply the segment between 12 and like for the purpose.
- Page 8 Only use genuine Makita batteries. Use of non-genuine Makita batteries, or batteries that have been altered, may result in the battery bursting causing fires, personal injury and damage. It will also void the Makita warranty for the Makita tool and charger. Tips for maintaining maximum battery life Charge the battery cartridge before completely discharged.
-
Page 9: Parts Description
Main power button (ADT = Automatic Torque Drive Technology) Lock-off lever Reverse button Battery cartridge Switch trigger Barrier (country specific) Hanger Handle Protector Lock lever Joint cover Shoulder harness (DUR191U and (DUR191U and (DUR191U and DUR191L only) DUR191L only) DUR191L only) 9 ENGLISH... -
Page 10: Functional Description
Caution lamp Status FUNCTIONAL Color Blinking DESCRIPTION Overload Overheat WARNING: Always be sure that the tool is switched off and the battery cartridge is removed Over discharge before adjusting or checking function on the tool. Failure to switch off and remove the battery cartridge may result in serious personal injury from accidental Overload protection start-up. If the tool gets into one of the following situation, the tool automatically stops and the caution lamp starts Installing or removing battery... -
Page 11: Main Power Switch
To start the tool, grasp the handle (the lock-off lever is Indicator lamps Remaining released by the grasp) and then pull the switch trigger. capacity To stop the tool, release the switch trigger. DUR190U and DUR191U Lighted Blinking 75% to 100% 50% to 75% 25% to 50% 0% to 25% Charge the battery. -
Page 12: Electric Brake
Installing the handle the switch trigger while depressing the lock-off lever when the cutting tool is stopped. The speed indicators For DUR190U and DUR191U only and ADT indicator start blinking, and the cutting tool Insert the shaft of the handle into the grip. Align rotates in reverse direction when you pull the switch the screw hole in the grip with the one in the shaft. - Page 13 Place handle between handle clamp and handle Mounting the attachment pipe holder. Adjust the handle to an angle that provides a comfortable working position and then secure with hex For DUR191U and DUR191L only socket head bolts. Mount the attachment pipe to the power unit. Turn the lever to the direction of the arrow shown in the figure.
-
Page 14: Cutter Blade
To remove the pipe, turn the lever to the direction of the Cutter blade arrow shown in the figure and pull the pipe out while pressing down the lock lever. CAUTION: When handling a cutter blade, always wear gloves and put the blade cover on the blade. CAUTION: The cutter blade must be well pol- ished, and free of cracks or breakage. -
Page 15: Nylon Cutting Head
Put the clamp washer and cup onto the cutter Plastic blade blade. NOTICE: Be sure to use genuine Makita plastic While holding down the spindle lock button, blade. tighten the nut securely by the box wrench. While holding down the spindle lock button, place the plastic blade onto the spindle and tighten it securely by hand. - Page 16 Adjust the handle and hanger position to obtain com- fortable handling of the tool. For DUR190U and DUR191U Adjust the handle/hanger position so that the tool comes within the range as shown below. ► 1 . Hex socket head bolt 2. Hanger For DUR190L and DUR191L Loosen the hex socket head bolts on the handle.
-
Page 17: Operation
When not in use, store the hex wrench as shown in the figure to keep it from being lost. DUR190U and DUR191U ► 1 . Hex wrench For DUR190L and DUR191L only ► 1 . Hook 2. Hanger DUR190L and DUR191L ► 1 . - Page 18 Pull out the strip release the tool from the shoulder Correct positioning and handling allow optimum control and reduce the risk of injury caused by kickback. harness. DUR190L and DUR191L DUR190U and DUR191U ► 1 . Buckle DUR190L and DUR191L Simply squeeze the sides of the buckle to release the tool from the shoulder harness.
-
Page 19: Maintenance
Discoloration, deformation or cracks may result. To maintain product SAFETY and RELIABILITY, repairs, any other maintenance or adjustment should be performed by Makita Authorized or Factory Service Centers, always using Makita replacement parts. Replacing the nylon cord WARNING: Use only the nylon cord with diameter specified in this instruction manual. - Page 20 95-M10L 100 mm 80 mm 20 ENGLISH...
-
Page 21: Troubleshooting
► 1 . Arrow on the protector 2. Arrow on the blade TROUBLESHOOTING Before asking for repairs, conduct your own inspection first. If you find a problem that is not explained in the manual, do not attempt to dismantle the tool. Instead, ask Makita Authorized Service Centers, always using Makita replace- ment parts for repairs. State of abnormality Probable cause (malfunction) Remedy Motor does not run. -
Page 22: Optional Accessories
The use of any other accessory or attachment may result in serious personal injury. CAUTION: These accessories or attachments are recommended for use with your Makita tool specified in this manual. The use of any other accessories or attachments might present a risk of injury to persons. Only use accessory or attachment for its stated purpose. - Page 24 Makita Corporation 3-11-8, Sumiyoshi-cho, Anjo, Aichi 446-8502 Japan 885790-927 20191209 www.makita.com...