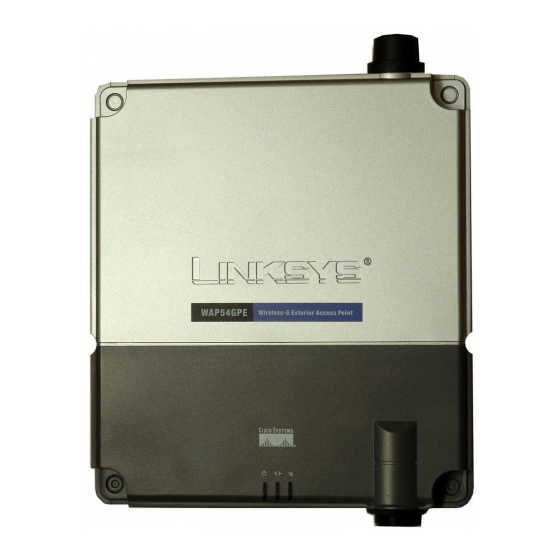
Linksys WAP54GPE User Manual
Wireless-g exterior access point
Hide thumbs
Also See for WAP54GPE:
- User manual (76 pages) ,
- Product data (2 pages) ,
- Product data (2 pages)

Related Manuals for Linksys WAP54GPE


Summary of Contents for Linksys WAP54GPE
-
Page 1: User Guide
® A Division of Cisco Systems, Inc. Wireless-G 802.11g User Guide Exterior Access Point WIRELESS WAP54GPE Model No. - Page 2 Wireless-G Exterior Access Point Copyright and Trademarks Specifications are subject to change without notice. Linksys is a registered trademark or trademark of Cisco Systems, Inc. and/or its affiliates in the U.S. and certain other countries. Copyright © 2004 Cisco Systems, Inc. All rights reserved.
-
Page 3: Table Of Contents
What’s in this User Guide? Chapter 2: Planning Your Wireless Network Network Topology Roaming Network Layout Chapter 3: Getting to Know the Wireless-G Exterior Access Point The LEDs The Ports The Reset Button and Ground Chapter 4: Connecting the Wireless-G Exterior Access Point... - Page 4 Wireless-G Exterior Access Point The Administration - Config Management Tab The Status - Local Network Tab The Status - Wireless Tab The Status - System Performance Tab Appendix A: Troubleshooting Frequently Asked Questions Appendix B: Wireless Security Security Precautions Security Threats Facing Wireless Networks...
- Page 5 Figure 4-1: Mark the Locations of the Two Wall-Mount Slots Figure 4-2: Attach the Mounting Plate Figure 4-3: Ground the Access Point Figure 4-4: Attach the Access Point to the Wall Figure 5-1: Setup Wizard’s Welcome Screen Figure 5-2: Connecting the Access Point...
- Page 6 Wireless-G Exterior Access Point Figure 6-10: Wireless - Advanced Wireless Settings Screen Figure 6-11: AP Mode Screen Figure 6-12: Wireless Repeater Diagram Figure 6-13: Site Survey Screen Figure 6-14: Wireless Bridge Diagram Figure 6-15: Administration - Management Screen Figure 6-16: The Administration - Log Screen...
-
Page 7: Chapter 1: Introduction Welcome
Use the instructions in this Guide to help you connect the Access Point, set it up, and configure it to bridge your different networks. These instructions should be all you need to get the most out of the Access Point. -
Page 8: What's In This User Guide
This chapter instructs you on how to connect the Access Point to your network. • Chapter 5: Setting Up the Wireless-G Exterior Access Point This chapter explains how to use the Setup Wizard to configure the settings on the Access Point. • Chapter 6: Configuring the Wireless-G Exterior Access Point This chapter explains how to use the Access Point’s Web-based Utility for advanced configuration. - Page 9 • Appendix H: Regulatory Information This appendix supplies the Access Point’s regulatory information. • Appendix I: Contact Information This appendix provides contact information for a variety of Linksys resources, including Technical Support. Chapter 1: Introduction What’s in this User Guide?
-
Page 10: Chapter 2: Planning Your Wireless Network
Linksys wireless adapters also provide users access to a wired network when using an access point, such as the Wireless-G Exterior Access Point, or wireless router. An integrated wireless and wired network is called an infrastructure network. -
Page 11: Chapter 3: Getting To Know The Wireless-G Exterior Access Point
Chapter 3: Getting to Know the Wireless-G Exterior Access Point The LEDs The Access Point's LEDs, where information about network activity is displayed, are located on the front panel. Figure 3-1: Front Panel (Power) Green. The power LED lights up when the Access Point is powered on. -
Page 12: The Ports
Wireless-G Exterior Access Point The Ports The Access Point's Ethernet network port is located on the bottom panel, while the antenna port is located on the top panel. Ethernet Figure 3-2: Ethernet Network Port (Ethernet) The Ethernet network port connects to Ethernet network devices, such as a switch or router that supports Power over Ethernet (PoE). -
Page 13: The Reset Button And Ground
Ground Figure 3-4: Reset Button Reset Button Reset There are two ways to Reset the Access Point's factory defaults. Either press the Reset button, for approximately ten seconds, or restore the defaults using the Access Point's Web- based Utility. Ground (Ground) Before you mount the Access Point, you must ground the Access Point as a precaution. -
Page 14: Chapter 4: Connecting The Wireless-G Exterior Access Point
2. Use the mounting plate as a template. On the wall you have chosen, mark the locations of the two wall-mount slots at the bottom of the mounting plate. 3. Attach two screws (not included) to the wall, so that the Access Point’s wall-mount slots line up with the two screws. -
Page 15: Figure 4-3: Ground The Access Point
Then slide the Access Point down so the screws fit snugly in the slots. 9. Attach two screws (not included) at the top of the mounting plate so the Access Point is securely mounted. 10. Connect the other end of the Ethernet network cable to a switch, router, or other device that supports Power over Ethernet. -
Page 16: Chapter 5: Setting Up The Wireless-G Exterior Access Point
Chapter 5: Setting Up the Wireless-G Exterior Access Point Setup Wizard Now that you've connected the Access Point to your wired network, you are ready to begin setting it up. This Setup Wizard will take you through all the steps necessary to configure the Access Point. -
Page 17: Figure 5-2: Connecting The Access Point
Exit to exit the Setup Wizard. 4. The Setup Wizard will run a search for the Access Point within your network and then display a list along with the status information for the selected access point. If this is the only access point on your network, it will be the only one displayed. -
Page 18: Figure 5-4: Login Screen
Wireless-G Exterior Access Point 5. You will be asked to sign onto the Access Point you have selected. Enter the default user name and password, admin, in both fields. Then, click Enter. (This user name and password can be changed from the Web-based Utility's Administration - Management tab.) -
Page 19: Figure 5-6: Wireless Settings Screen
Select the wireless mode you want the Access Point to use for all of the wireless networks it supports. Select SSID 2 and enter your second SSID in the field provided. Then select this network’s channel setting. -
Page 20: Figure 5-7: Wireless Security Settings - Wep Screen
TKIP (Temporal Key Integrity Protocol) encryption, which can be used in conjunction with a RADIUS server. passphrase: used much like a password, a passphrase simplifies the WEP encryption process by automatically generating the WEP encryption keys for Linksys products. -
Page 21: Figure 5-8: Wireless Security Settings - Wpa-Personal Screen
Back to return to the previous page. 9. The Wireless Power Management screen will appear. You can adjust the power output of the Access Point to get the appropriate coverage for your wireless network. Select the setting appropriate for your environment. -
Page 22: Figure 5-10: Confirmation Screen
11. At this point, the configuration performed with the Setup Wizard is complete. To configure any other Access Points in your network, you can run this Setup Wizard again. Click the Online Registration button to register the Access Point, or click the Exit button to exit the Setup Wizard. -
Page 23: Chapter 6: Configuring The Wireless-G Exterior Access Point
Overview The Access Point has been designed to be functional right out of the box, with the default settings in the Setup Wizard. However, if you'd like to change these settings, the Access Point can be configured through your web browser with the Web-based Utility. - Page 24 • Language Upgrade. On this screen, change the language of the Access Point’s Web-based Utility. • Reboot. Use this screen to reboot the Access Point. • Config Management. You can back up the configuration file for the Access Point, as well as save the backup configuration file to the Access Point.
-
Page 25: Accessing The Utility
192.168.1.245.) (Should you need to learn what IP address the Access Point presently uses, run the Setup Wizard again. It will scan the Access Point and give you its IP address.) Press the Enter key and the following screen will appear. Enter admin in the User Name field. The first time you open the Web-based Utility, use the default password, admin. -
Page 26: Figure 6-3: Setup - Static Ip Address Screen
Wireless-G Exterior Access Point Select Static IP Address if you want to assign a static or fixed IP address to the Access Point. Then complete the following: • IP Address. The IP address must be unique to your network. We suggest you use the default IP address of 192.168.1.245. -
Page 27: The Wireless - Basic Wireless Settings Tab
You can select from a range of transmission speeds, or you can keep the default setting, 54 Mbps, to have the Access Point enable the Auto- Chapter 6: Configuring the Wireless-G Exterior Access Point... -
Page 28: The Wireless - Wireless Security Tab
Access Point and a wireless device. Access Point VLAN ID. When multiple VLANS exist on a network, set this ID so that people on that VLAN will have access to the Access Point’s configuration screens. Only users in the same VLAN will have access. -
Page 29: Figure 6-6: Wireless Security - Wpa Enterprise Screen
SSID Interoperability. When enabled, the devices of the designated wireless network will have access to the other wireless networks configured on the Access Point. If you want devices of the designated wireless network to have access to other wireless networks, select Enabled. Otherwise, select Disabled. -
Page 30: Figure 6-7: Wireless Security - Radius Screen
RADIUS Server Port. Enter the port number used by the RADIUS server. Shared Secret. Enter the Shared Secret key used by the Access Point and RADIUS server. Default Transmit Key. Select a Default Transmit Key (choose which Key to use). -
Page 31: The Wireless - Wireless Network Access Tab
Wireless-G transmissions but will severely decrease performance. Keep the default setting, Auto, so the Access Point can use this feature as needed, when the Wireless-G products are not able to transmit to the Access Point in an environment with heavy 802.11b traffic. Select Enabled if you want to permanently enable this feature, or select Disabled if you want to permanently disable this feature. - Page 32 Power Output. You can adjust the output power of the Access Point to get the appropriate coverage for your wireless network. Select the level you need for your environment. If you are not sure which setting to choose, then keep the default setting, 100%.
-
Page 33: The Ap Mode Tab
On this screen you can change the Access Point’s mode of operation. In most cases, you can keep the default, Access Point. You may wish to do this if you want to use the Access Point as a wireless repeater to extend the range of your wireless network. -
Page 34: Figure 6-12: Wireless Repeater Diagram
Survey button. Select the access points you want to use and click the Apply button. Then click the Close button to return to the AP Mode screen. If you do not see the access point you want, click the Refresh button to run another site survey. -
Page 35: Figure 6-14: Wireless Bridge Diagram
Apply button. Then click the Close button to return to the AP Mode screen. If you do not see the wireless bridge/access point you want, click the Refresh button to run another site survey. The remote wireless bridges/access points also need to be set to Wireless Bridge mode. -
Page 36: The Administration - Management Tab
Figure 6-15: Administration - Management Screen SNMP is a popular network monitoring and management protocol. It provides network administrators with the ability to monitor the status of the Access Point and receive notification of any critical events as they occur on the Access Point. -
Page 37: The Administration - Log Tab
You can have logs that keep track of the Access Point’s activities. Email Alert E-Mail Alert. To enable the Access Point to send e-mail alerts in the event of certain attacks (see the “Alert Log” section below), select Enabled. If you do not want to have e-mail alerts, select Disabled. - Page 38 Syslog Server IP Address. Enter the IP address of the Syslog server. In addition to the standard event log, the Access Point can send a detailed log to an external Syslog server. The Access Point’s Syslog captures all log activities and includes this information about all data transmissions: every connection source and destination IP address, IP server, and number of bytes transferred.
-
Page 39: The Administration - Factory Default Tab
On this screen you can restore the Access Point’s factory default settings. Factory Default Write down any custom settings before you restore the factory defaults. Once the Access Point is reset, you will have to re-enter all of your configuration settings. -
Page 40: The Administration - Language Upgrade Tab
Wireless-G Exterior Access Point The Administration - Language Upgrade Tab On this screen you can do a language upgrade to change the language used by the Access Point’s Web-based Utility. Language Upgrade If you do want to change the language currently used by the Web-based Utility, then you can download a language upgrade file and update the Access Point. -
Page 41: The Administration - Config Management Tab
File button and follow the on-screen instructions. Upload AP Config. To upload a configuration file to the Access Point, enter the location of the configuration file in the field provided, or click the Browse button to find the file. Then click the Load radio button. -
Page 42: The Status - Wireless Tab
Wireless-G Exterior Access Point The Status - Wireless Tab The Wireless screen displays the Access Point’s current status information for the wireless network(s). Wireless Network MAC Address. The MAC Address of the Access Point’s wireless interface is displayed here. Mode. The Access Point’s mode is displayed here. -
Page 43: The Status - System Performance Tab
Wireless-G Exterior Access Point The Status - System Performance Tab The System Performance screen displays the Access Point’s status information for its current settings and data transmissions. System Performance Wired Name. This indicates that the statistics are for the wired network, the LAN. - Page 44 Dropped Packets Received. This shows the number of dropped packets received for each wireless network. To update the status information, click the Refresh button. Help information is displayed on the right-hand side of the screen. Chapter 6: Configuring the Wireless-G Exterior Access Point The Status - System Performance Tab...
-
Page 45: Appendix A: Troubleshooting
Frequently Asked Questions Can the Access Point act as my DHCP Server? No. The Access Point is nothing more than a wireless hub, and as such cannot be configured to handle DHCP capabilities. Can I run an application from a remote computer over the wireless network? This will depend on whether or not the application is designed to be used over a network. - Page 46 Access Point. Before using the roaming function, the workstation must make sure that it is set to the same channel number as the Access Point of the dedicated coverage area. To achieve true seamless connectivity, the wireless LAN must incorporate a number of different functions. Each node and Access Point, for example, must always acknowledge receipt of each message.
- Page 47 Can Linksys wireless products support file and printer sharing? Linksys wireless products perform the same function as LAN products. Therefore, Linksys wireless products can work with NetWare, Windows NT/2000, or other LAN operating systems to support printer or file sharing.
- Page 48 (frequency). How do I reset the Access Point? Press the Reset button on the back of the Access Point for about ten seconds. This will reset the unit to its default settings. How do I resolve issues with signal loss? There is no way to know the exact range of your wireless network without testing.
-
Page 49: Appendix B: Wireless Security
Wireless-G Exterior Access Point Appendix B: Wireless Security Linksys wants to make wireless networking as safe and easy for you as possible. The current generation of Linksys products provide several network security features, but they require specific action on your part for implementation. - Page 50 This includes hackers. So, don’t broadcast the SSID. Wireless networking products come with a default SSID set by the factory. (The Linksys default SSID is “linksys”.) Hackers know these defaults and can check these against your network. Change your SSID to something unique and not something related to your company or the networking products you use.
- Page 51 These security recommendations should help keep your mind at ease while you are enjoying the most flexible and convenient technology Linksys has to offer. Appendix B: Wireless Security Security Threats Facing Wireless Networks...
-
Page 52: Appendix C: Upgrading Firmware
The Access Point's firmware is upgraded through the Web-based Utility’s Administration - Firmware Upgrade tab. Follow these instructions: 1. Download the firmware upgrade file from the Linksys website, www.linksys.com. 2. Extract the firmware upgrade file on your computer. 3. Open the Access Point’s Web-based Utility. -
Page 53: Appendix D: Windows Help
Windows Help and are described in this appendix. TCP/IP Before a computer can communicate with the Access Point, TCP/IP must be enabled. TCP/IP is a set of instructions, or protocol, all PCs follow to communicate over a network. This is true for wireless networks as well. -
Page 54: Appendix E: Glossary
802.11g - A wireless networking standard that specifies a maximum data transfer rate of 54Mbps, an operating frequency of 2.4GHz, and backward compatibility with 802.11b devices. Access Point - A device that allows wireless-equipped computers and other devices to communicate with a wired network. Also used to expand the range of a wireless network. - Page 55 Wireless-G Exterior Access Point Buffer - A shared or assigned memory area that is used to support and coordinate different computing and networking activities so one isn't held up by the other. Byte - A unit of data that is usually eight bits long Cable Modem - A device that connects a computer to the cable television network, which in turn connects to the Internet.
- Page 56 HTTP (HyperText Transport Protocol) - The communications protocol used to connect to servers on the World Wide Web. Infrastructure - A wireless network that is bridged to a wired network via an access point. IP (Internet Protocol) - A protocol used to send data over a network.
- Page 57 Packet - A unit of data sent over a network. Passphrase - Used much like a password, a passphrase simplifies the WEP encryption process by automatically generating the WEP encryption keys for Linksys products. Appendix E: Glossary...
- Page 58 RJ-45 (Registered Jack-45) - An Ethernet connector that holds up to eight wires. Roaming - The ability to take a wireless device from one access point's range to another without losing the connection. Router - A networking device that connects multiple networks together.
- Page 59 Wireless-G Exterior Access Point Spread Spectrum - Wideband radio frequency technique used for more reliable and secure data transmission. SSID (Service Set IDentifier) - Your wireless network's name. Static IP Address - A fixed address assigned to a computer or device that is connected to a network.
- Page 60 Wireless-G Exterior Access Point VPN (Virtual Private Network) - A security measure to protect data as it leaves one network and goes to another over the Internet. WAN (Wide Area Network)- The Internet. WEP (Wired Equivalent Privacy) - A method of encrypting network data transmitted on a wireless network for greater security.
-
Page 61: Appendix F: Specifications
Wireless-G Exterior Access Point Appendix F: Specifications Model WAP54GPE Standards IEEE802.11g, IEEE802.11b, IEEE802.3u, IEEE802.3af Ports Ethernet, Antenna Buttons Reset Cabling Type UTP CAT 5 LEDs Power, LAN, Wireless Transmit Power 12 dBm Security Features WEP, WPA, RADIUS WEP Key Bits... - Page 62 Wireless-G Exterior Access Point Operating Humidity 5% to 95%, Non-Condensing Storage Humidity 5% to 95%, Non-Condensing Appendix F: Specifications...
-
Page 63: Appendix G: Warranty Information
Your exclusive remedy and Linksys' entire liability under this warranty will be for Linksys at its option to repair or replace the Product or refund Your purchase price less any rebates. -
Page 64: Appendix H: Regulatory Information
Canadian regulations. EC DECLARATION OF CONFORMITY (EUROPE) Linksys declares that this product conforms to the specifications listed below, following the provisions of the European R&TTE directive 1999/5/EC: EN 301 489-1, 301 489-17 General EMC requirements for Radio equipment. - Page 65 Linksys vakuuttaa täten että dieses produkt tyyppinen laite on direktiivin 1999/5/EY oleellisten vaatimusten ja sitä koskevien näiden direktiivien muiden ehtojen mukainen. Linksys déclare que le produit est conforme aux conditions essentielles et aux dispositions relatives à la directive 1999/5/EC. Belgique: Dans le cas d'une utilisation privée, à...
-
Page 66: Appendix I: Contact Information
Can't find information about a product you want to buy on the web? Do you want to know more about networking with Linksys products? Give our advice line a call at: Or fax your request in to: If you experience problems with any Linksys product,...