
Related Manuals for Linksys KVM2KIT


Summary of Contents for Linksys KVM2KIT
-
Page 1: Port Switch
Integrated K V M 2-Port Switch Use this Guide to install: KVM2KIT Installation Guide... - Page 2 Integrated KVM 2-Port Switch EC Declaration of Conformity (Europe) In compliance with the EMC Directive 89/336/EEC, Low Voltage Directive 73/23/EEC, and Amendment Directive 93/68/EEC, this product meets the requirements of the following standards: • EN55022 Emission • EN55024 Immunity...
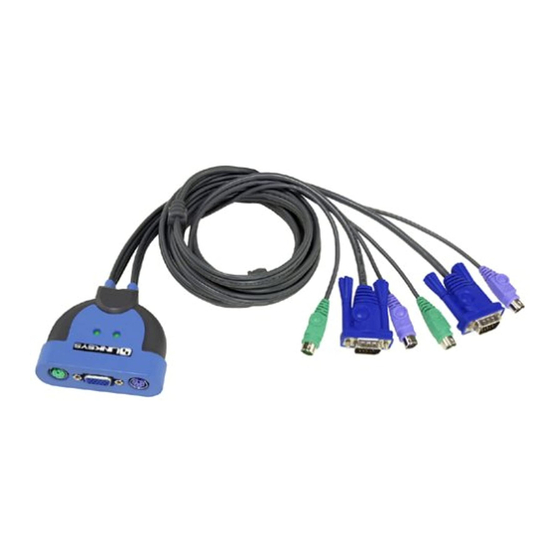
- Page 3 One PS/2 Mouse Step 1: Install the Integrated KVM 2-Port Switch A. Power down the monitor and computers before you install the KVM Switch. Unplug the power cords of any computers that have the Keyboard Power On function; otherwise, the KVM Switch will receive power from those com- puters.
- Page 4 Step 2: Use the Hot Key Combinations for the Integrated KVM 2-Port Switch The KVM Switch is controlled by hot key commands, also known as keyboard shortcuts. Hot key commands allow you to conveniently access either comput- er directly from the keyboard. Using hot keys, you can manually toggle between computers or automatically cycle between computers at a preset time interval.
- Page 5 Shift key. To exit Auto Scan Mode, press the spacebar. ProConnect™ Series Integrated KVM 2-Port Switch Initiate Auto Scan Mode and Change the Scan Interval If you want to change the can interval, use the following hot key combination: 1.
- Page 6 (3 is default) ProConnect™ Series Integrated KVM 2-Port Switch Contact Information For help with installation or operation of this product, contact Linksys Technical Support at one of the phone numbers listed in the Technical Support insert or Internet addresses below: E-mail Europe United Kingdom &...
- Page 7 w w w. l i n k s y s . c o m...