Table of Contents
Advertisement
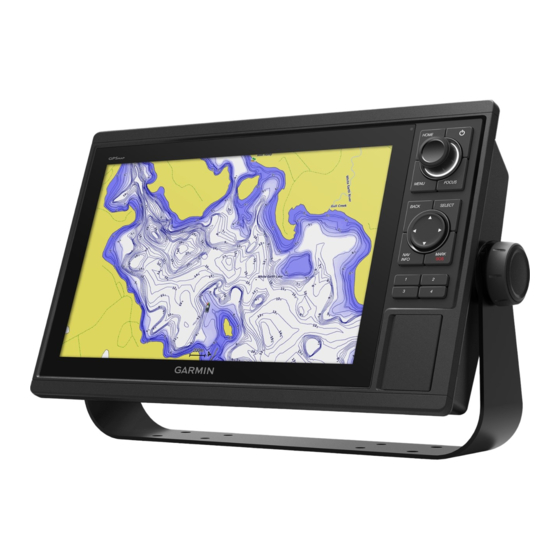
GPSMAP
10X2/12X2 SERIES
®
INSTALLATION INSTRUCTIONS
Important Safety Information
WARNING
Failure to follow these warnings, cautions, and notices could result in personal injury, damage to the vessel or
device, or poor product performance.
See the Important Safety and Product Information guide in the product box for product warnings and other
important information.
When connecting the power cable, do not remove the in-line fuse holder. To prevent the possibility of injury or
product damage caused by fire or overheating, the appropriate fuse must be in place as indicated in the product
specifications. In addition, connecting the power cable without the appropriate fuse in place voids the product
warranty.
CAUTION
Always wear safety goggles, ear protection, and a dust mask when drilling, cutting, or sanding.
To avoid possible personal injury or damage to the device and vessel, disconnect the vessel's power supply
before beginning to install the device.
To avoid possible personal injury or damage to the device or vessel, before applying power to the device, make
sure that it has been properly grounded, following the instructions in the guide.
NOTICE
For the best possible performance, the device must be installed according to these instructions.
When drilling or cutting, always check what is on the opposite side of the surface to avoid damaging the vessel.
Read all installation instructions before proceeding with the installation. If you experience difficulty during the
installation, contact Garmin
®
Product Support.
Contacting Garmin Support
• Go to
support.garmin.com
for help and information, such as product manuals, frequently asked questions,
videos, and customer support.
• In the USA, call 913-397-8200 or 1-800-800-1020.
• In the UK, call 0808 238 0000.
• In Europe, call +44 (0) 870 850 1241.
Software Update
You may need to update the chartplotter software after installation. For the instructions on how to update the
software, see the owner's manual at www.garmin.com/manuals/GPSMAP10x2-12x2.
October 2020
GUID-BF1B0D74-52BF-4F5B-938B-9A7556F36E8C v4
Advertisement
Table of Contents

Related Manuals for Garmin GPSMAP 12 2 Series


Summary of Contents for Garmin GPSMAP 12 2 Series
- Page 1 • In Europe, call +44 (0) 870 850 1241. Software Update You may need to update the chartplotter software after installation. For the instructions on how to update the software, see the owner's manual at www.garmin.com/manuals/GPSMAP10x2-12x2. October 2020 GUID-BF1B0D74-52BF-4F5B-938B-9A7556F36E8C v4...
-
Page 2: Tools Needed
Tools Needed • Drill ◦ Bail mount: drill bits appropriate for the surface and hardware ◦ Flush mount: 14 mm ( in.), 6 mm ( in.) and 3.6 mm ( in.) (with nut plate), or 3.2 mm ( in.) drill bit (with no nut plate) •... -
Page 3: Bail Mounting The Device
Bail Mounting the Device NOTICE If you are mounting the bracket on fiberglass with screws, it is recommended to use a countersink bit to drill a clearance counterbore through only the top gel-coat layer. This will help to avoid cracking in the gel-coat layer when the screws are tightened. -
Page 4: Flush Mounting The Device
Flush Mounting the Device NOTICE Be careful when cutting the hole to flush mount the device. There is only a small amount of clearance between the case and the mounting holes, and cutting the hole too large could compromise the stability of the device after it is mounted. -
Page 5: Connection Considerations
16 Starting in one corner of the mounting location, place a nut plate on the back of the mounting surface, lining up the large and small holes. The raised portion of the nut plate should fit into the larger hole. 17 Secure the nut plates to the mounting surface by fastening the included M3 screws through the smaller 3.6 mm (... - Page 6 Power/NMEA 0183 Cable ® • The wiring harness connects the device to power, NMEA 0183 devices, and a lamp or a horn for visible or audible alerts. • If it is necessary to extend the NMEA 0183 or alarm wires, you must use 22 AWG (.33 mm²) wire. •...
- Page 7 ◦ Additional Garmin Marine Network cables and connectors are available from your Garmin dealer. • The ETHERNET ports on the device each act as a network switch. Any compatible device can be connected to any ETHERNET port to share data with all devices on the boat connected by a Garmin Marine Network cable.
- Page 8 NMEA 2000 network. If you do not have an existing NMEA 2000 network you can create a basic one using cables from Garmin. If you are unfamiliar with NMEA 2000, you should read the Technical Reference for NMEA 2000 Products at garmin.com/manuals/nmea_2000.
-
Page 9: Nmea 0183 Connection Considerations
Item Description NMEA 2000 compatible Garmin device GPS antenna Ignition or in-line switch NMEA 2000 power cable NMEA 2000 drop cable 12 Vdc power source NMEA 2000 terminator or backbone cable NMEA 2000 T-connector NMEA 2000 terminator or backbone cable NMEA 0183 Connection Considerations •... - Page 10 This diagram illustrates two-way connections for both sending and receiving data. You can also use this diagram for one-way communication. To receive information from a NMEA 0183 device, refer to items , and when connecting the Garmin device. To transmit information to a NMEA 0183 device, refer to items , and when connecting the Garmin device.
- Page 11 NMEA 0183 and Power Cable Pinout Pin Number Wire Function Wire Color NMEA 0183 Tx/A (Out +) Blue NMEA 0183 Rx/A (In +) Brown NMEA 0183 Tx/B (Out -) Gray NMEA 0183 Rx/B (In -) Violet Alarm Yellow Accessory on Orange Ground (shield) Black...
- Page 12 Lamp and Horn Connections The device can be used with a lamp, a horn, or both, to sound or flash an alert when the chartplotter displays a message. This is optional, and the alarm wire is not necessary for the device to function normally. When connecting the device to a lamp or horn, observe these considerations.
-
Page 13: Specifications
2.34 kg (5.15 lb.) Max. power usage at 10 Vdc 34.8 W Typical current draw at 12 Vdc 2.2 A Max. current draw at 12 Vdc 2.9 A The device withstands incidental exposure to water of up to 1 m for up to 30 min. For more information, go to www.garmin.com/waterrating. -
Page 14: Nmea 2000 Pgn Information
NMEA 2000 PGN Information Transmit and Receive Description 059392 ISO acknowledgment 059904 ISO request 060160 ISO transport protocol: Data transfer 060416 ISO transport protocol: Connection management 060928 ISO address claimed 065240 Commanded address 126208 Request group function 126996 Product information 126998 Configuration information 127237... - Page 15 Description 130312 Temperature (obsolete) Transmit Description 126464 Transmit and receive PGN list group function 126984 Alert Response 127497 Trip parameters: Engine Receive Description 065030 Generator average basic AC quantities (GAAC) 126983 Alert 126985 Alert text 126987 Alert threshold 126988 Alert value 126992 System time 127251...
-
Page 16: Nmea 0183 Information
Description 129802 AIS safety-related broadcast message 129808 DSC call Information 129809 AIS class B "CS" static data report, part A 129810 AIS class B "CS" static data report, part B 130313 Humidity 130314 Actual pressure 130316 Temperature: Extended range 130576 Trim tab status 130577 Direction data... - Page 17 Garmin ® , the Garmin logo, and GPSMAP ® are trademarks of Garmin Ltd. or its subsidiaries, registered in the USA and other countries. These trademarks may not be used without the express permission of Garmin. NMEA , NMEA 2000 , and the NMEA 2000 logo are registered trademarks of the National Marine Electronics Association.
- Page 18 © 2020 Garmin Ltd. or its subsidiaries support.garmin.com...