Kyocera KM-6030 Operation Manual
Scanner interface card scan system (g)
Hide thumbs
Also See for KM-6030:
- Service manual (463 pages) ,
- Operation manual (124 pages) ,
- Ftp transmission manual (2 pages)
Table of Contents
Advertisement
Quick Links
Advertisement
Table of Contents

Related Manuals for Kyocera KM-6030


Summary of Contents for Kyocera KM-6030
- Page 1 Scan System (G) Operation Guide Set-up Edition...
- Page 2 This Operation Guide mentions that 6030 is a 60 ppm (prints per minute) machine and 8030 is an 80 ppm (prints per minute) machine.
-
Page 3: Trademark Information
Trademark Information • Microsoft, Windows, Windows NT and Internet Explorer are registered trademarks of Microsoft Corporation of America and other countries. • Windows Me , Windows Server and Windows XP are trademarks of Microsoft Corporation. • Ethernet is a registered trademark of Xerox Corporation. •... -
Page 4: About This Operation Guide
About this Operation Guide This Operation Guide is meant to be read when the Scanner Interface Card is installed and your copier is to be used as a network scanner. It explains set-up procedures and other related operation on the machine. As the required set-up in order to use the copier as a scanner may differ depending upon the environment in use in the connected computer, please read those sections related to your specific computer environment and perform the appropriate set-up procedures explained there. - Page 5 Important: The use of scanned legally copyrighted materials, such as documents, musical scores, pictures, woodblock prints, maps, drawings and photographs, for any intent other than your own personal or home use, or other such purpose, is prohibited under the copyright law without prior permission from the legal copyright owner.
-
Page 6: Getting Connected
Getting connected The following procedures are required in order to use this machine as a scanner. Connect the scanner to your computer <Example connection> Network cable Perform the required operation at the scanner Perform the required operation at your computer Connecting the scanner to your computer network with a network cable (100BASE-TX and 10BASE-T) -
Page 7: Table Of Contents
Table of contents Preparations ...1-1 Names of parts ... 1-1 Main body ... 1-1 Operation panel ... 1-2 Accessories ... 1-3 Utilities and other software (the main content of the included CD-ROMs) ... 1-3 Required items ... 1-3 Set-up ...1-4 Setting up the scanner ... -
Page 9: Preparations
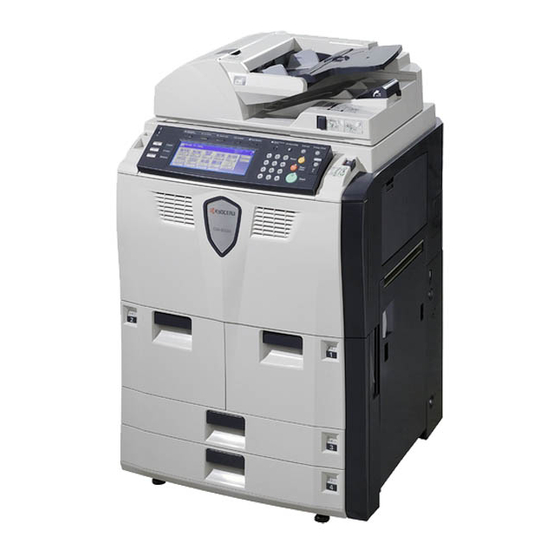
Preparations Names of parts Main body Document processor — Set the originals here. When setting an original on the platen, open and close the document processor. Platen — Set the original to be scanned face-down in the left-rear portion of the platen. Original size indicator lines —... -
Page 10: Operation Panel
Preparations Operation panel [System menu/Counter] key — Press this key when you want to change default settings for the scanner as well as register new users. [Reset] key — Press this key when you want to cancel default and scan settings, as well as when you want to clear selected destination folders and computers. -
Page 11: Accessories
Accessories Prior to using the scanner for the first time, verify that the following accessories are included with this product. • 1 CD-ROM (Scanner Library) • 1 CD-ROM (TWAIN-compatible application) • Operation Guide Utilities and other software (the main content of the included CD-ROMs) CD-ROM (Scanner Library) •... -
Page 12: Set-Up
Set-up Setting up the scanner Outline and network configuration Example of transmission modes for data scanned using the Print/Scan System and the required software The software indicated in the thick-lined balloons is included with this product. Install the software that is appropriate to your operating environment and needs. Configuration Tool ddress Editor Network settings... -
Page 13: Connecting The Scanner To Your Computer Network
Connecting the scanner to your computer network Caution ALWAYS turn the main power switch to the scanner OFF BEFORE connecting the network cable. Turn the main power switch located on the rear left of the scanner OFF ( ). Connect a 10BASE-T or 100BASE-TX cable to the scanner interface connector located on the rear right of the scanner. -
Page 14: Making Settings From The Touch Panel
Set-up Making settings from the touch panel This section explains the settings for using the scanner. The setting items are shown below. • Basic scanner settings...Page 6 • Registering and editing user information...Page 7 • Editing the shared Address Book...Page 8 •... -
Page 15: Registering And Editing User Information
Press [System Basic]. Note If Unable to use scanner appears, the touch panel will return to the System Menu screen. Wait for a while (approx. 2 minutes) and then press [System Basic] again. Use [ ] and [ ] to select the setting that you want to change and then press [Change #]. - Page 16 Set-up If you want to change previously registered user information, use [ ] and [ ] to select the name of the user that you want to edit the information for and press [Change User Info.]. If a password (see User registration information on page 11) has been registered for that user, enter the registered password.
- Page 17 Enter your user number and then press [Enter]. Notes • Your user number refers to the 3-digit number to the left of your user name as it appears in the screen when performing step 2 on page 8. For example, using the sample screen under step 2 on page 8 as an example, the user number for User A would be 001.
-
Page 18: Group Registration
Set-up Group registration Press [Information], use [ ] and [ ] to select the item that you want to edit, and then press [Change #]. The Change Setting screen will appear. Enter the corresponding information in accordance with the settings, etc., that are shown on the touch panel. - Page 19 User registration information Item E-mail address IP address or host name Name to display User password Save folder No. Destination registration information Item E-mail address IP address or host name Name to display Save folder No. Add dest. Note In order for scanner users to create and use their own personal Address Book, it is necessary to install the Address Book software in that user’s computer.
- Page 20 Set-up Date/Time and Time Difference Sets the required area information for the Send E-mail function. The time of day when e-mail is sent from the scanner is included in the header of that e-mail message as the transmission time. Perform the following procedure in order to set the date and time in your area, as well as the time difference to GMT (Greenwich Mean Time).
-
Page 21: Other Settings
Use [ ] and [ ] to select Date/Time and then press [Change #]. Use [+] and [-] to change the setting as desired. Press [Close] to register the change to that setting. Notes • Be sure to set the time difference first and then the date and time. •... -
Page 22: Setting Up The Scanner Software
Set-up Setting up the scanner software System requirements System environment Recommended environment CPU CD-ROM drive Ethernet cable Installing the software There are four main functions available with this network scanner. Perform the following procedure in order to install into your computer the required utility that is appropriate to the application and operating system in use in your computer. -
Page 23: Installing The Utilities
Note Refer to the Functions Edition of the Operation Guide (On-Line Manual) for more detailed information on using DB Assistant, Scanner File Utility or your Web browser software in order to utilize the Database Connection (adding file information to the scanned image data file) function. Installing the utilities The following utilities are contained on the CD-ROM that is included with this product. -
Page 24: Installing The Twain Source
Set-up Installing the TWAIN Source Run Windows. Quit all other applications that may be open. Insert the supplied Scanner Library CD-ROM into the optical drive of your PC. The License Agreement will be displayed. If you agree with the conditions contained therein, click on [Accept]. -
Page 25: Performing The Required Operation At The Scanner
Performing the Required Operation at the Scanner Scanning under the Scan to PC function Before using the Scan to PC function Be sure to perform the following settings in order to use the Scanner File Utility. Install the Scanner File Utility in the destination computer. Run the Scanner File Utility and register the destination folder for the scanned image data. - Page 26 Performing the Required Operation at the Scanner Note If the Selec. of senders (users) setting is turned ON, the user that is registered under User Number 001 will be automatically selected. If a password was designated during registration of your user information, the Password Input screen will appear.
-
Page 27: Scan Settings
Check the selected destinations. Use [ ] and [ ] to make sure that all of the selected destinations are correct. If an incorrect or unnecessary destination is in the list, select it and press [Delete]. Scan settings The Scan Settings menu is displayed in the right portion of the touch panel. - Page 28 Performing the Required Operation at the Scanner If you select On under Continuous sending in the Scan to PC screen, once the scanning operation is completed, the touch panel will return to the Scan to PC screen, as appropriate, with the current settings unchanged.
-
Page 29: Scanning Under The Send E-Mail Function
Scanning under the Send E-mail function Before using the Send E-mail function Register the destination name and the e-mail address in the scanner. How to scan under Send E-mail Press the [Scanner] key. Press [Send E-mail]. Select your user name. Press the number key directly or enter the user number using the numeric keys and press [Enter]. - Page 30 Performing the Required Operation at the Scanner If you want to manually enter an e-mail address, press [Enter dest.]. Type in the e-mail address of the desired destination. Once you have entered the address, press [End] and the Select the Kind of Receiver screen will appear.
- Page 31 Once you have selected all of the destinations that you want to send the e-mail to, press [Close]. To select other destinations, repeat the procedure from step 4. Check the selected destinations. Use [ ] and [ ] to make sure that all of the selected destinations are correct.
- Page 32 Performing the Required Operation at the Scanner If you select ON under Batch scanning in the [Edit] tab in the Scan Settings menu screen, a screen that asks whether or not you want to continue scanning will appear after scanning of the original is complete.
-
Page 33: Scanning With Twain
Scanning with TWAIN The following explains the settings that need to be made in the scanner in order to scan using the TWAIN function. When performing the scanning operation at the scanner Press the [Scanner] key. Press [TWAIN]. Set the original that you want to scan. Run the TWAIN Source in the corresponding application. - Page 34 Performing the Required Operation at the Scanner Set the original that you want to scan in the scanner and press the [Start] key. Scanning will begin. Notes • Scan settings can also be made on the operation panel of the scanner. Change any settings there that you want.
-
Page 35: Setting Up The Database Connection Function
Setting up the Database Connection function Preparations First, perform the following set-up procedure in order to use the Database Connection function. Install the DB Assistant into the network manager’s computer. Run the DB Assistant and perform the related settings for the Database Connection function. Run the Scanner File Utility in the computer in which you want to save the scanned image data and perform the related settings for the Database Connection function. - Page 36 Performing the Required Operation at the Scanner If a password was designated during registration of that destination, the Password Input screen will appear first. After entering the appropriate password, press [Enter]. If the entered password matches the registered one, the Destination of input data screen will appear.
- Page 37 Select the item that you want to register the keyword under and then press [Enter]. The input screen for the selected item will be displayed. The following steps explain the procedure when you select the [Keyword] item. Notes • You can also change the name of the file by selecting the [File Name] item. •...
- Page 38 Performing the Required Operation at the Scanner Notes • You can change the scan settings as desired by simply performing the corresponding setting procedure on the scanner’s operation panel. • If you perform the same settings both from your computer and at the scanner itself, the specific settings made at the scanner will take priority.
- Page 40 Revision 1.0 2005.1 303JV56010 2005 KYOCERA MITA Corpration All rights reserved.