
Related Manuals for La Crosse Technology 102819


Summary of Contents for La Crosse Technology 102819
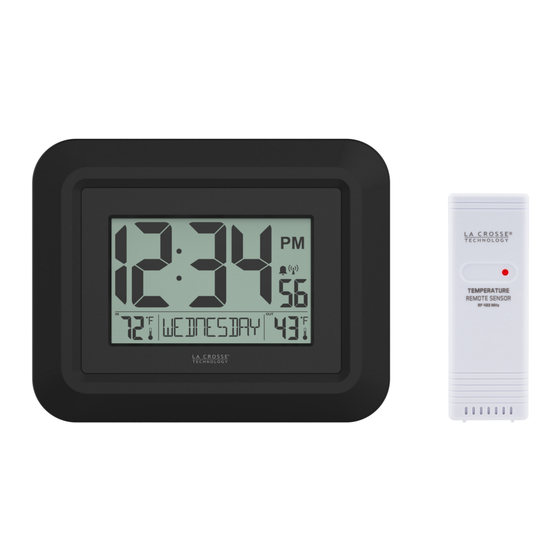
- Page 1 ATOMI C D IG I TA L WAL L C LO C K I N ST R UC TI O N M AN UA L MODEL: 513-1918B DC: 102819 1 | PAGE ATOMIC DIGI TAL CLO CK...
-
Page 2: Table Of Contents
TA BLE OF C O NTEN TS 3. Power Up 3. Custom Date Display 4. Settings Menu 5. Daylight Saving Time Options 5. Atomic Time 6. Time Alarm • Set Alarm • Activate/Deactivate Alarm • Snooze Alarm 6. Outdoor Sensor Reception 7. -
Page 3: Power Up
P OW ER U P 1. Insert 2-AA batteries into your Outdoor Sensor. 2. Insert 3-AAA batteries into your Digital Clock. 3. Once the Outdoor Sensor is reading to your clock, place it outside in a shaded location to protect it from the sun’s heat. -
Page 4: Settings Menu
S E TT ING S 1. Hold the SET button to enter the Settings Menu. 2. Use the + or - button to adjust values. 3. Press the SET button to confirm and move to next item. Settings Menu Order: •... -
Page 5: Daylight Saving Time Options
HOUR MINUTES YEAR MONTH DATE FAHRENHEIT/CELSIUS DAY LI GH T SAVIN G TI ME OPTI O NS Some states are considering going to year around Daylight Saving Time. We have built in options to accommodate this feature into the program menu. DST AUTO ON: Your clock will automatically move 1 hour ahead in the spring and move one hour back in the fall when it receives the signal from the Atomic Clock to change. -
Page 6: Time Alarm
T IM E ALA RM Set Time Alarm 1. Hold the ALARM button 2 seconds to enter settings mode. 2. Press the + or - button to adjust the flashing values. 3. Hold the + or - buttons to adjust quickly. 4. -
Page 7: Factory Restart
FACTORY R ESTA RT Factory Restart: When the outdoor readings show NO and searching for the sensor has not helped, complete a full restart: 1. Bring the sensor in the house about five feet from the clock. 2. Remove batteries from the sensor, and from the clock 3. -
Page 8: Specifications
• Promptly remove expired batteries. WA R RA NTY I N FO La Crosse Technology, Ltd. provides a 1-year limited time warranty (from date of purchase) on this product relating to manufacturing defects in materials & workmanship. For Full Warranty Details, Visit: www.lacrossetechnology.com/support... -
Page 9: Fcc Statement
FC C STATE MENT WA R RA N TY IN F O La Crosse Technology, Ltd. provides a 1-year limited time warranty (from date of purchase) on this product relating to manufacturing defects in materials & workmanship. La Crosse Technology, Ltd.