Advertisement
Quick Links
Advertisement

Related Manuals for Klipsch KPT-100


Summary of Contents for Klipsch KPT-100
- Page 1 Fig. 24...
- Page 2 Klipsch Professio nal Theater Speaker Systems Installation Manual Applicable for the Installation and assembly of the following products: Screen Systems KPT-MCM Grand KPT-Jubilee® Stage System KPT-941-T (THX® – Approved) KPT-941 KPT-535 KPT-904 KPT-325 Surround Systems KPT-250 KPT-200 (THX® – Approved) KPT-100 (THX®...
- Page 3 Welcome to the Klipsch line of Professional Theater Speaker Systems! Since the earliest days of amplified sound systems, Klipsch has utilized the latest concepts in loudspeaker design, surpassing the expectations of concurrent fidelity. Today, by combining our design excellence with a solid...
- Page 4 4) With a low level pink noise or frequency generator signal source, verify that the low frequency amplifier and processor outputs for each of the systems is feeding the proper speaker component(s). Do the same for all of the amplifier and speaker sections, across all of the installed systems.
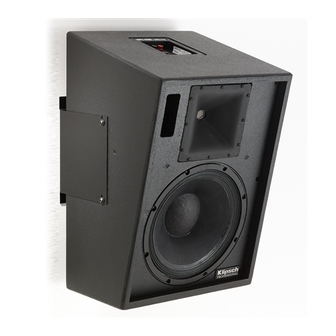
- Page 5 17, 18, 19 and 20. The bolt locations shown in "A" on Fig. 17 are common to models KPT-250, KPT-200 and KPT-100 surround sound speakers, and are used when mounting the speakers using a Goldberg bracket. The bolt hole locations shown at "B" in Fig. 17 are used when mounting the speakers using either an APC or OmniMount bracket.
- Page 6 Mechanical Installation for KPT-904 Mechanical Installation for KPT-535 Mechanical Installation for KPT-325 Mechanical Installation for KPT-684 Mechanical Installation for KPT-484 Mechanical Installation for KPT-250, KPT-200, KPT-100 Mechanical Installation for KPT-110 Surround Sound System Installation Screen Sound System Setup and Alignment Wiring Detail Example...
- Page 7 C r o s s o v e r s Although passive crossovers are available for a number of the Klipsch screen and stage systems, there are advantages to using active crossovers. By actively dividing the frequency sections for the systems, less power is lost to heat in the passive crossover, and device control (damping factor) is greatly improved.
- Page 8 Fig. 13 Fig. 14 Fig. 15 Fig. 16 Mechanical Installation Drawings for KPT-535 Please refer to the following drawings for assembly details: Figures 13 and 14. After unpacking all components, locate the KPT-402 compression driver and horn. Attach the driver to the horn using supplied hardware. Locate the two "...
- Page 9 Mechanical Installation Drawings for KPT-941 Please refer to the following drawings for assembly details: Figures 9 and 10. After unpacking all components, locate the KPT-941 HF compression driver and horn. Attach the driver to the horn using supplied hardware. Locate the two "...
- Page 10 The Klipsch Tractrix® Horns in the high-frequency and mid-bass sections will provide linear frequency response, although at reduced levels, as the listening angle off-axis is increased, up to the pattern limits of the horn components.
- Page 11 Mechanical Installation Drawings for KPT-MCM-4 Grand. Please refer to the following drawings for assembly details: Figures 1 and 2. After unpacking all components, locate the KPT-941 HF compression driver and horn. Attach the driver to the horn using supplied hardware. Locate the two "...
- Page 12 Fig. 5 Fig. 6 Fig. 7 Fig. 8 Mechanical Installation Drawings for KPT-Jubilee™ Please refer to the following drawings for assembly details: Figures 5 and 6: After unpacking all the components, locate the two top of the KPT-XII. Remove the two screws and washers. Place the KPT- 904-HF unit on top of the KPT-XII, making sure that the hole/slot as indicated by "A"...