Advertisement
Quick Links
Advertisement

Related Manuals for Alpine BT50-R65P


Summary of Contents for Alpine BT50-R65P
- Page 1 ALPINE PREMIUM SPEAKER SYSTEM BT50-R65P / BT50-S65P Installation Manual...
- Page 3 WARNING Before installing or connecting the unit, please read the following thoroughly for proper use. WARNING CAUTION MAKE THE CORRECT CONNECTIONS. USE SPECIFIED ACCESSORY PARTS AND INSTALL THEM SECURELY. Failure to make the proper connections may result in fire or product damage. Be sure to use only the specified accessory parts.
-
Page 4: Parts List
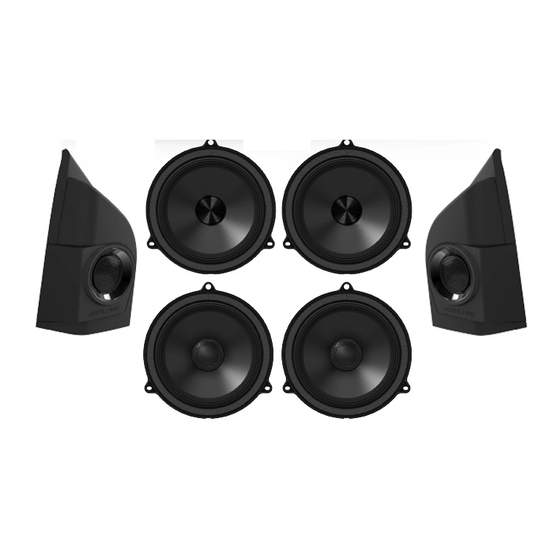
Parts List Alpine Tweeter Assembly Alpine Front Speakers 6x Foam Adhesive Alpine Rear Speakers 4x T15 Torx Screw 6x Cable Ties Door Handles (Retained) 2x Dome Phillips head Screw 4x Bevel Phillips head Screw Rear Door Cards (Retained) Door Pockets (Retained) - Page 5 Parts List 12x T15 Torx Screw 8x Dome Phillips head Screw Speaker Assemblies (Retained) Bottom of Door Cards (Retained)
-
Page 6: Required Tools
Required Tools Plastic Trim Removal Tool Flat Head Screw Driver PH2 Screwdriver T15 Torx Screwdriver Side cutters... - Page 7 Disconnection Of Battery WARNING It is recommended to disconnect the cable from the negative battery terminal before proceeding with this installation.
- Page 8 Removal of Door Cards (Front) 1. To remove the trim from the front door requires a PH2 screwdriver, T15 Torx screwdriver/socket and Jewellers flat head screwdriver. 2. Remove the cover from behind the door handle by prying it from the edge using a flat head jewellers screwdriver.
- Page 9 Removal of Door Cards (Front) 3. Unscrew the T15 Torx Screw with a T15 torx bit/screwdriver. 4. Unscrew the 2 Domed Phillips-Head Screws holding in the bottom of the door card with a PH2 screwdriver.
- Page 10 Removal of Door Cards (Front) 5. Remove the cover inside the pocket of the door card to expose the flat phillips head screw 6. Unscrew the bevel phillips-head screw inside the pocket of the door card.
- Page 11 Removal of Door Cards (Front) 7. To remove the tweeter assembly, release the top and side push clips by prying the assembly out from the indicated locations with a trim removal tool 8. Once the 2 push clips are released, pull outwards to release the third clip and remove the assembly.
- Page 12 Removal of Door Cards (Front) 9. Unclip the connector holding the tweeter assembly in place. 10. Starting at the bottom of the door card, pull it away from the door at the respective clipping points indicated by numbers 1-6. Keep the door card hanging from the top edge of the door.
- Page 13 Removal of Door Cards (Front) 11. With the door card still hanging from the top edge, disconnect the window switch connector reaching from the bottom of the door card and releasing it from the switch Note that the drivers side door card has 3 connectors to unclip. Drivers Side connectors...
- Page 14 Removal of Door Cards (Front) 12. With the door card still hangning from the top edge, disconnect the door handle mechanism by reaching from the bottom of the door card and pulling it away from the door card. 13. Slide the door card up to un-hinge it and remove it from the door once all clips and connectors are removed.
- Page 15 Removal of Speakers (Front) 14. Unscrew the 3 T15 Torx Screws holding the factory speaker assembly in place. Retain the screws for installation of Alpine speakers. 15. Unplug the speaker wiring connector from the speaker assembly.
- Page 16 Removal of Speakers (Front) 16. Remove the speaker by levering it out from the bottom to release the clip holding it into the door.
- Page 17 Removal of Door Cards (Rear) 17. Removing the trim from the front door requires a PH2 screwdriver, T15 Torx screwdriver/socket and Jewell ers flat head screwdriver. 18. Remove the cover from behind the door handle by prying it from the edge using a flat head jewellers screwdriver.
- Page 18 Removal of Door Cards (Rear) 19. Unscrew the T15 Torx screw with a T15 torx bit/ screwdriver. 20. Unscrew the 2 domed phillips-head screws holding in the bottom of the door card with a PH2 screwdriver.
- Page 19 Removal of Door Cards (Rear) 21. Remove the cover inside the pocket of the door card to expose the flat phillips head screw 22. Unscrew the bevel phillips-head screw inside the pocket of the door card.
- Page 20 Removal of Door Cards (Rear) 23. Remove the cover on the end of the door card with a jewellers flat head screw driver to expose a phillips head screw. 24. Using the PH2 screw driver, remove the phillips-head screw from the door card.
- Page 21 Removal of Door Cards (Rear) 25. Starting at the bottom of the door card, pull it away from the door at the respective clipping points indicated by numbers 1-6. Keep the door card hanging from the top edge of the door. 26.
- Page 22 Removal of Door Cards (Rear) 27. With the door card still hanging from the top edge, disconnect the door handle mechanism by reaching from the bottom of the door card and pulling it away from the door card. 28. Slide the door card up to un-hinge it and remove it from the door once all clips and connectors are removed.
- Page 23 Removal of Speakers (Rear) 29. Unscrew the 3 T15 Torx Screws holding the factory speaker assembly in place. Retain the screws for the installation of Alpine speakers 30. Unplug the speaker wiring connector from the speaker assembly.
- Page 24 Removal of Speakers (Rear) 31. Remove the speaker by levering it out from the bottom to release the clip holding it into the door.
- Page 25 Installation of Alpine Speakers (Rear) 32. Re-install the 3 T15 mounting screws to secure the Alpine speaker assembly to the door. 33. Plug the Alpine speaker assembly into the factory speaker connector and wrap a foam adhesive pad around the connection.
- Page 26 Installation of Alpine Speakers (Rear) 34. Cable tie the newly connected male and female plugs to the factory wiring from the rubber grommet and cut the excess tie. 28 - 17 35 Follow the ‘Removal of Door Cards (Rear)’ in reverse order to re-install the door...
- Page 27 Installation of Alpine Speakers (Front) 36. Re-install the 3 T15 mounting screws to secure the Alpine speaker assembly to the door. 37. Plug the Alpine speaker assembly into the factory speaker connector and wrap a foam adhesive pad around the connection.
- Page 28 Installation of Alpine Speakers (Front) 38. Cable tie the crossover to the exisiting factory loom above the grommet and cut the excess tie. 13 - 10 39 Follow the ‘Removal of Door Cards (Front)’ in reverse order to re-install the door...
- Page 29 Installation of Alpine Speakers (Front) 40. Connect the Alpine tweeter assembly to the factory tweeter connector and wrap a foam adhesive pad around the connection. 41. Insert the assembly by pushing into the clipping locations.
- Page 30 Published April 2020...