Table of Contents
Advertisement
Quick Links
Advertisement
Table of Contents

Related Manuals for Insignia KYS900


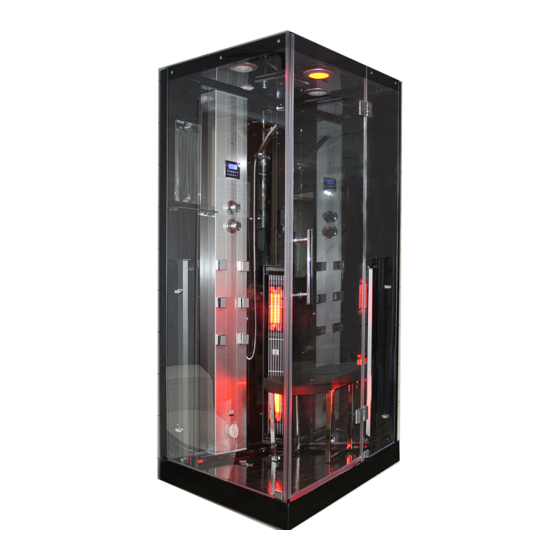
Summary of Contents for Insignia KYS900
- Page 1 Installation Guide KYS900 Sauna...
- Page 2 INSIGNIA INSTALLATION GUIDE KYS900 Sauna IMPORTANT : Please check all contents before build commences. No returns will be accepted once the build has started as it is deemed acceptance of product. 30 Day Technical Support : Please call 01908 317512 and request technical support for assistance during your build, should you require it.
-
Page 3: Table Of Contents
Contents Thank you for your recent purchase of an Insignia product. Please read this guide with great care to ensure you get the best out of your build and have a finished product that will last for many years to come. -
Page 4: Electrical & Tool Requirements
Electrical & Tool Requirements Electrical Requirement Voltage Rating : 220 - 240AC Frequency Rating : 50Hz Power Rating : 2500 Watts Amperage : 10.42 Amps Always consult a qualified Electrician before connection to ensure suitability. Your electrical contractor will understand ALL legal requirements of connection before undertaking any work or installation. -
Page 5: Box Contents
Box Contents IMPORTANT : Have you got everything? If not please contact the Insignia directly on 01908 317 512. Remember to never book your tradesman until everything has arrived, been checked and is present. No replacement/missing parts can be obtained free of charge during or after the build. -
Page 6: Assembly Of The Exterior
Step 1 : Levelling the Tray Note Level the tray by using a spirit level and then changing the elvation of the legs by screwing clockwise or counter-clockwise Visit insigniashowers.com for all your accessories and upgrades. - Page 7 Step 2 : Connecting the Column and Glass Panel Brackets Note Take the glass brackets and connect to the tray, with the screw tightening connection facing inside the tray. Locate the pre drilled holes for connection. Repeat for all brackets. Then take 90 degrees ‘L’...
- Page 8 Step 3 : Installing the Column Note Take the rubber seal without holes and place on the tray. Slot the column into position, ensuring you connect all power cables as ou alignthe column. Once aligned, screw the column into the ‘L’ Bracket.
- Page 9 Then simply slot the glass panel into the bracjet and secure in place with the bolt. Leave a gap at the end of the seal for the bracket to fit. Call Insignia on 01908 317512 for any advice with installation.
- Page 10 Along the corner of the glass, place the 90 degree aluminium framework connector, angled to allow the side panel to be inserted along the right hand side of the shower. Call Insignia on 01908 317512 for any advice with installation.
- Page 11 Step 6 : Installing the Right Side Panel and Front Framework Note Ensure you place a seal along the bottom of the glass panel first. Then simply slot the glass panel into the bracket and secure in place with the bolt. Also ensure you feed the panel into the 90 degree corner upright.
- Page 12 Step 7 : Installing the Front Fixed Glass Note Repeat the process from the previous pages.
- Page 13 Step 8 : Installing the Left Back and Side Panels Note Repeat the process from the previous pages Call Insignia on 01908 317512 for any advice with installation.
-
Page 14: Assembly Of The Roof
Installing the Roof Note Place the rubber seal on the top of the column before putting the roof in place. Use the provided nuts, bolts and screws to secure the roof. Call Insignia on 01908 317512 for any advice with installation. -
Page 15: Installation Of Door
Step 10 : Installinig the Door Seal Note Push the fixed glass seal onto the fixed glass. Push the bottom door seal onto the door. Push magnetic door seals on the door and fixed glass panel... - Page 16 Step 11 : Installing the Door Hinges Note Use the Allen key provided to take the hinge apart. Use glass protecting spacer either side of the glass and connect the bolts from the inside of the shower. Lift the door into position and hold steady whilst connecting the hinges.
- Page 17 Installing the Door Handle Note Use the Allen key provided to take the door handle apart. When connecting ensure you have the glass protecting spacer on either side of the glass. Call Insignia on 01908 317512 for any advice with installation.
-
Page 18: Fitting The Sauna Heaters
Tap the heater down with a mallet to lock them into position. Ensure the connection wire is fed up inside the heater for a flush fit. Call Insignia on 01908 317512 for any advice with installation. -
Page 19: Installing Accessories
Step 14 : Installing the Accessories Note Using the accessories connection bolts, screw the acces- sories in position and secure from the rear using washers and nuts. - Page 20 Step 15 : Installing the Accessories Continued Note Using the screws and nuts provided, connect the shelf to the left back wall using the screws and nuts.
- Page 21 Step 16 : Installing the Accessories Continued Note Again, using the screws and nuts provided, connect the mirror to the left back wall using the screws and nuts. Call Insignia on 01908 317512 for any advice with installation.
- Page 22 Step 17 : Assembling the Stool Note Using the Allen Key provided , screw the legs to the stools and place in the shower. Call Insignia on 01908 317512 for any advice with installation.
-
Page 23: Water Valve Connections
Step 18 : Water Valve Connections... -
Page 24: Power Connections
Step 19: Power Connections... -
Page 25: Control Panel Instructions
To connect the Bluetooth, press the audio function (button 10) unit ‘BT’ is shown on the control panel. Pair the sauna with your device. Once connection has been successful and the Bluetooth icon showing on the panel interface. Call Insignia on 01908 317512 for any advice with installation. - Page 26 Button 12 (Power) Use to power the control panel on or off. Also use to unlock he panel (enters lock mode auto- matically after 60 seconds of inactivity). Call Insignia on 01908 317512 for any advice with installation.
-
Page 27: Sauna Safety Instructions
Steam Room/Sauna Usage & Safety Guide 1.Never leave children unattended in the Sauna/Steam Shower. 2.Regulate the temperature of sauna before session - Pre-heat time 15- 30 minutes (from room temperature 20c) 3.Never touch the heater panels whilst in operation, possible burning may occur. -
Page 28: Weee Compliance
We accept returns of all products carrying the Insignia brand. All other products are either considered outside the scope of WEEE or Insignia is not technically the producer of these products. Insignia also accepts historic like-for-like WEEE returns. - Page 29 Directive 305/2011/EC. A copy of the Declaration of performance is available from www.insigniarange. co.uk/ce.aspx Insignia™ is a registered trademark of Maclean International Ltd, 9a Deans Road, Old Wolverton, Canon Industrial Park, Milton Keynes, Buckinghamshire, MK12 5NA, UK All images are subject to copyright. Images may not be used in any way shape or form with out written permission from Maclean Interna- tional Ltd.
- Page 30 Discover Discover Serenity Serenity Everyday Everyday...