Table of Contents
Advertisement
Quick Links
Advertisement
Table of Contents

Related Manuals for Fisher & Paykel DH9060P2


Summary of Contents for Fisher & Paykel DH9060P2
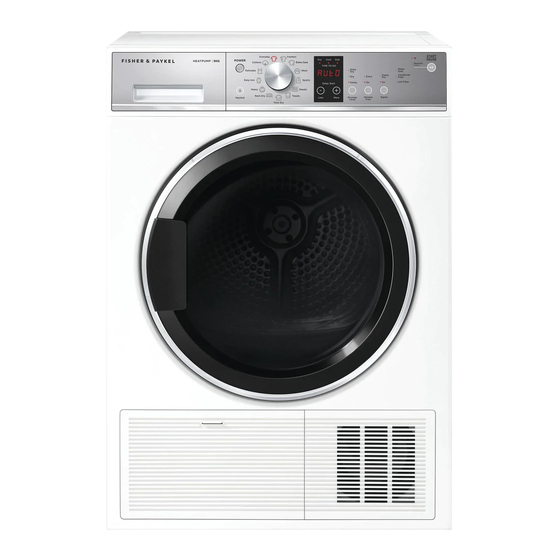
- Page 1 HEAT PUMP CLOTHES DRYER DH9060P2 & DH9060PG2 models USER GUIDE NZ AU...
-
Page 3: Table Of Contents
CONTENTS Safety and warnings Control panel WiFi connection Dry cycles Dry preparation Getting started quickly Drying cycle options Customising a dry cycle Caring for your dryer Before you call for service Before you call for service Fault codes Troubleshooting Manufacturer’s warranty Customer care Registration To register your product visit our website: fisherpaykel.com/register... -
Page 5: Safety And Warnings
SAFETY AND WARNINGS WARNING! Electric Shock Hazard Failure to follow this advice may result in electric shock or death. • If you are using an extension cord or a portable electrical outlet device (eg multi-socket outlet box), ensure that it is positioned so that it does not come into contact with water or moisture. - Page 6 SAFETY AND WARNINGS READ AND SAVE THIS GUIDE When using this appliance, follow basic precautions, including the following: General The appliance must not be supplied through an external switching device, such as a timer, or connected to a circuit that is regularly switched on and off by a utility. We do not recommend the use of extension cords or portable electrical outlet devices for safety reasons.
- Page 7 Do not overload your dryer beyond its rated capacity: MODEL MAXIMUM CAPACITY (KG) DH9060P2 DH9060PG2 *Capacity refers to the maximum dry weight of items the dryer can dry at any one time Never put dripping wet clothes in or on top of the dryer as excess water may cause an electrical hazard.
- Page 8 SAFETY AND WARNINGS Items that have previously been cleaned in, washed in, soaked in or spotted with flammable liquids or solids, eg petrol/gasoline, kerosene, dry cleaning solvents, vegetable or cooking oil, acetone, denatured alcohol, some brands of spot removers, turpentine, waxes and wax removers or other flammable or explosive substances should not be placed in a tumble dryer.
-
Page 9: Control Panel
CONTROL PANEL 1 POWER Press to turn the dryer ON/OFF. 2 Keylock Press and hold to disable all buttons on the display panel, except button. This prevents accidental button presses. POWER 3 SmartTouch™ Rotate to select your desired drying cycle. control dial The icon illuminates to indicate the selected drying cycle. - Page 10 CONTROL PANEL Timed cycles When a timed cycle is selected the machine dries for the selected time regardless of the level of moisture in the load. It is important to check the items throughout the timed programmes to avoid over drying. Timed cycles include TIME DRY, RACK DRY WOOL Timed programmes of 10 to 150 minutes can be selected using the...
- Page 11 CONTROL PANEL Keylock Keylock can be used to lock the buttons on your dryer when not in use. This will avoid accidental button pushes. To turn Keylock Press for two seconds. When activated, the button is illuminated. If Keylock is and the dryer is turned If a button is pressed while KEYLOCK...
-
Page 12: Wifi Connection
WIFI CONNECTION Your appliance can be connected to your home wireless network and operated remotely using the app. Getting started Ensure your home WiFi network is turned on. You will be given step by step guidance on both your appliance and mobile device. It may take up to 15 minutes to connect your appliance. -
Page 13: Dry Cycles
DRY CYCLES Your dryer has a number of dry cycles, selecting the most appropriate cycle for each load will help ensure you get the best drying result. DEFAULT CYCLE DESIGNED FOR LOAD DRYNESS (KG) LEVEL* Everyday Auto sensing cycle for mixed loads. Cottons** Auto sensing cycle for cotton clothes. -
Page 14: Dry Preparation
DRY PREPARATION Sorting Sort your garments before placing them into the dryer. Sort into loads of similar items, and loads that will likely take similar times to dry. Heavier items (eg towels, and flannelette sheets) are best dried separately from lightweight items (eg synthetics, polyester-cotton sheets and shirts). - Page 15 DRY PREPARATION Before you load Check pockets for items that could damage your clothes or get caught in the dryer. Close zippers, hooks and eyes, and other fastenings (ie fasten the openings of duvet/ doona covers), and remove loose bra wires. These may damage both your dryer and your clothes.
- Page 16 DRY PREPARATION Drying rack There are many items that would benefit from being dried on a drying rack. For example items such as sport shoes, soft toys, hats and woollen items that may be damaged if they are tumbled. The drying rack is installed in your dryer when it leaves the factory.
-
Page 17: Getting Started Quickly
GETTING STARTED QUICKLY Check the lint and condenser filters are clean and replaced correctly before every load. Ensure the water tank is empty or drain hose secure before using your dryer. Sort and load items into the dryer drum, ensuring no items are in the way of the door. Close the door (you will hear it click shut). - Page 18 GETTING STARTED QUICKLY If you wish to change a cycle or select a different option once a drying cycle has started, press then select the new cycle or option. Press to restart the dryer with the new cycle and/or settings. When the cycle finishes, your dryer will beep and then turn off automatically. If the WRINKLE option has been selected the dryer will rotate the drum periodically blowing cool air FREE...
-
Page 19: Drying Cycle Options
DRYING CYCLE OPTIONS All drying cycles default to the recommended options for that cycle based on the average expected load to be dried using that cycle. You can vary the options (eg DRYNESS LEVEL ) to create your desired cycle. Some options are not available on some cycles, for DRY TEMP clothes care reasons, or because the option is not appropriate for the cycle. - Page 20 DRYING CYCLE OPTIONS Wrinkle Free To minimise wrinkling, select one of the options. WRINKLE FREE provides wrinkle free operation for 1 hour. provides wrinkle free operation for 24 hours. EXTRA To stop the dryer at any point during the stage of the cycle, press WRINKLE FREE You can then open the dryer door and remove your items.
- Page 21 DRYING CYCLE OPTIONS Delay Start option can delay the start of the dry cycle between 15 minutes and DELAY START 12 hours. Press to increase the delay time, and MORE to decrease the time, or turn LESS DELAY off. START Press to confirm your selection and start the countdown.
-
Page 22: Customising A Dry Cycle
CUSTOMISING A DRY CYCLE After using your dryer a few times you may discover there are some drying options you prefer for some cycles. You can programme your dryer to remember the drying options you prefer for each drying cycle. For instance, you may want to set the cycle to EASY IRON a different dryness setting or programme the... - Page 23 CUSTOMISING A DRY CYCLE Select your preferred setting for this option. Only a single dry cycle option can be customised at a time. Press once to save your customised cycle. A long beep will sound to confirm that your changes have been saved. Ensure the customised dry cycle option is saved before customizing any other options.
-
Page 24: Caring For Your Dryer
CARING FOR YOUR DRYER When you have finished using your dryer Unplug the dryer from the power socket. Wipe around the door to remove any remaining condensation and foreign matter. Clear the lint and condenser filters and empty the water tank (if not set up to automatically drain). - Page 25 CARING FOR YOUR DRYER To clean the door lint filter: Open the dryer door. Remove the lint filter by pulling it up and out of the filter slot. Open it out and wipe the surfaces clean with your hand or a soft cloth. Close the lint filter and place it back in the opening.
- Page 26 CARING FOR YOUR DRYER To clean the condenser filter: Switch off the power supply and remove the power plug. Open the condenser filter cover. Turn the four condenser lock levers 90° then pull out the condenser filter. Use your hand, a cloth or a vacuum with a crevice nozzle to remove any lint build-up from the mesh surface of the filter.
- Page 27 CARING FOR YOUR DRYER To clean the filter foam: Remove the bracket securing the foam to condenser filter. Remove the foam and vacuum lint build-up with a crevice nozzle. Replace the filter foam and secure with the bracket. The condenser filter foam should be replaced regularly, three filter foams are provided with your dryer.
- Page 28 CARING FOR YOUR DRYER To clean the evaporator grid: With the condenser filter removed you will be able to see the evaporator grid. Cut Hazard. The surface of the evaporator has sharp edges and contact may result in injury. Handle with care when cleaning the grid and always keep blades away from fingers and body.
- Page 29 CARING FOR YOUR DRYER Cleaning the sensors There are sensors in your dryer that detect whether the laundry is dry or not. These sensors need to be cleaned periodically (we recommend approximately four times a year). To clean the sensor: Open the door of your dryer. Allow the dryer to cool if drying has been carried out.
- Page 30 CARING FOR YOUR DRYER Emptying the water collection tank During the drying cycle, steam condenses into water and is collected in the water tank, located at the top left of the dryer. It is important to empty the water tank after every load. If the water tank becomes full during operation, the dryer will pause, display a user prompt and beep to alert you.
-
Page 31: Before You Call For Service
BEFORE YOU CALL FOR SERVICE User warnings Your dryer is capable of diagnosing a number of its own problems. It will sound a continuous series of beeps and display a user prompt when it has a problem that you can correct yourself. -
Page 32: Before You Call For Service
BEFORE YOU CALL FOR SERVICE The door is Close the door fully and press not closed Try opening and closing the door again. Reposition the load, ensure the load is correctly in the drum and that protruding items are not preventing the door from closing. -
Page 33: Fault Codes
FAULT CODES When a continuous series of beeps sound, all the lights turn off on the control panel and a number appears on the display, a fault has occurred. The dryer will automatically enter this mode if a fault occurs. The word will be shown in the control panel FAULT display followed by a number. -
Page 34: Troubleshooting
TROUBLESHOOTING The following is a list of problems you may encounter when using this appliance and some suggestions that may help to correct the problem. If you still have problems, contact your Fisher & Paykel trained and supported service technician. PROBLEM POSSIBLE CAUSES WHAT TO DO... - Page 35 TROUBLESHOOTING PROBLEM POSSIBLE CAUSES WHAT TO DO Dryer is taking Drying cycle selected not Select an appropriate cycle for the too long. appropriate for the load. load. Refer to ‘Drying rack’. Results were Dryness level selected not Select a higher dryness level. not satisfactory.
- Page 36 TROUBLESHOOTING PROBLEM POSSIBLE CAUSES WHAT TO DO Dryer is not Drain hose not connected Ensure the drain hose is connected draining to the water tank. correctly. Refer to your installation guide for guidance on draining. Water tank not in Ensure water tank is properly place correctly.
- Page 37 TROUBLESHOOTING PROBLEM POSSIBLE CAUSES WHAT TO DO Small amount Water tank needs to Refer to ‘Emptying the water of water in be emptied. collection tank’. the drum at Environmental conditions If conditions are particularly hot, end of cycle may be affecting humid or cold, it is possible vaporised dryer operation.
- Page 38 TROUBLESHOOTING PROBLEM POSSIBLE CAUSES WHAT TO DO Linting Lint filter not cleaned Ensure the lint filter is cleaned after or replaced. every cycle and replaced correctly. Refer to ‘Cleaning the filters’. Loads not sorted correctly. Dry lint-giving items separately from lint receivers. Also, dry similar colours together, eg light coloured items with light coloured items, dark items with dark items.
- Page 39 TROUBLESHOOTING PROBLEM POSSIBLE CAUSES WHAT TO DO Tangling Loads not separated Try separating out larger items during loading. from smaller items. Items loaded into the Load items individually into the dryer incorrectly. dryer. Do not place folded items in the dryer. Incorrect cycle selection. Try using the cycle to EASY IRON...
-
Page 40: Manufacturer's Warranty
MANUFACTURER’S WARRANTY For New Zealand and Australia only. You automatically receive a 2 year Manufacturer’s Warranty with the purchase of this heat pump clothes dryer covering parts and labour for servicing within the country of purchase. Fisher & Paykel undertakes to: Repair or, at its option, replace without cost to the owner either for material or labour any part of the product, the serial number of which appears on the product, which is found to be defective within TWO YEARS of the date of purchase. - Page 41 MANUFACTURER’S WARRANTY This product has been designed for use in a normal domestic (residential) environment. This product is not designed for commercial use (whatsoever). Any commercial use by a customer will affect this product’s Manufacturer’s Warranty. Service under this Manufacturer’s Warranty must be provided by a Fisher & Paykel trained and supported service technician (refer to the ‘Before you call for service’).
-
Page 42: Customer Care
CUSTOMER CARE Before you call for service or assistance Check the things you can do yourself. Refer to your User guide and check: 1 Your product is correctly installed. 2 You are familiar with its normal operation. 3 You have read the ‘Customising a dry cycle’ and ‘Troubleshooting’ sections. If after checking these points you still need assistance or parts, please refer to your nearest Fisher & Paykel trained and supported service technician, Customer Care, or contact us through our website fisherpaykel.com. - Page 43 CUSTOMER CARE Registration Register your product with us so we can provide you with the best service possible. To register your product visit our website: fisherpaykel.com/register Complete and keep for safe reference: Model Serial No. Purchase Date Purchaser Dealer Suburb Town Country...
- Page 44 FISHERPAYKEL.COM © Fisher & Paykel Appliances 2021. All rights reserved. The models shown in this guide may not be available in all markets and are subject to change at any time. The product specifications in this guide apply to the specific products and models described at the date of issue.