Table of Contents
Advertisement
Quick Links
Advertisement
Chapters
Table of Contents

Related Manuals for Fisher & Paykel Dish Drawer DD24SAX9 FP US CA


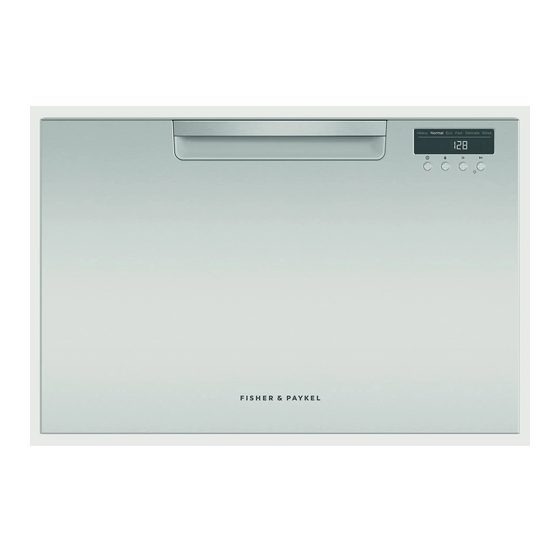
Summary of Contents for Fisher & Paykel Dish Drawer DD24SAX9 FP US CA
- Page 1 PARTS MANUAL Dish Drawer DD24SAX9 FP US CA Product Code 81094-A US CA...
-
Page 2: Table Of Contents
CONTENTS Introduction Front panels/controls Cabinet assembly Lid & link assembly Tub & components Baskets & racks Installation components... -
Page 3: Introduction
INTRODUCTION BRAND VOLTAGE MODEL PRODUCT CODE Fisher & Paykel 120VAC 60Hz DD24SAX9 FP US CA 81094-A MODELS The models covered by this manual are listed on the front cover. The information detailed in this manual is subject to change without notice. The latest version is indicated by the reprint date and replaces any earlier editions. -
Page 4: Front Panels/Controls
FRONT PANELS/CONTROLS DWG 004156... - Page 5 FRONT PANELS/CONTROLS REFERENCE PART NUMBER PART DESCRIPTION KIT MODULE DISPLAY DD60A9 512018 MOD DISP 525 PH9 VALUE X 1 Includes RIVET SNAP NYLON GREY X 3 Includes 511861 510779 WEDGE HOUSING UI DD PH9 CONTROL PANEL ESD SHIELD 608V 524608 HARNESS UI ONE PH8 524875 BUTTON ASSY DD PH9...
-
Page 6: Cabinet Assembly
CABINET ASSEMBLY DWG 004161... - Page 7 CABINET ASSEMBLY REFERENCE PART NUMBER PART DESCRIPTION KIT BRACKET SLIDE RH & LH ASSY 524116P BRACKET SLIDE RH ASSY X 1 Includes BRACKET SLIDE LH ASSY X 1 Includes SCREW MC M5X10 TAPTITE X 6 Includes 556607 INSTR SHT SLIDE BRACKET SPARE KIT Includes 556607P SCREW MC M5X10 TAPTITE (PKT 10)
- Page 8 CABINET ASSEMBLY DWG 004161...
- Page 9 CABINET ASSEMBLY REFERENCE PART NUMBER PART DESCRIPTION HOSE INLET WIRSBO US 525970 CLIP TUB RELEASE RH MID GREY 524783 CLIP TUB RELEASE LH MID GREY 524782 TERMINAL BLOCK OK501/3 524600 SHIELD TERMINAL BLOCK 524647 524457 HARNESS AUX FLEX LINK US...
-
Page 10: Lid & Link Assembly
LID & LINK ASSEMBLY DWG 004172... - Page 11 LID & LINK ASSEMBLY REFERENCE PART NUMBER PART DESCRIPTION LID YOKE RIGHT 529969 LID YOKE LEFT 529970 KIT LID ACTUATORS 605 (PKT 2) 522085 KIT DD FILL HOSE LOWER SPARE 510856 KIT DD DRAIN HOSE SPARE 510852 O RING CUFF SOCKET UL REC Includes HOSE DRAIN UPPER ASSY 605 Includes...
-
Page 12: Tub & Components
TUB & COMPONENTS DWG 004146... - Page 13 TUB & COMPONENTS REFERENCE PART NUMBER PART DESCRIPTION FP O MOULDED 608 TYPE 16 524467 KIT DRAIN/MICROFILTER ASYS 608 510921 DRAIN FILTER ASSY 608 Includes 510129 MICRO FILTER ASSY 608 TYPE 11 Includes 510658 MOTOR ROTOR ASSY 608 (SP) 524922P TUB STD W/ASSY DD608 524593 3 DEGREE LIGHTPIPE PH8...
- Page 14 TUB & COMPONENTS DWG 004146...
- Page 15 TUB & COMPONENTS REFERENCE PART NUMBER PART DESCRIPTION KIT ELEMENT & SEAL 608 120V 510924 ELEMENT SEAL 608 Includes ELEMENT 608 KAWAI 120V Includes 524537 ELEMENT COVER 608 EXIT DUCT ASSY 522578 SPRAYARM VALUE ASSY 524422 CLAMP HOSE TYPE 12232-17-4 528674 FLAP VALVE FAN HOUSING 605 528063...
-
Page 16: Baskets & Racks
BASKETS & RACKS DWG 003577... - Page 17 BASKETS & RACKS REFERENCE PART NUMBER PART DESCRIPTION BASE RACK ASSY VM CTD 524987 CROCK INSERT FOLDDOWN 608 524864 COMB FIXED BB RHS CTD Includes COMB FIXED BB LHS CTD Includes CLIP FRONT FOLDDOWN 94 Includes CLIP LOCKED FOLDDOWN Includes KIT CLIP FRONT/BACK FD PH7 524146 CLIP LOCKED FOLDDOWN...
-
Page 18: Installation Components
INSTALLATION COMPONENTS BOOK SET USER GUIDE DWG 004157... - Page 19 INSTALLATION COMPONENTS REFERENCE PART NUMBER PART DESCRIPTION CLAMP HOSE DIA 32-14 528690 SUPPORT DRAIN HOSE 525477 DRAIN HOSE JOINER SGL 529075 KIT INSTALL TAB DISHDRAWER 523007 TAB TOP (2) Includes INSTALL TAB TTA (2) Includes INSTALL TAB TTB (2) Includes SCREW WS 8X5/8TWINFST MTSPH ZP (6) Includes BKST USR PH9 VALUE FP US...
- Page 20 www.fisherpaykel.com Copyright © Fisher & Paykel Appliances Ltd 2016. All rights reserved. The product specifications in this manual apply to the specific model described at the date of issue. Under our policy of continuous product improvement, these specifications may change at any time. Only use this manual if the product code on the front matches the product code on the serial label of the product.
- Page 21 USER GUIDE DishDrawer dishwasher DD60DA, DD24DA, DD60SA, DD24SA, DD60DC, DD24DC, DD60SC and DD24SC models NZ AU US CA GB IE...
- Page 23 This user guide is an accompaniment to your ‘Quick start guide’ which is included with your dishwasher. For operating instructions, see your ‘Quick start guide’. If you no longer have your ‘Quick start guide’, you can download it from our local website, listed on the back cover. Refer to your ‘Quick start guide’...
- Page 25 CONTENTS Safety and warnings Caring for your dinnerware Operating instructions Setting wash modifiers Racking features Loading suggestions Water hardness and dishwashing Wash programs and detergent quantities Adding detergent Using rinse aid Water softener User maintenance instructions Troubleshooting If there is a fault How to attend to a fault Warranty and service Wash program data...
-
Page 26: Safety And Warnings
SAFETY AND WARNINGS Your dishwasher has been carefully designed to operate safely during normal dishwashing procedures. Please keep the following instructions in mind when you are using your dishwasher. IMPORTANT SAFETY INSTRUCTIONS • WARNING! - When using your dishwasher, follow basic precautions, including the following: •... - Page 27 SAFETY AND WARNINGS • Use only detergents or rinse aid recommended for use in a domestic dishwasher and keep them out of reach of children. Check that the detergent dispenser(s) is empty after the completion of each wash program. • When loading items to be washed, locate sharp items so that they are not likely to damage the internal lid of the dishwasher and load sharp knives...
- Page 28 SAFETY AND WARNINGS • To reduce the risk of injury, do not allow children to play in or on the dishwasher. • Under certain conditions, hydrogen gas may be produced in a hot water heater system that has not been used for two weeks or more.
- Page 29 SAFETY AND WARNINGS IMPORTANT SAFETY INSTRUCTIONS Installation • This dishwasher must be installed and located in accordance with the Installation instructions before it is used. If you did not receive Installation instructions with your dishwasher, you can order them by calling your Authorised Repairer or download them from our local Fisher &...
- Page 30 SAFETY AND WARNINGS • Do not store or use petrol, or other flammable vapours and liquids in the vicinity of the dishwasher. • Connect to a properly rated, protected and sized power supply circuit to avoid electrical overload. • Make sure that the power supply cord is located so that it will not be stepped on, tripped over or otherwise subject to damage or stress.
- Page 31 SAFETY AND WARNINGS • This appliance must be grounded. In the event of a malfunction or breakdown, grounding will reduce the risk of electric shock by providing a path of least resistance for electric current. This appliance is equipped with a cord having an equipment- grounding conductor and a grounding plug.
- Page 32 SAFETY AND WARNINGS IMPORTANT SAFETY INSTRUCTIONS Maintenance • Disconnect the appliance from the power supply before any cleaning or maintenance. • When disconnecting the appliance pull the plug rather than the power supply cord or junction of cord to avoid damage. •...
- Page 33 SAFETY AND WARNINGS Operational • Under no circumstances should you open the drawer whilst the dishwasher is in operation. • Always press the button to pause and wait until you hear the four additional beeps before opening the drawer. • The dishwasher must be used with the motor assembly, filter plate, drain filter and spray arm in place.
- Page 34 SAFETY AND WARNINGS • Household appliances are not intended to be played with by children. Children of less than 8 years old must be kept away from the appliance unless continuously supervised. This appliance can be used by children aged from 8 years and above, and persons with reduced physical, sensory or mental capabilities or lack of experience and...
-
Page 35: Caring For Your Dinnerware
CARING FOR YOUR DINNERWARE The combination of high temperatures and dishwasher detergent may cause damage to some items if they are washed in the dishwasher. Remember, if in any doubt about any aspect concerning items washed in the dishwasher, follow the instructions from the manufacturer of the items, or wash the item by hand. -
Page 36: Operating Instructions
OPERATING INSTRUCTIONS SETTING WASH MODIFIERS (DD***C MODELS ONLY) Along with setting the wash programme, you may select one of the following the additional options: Extra dry: Increases the wash temperature and the length of the drying phase for ● improved drying performance. Quick: Uses additional water and energy for a faster wash time, while maintaining wash ●... - Page 37 SETTING WASH MODIFIERS (DD***C MODELS ONLY) Using sanitize The sanitize wash modifier adjusts the wash program to meet the conditions required by Section 6, NSF 184 for sanitization to occur. While sanitize is running, the wash program is monitored to ensure that these conditions are met.
-
Page 38: Racking Features
RACKING FEATURES - CUTLERY BASKET To reduce the risk of injury, we ● recommend loading knives and sharp utensils with handles facing Mix spoons, knives and forks ● Removable small within each section to stop items container cutlery nesting together and to (DD***C models only) ensure the water circulates freely. - Page 39 RACKING FEATURES - CUTLERY BASKET Removable small items container (DD***C models only) Small, light items like baby bottle ● teats are best placed into the small items container to prevent them from being displaced during the wash. You can extend your cutlery basket ●...
- Page 40 RACKING FEATURES - FOLDAWAY CUP RACKS Racking features will vary depending on model. Stemware notches Foldaway cup racks These notches help support long-stemmed You can fold these ● DD***C glassware. independently of each Models other. only Fold the racks away if ●...
- Page 41 RACKING FEATURES - FOLDING TINE RACK Folding tines For optimum stability, place larger ● plates between the longer tines in the front. Fold the tines down if you need the ● space for pots or other large items. Release by pushing the small clips ●...
- Page 42 (DD***A MODELS ONLY) RACKING FEATURES - FIXED TINE RACK Removable fixed tine plate rack This rack is your main dish rack. The tine ● spacing has been optimized for maximum wash performance of plates and bowls. Trap door Remove the rack to make space for larger items.
- Page 43 (DD***C MODELS ONLY) RACKING FEATURES - SPACING-ADJUSTABLE TINE RACK Removable spacing-adjustable tine rack Designed to fit deep bowls ● (wide spacing) or small plates (narrow spacing), depending on adjustment. Handle To adjust the tine spacing To adjust between wide and ●...
-
Page 44: Loading Suggestions
LOADING SUGGESTIONS When loading your drawer, make sure that you place items so that water coming from the rotating spray arms below can reach all ● areas (wash performance will be reduced if it can’t) nothing blocks the water from getting to items on the foldaway cup racks ●... -
Page 45: Water Hardness And Dishwashing
WATER HARDNESS AND DISHWASHING What is water hardness? Hard water is water with a high concentration of minerals such as calcium and magnesium. In soft water, this concentration is low. Water hardness varies by geographical location. How does water hardness affect dishwashing? Hard water can be detrimental to the performance of your dishwasher. - Page 46 WASH PROGRAMS AND POWDERED DETERGENT QUANTITIES Find out about water hardness in your home, then use the table below to determine ● how much powdered detergent to use for each wash program. See also section ‘Water hardness and dishwashing’. For information on which program to use for your load, see your ‘Quick start guide’. ●...
-
Page 47: Adding Detergent
ADDING DETERGENT Powdered dishwasher detergent Note: You may see other, equally suitable types of dishwasher detergent on the shelves of your supermarket. Read and follow the detergent manufacturer’s recommendations. Pour into powdered detergent dispenser Secondary powdered detergent dispenser Latch Main Powdered detergent dispenser... - Page 48 ADDING DETERGENT Pouch packs of Gel or Powder Note: You may see other, equally suitable types of dishwasher detergent on the shelves of your supermarket. Read and follow the detergent manufacturer’s recommendations. Place on tablet tray in cutlery basket Tablet tray If the cutlery basket is not being used for a particular load, place pack in the bottom of the drawer.
- Page 49 ADDING DETERGENT Solid dishwasher tablets Note: You may see other, equally suitable types of dishwasher detergent on the shelves of your supermarket. Read and follow the detergent manufacturer’s recommendations. Place on tablet tray in cutlery basket Tablet tray If the cutlery basket is not being used for a particular load, place tablet in the bottom of the drawer.
- Page 50 ADDING DETERGENT Unsuitable detergents These types of detergent are not suitable and may damage your dishwasher or lead to a service call that is not covered by warranty. IMPORTANT! Do not use these in your dishwasher! Liquid detergents ● Laundry detergents ●...
-
Page 51: Using Rinse Aid
USING RINSE AID We recommend using liquid rinse aid regularly to give the best drying results. ● Rinse aid gives a streak-free, sparkling clean look to glass and chinaware. It also ● prevents metal from tarnishing. The rinse aid dispenser is on the inside of the drawer, underneath the detergent ●... -
Page 52: Water Softener
WATER SOFTENER (SOME MODELS ONLY) IMPORTANT! Only some models (those with a letter ‘H’ in the model name) have a built-in water ● softener. Models with water softener are not currently available in New Zealand and Australia. ● Models without built in water softener: ●... - Page 53 WATER SOFTENER (SOME MODELS ONLY) How to fill the salt reservoir 1 Open the drawer(s). 2 Unscrew the salt reservoir cap by turning anticlockwise. 3 Place the salt into the salt container and pour the contents into the salt reservoir. The salt reservoir can hold up to approximately 1 lb/0.5 kg of salt.
-
Page 54: User Maintenance Instructions
USER MAINTENANCE INSTRUCTIONS IMPORTANT! Disconnect the dishwasher from the power supply (unplug or switch off at the circuit breaker) and allow all its parts to cool before any cleaning or maintenance. Holiday time If the dishwasher is not going to be used for some time, we recommend you leave ●... - Page 55 USER MAINTENANCE INSTRUCTIONS Cleaning the drain filter and filter plate IMPORTANT! If a dishwasher cleaner / descaler is used, you must run a wash programme with ● detergent immediately afterward to prevent any damage to your dishwasher. The dishwasher must be used with the filter plate, drain filter and spray arm correctly ●...
- Page 56 USER MAINTENANCE INSTRUCTIONS Removing the drain filter and filter plate to clean 3 Twist the circular drain filter anti/counter- clockwise and lift to remove. It is normal to find some water under it. 4 Remove the drain filter mesh by pinching one side only and pulling it off, as shown.
- Page 57 USER MAINTENANCE INSTRUCTIONS Cleaning the spray arm 1 Unplug the dishwasher or turn it off at the power supply. 2 Unclip the glass supports (if fitted) from the rack wires and fold up all the foldaway cup racks, so that they are all upright and close to the top. 3 Remove the base rack carefully.
-
Page 58: Troubleshooting
TROUBLESHOOTING PROBLEM POSSIBLE CAUSE WHAT TO DO Wash program unsuitable See your ‘Quick start guide’ for a suitable Unclean dishes for the load. wash program, or the soils were too heavily baked on and dishes may need soaking. Spray arm unable to Ensure no items are obstructing the spray rotate. - Page 59 TROUBLESHOOTING PROBLEM POSSIBLE CAUSE WHAT TO DO Wrong type of detergent ONLY use detergents for Dishwashers. Foaming used See ‘Adding detergent’. Incorrect amount of See section ‘Wash programs and detergent detergent. quantities’ or follow the detergent manufacturer’s instructions. Too much egg in the Increase the amount of detergent.
- Page 60 TROUBLESHOOTING PROBLEM POSSIBLE CAUSE WHAT TO DO Drawer will Childlock feature is on. Turn the Childlock off. See your not open (no Quickstart guide for instructions. beeping, no wash Closed drawer auto lock Press any button and open drawer underway) is on.
- Page 61 TROUBLESHOOTING PROBLEM POSSIBLE CAUSE WHAT TO DO The wash program The wash program is No action required. The program will seems to have still underway. It is in transition into a more audible phase finished (the a ‘quiet’ phase that is after the ‘quiet’...
- Page 62 TROUBLESHOOTING PROBLEM POSSIBLE CAUSE WHAT TO DO Incorrect loading. Ensure the dishes are not nesting Dishes did not dry together. Dishes were left in the We recommend unloading the dishes drawer for several hours within a few hours after a wash program after a wash.
-
Page 63: If There Is A Fault
IF THERE IS A FAULT How do I know if there is a fault? Your dishwasher will self-diagnose and let you know by beeping continuously and displaying a flashing fault code. Single models: If there is a fault in the drawer: The fault code will flash in the display. -
Page 64: How To Attend To A Fault
HOW TO ATTEND TO A FAULT START HERE Press to stop the beeping. Note down the fault code. Look up the fault in the table opposite. If it’s a ‘A’ code If it’s an ‘F’ code A1: Ensure the water supply is on, press again to clear the fault then press... - Page 65 HOW TO ATTEND TO A FAULT DISPLAY POSSIBLE CAUSE OF FAULT No water – the water supply hasn’t been turned on. Drawer cannot drain. The drainage hose may be blocked or kinked, or the connection to drainage pipe may be blocked. ...
-
Page 66: Warranty And Service
WARRANTY AND SERVICE Before you call for service or assistance ... Check the things you can do yourself. Refer to the installation instructions and your user guide and check that: 1 Your product is correctly installed. 2 You are familiar with its normal operation. If after checking these points you still need assistance or parts, please refer to the Service &... -
Page 68: Wash Program Data
WASH PROGRAM DATA For information on which program to use for your load, see your ‘Quick start guide’. Wash cycle times indicated are approximate. USA & CANADA HEAVY NORMAL FAST DELICATE RINSE (~131 MINS) (~116 MINS) (~33 MINS) (~86 MINS) (~10 MINS) main wash 150 main wash 150... - Page 69 WASH PROGRAM DATA For information on which program to use for your load, see your ‘Quick start guide’. Wash cycle times indicated are approximate. NEW ZEALAND & AUSTRALIA HEAVY NORMAL FAST DELICATE RINSE (~112 MINS) (~107 MINS) (~35 MINS) (~86 MINS) (~10 MINS) main wash 70 main wash 60...
- Page 70 WASH PROGRAM DATA For information on which program to use for your load, see your ‘Quick start guide’. Wash cycle times indicated are approximate. GREAT BRITAIN & IRELAND HEAVY NORMAL FAST DELICATE RINSE (~112 MINS) (~122 MINS) (~35 MINS) (~86 MINS) (~10 MINS) main wash 70 main wash 60...
-
Page 71: Standards Tests
STANDARDS TEST (USA AND CANADA) The dishwashers are tested to various standards for wash performance using the parameters detailed below. Rinse agent setting 5 for single models; 10 for double models Maximum place setting Fixed height setting of racks 5½” (140mm) Recommended loading pattern Top drawer... - Page 72 STANDARDS TEST (NEW ZEALAND AND AUSTRALIA) The dishwashers are tested to AS/NZS 2007 standards for both wash and dry performance, using the parameters detailed below. Normal Eco Wash program (At the end of the program, open the drawer 50 mm to improve the dry performance.) 23.75g (main wash) per drawer Detergent quantities Rinse aid setting...
- Page 73 STANDARDS TEST (GREAT BRITAIN & IRELAND) The dishwashers are tested to EN50242 standards for both wash and dry performances using the parameters detailed below. Normal Eco Wash program 2.5g (pre-wash) per drawer Detergent quantities 15.5g (main wash) per drawer Rinse aid setting Adjust the water softener to match the water Water softener setting hardness.
- Page 76 www.fi sherpaykel.com Copyright © Fisher & Paykel Appliances 2016. All rights reserved. The product specifications in this booklet apply to the specific products and models described at the date of issue. Under our policy of continuous product improvement, these specifications may change at any time. You should therefore check with your Dealer to ensure this booklet correctly describes the product currently available.