
Related Manuals for Fisher & Paykel OR36SDPWGX1


Summary of Contents for Fisher & Paykel OR36SDPWGX1
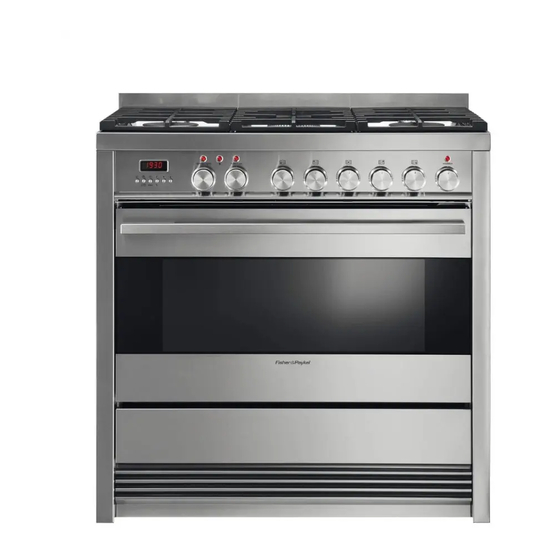
- Page 1 Freestanding range User guide OR36SDPWGX model Cuisinière indépendante Guide d’utilisation Modèle OR36SDPWGX US CA...
- Page 2 WARNING ! To reduce the risk of tipping the appliance, the appliance must be secured by properly installed anti-tip device packed with the appliance. • ALL RANGES CAN TIP • INJURY TO PERSONS COULD RESULT • INSTALL ANTI-TIP DEVICE PACKED WITH RANGE •...
- Page 3 GAS/ELECTRIC RANGE for residential use only USERS OPERATING INSTRUCTIONS IMPORTANT - PLEASE READ AND FOLLOW • Before beginning, please read these instructions completely and carefully. • Do not remove permanently affi xed labels, warnings, or plates from the product. This may void the warranty.
- Page 5 Dear Customer, Thank you for having purchased and given your preference to our product. The safety precautions and recommendations reported below are for your own safety and that of others. They will also provide a means by which to make full use of the features offered by your appliance. Please preserve this booklet carefully.
- Page 6 USER INSTRUCTIONS GENERAL INFORMATION WARNING!! WARNING!! ELECTRICAL GROUNDING INSTRUCTIONS This appliance shall not be used for space heating. This The range must be electrically grounded in accordance with information is based on safety considerations. local codes or, in the absence of local codes, with the Natio- nal Electrical Code, ANSI/NFPA No.
- Page 7 IMPORTANT PRECAUTIONS AND RECOMMENDATIONS After having unpacked the appliance, check to ensure that it is not damaged. In case of doubt, do not use it and consult your dealer or a professionally qualifi ed technician. Packing elements (i.e. plastic bags, polystyrene foam, nails, packing straps, etc.) should not be left around within easy reach of children, as these may cause serious injuries.
- Page 8 features Fig. 1.1 GAS BURNERS Rear left Semi-rapid burner (SR) - 8000 BTU/hr Rear right Semi-rapid burner (SR) - 8000 BTU/hr Front right Triple-ring burner (TR) - 12000 BTU/hr Front left Triple-ring (TR) - 12000 BTU/hr Central Dual burner (D) - 18000 BTU/hr Note: •...
- Page 9 11 13 12 Fig. 1.2 CONTROLS DESCRIPTION Gas cooking hob controls: Front left burner (4) control knob Rear left burner (1) control knob Central burner (5) control knob Rear right burner (2) control knob Front right burner (3) control knob Oven controls: Function selector dial Temperature dial (potentiometer)
- Page 10 how to use the top burners GAS BURNERS (Triple-ring and Semi-rapid) Gas fl ow to the burners is adjusted by turning the dials (illustrated in fi g. 2.1) which con- trol the valves. Turning the dial so that the symbols printed on the dial point to the mark on the bezel achieves the following functions: Dial Function...
- Page 11 LIGHTING GAS BURNERS FITTED WITH FLAME FAILURE SAFETY DEVICE (Triple-ring and Semi-rapid burners) In order to light the burner, you must: Push and turn the dial in an counter-clockwise direction to the position (maxi- mum rate), push in and hold the dial until the fl ame has been lit (fi g. 2.2). The sparks produced by the electrode situated inside the relative burner will light the fl...
- Page 12 GAS BURNERS (Dual) The Dual Burner is a very fl exible burner which allows different regulations for optimal cooking. It is composed by one inner and one outer crown; the fl ame of the inner crown can be regulated separately from the fl ames of the outer crown. The Dual Burner can be used: •...
- Page 13 LIGHTING GAS BURNERS FITTED WITH FLAME FAILURE SAFETY DEVICE (Dual burner) In order to light the burner, you must: Push and turn the dial in an counter-clockwise direction to the position (ma- ximum rate of inner + outer crown); push in and hold the dial until the fl ame has been lit (fi...
- Page 14 CHOICE OF BURNER (fi g. 2.5) The symbols or wordings printed on the panel above the gas dials indicate the corre- spondence between the dial and the burner. The most suitable burner is to be chosen according to the diameter and volume capacity of the container to be warmed.
- Page 15 how to use the warming drawer GENERAL FEATURES The warming drawer is fi tted with an heating element (220W at 240V, 165W at 208V) in the top. The heating can be regulated from (min position) to (max position). USING THE WARMING DRAWER FOR THE FIRST TIME •...
- Page 16 TEMPERATURE SELECTOR The setting can be anywhere between (min) and (max) position. Dial position °F (240V) °C (240V) °F (208V) °C (208V) (min) from 87 to 202 from 31 to 94 from 87 to 175 from 31 to 79 between (min) and (max) (max)
- Page 17 how to use the self cleaning oven GENERAL FEATURES The oven has special operating features. ATTENTION: The oven door Five different functions can be used to satisfy all cooking needs; it also has a self cle- becomes very hot during ope- aning function which can clean the oven cavity at high temperature, a defrost function ration.
- Page 18 SELECTING THE FUNCTIONS (fi gs. 4.1, 4.2a, 4.2b) The function is selected by turning the function selector dial and matching the marking on the dial with the reference mark on the bezel. IMPORTANT NOTE FOR THE COOKING FUNCTIONS: Once selecting the function and temperature (the temperature fl...
- Page 19 (Bake) The upper and lower heating elements switch on. The heat is diffused by natural convection and the temperature must be set between 120°F (50°C) and 535°F (280°C). On selecting this function the electronic programmer starts cooking with a pre-heating temperature set at 390°F (200°C).
- Page 20 CAUTION: During the self (Self Cleaning Function - this is not a cooking function) cleaning cycle the accessi- ble parts may become hot. IMPORTANT NOTES: Keep children away. This is not a cooking function but is only used to clean the oven.
- Page 21 SELECTING °F/°C ON THE DISPLAY Turn the oven selector dial to a cooking function (i.e. Press on the programmer (or use the temperature dial) to reduce the tempe- rature until you reach the minimum value (120°F/50°C). Press on the programmer. Press and hold (the temperature fl...
- Page 22 HOW TO START THE SELF CLEANING CYCLE Important: The self cleaning cycle must only be performed with the oven empty; so, before starting the cycle take all the accessories (shelves, drip tray, ...) out of the oven cavity and wipe up any traces of overfl owed liquid. Do not use any de-greasing products (e.g.
- Page 23 I I I I I I I I I I I I I I PROBLEMS ON STARTING AND DURING THE SELF CLEA- NING CYCLE “door” (fl ashing) appears on the programmer display The function selector has been turned to the self cleaning position with the oven door open or not perfectly closed.
- Page 24 HOW TO STOP THE SELF CLEANING CYCLE Turn the function selector to (oven OFF). If the oven cavity temperature is higher than 570°F (300°C): • “Hot” appears on the programmer display. • When the oven cavity temperature drops below 570°F (300°C): –...
- Page 25 ABNORMAL SITUATIONS AND/OR OPERATION PROBLEMS during cooking or the self cleaning cycle “F000” or “F001” appear during cooking or self cleaning cycle Oven temperature sensor is broken or not working properly. The cooling fan stays on and if the self cleaning cycle is in progress the door remains locked. What to do: •...
- Page 26 COOKING ADVICE STERILIZATION Sterilization of foods to be conserved, in full and hermetically sealed jars, is done in It is advisable to handle the the following way: Turn the switch to position (Convection Bake). oven accessories using Set the thermostat dial to position 350°F (175°C) and preheat the oven. oven gloves.
- Page 27 Telescopic sliding shelves cannot be used on the top two shelf positions STEP STEP STEP STEP STEP STEP STEP STEP STEP STEP Fig. 4.3 BROILING Very important: When using the oven in BROIL mode, the oven door must remain closed. •...
- Page 28 how to use the electronic programmer The electronic programmer is a device which groups together the following functions: • 12 hours clock with illuminated display. • Timer (up to 3 hours). • Program for semi-automatic oven cooking. • Program for automatic oven cooking. •...
- Page 29 TIMER The timer function is only used to count the time and does not infl uence oven opera- tion or any programmes which are in progress or set. Press - “0:00” appears on the programmer display. Press to set the time required (or turn the temperature dial to the right to increase the time and to the left to reduce it) - the bell symbol lights up on the display.
- Page 30 CANCELLING A SET PROGRAM To cancel any program just press the at the same time for more than 3 seconds or turn the function selector dial to (oven OFF). Note: If during a set program the function selector dial is turned to (self cleaning), (oven lighting), (defrosting frozen...
- Page 31 cleaning and maintenance GENERAL RECOMMENDATION WARNING • Important: Before any operation of cleaning and maintenance disconnect the VERY IMPORTANT appliance from the electrical supply. • It is advisable to clean the appliance when it is cold, especially when cleaning the enamelled parts. Before operation •...
- Page 32 CORRECT POSITION OF THE SEMI-RAPID BURNERS It is very important to check that the burner fl ame spreader “B” and the cap “A” have been correctly positioned (see fi gs. 6.1 and 6.2 ). Failure to do so can cause serious problems.
- Page 33 PAN SUPPORTS These parts can be removed and cleaned with appropriate products. After cleaning, they must be well dried and correctly replaced. It is very important to check that the pan supports have been correctly positioned (fi g. 6.7). Failure to do so can cause serious problems. Fig.
- Page 34 FITTING THE SIDE RACKS 1. Slide the side rack gently so it engages with the rear lock stud. Make sure that they are the right way up, as in the illustrations, and then insert and tighten the front fi xing screw. 2.
- Page 35 OVEN SHELF INSTALLATION AND REMOVAL The oven shelf is provided with a security block to prevent accidental extraction. Slide the shelf between the runners (fi g 6.11). The bigger guard rail goes to the rear. Keep attention to insert the shelf correctly (see fi gure 6.11). To remove, follow the steps in reverse order.
- Page 36 REMOVING THE WARMING DRAWER Open the drawer completely (fi g. 6.13a) WARNING: Move down the lever of left guide and up the lever of right guide (fi gs. 6.13b, • Do not remove drawer while 6.13c). hot. Remove the drawer (fi g. 6.13a) holding the levers in position. •...
- Page 37 REMOVING THE OVEN DOOR The oven door can easily be removed as follows: • Open the door to the full extent (fi g. 6.15a). • Open the lever “A” completely on the left and right hinges (fi g. 6.15b). • Hold the door as shown in fi...
- Page 38 DO’S AND DO NOT’S • Do always use the oven with the door closed. • Do read the user instructions carefully before using the range for fi rst time. • Do allow the oven to heat for about two hours, before using for the fi rst time, in order to expel any smell from the new oven insulation, without the introduction of food.
- Page 39 CUISINIÈRE À GAZ/ÉLECTRIQUE Cet appareil est réservé à l’usage résidentiel uniquement. MODE D’EMPLOI POUR LES UTILISATEURS IMPORTANT - VEUILLEZ LIRE ET SUIVRE • Avant de commencer, veuillez lire attentivement toutes les instructions. • N’enlevez pas les étiquettes, plaques ou avertissements permanents de l’appareil. Cela pourrait annuler la garantie.
- Page 40 Pour réduire le risque de basculer l’appareil, il doit être fi xé correctement par le dispositif antibasculement fourni avec l’appareil. • TOUS LES TYPES DE CUISINIÈRE PEUVENT BASCULER • CELA PEUT PROVOQUER DES BLESSURES • INSTALLEZ LE DISPOSITIF ANTIBASCULEMENT FOURNI AVEC LA CUISINIÈRE •...
- Page 41 Cher client, Nous vous remercions d’avoir acheté et préféré notre produit. Les mesures de sécurité et les recommandations ci-dessous sont pour votre propre sécurité et pour celle des autres. Elles permettront également de profi ter au maximum des fonctions offertes par votre appareil.
- Page 42 MODE D’EMPLOI RENSEIGNEMENTS GÉNÉRAUX AVERTISSEMENT!! AVERTISSEMENT!! INSTRUCTIONS DE MISE À LA TERRE Cet appareil ne doit pas être utilisé pour chauffer une La cuisinière doit être mise à la terre conformément aux co- pièce. Ces renseignements sont basés sur des facteurs des locaux ou, en l’absence de ceux-ci, à...
- Page 43 CONSIGNES ET RECOMMANDATIONS IMPORTANTES Après avoir déballé l’appareil, assurez-vous qu’il n’est pas endommagé. Si vous n’êtes pas certain, ne l’utilisez pas et consultez votre fournisseur ou un technicien professionnel qualifi é. Les éléments d’emballage (sacs de plastique, mousse de polystyrène, clous, feuillards de cerclage, etc.) doi- vent être gardés hors de la portée des enfants, car ils peuvent entraîner de graves blessures.
- Page 44 caractéristiques Fig. 1.1 SURFACE DE CUISSON Brûleur semi-rapide (SR) arrière gauche - 8 000 BTU/h Brûleur semi-rapide (SR) arrière droit - 8 000 BTU/h Brûleur triple couronne (TR) avant droit - 12 000 BTU/hr Brûleur triple couronne (TR) avant gauche - 12 000 BTU/hr Brûleur double (D) central - 18 000 BTU/h Remarque : •...
- Page 45 11 13 12 Fig. 1.2 DESCRIPTION DES COMMANDES Commandes des brûleurs supérieurs: Bouton de commande du brûleur avant gauche (4) Bouton de commande du brûleur arrière gauche (1) Bouton de commande du brûleur central (5) Bouton de commande du brûleur arrière droit (2) Bouton de commande du brûleur avant droit (3) Commandes du four : Bouton de sélection de fonction...
- Page 46 comment utiliser les brûleurs supérieurs BRÛLEURS À GAZ (Triple couronne et Semi-rapide) Vous pouvez ajuster l’alimentation en gaz des brûleurs en tournant les boutons (fi g. 2.1) qui contrôlent les soupapes. En tournant le bouton de façon à ce que les symboles qui y sont imprimés pointent vers ceux imprimés sur la jante, vous pouvez accomplir les fonctions suivantes: Position du Function...
- Page 47 ALLUMAGE DES BRÛLEURS À GAZ MUNIS D’UN DISPOSI- TIF DE SÉCURITÉ EN CAS D’EXTINCTION DES FLAMMES (Brûleurs triple couronne et semi-rapides) Pour allumer le brûleur, vous devez procéder de la façon suivante : Poussez et tournez le bouton dans le sens antihoraire jusqu’à la position (ou- verture maximale).
- Page 48 BRÛLEURS À GAZ (Double) Le brûleur double est un brûleur très fl exible qui comporte différents réglages et permet une cuisson optimale. Il est composé d’une couronne intérieure et d’une couronne extérieure; les fl ammes de la couronne intérieure peuvent être réglées indépendamment des fl ammes de la couronne extérieure.
- Page 49 ALLUMAGE DES BRÛLEURS À GAZ MUNIS D’UN DISPOSI- TIF DE SÉCURITÉ EN CAS D’EXTINCTION DES FLAMMES (Brûleur double) Pour allumer le brûleur, vous devez procéder de la façon suivante : Poussez et tournez le bouton dans le sens antihoraire jusqu’à la position (ouverture maximale).
- Page 50 CHOIX DU BRÛLEUR (fi g. 2.5) Les symboles ou les inscriptions imprimées sur le tableau situé au-dessus des boutons de commande indiquent la correspondance entre le bouton et le brûleur: Vous devez choisir le brûleur le plus approprié en fonction du diamètre et de la capacité de volume du récipient à...
- Page 51 comment utiliser le tiroir de maintien au chaud CARACTÉRISTIQUES GÉNÉRALES Le tiroir de maintien au chaud est doté d’un élément chauffant (220W, 240V - 165W , 208V) situé sur le dessus. La chaleur peut être réglée entre (min) and (max). UTILISATION DU TIROIR DE MAINTIEN AU CHAUD POUR LA PREMIÈRE FOIS •...
- Page 52 SÉLECTEUR DE TEMPÉRATURE Vous pouvez régler la température à n’importe quelle position entre (min) and (max). Position du bouton °F (240V) °C (240V) °F (208V) °C (208V) (min) de 87 à 202 de 31 à 94 de 87 à 175 de 31 à...
- Page 53 comment utiliser le four autonettoyant CARACTÉRISTIQUES GÉNÉRALES Attention: La porte du four de- Le four comporte des caractéristiques de fonctionnement spéciales. vient très chaude lorsque le Cinq fonctions différentes sont mises à votre disposition pour satisfaire tous vos be- soins de cuisson. La cuisinière comporte aussi une fonction autonettoyante qui per- four fonctionne.
- Page 54 SÉLECTION DES FONCTIONS (fi gures 4.1, 4.2a, 4.2b) Vous pouvez sélectionner la fonction en tournant le bouton de sélection de fonction de façon à ce que le marquage sur le bouton corresponde au marque de référence imprimé sur le tableau. NOTE IMPORTANTE POUR LES FONCTIONS DE CUISSON: Après la sélection de la fonction et de la température (la température clignote sur l’écran d’affi...
- Page 55 (Cuisson à Convection Classique) Les éléments chauffants supérieur et inférieur se mettent en marche. La chaleur est diffusée par convection naturelle et la température doit être réglée entre 120°F (50°C) et 535°F (280°C). Lorsque vous sélectionnez cette fonction, le programmateur électronique commence la cuisson avec une température de préchauffage réglée à...
- Page 56 (Fonction Autonettoyage - il ne s’agit pas d’une fonction ATTENTION: Au cours de de cuisson) l’autonettoyage, les pièces accessibles peuvent deve- nir très chaudes. REMARQUES IMPORTANTES : Tenez les enfants à l’écart. Ce n’est pas une fonction de cuisson; elle ne sert qu’à nettoyer le four.
- Page 57 SÉLECTION DE °F/°C SUR L’ÉCRAN D’AFFICHAGE Tournez le bouton de sélection de fonction du four à une fonction de cuisson (ex. - Cuisson à Convection Classique). Appuyez sur le bouton du programmateur (ou utilisez le bouton de réglage de la température) pour réduire la température jusqu’à atteindre la valeur minimale (120°F/50°C).
- Page 58 COMMENT DÉMARRER L’AUTONETTOYAGE Important : L’autonettoyage ne doit être effectué que lorsque le four est vide; donc, avant de démarrer le cycle, retirez tous les accessoires (grilles, lèchefri- te, ...) de la cavité du four et essuyez toute trace de liquide qui aurait débordé. N’utilisez aucun produit de dégraissage (ex.
- Page 59 I I I I I I I I I I I I I I PROBLÈMES DE DÉMARRAGE ET DE FONCTIONNEMENT DU CYCLE D’AUTONETTOYAGE “door” (porte) clignote sur l’écran d’affi chage du programmateur La porte du four était ouverte ou mal fermée lorsque le bouton de sélection de fonction a été...
- Page 60 COMMENT ARRÊTER L’AUTONETTOYAGE Tournez le bouton de sélection de fonction à (four ARRÊTÉ) Si la température de la cavité du four est supérieure à 570°F (300°C): • “Hot” (chaud) apparaît sur l’écran d’affi chage du programmateur. • Lorsque la température de la cavité du four descend sous 570°F (300°C): –...
- Page 61 SITUATIONS ANORMALES ET/OU PROBLÈMES DE FON- CTIONNEMENT - lors de la cuisson ou de l’autonettoyage “F000” ou “F001” s’affi che lors de la cuisson ou de l’autonettoyage Le capteur de température du four est abîmé ou ne fonctionne pas convenable- ment.
- Page 62 CONSEILS DE CUISINE STÉRILISATION La stérilisation des aliments à conserver dans des pots remplis et hermétiquement Il est recommandé d’utili- fermés se fait comme suit : Tournez le bouton à la position (cuisson par convection ventilée). ser des gants de cuisine Réglez le thermostat à...
- Page 63 Clayettes coulissantes télescopiques ne peu- vent pas être utilisées sur les deux premières positions du plateau NIVEAU 1 STEP NIVEAU 2 STEP STEP NIVEAU 3 NIVEAU 4 STEP STEP NIVEAU 5 Fig. 4.3 CUISSON AU GRIL Très important: Vous devez toujours fermer la porte du four lorsque vous utilisez l’élément du gril.
- Page 64 comment utiliser le programmateur électronique Le programmateur électronique est un dispositif qui regroupe les fonctions suivantes: • Horloge sur 12 heures avec affi chage lumineux. • Minuterie (jusqu’à 3 heures). • Programme pour cuisson au four semi-automatique. • Programme pour cuisson au four automatique. •...
- Page 65 MINUTERIE La fonction de minuterie n’est utilisée que pour compter le temps et n’affecte pas le fonctionnement du four ni tout autre programme réglé ou en cours. Appuyez sur le bouton - “0:00” apparaît sur l’écran d’affi chage du programma- teur.
- Page 66 ANNULATION D’UN PROGRAMME Pour annuler un programme appuyez simultanément sur les boutons pour plus de 3 secondes ou tournez simplement le bouton de sélection de fonction à (four ARRÊTÉ). Remarque: Si au cours d’un programme le bouton de sélection de fonction est tourné à (autonettoyage), (éclairage du four),...
- Page 67 nettoyage et entretien RECOMMANDATION GÉNÉRALE AVERTISSEMENT • Important : Avant toute opération de nettoyage et d’entretien, déconnectez l’ap- TRÈS IMPORTANT pareil de l’alimentation électrique. • Il est recommandé de nettoyer l’appareil lorsqu’il est froid, en particulier pour le nettoyage des pièces émaillées. Avant toute opération d’en- •...
- Page 68 POSITION CORRECTE DES BRÛLEURS SEMI-RAPIDES Il est très important de vérifi er que le dif- fuseur de fl ammes “B” et le chapeau “A” ont été correctement positionnés (fi g. 6.1 et 6.2). Si vous ne respectez pas cette con- signe, des problèmes graves pourraient survenir.
- Page 69 GRILLES DE SUPPORT CASSEROLES Ces pièces peuvent être enlevées et lavées avec des produits appropriés. Après le nettoyage, elles doivent être bien séchées et remises parfaitement à leur place. Il est très important de vérifi er le positionnement parfait des grilles (fi g. 6.7), car une position incorrecte peut être la cause de graves anomalies.
- Page 70 MONTAGE DES SUPPORTS LATÉRAUX Faites glisser les grilles latérales doucement pour qu’elles s’engagent avec le goujon de verrouillage arrière. Assurez-vous qu’elles sont dans le bon sens, comme dans les illustrations, puis insérez et serrez la vis de fi xation avant. S’il n’est pas déjà...
- Page 71 INSTALLATION ET RETAIT DE LA GRILLE DU FOUR La grille du four est munie d’un système de blocage (dispositif de sécurité) qui permet d’éviter qu’elle ne sorte accidentellement du four. • Faire glisser sur les guides la grille (fi g. 6.11); mettre la grille de façon que le barrage de protection (le plus grand) soit tourné vers l’intérieur du four.
- Page 72 RETRAIT DU TIROIR DE MAINTIEN AU CHAUD AVERTISSEMENT : Ouvrez le tiroir complètement (fi g. 6.13a). • Ne retirez pas le tiroir lorsqu’il Abaissez le levier de la glissière gauche (fi g. 6.13b) et levez le levier de la est chaud. glissière droite (fi...
- Page 73 DÉPOSE DE LA PORTE DU FOUR Vous pouvez facilement enlever la porte du four en procédant comme suit : • Ouvrez complètement la porte du four (fi g. 6.15a). • Ouvrez complètement le levier “A” sur les charnières gauche et droite (fi g. 6.15b). •...
- Page 74 À FAIRE ET À NE PAS FAIRE • Fermez toujours la porte du four lorsque vous utilisez le four. • Lisez attentivement le mode d’emploi avant d’utiliser la cuisinière pour la première fois. • Laissez chauffer le four deux heures avant de l’utiliser pour la première fois. Vous évacuerez ainsi toute odeur provenant de l’isolant du four avant d’introduire des aliments.
- Page 75 POUR VOTRE SÉCURITÉ Les recouvrements externes ne doivent en aucune circonstance être retirés pour entretien ou réparation, excepté par un technicien qualifi é. Avant d’appeler pour demander une réparation ou de l’assistance... Vérifi ez les points que vous pouvez contrôler vous-même. Consultez les instructions d’installation et le guide de l’uti- lisateur pour vous assurer que : Votre produit est installé...
- Page 76 www.fi sherpaykel.com Copyright © Fisher & Paykel 2015. All rights reserved. The product specifications in this booklet apply to the specific products and models described at the date of issue. Under our policy of continuous product improvement, these specifications may change at any time. You should therefore check with your Dealer to ensure this booklet correctly describes the product currently available.