Table of Contents
Advertisement
Quick Links
User's Manual
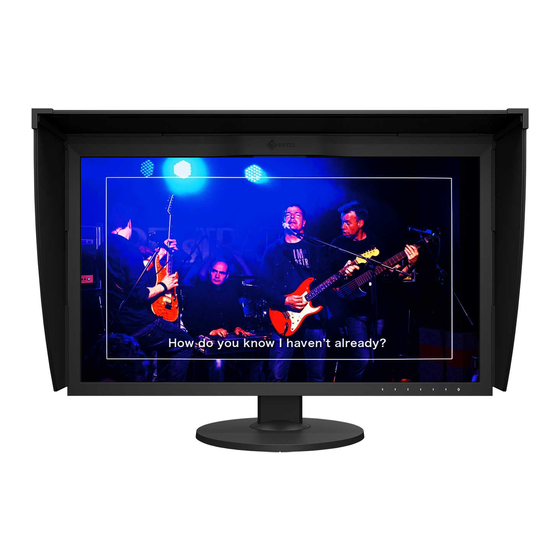
Color Management LCD Monitor
Thank you for purchasing our Color Management LCD Monitor.
Important
Please read this "User's Manual", and "PRECAUTIONS" (separate
volume) carefully to familiarize yourself with safe and effective usage.
• Refer to the "Setup Guide" for information on the installation /
connection of the monitor.
• For the latest product information including the "User's Manual",
refer to our web site :
www.eizoglobal.com
Advertisement
Table of Contents

Related Manuals for Eizo ColorEdge CG279X-BK


Summary of Contents for Eizo ColorEdge CG279X-BK
- Page 1 User’s Manual Color Management LCD Monitor Thank you for purchasing our Color Management LCD Monitor. Important Please read this “User’s Manual”, and “PRECAUTIONS” (separate volume) carefully to familiarize yourself with safe and effective usage. • Refer to the “Setup Guide” for information on the installation / connection of the monitor.
- Page 2 EIZO Corporation is under no obligation to hold any submitted material or information confidential unless prior arrangements are made pursuant to EIZO Corporation’s receipt of said information. Although every effort has been made to ensure that this manual provides up-to-date information, please note that EIZO monitor specifications are subject to change without notice.
-
Page 3: Notice For This Monitor
When the screen becomes dark or begins to flicker, please contact your local EIZO representative. Do not press on the LCD panel or edge of the frame strongly, as this may result in display malfunctions, such as interference patterns, etc. -
Page 4: Cleaning
About the Installation When the monitor is cold and brought into a room or the room temperature goes up quickly, dew condensation may occur on the interior and exterior surfaces of the monitor. In that case, do not turn the monitor on. -
Page 5: Table Of Contents
Contents Notice for This Monitor ......... 3 Chapter 5 Advanced Adjustments/Settings ... 23 Cleaning ..............4 5-1. Basic Operation of the Setting Menu ..23 To Use the Monitor Comfortably ......4 5-2. Setting Menu Functions ......24 ● Signal .............24 Contents .............. -
Page 6: Chapter 1 Introduction
Chapter 1 Introduction This chapter describes the features of the monitor and the name of each control. 1-1. Features ● Support for HDR (High Dynamic Range) video • Complies with the international HDR standards for movies and broadcasts Supports both the HDR "PQ format" for streaming and movie production, and the HDR "Hybrid Log Gamma format"... -
Page 7: Power Delivery
● Support for DisplayPort Alt Mode / USB Power Delivery • This product is equipped with a USB Type-C connector and supports video signal transfer (DisplayPort Alt Mode) and USB device charging (USB Power Delivery). It supplies 15W of power to a connected notebook PC when used as an external monitor. Video signals Power supply Note... -
Page 8: Controls And Functions
1-2. Controls and Functions ● Front (When sensor is operating) 1. Built-in calibration sensor Executes calibration for monitors. By executing SelfCalibration, the calibration sensor automatically operates and regularly calibrates the monitor (page 15). 2. Operation switches Displays menus. Operate the switches according to the operation guide. -
Page 9: Rear
● Rear 4. Transportation handle This handle is used for transportation. Attention • Firmly grasp and hold the monitor by the bottom while grabbing the handle, and carefully convey the monitor so as not to drop it. Do not hold the sensor section on the front side of the monitor. 5. -
Page 10: Changing The Pc Display Settings
1-3. Changing the PC Display Settings If the screen is not properly displayed after connecting the monitor to a PC, follow the procedure below to change the PC display settings. ● Windows 10 1. Right-click anywhere on the desktop except for on icons to display the menu. 2. -
Page 11: Macos
● macOS 1. Select "System Preferences" from the Apple menu. 2. When the "System Preferences" panel is displayed, click "Displays". 3. If there are multiple monitors including the notebook PC screen connected to the computer, open the "Arrangement" tab and confirm that "Mirror displays" is not selected. If it is selected, clear it. 4. -
Page 12: Chapter 2 Basic Adjustments/Settings
Chapter 2 Basic Adjustments/Settings This chapter describes the basic functions that can be set by touching the switches on the front of the monitor. For advanced adjustment and setting procedures using the Setting menu, see “Chapter 5 Advanced Adjustments/Settings” (page 23). -
Page 13: Switching Input Signals
2-2. Switching Input Signals When a monitor has multiple signal inputs, the signal to display on-screen can be changed. 2-3. Switching the Display Mode (color mode) This function allows easy selection of a display mode according to monitor application. ● Display Modes Color Mode Purpose... -
Page 14: Color Mode Setting Values
● Color Mode Setting Values -: Cannot be changed Color Mode Item ® HLG_ Adobe User BT.2020 BT.709 PQ_DCI sRGB BT.2100 BT.2100 Brightness (cd/m Temperature 6500K Gamma (EOTF) sRGB PQ / HLG Clipping (cd/m 1000 1000 HLG System Gamma ® Adobe Color Gamut Native BT.2020... -
Page 15: Chapter 3 Selfcalibration
Chapter 3 SelfCalibration This product is equipped with a built-in calibration sensor. By setting the calibration targets and execution schedule in advance, the calibration sensor automatically operates and regularly calibrates the monitor. This automatic calibration function is called "SelfCalibration". The adjustment content of SelfCalibration differs depending on the color mode that is executed. •... -
Page 16: Selfcalibration Functions
● SelfCalibration functions Set the details for "SelfCalibration". Function Settings Description Execute SelfCalibration can be executed manually regardless of the schedule. Note • After selecting "Execute", warming up (after the power to the monitor is switched on, leaving the monitor on for a certain period of time until the display becomes stable) may be executed before the built- in calibration sensor comes out. - Page 17 Function Settings Description Schedule Timing Jan/Apr/Jul/Oct When the execution cycle is "Quarterly", Feb/May/Aug/Nov "Biannually", "Annually", or "Usage Time", select Mar/Jun/Sep/Dec the timing for executing SelfCalibration. Jan/Jul The settings differ depending on the execution Feb/Aug Mar/Sep cycle setting. Apr/Oct • "Quarterly": May/Nov Jan/Apr/Jul/Oct, Feb/May/Aug/Nov, Mar/Jun/ Jun/Dec...
-
Page 18: Setting Targets
3-1. Setting targets Set calibration targets for Advanced Mode. You can set targets by using ColorNavigator 7 or on the monitor itself. When using the monitor itself, set the following functions in the "Color" menu. • "Color Mode" Select "CAL". •... -
Page 19: Activating Selfcalibration In Advanced Mode
● Activating SelfCalibration in Advanced Mode Execute SelfCalibration in Advanced Mode. In "Settings" in the "SelfCalibration" menu, set the following functions: • "Mode Settings" Select "Advanced Mode". • "Advanced Mode" Select "10-CAL", and set "On". 3-3. Checking results Check the SelfCalibration calibration results by using the monitor. In the "Color"... -
Page 20: Chapter 4 Custom Key Settings
Chapter 4 Custom Key Settings You can assign functions to the custom keys to easily start specified functions. This chapter describes how to operate the custom keys and how to assign functions to the custom keys. 4-1. Basic Operation of the Custom Keys Displaying the operation guide 1. - Page 21 2. Use to select "Preferences", and then select The Preferences menu appears. 3. Use to select "Custom Key", and then select The Custom Key menu appears. 4. Use to select the custom key to which you want to assign a function, and then select The menu for assigning a function appears.
-
Page 22: Functions That Can Be Assigned To Custom Keys
● Functions that can be Assigned to Custom Keys Function Description Disables the custom key even when it is touched. Input Range Sets the Input Range function. For more information, see page BT.709 Gamut Sets the BT.709 Gamut Warning function. For more information, see page Warning Luminance Warning... -
Page 23: Chapter 5 Advanced Adjustments/Settings
Chapter 5 Advanced Adjustments/Settings This chapter describes the advanced monitor adjustment and setting procedures using the Setting menu. For the basic setting functions using the switches on the front of the monitor, see "Chapter 2 Basic Adjustments/Settings" (page 12). 5-1. Basic Operation of the Setting Menu Menu display 1. -
Page 24: Setting Menu Functions
2. Choose an item to adjust/set with , and then press The Adjustment/Setting menu appears. 3. Adjust/set the selected item with , and then select The Sub menu appears. Selecting during adjustment/setting will cancel the adjustment/setting and restore the state prior to making changes. - Page 25 Function Settings Description YUV Color Matrix Auto Select the YUV format of the input signal. Use this setting for BT.601 gradation collapse or other occurrences where the screen BT.709 is displayed incorrectly because of a problem with the input BT.2020 signal.
-
Page 26: Color
● Color The setting details differ depending on the color mode selected. When the color mode is Standard Mode (User / BT.2020 / BT.709 / DCI / PQ_DCI / ® PQ_BT.2100 / HLG_BT.2100 / Adobe RGB / sRGB) Each color mode setting status can be adjusted according to personal preference. Attention •... - Page 27 Function Settings Description Temperature Native The color temperature can be adjusted. 4000 K to 10000 K The color temperature is used to express the chromaticity of "White". The value is expressed in degrees "K" (Kelvin). The screen becomes reddish at a low color temperature, and bluish at a high color temperature, like the temperature of a User flame.
- Page 28 Function Settings Description Advanced -100 to 100 The hue can be adjusted. Settings Note • Using this function may make some color gradations unavailable for display. Saturation -100 to 100 The saturation can be adjusted. Note • Using this function may make some color gradations unavailable for display.
- Page 29 Function Settings Description Advanced Black Level 0 to 1500 You can adjust the brightness and chromaticity of black by adjusting Settings the black level for red, green, and blue. Display the black test pattern or the background and adjust the black level. 6 Colors -100 to 100 The hue, saturation and lightness (brightness) can each be adjusted...
- Page 30 Function Settings Description Target Gamma (EOTF) 1.0 to 2.7 Set the gamma that will be used as a calibration target Settings sRGB for SelfCalibration. EBU(2.35) Set the gamma, or select the gamma curve defined by each standard. Note • The "Gamma (EOTF)" becomes "Fixed" when Fixed adjusting with ColorNavigator 7.
-
Page 31: Selfcalibration
Function Settings Description Target Color Gamut Native Set the color gamut that will be used as a calibration ® Settings Adobe target for SelfCalibration. sRGB In "Color Gamut", the color gamut defined by each standard can be selected. To set a color gamut other than those specified by each BT.709 BT.2020 standard, specify the color coordinates of each RGB... - Page 32 ● Screen The signal settings are used to configure advanced settings for input signals, such as the screen display size and color format. Function Settings Description Picture Expansion Auto The screen size of the monitor display can be changed. Full Screen •...
- Page 33 Function Settings Description BT.709 Gamut Warning If "Color Gamut" is set to "BT.2020" and a signal is input that Clip complies with the ITU-R BT.2020 standard, you can set the display method for colors that exceed the color gamut for the BT.709 standard.
- Page 34 Function Settings Description Luminance Warning You can check areas with a brightness that is higher than the On(Yellow) brightness that is set for the PQ / HLG Clipping function for On(Magenta) the input signal (areas where clipping occurs). Example: Setting On(Magenta) Note •...
-
Page 35: Preferences
● Preferences The monitor's settings can be configured to suit the usage environment or personal preference. Function Settings Description Menu Rotation 0° This function allows you to change the orientation of the 90° Setting menu to align with the installation orientation. Note •... - Page 36 Function Settings Description Off Timer You can set the time for the monitor's power to automatically turn off. The monitor will automatically turn off when the time set here elapses after the monitor is turned on, or after the monitor wakes up from Power Save. Note •...
-
Page 37: Languages
Function Settings Description Monitor Reset Restores all settings to their default values, except for the Cancel settings in the "Administrator Settings" menu. ● Languages The display language for menus and messages can be selected. Settings English, German, French, Spanish, Italian, Swedish, Japanese, Simplified Chinese, Traditional Chinese ●... -
Page 38: Chapter 6 Administrator Settings
Chapter 6 Administrator Settings This chapter describes how to configure monitor operation using the "Administrator Settings" menu. This menu is for administrators. Configuration on this menu is not required for normal monitor use. 6-1. Basic Operation of the "Administrator Settings" Menu Menu display 1. -
Page 39: Administrator Settings" Menu Functions
) on the front of the monitor. On-Screen Logo When this function is set to "Off", the EIZO logo that is displayed when the monitor is turned on does not appear. Information Display When this function is set to “On”, detailed information about the input signal is displayed when the signal or color mode is switched. - Page 40 Function Settings Description DUE Priority Uniformity This product is equipped with a Digital Uniformity Equalizer (DUE) Brightness function that reduces display unevenness. This DUE setting can be changed. • "Uniformity" Prioritizes reduction of display unevenness. • "Brightness" Prioritizes high brightness and high contrast. Note •...
-
Page 41: Chapter 7 Troubleshooting
Refer to the User's Manual of the graphics board for details. • This message appears when an external • Check whether the signal cable specified by EIZO is device connected to the USB Type-C connected. connector does not support video signal •... -
Page 42: Imaging Problems
(page 26)). The LCD monitor backlight has a limited life span. If the screen becomes dark or begins to flicker, contact your local EIZO representative. 2. Afterimages appear • Afterimages are particular to LCD monitors. Avoid displaying the same image for a long time. -
Page 43: Selfcalibration Problems
• Try calibrating the monitor by using ColorNavigator 7. 3. SelfCalibration failure • Refer to the error code table. If an error code that does not appear in the error code table is displayed, contact your local EIZO representative. 4. SelfCalibration is canceled while •... -
Page 44: Other Problems
• Try changing to a different USB port on the monitor. • Reboot the external device. • If the peripheral devices work correctly when the external device and peripheral devices are connected directly, contact your local EIZO representative. • Check whether the external device and OS are USB compliant. -
Page 45: Chapter 8 Reference
Chapter 8 Reference 8-1. Removing the Stand The stand section of this product can be removed. Attention • Do not move the removed stand up and down. Doing so may result in injury or equipment damage. • The monitor and stand are heavy. Dropping them may result in injury or equipment damage. To prevent damaging the panel surface, lay the monitor with its panel surface facing down on a soft cloth spread on a stable surface. -
Page 46: Attaching The Optional Arm
8-2. Attaching the Optional Arm An optional arm (or an optional stand) can be attached by removing the stand section. Please refer to our web site for the corresponding optional arm (or optional stand). www.eizoglobal.com Attention • When attaching an arm or stand, follow the instructions of their User's Manual. •... -
Page 47: Attaching/Detaching The Cable Holder
8-3. Attaching/Detaching the Cable Holder A cable holder is supplied with this product. Use the cable holder to organize the cables connected to the monitor. Attachment procedure Pass the cables through the cable holder. Close the cable holder. In this state, insert the cable holder into the stand. Note •... - Page 48 Detachment procedure Close the cable holder. In this state, pull the cable holder from the stand. Chapter 8 Reference...
-
Page 49: Connecting Multiple External Devices
8-4. Connecting Multiple External Devices The product allows you to connect multiple external devices and switch between them for display. Connection examples DD200DL(DVI-D - DVI-D) HDMI HH200SS(HDMI - HDMI) HDMI DisplayPort PP200 (DisplayPort - DisplayPort) DisplayPort USB Type-C CC200SS (USB Type-C - USB Type-C) USB Type-C Note •... -
Page 50: Making Use Of The Usb Hub Function
8-5. Making Use of the USB Hub Function This monitor is equipped with a USB hub. It works as a USB hub when connected to a USB-compatible external device, allowing the connection of peripheral USB devices. The USB hub function supports both USB cables (UU200SS) and USB Type-C cables (CC200SS). ●... -
Page 51: Specifications
8-6. Specifications LCD Panel Type IPS (Anti-Glare) Backlight Wide color gamut LED Size 68.4 cm (27.0) Resolution 2560 dots x 1440 lines Display Size (H x V) 596.7 mm x 335.7 mm Pixel Pitch 0.233 mm x 0.233 mm Pixel Density 109 ppi Display Colors Approx. -
Page 52: Accessories
Physical Outside Minimum 638 mm x 415.9 mm x 265 mm (width x height x depth) Specifications Dimensions Height (Tilt: 0˚) Maximum 638 mm x 579.5 mm x 274.3 mm (width x height x depth) Height (Tilt: 35˚) Outside Dimensions (Without 638 mm x 390 mm x 69.4 mm (width x height x depth) Stand) Net Weight... -
Page 53: Appendix
Apple, macOS, Mac OS, OS X, Macintosh and ColorSync are registered trademarks of Apple Inc. EIZO, the EIZO Logo, ColorEdge, CuratOR, DuraVision, FlexScan, FORIS, RadiCS, RadiForce, RadiNET, Raptor and ScreenManager are registered trademarks of EIZO Corporation in Japan and other countries. -
Page 54: Fcc Declaration Of Conformity
Changes or modifications not expressly approved by the party responsible for compliance could void the user’s authority to operate the equipment. Note Use the attached specified cable below or EIZO signal cable with this monitor so as to keep interference within the limits of a Class B digital device. - AC Cord... - Page 55 03V27524B1 UM-CG279X Copyright © 2018 EIZO Corporation. All rights reserved. 2nd Edition-November, 2018...