Table of Contents
Advertisement
Quick Links
Advertisement
Table of Contents

Summary of Contents for Yamaha SW60XG
- Page 1 YAMAHA AUTHORIZED PRODUCT MANUAL SW60XG SOUND CARD...
- Page 2 SOUND CARD SW60XG OWNER'S MANUAL...
- Page 3 This product, when installed as indicated in the instructions contained in this manual, meets FCC requirements. Modifications not expressly approved by Yamaha may void your authority, granted by the FCC, to use the product. 2. IMPORTANT: When connecting this product to accessories and/or another product use only high quality shielded cables.
-
Page 4: Table Of Contents
SW60XG Application S o f t w a r e ....... -
Page 5: Package Contents & Minimum System Requirements
PACKAGE CONTENTS & MINIMUM SYSTEM REQUIREMENTS PACKAGE CONTENTS The SW60XG package includes the items listed below, so before beginning, please take a moment to make sure you have everything you need. (If something is missing, please contact your authorized Yamaha dealer.) Sound card SW60XG Orchestrator Plus music production software. -
Page 6: Sw60Xg Setup
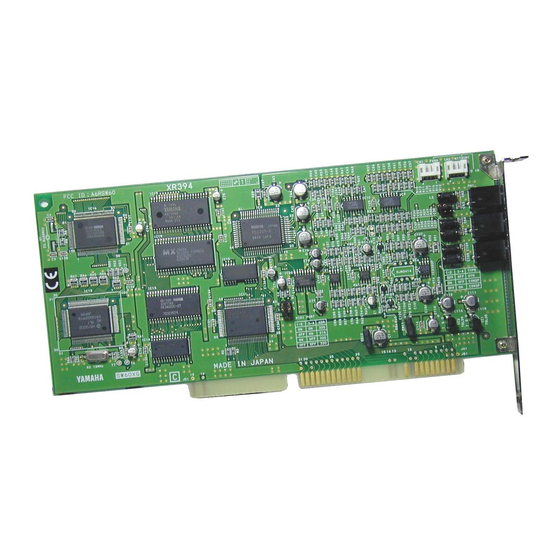
CD IN connector: Allows stereo input of line-level signals from an internal CD-ROM drive (Panasonic or MITSUMI). MIC type jumper: Configures the SW60XG mic. input to accomodate 3-Iead condenser or dynamic microphone; or 2-lead condenser microphone. 1-2 Open/3-4 Open: dynamic microphone. -
Page 7: Sw60Xginstallation
1. Turn off the computer and unplug its AC power cord. CAUTION: Do not attempt to install your SW60XG while the computer is plugged in. This can cause irreparable dam- age to the sound card or your computer hardware, and may pose a serious shock hazard! 2. - Page 8 CAUTION: Before touching the SW60XG card, first touch a metal surface to discharge any static electricity in your body; such static electricity can cause serious damage to your SW60XG. Also do not touch the inside surfaces of your SW60XG in order to prevent possible interference with or damage to the circuitry.
-
Page 9: Application Software Installation
Mapper. The installation program also modifies the AUTOEXEC.BAT, SYSTEM.INl and CONTROL.INI files. It's a good prac- tice to make back-up copies and/or print out the text of these files before you install the SW60XG application software. Installation Procedure for Windows 3.1 1. - Page 10 Setup will procede and a dialog box asking if you would like to restart Windows will appear. NOTE: The default setting installs the software to the C drive and SW60XG directory. If you want to use a different drive/directory, type in the name of the different drive/directory.
- Page 11 7. If the default directory (C:\SW60XG) is acceptable, click [OK]. Setup will proceed and a dialog box asking if you would like to restart Windows will appear. 8. If you wish to restart Windows, click [Yes]. Windows will restart and your SW60XG software is installed.
-
Page 12: Sw60Xg Application Software
See page 5 for the MIDI Port Address jumper setting. SW60XG APPLICATION SOFTWARE SW60XG offers two types of effect controllers, one for Windows (EffectGearll) and the other for DOS (EFFECTCON). EffectGearll EffectGearll lets you select and apply various types of effects to the microphone, the line-level input, or the CD- ROM audio signals. - Page 13 Names and Functions VOICE CANCEL button: Click this button to reduce the volume level of the vocal from CD audio playback for karaoke sing-along accompaniment. The effectiveness of this function may vary depending on the recording on which it is used. MINIMIZE button: Click this button to resize the EffectGearll window to icon size.
-
Page 14: Effectcon
DOS. EFFECTCON also supports volume adjustment of mic., line, CD, and MIDI as well as performing hardware diagnostic functions. Startup Procedure Start EFFECTCON in the SW60XG directory. [KEY OPERATION] * "_" indicates a space. CD_\SW60XG + <ENTER> EFCON + <ENTER>... -
Page 15: Troubleshooting
EFCON commands may be added to the autoexec.bat file of a boot disk used to start a game. TROUBLESHOOTING Windows will not start. • The SW60XG may not be inserted properly into the expansion slot. Check it or insert the SW60XG into another expansion slot and try again. MIDI (internal synthesizer) does not sound. -
Page 16: Specifications
Game or application does not support MIDI port addresses 300, 310, 320, or 330. • The MIDI port addresses supported by the SW60XG are those most commonly used by game and music applications. Occassionaliy, an application requiring another MIDI port address may be encoun- tered. - Page 17 5. LIMITED LIABILITY Your sole remedies and Yamaha's entire liability are as set forth above. In no event will Yamaha be liable to you or any other person for any damages, including without limitation any incidental or consequen- tial damages, expenses, lost profits, lost savings or other damages arising out of the use or inability to use such SOFTWARE even if Yamaha or an authorized dealer has been advised of the possibility of such damages, or for any claim by any other party.
- Page 18 ® YAMAHA Yamaha Corporation of America 6600 Orangethorpe Avenue, P.O. Box 6600, Buena Park, CA 90622-6600 1/24/97 24955...


