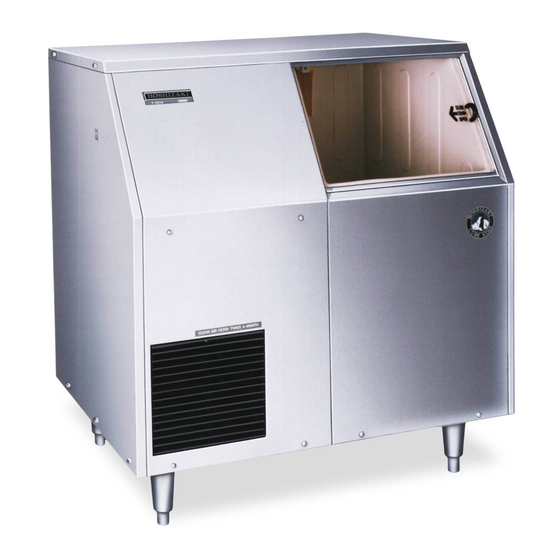
Hoshizaki F-500BAF Instruction Manual
Self-contained flaker
Hide thumbs
Also See for F-500BAF:
- Service manual (47 pages) ,
- Instruction manual (22 pages) ,
- Parts list (61 pages)

Related Manuals for Hoshizaki F-500BAF


Summary of Contents for Hoshizaki F-500BAF
- Page 1 Reliability is a beautiful thing SELF-CONTAINED FLAKER INSTRUCTION MANUAL F-500BAF(-C) ISSUED: REVISED: December 30, 2004 April 13, 1998...
- Page 2 HOSHIZAKI provides this manual primarily to assist qualified service technicians in the installation, maintenance and service of the icemaker. Should the reader have any questions or concerns which have not been satisfactorily addressed, please call or write to the HOSHIZAKI Technical Support Department for assistance.
-
Page 3: Table Of Contents
• Please review this manual. It should be read carefully before the icemaker is installed and operated. Only qualified service technicians should install, service and maintain the icemaker. This manual should be made available to the technician prior to installation, maintenance or service. -
Page 4: Specifications
We reserve the right to make changes in specifications and design without prior notice. NOTE: Only the “MODEL NUMBER” is replaced for F-500BAF-C. HOSHIZAKI ICE MAKER 115-120/60/1 (3 WIRE WITH NEUTRAL FOR 115V) 120V 7.9RLA... -
Page 5: Dimensions/Connections
2. Dimensions/Connections Unit = inches [mm.] F-500BAF, F-500BAF-C... -
Page 6: Installation And Operating Instructions
II. Installation and Operating Instructions 1. Checks Before Installation Remove shipping carton, tape(s) and packing. If packing material is left in the icemaker, it will not work properly. Ensure all components, fasteners and thumbscrews are securely in place. 1) Remove the front panel to prevent damage when installing the icemaker. See Fig. 1. 2) Remove the package containing the accessories from inside the icemaker. -
Page 7: Location
3. Location This icemaker is not intended for outdoor use. Normal operating ambient temperature should be within +45°F to +100°F; Normal operating water temperature should be within +45°F to +90°F. Operation of the icemaker, for extended periods, outside of these normal temperature ranges may affect production capacity. -
Page 8: Electrical Connection
5. Electrical Connection 1. Electrical connection must be made in accordance with the instructions on a “WARNING” tag provided with the pig tail leads in the junction box. 2. This icemaker requires a ground that meets the national and local electrical code requirements. -
Page 9: Water Supply And Drain Connections
6. Water Supply and Drain Connections See Fig. 3 • External filters, strainers or softeners may be required depending on the water quality. • Water supply inlet is 1/2" female pipe thread (FPT). • A water supply line shut-off valve and drain valve should be installed. A minimum of 3/8"... -
Page 10: Final Check List
7. Final Check List 1) Is the icemaker level? 2) Is the icemaker in a site where the ambient temperature is within +45°F to +100°F and the water temperature within +45°F to +90°F all year around? 3) Is there at least 6" clearance at rear and sides and 24" at top for maintenance or service? 4) Have all shipping carton, tape(s) and packing been removed from the icemaker? 5) Are all components, fasteners and thumbscrews securely in place? -
Page 11: Startup
15) Has the safety switch been checked for correct operation? Activate the safety switch on top of the spout. The ice machine should shut down immediately. Turn the ice machine off, then back on, to reset. 8. Startup 1. All parts are factory-adjusted. Improper adjustments may result in failure. 2. -
Page 12: Preparing The Icemaker For Long Storage
9. Preparing the Icemaker for Long Storage - See Fig. 4 When shutting off the icemaker for an extended time, drain out all water from the water line and remove the ice from the storage bin. The storage bin should be cleaned and dried. -
Page 13: Cleaning And Maintenance
[a] Cleaning Solution Dilute 4.8 fl. oz. (142 ml) of recommended cleaner Hoshizaki “Scale Away” or “LIME-A-WAY” (Economics Laboratory, Inc.) with 0.8 gallons (3 l) of warm water. This is a minimum amount. Make more solution if necessary. -
Page 14: [C] Sanitizing Solution
8) Remove the thumbscrews attaching spout (A) to the evaporator assembly and lift off spout (A) and spout packing (A). 9) Pour the cleaning solution over the extruding head until the evaporator assembly and the reservoir are filled and the solution starts to overflow into the drain pan. Note: If there is excess scale on the extruding head, fill the evaporator assembly and reservoir as described above, then use a clamp on the reservoir hose between the reservoir and evaporator assembly to block flow. -
Page 15: [D] Sanitizing Procedure - Initial
[d] Sanitizing Procedure - Initial 1) Close the water supply line shut-off valve. 2) In the storage bin, remove the thumbscrews attaching spout (B), then remove spout (B) and spout packing (B). 3) Remove the thumbscrews attaching spout (A) to the evaporator assembly and lift off spout (A) and spout packing (A), and the cylinder packing. - Page 16 6) Remove the thumbscrews attaching spout (A) to the evaporator assembly and lift off spout (A) and spout packing (A). 7) Pour the sanitizing solution over the extruding head until the evaporator assembly and the reservoir are filled and the solution starts to overflow into the drain pan. 8) Using the thumbscrews, replace spouts (A) and (B) and spout packings (A) and (B) in their correct positions.
-
Page 17: Maintenance
More frequent inspection and maintenance are recommended. Consult with your local distributor about inspection and maintenance service. To obtain the name and phone number of your local distributor, call Hoshizaki Care at 1-800-233-1940 in the USA. 1) Stainless Steel Exterior To prevent corrosion, wipe the exterior occasionally with a clean and soft cloth. - Page 18 3) Air Filter A plastic mesh air filter removes dirt or dust from the air, and keeps the condenser from getting clogged. As the filter gets clogged, the icemaker’s performance will be reduced. Check the filter at least twice a month. When clogged, use warm water and a neutral cleaner to wash the filter.
- Page 19 HOSHIZAKI HOSHIZAKI AMERICA, INC. 618 HIGHWAY 74 SOUTH PEACHTREE CITY, GA 30269 U.S.A. PHONE: 770-487-2331 www.hoshizakiamerica.com 91A2HA10D...