Table of Contents
Advertisement
Quick Links
CALIBRATION PROCEDURE
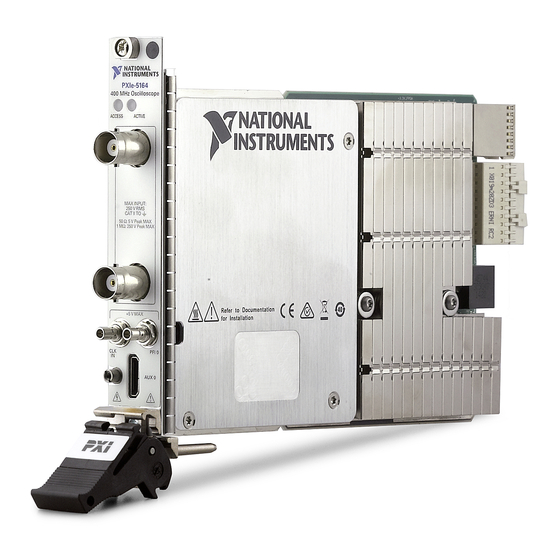
PXIe-5164
This document contains the verification and adjustment procedures for the PXIe-5164. Refer
to
ni.com/calibration
Contents
Required Software.....................................................................................................................2
Related Documentation.............................................................................................................2
Test Equipment..........................................................................................................................2
Test Conditions..........................................................................................................................7
Password................................................................................................................................... 8
Calibration Interval................................................................................................................... 8
As-Found and As-Left Limits................................................................................................... 8
Measurement Uncertainty......................................................................................................... 8
Calibration Overview................................................................................................................ 9
Test System Characterization....................................................................................................9
Zeroing the Power Sensor................................................................................................. 9
Characterizing Power Splitter Amplitude Balance and Loss..........................................10
Verification..............................................................................................................................14
Verifying DC Accuracy...................................................................................................15
Verifying AC Amplitude Accuracy.................................................................................19
Verifying 50 Ω Passband Amplitude Flatness and Bandwidth....................................... 22
Verifying 1 MΩ Passband Amplitude Flatness and Bandwidth......................................30
Verifying Timebase Accuracy.........................................................................................40
Verifying Input Capacitance............................................................................................41
Verifying RMS Noise......................................................................................................42
Adjustment.............................................................................................................................. 43
Adjusting the PXIe-5164................................................................................................ 43
Adjusting 1 MΩ Compensation Attenuator ................................................................... 44
Adjusting 1 MΩ DC Reference ......................................................................................44
Adjusting 50 Ω DC Reference ....................................................................................... 45
Adjusting Timebase.........................................................................................................45
Adjusting 50 Ω Passband Amplitude Flatness and Bandwidth.......................................46
Adjusting 1 MΩ Passband Amplitude Flatness and Bandwidth..................................... 48
Reverification..........................................................................................................................51
Updating Verification Date and Time..................................................................................... 51
Worldwide Support and Services............................................................................................ 51
for more information about calibration solutions.
Advertisement
Table of Contents

Related Manuals for National Instruments PXIe-5164


Summary of Contents for National Instruments PXIe-5164
-
Page 1: Table Of Contents
CALIBRATION PROCEDURE PXIe-5164 This document contains the verification and adjustment procedures for the PXIe-5164. Refer ni.com/calibration for more information about calibration solutions. Contents Required Software........................2 Related Documentation......................2 Test Equipment..........................2 Test Conditions..........................7 Password........................... 8 Calibration Interval........................8 As-Found and As-Left Limits....................8 Measurement Uncertainty...................... -
Page 2: Required Software
Required Software Calibrating the PXIe-5164 requires you to install the following software on the calibration system: • NI-SCOPE 16.1 or later. PXIe-5164 was first supported in NI-SCOPE 16.1. • NI LabVIEW Instrument Design Libraries for Reconfigurable Oscilloscopes 16.1 or later. - Page 3 50 Ω, ±200 V into 1 MΩ • Accuracy: ±(0.025% of output + 25 µV) Capacitance measurement: • Range: 15 pF to 25 pF • Accuracy: ±(2% of reading ± 0.25 pF) PXIe-5164 Calibration Procedure | © National Instruments | 3...
- Page 4 • Frequency: 50 kHz BNC Tee Pasternack PE9174 Verifications: Impedance: 50 Ω (m-f-f) • AC amplitude accuracy Double Pasternack PE9008 Verifications: Impedance: 50 Ω banana plug • AC amplitude to BNC (f) accuracy 4 | ni.com | PXIe-5164 Calibration Procedure...
- Page 5 • Amplitude: -10 dBm to 16 dBm Adjustment • Frequency: 50 kHz to Verifications: 401 MHz • Passband • Harmonics: <-30 dBc amplitude • Frequency accuracy: flatness and ±100.0 ppm bandwidth PXIe-5164 Calibration Procedure | © National Instruments | 5...
- Page 6 Passband amplitude flatness and bandwidth • Frequency range: DC to SMA (f)-to-N Fairview Test system 401 MHz (m) adapter Microwave characterization SM4226 • VSWR: <1.05 Adjustment Verifications: • Passband amplitude flatness and bandwidth 6 | ni.com | PXIe-5164 Calibration Procedure...
-
Page 7: Test Conditions
• Impedance: 50 Ω Test Conditions The following setup and environmental conditions are required to ensure the PXIe-5164 meets published specifications: • Allow a warm-up time of at least 15 minutes after the chassis is powered on. The warm- up time ensures that the PXIe-5164 is at a stable operating temperature. -
Page 8: Password
2 years As-Found and As-Left Limits The as-found limits are the published specifications for the PXIe-5164. NI uses these limits to determine whether the PXIe-5164 meets the specifications when it is received for calibration. Use the as-found limits during initial verification. -
Page 9: Calibration Overview
DUTs or test equipment. Zeroing the Power Sensor Ensure that the power sensor is not connected to any signals. Zero the power sensor using the built-in function, according to the power sensor documentation. PXIe-5164 Calibration Procedure | © National Instruments | 9... -
Page 10: Characterizing Power Splitter Amplitude Balance And Loss
Adjusting 1 MΩ Passband Amplitude Flatness and Bandwidth Table 2. Power Splitter Characterization Config Test Point: Frequency (MHz) 0.05 10.1 30.1 45.1 60.1 75.1 90.1 100.1 120.1 150.1 170.1 190.1 200.1 210.1 230.1 245.1 10 | ni.com | PXIe-5164 Calibration Procedure... - Page 11 Connect the other SMA (m)-to-BNC (m) adapter to the other output port of the power splitter. Refer to this assembly as splitter output 2. Connect the power sensor to splitter output 2. The following figure illustrates the hardware setup. PXIe-5164 Calibration Procedure | © National Instruments | 11...
- Page 12 10. Configure the power sensor to correct for the Test Point Frequency value using the power sensor frequency correction function. 11. Wait 0.1 second for settling. 12. Use the power sensor to measure the power in dBm. 12 | ni.com | PXIe-5164 Calibration Procedure...
- Page 13 Frequency: the Test Point Frequency value from the Power Splitter Characterization table • Amplitude level: 2.0 dBm 18. Configure the power sensor to correct for the Test Point Frequency value using the power sensor frequency correction function. PXIe-5164 Calibration Procedure | © National Instruments | 13...
-
Page 14: Verification
Verification of the PXIe-5164 is complete only after you have successfully completed all tests in this section using the As-Found Limits. Refer to the following figure for the names and locations of the PXIe-5164 front panel connectors. You can find information about the functions of these connectors in the device getting started guide. -
Page 15: Verifying Dc Accuracy
PFI 0 AUX 0 Verifying DC Accuracy This procedure verifies the DC accuracy of the PXIe-5164 by comparing the voltage measured by the device to the value sourced by the voltage standard. Caution Avoid touching the connections when generating a high voltage from the calibrator. - Page 16 ± 5 °C, where Factory T = 23 °C. Uncertainty of the 9500B includes long-term stability of 1 year, temperature coefficient, linearity, load, and line regulation and traceability of factory and National Calibration Standard. 16 | ni.com | PXIe-5164 Calibration Procedure...
- Page 17 ± 5 °C, where Factory T = 23 °C. Uncertainty of the 9500B includes long-term stability of 1 year, temperature coefficient, linearity, load, and line regulation and traceability of factory and National Calibration Standard. PXIe-5164 Calibration Procedure | © National Instruments | 17...
- Page 18 ±48.0 2.5 V 198.9 200.0 ±808 ±534 ±48.0 Connect the calibrator test head to channel 0 of the PXIe-5164. Configure the PXIe-5164 with the following settings: • Input impedance: the Input Impedance value from the DC Accuracy Verification table •...
-
Page 19: Verifying Ac Amplitude Accuracy
Repeat steps 2 through 8 for each configuration listed in the DC Accuracy Verification table. 10. Disable the calibrator output. 11. Connect the calibrator test head to channel 1 of the PXIe-5164 and repeat steps 2 through 8 for each configuration listed in the DC Accuracy Verification table. - Page 20 NI PXI-4071 specifications apply after self-calibration is performed and in an ambient temperature of 23 °C ± 5 °C. • The cable from the BNC Tee to the DMM must be 1 meter or less. • Pasternack BNC Tee PE9174. 20 | ni.com | PXIe-5164 Calibration Procedure...
- Page 21 5. Function Generator 3. BNC (f) to Double Banana Plug 6. DMM Connect the DMM and function generator to channel 0 of the PXIe-5164 as shown in the AC Verification Test Connections figure. Configure the DMM with the following settings: •...
-
Page 22: Verifying 50 Ω Passband Amplitude Flatness And Bandwidth
11. Disable the function generator output. 12. Connect the DMM and function generator to channel 1 of the PXIe-5164 as shown in the AC Verification Test Connections figure and repeat steps 2 through 9 for each configuration listed in the AC Amplitude Accuracy Verification table. - Page 23 Measurement uncertainty is based on the following equipment and conditions: • Rohde & Schwarz NRP-Z91 at 20 °C to 25 °C. • Harmonics from the signal generator are less than -30 dBc. PXIe-5164 Calibration Procedure | © National Instruments | 23...
- Page 24 ±0.117 Measurement uncertainty is based on the following equipment and conditions: • Rohde & Schwarz NRP-Z91 at 20 °C to 25 °C. • Harmonics from the signal generator are less than -30 dBc. 24 | ni.com | PXIe-5164 Calibration Procedure...
- Page 25 Measurement uncertainty is based on the following equipment and conditions: • Rohde & Schwarz NRP-Z91 at 20 °C to 25 °C. • Harmonics from the signal generator are less than -30 dBc. PXIe-5164 Calibration Procedure | © National Instruments | 25...
- Page 26 -0.1 Measurement uncertainty is based on the following equipment and conditions: • Rohde & Schwarz NRP-Z91 at 20 °C to 25 °C. • Harmonics from the signal generator are less than -30 dBc. 26 | ni.com | PXIe-5164 Calibration Procedure...
- Page 27 1 and the signal generator is connected to the input port of the power splitter. The following figure illustrates the hardware setup. PXIe-5164 Calibration Procedure | © National Instruments | 27...
- Page 28 8. Signal Generator Configure the power sensor with the following settings: • Power measurement: continuous average • Path selection: automatic • Averaging: automatic • Averaging resolution: 4 (0.001 dB) • Aperture: 20 ms 28 | ni.com | PXIe-5164 Calibration Procedure...
- Page 29 Test System Characterization section for the current Test Point Frequency. Use the PXIe-5164 to acquire and measure the power using the Extract Single Tone Information VI, converting the result from Vpk to dBm. Record the result as device input power.
-
Page 30: Verifying 1 Mω Passband Amplitude Flatness And Bandwidth
16. Connect splitter output 2 of the power sensor assembly to channel 1 of the PXIe-5164 and repeat steps 2 through 14 for each configuration listed in the 50 Ω Passband Amplitude Flatness and Bandwidth Verification table. 17. Disable the signal generator output. - Page 31 Measurement uncertainty is based on the following equipment and conditions: • Rohde & Schwarz NRP-Z91 at 20 °C to 25 °C. • Harmonics from the signal generator are less than -30 dBc. PXIe-5164 Calibration Procedure | © National Instruments | 31...
- Page 32 ±0.109 Measurement uncertainty is based on the following equipment and conditions: • Rohde & Schwarz NRP-Z91 at 20 °C to 25 °C. • Harmonics from the signal generator are less than -30 dBc. 32 | ni.com | PXIe-5164 Calibration Procedure...
- Page 33 Measurement uncertainty is based on the following equipment and conditions: • Rohde & Schwarz NRP-Z91 at 20 °C to 25 °C. • Harmonics from the signal generator are less than -30 dBc. PXIe-5164 Calibration Procedure | © National Instruments | 33...
- Page 34 ±0.129 Measurement uncertainty is based on the following equipment and conditions: • Rohde & Schwarz NRP-Z91 at 20 °C to 25 °C. • Harmonics from the signal generator are less than -30 dBc. 34 | ni.com | PXIe-5164 Calibration Procedure...
- Page 35 Measurement uncertainty is based on the following equipment and conditions: • Rohde & Schwarz NRP-Z91 at 20 °C to 25 °C. • Harmonics from the signal generator are less than -30 dBc. PXIe-5164 Calibration Procedure | © National Instruments | 35...
- Page 36 ±0.109 Measurement uncertainty is based on the following equipment and conditions: • Rohde & Schwarz NRP-Z91 at 20 °C to 25 °C. • Harmonics from the signal generator are less than -30 dBc. 36 | ni.com | PXIe-5164 Calibration Procedure...
- Page 37 Measurement uncertainty is based on the following equipment and conditions: • Rohde & Schwarz NRP-Z91 at 20 °C to 25 °C. • Harmonics from the signal generator are less than -30 dBc. PXIe-5164 Calibration Procedure | © National Instruments | 37...
- Page 38 8. SMA (f)-to-N (m) Adapter 4. Power Splitter 9. Signal Generator 5. 50 Ω SMA Feed-Thru Terminator Configure the power sensor with the following settings: • Power measurement: Continuous average • Path selection: automatic • Averaging: automatic 38 | ni.com | PXIe-5164 Calibration Procedure...
- Page 39 Test System Characterization section for the current Test Point Frequency. Use the PXIe-5164 to acquire and measure the power using the Extract Single Tone Information VI, converting the result from Vpk to dBm. Record the result as device input power.
-
Page 40: Verifying Timebase Accuracy
16. Connect the splitter output 2 of the power sensor assembly from the Test System Characterization section to channel 1 of the PXIe-5164. Repeat steps 2 through 14 for each configuration in the 1 MΩ Passband Amplitude Flatness and Bandwidth Verification table. -
Page 41: Verifying Input Capacitance
Repeat steps 2 through 6 for each configuration listed in the Input Capacitance Verification table. Connect the calibrator test head to channel 1 of the PXIe-5164 and repeat steps 2 through 6 for each configuration listed in the Input Capacitance Verification table. -
Page 42: Verifying Rms Noise
Verifying RMS Noise Follow this procedure to verify the RMS noise of the PXIe-5164 using a 50 Ω terminator. Table 9. RMS Noise Verification Input Impedance Vertical Range Test Limit Measurement Config (Ω) (% of FS) Uncertainty (% of FS) pk-pk 0.25 V... -
Page 43: Adjustment
Repeat steps 2 through 4 for each configuration listed in the RMS Noise Verification table. Connect the 50 Ω terminator to channel 1 of the PXIe-5164 and repeat steps 2 through 4 for each configuration listed in the RMS Noise Verification table. -
Page 44: Adjusting 1 Mω Compensation Attenuator
16. Call the niScope Close VI to close the NI-SCOPE session. Adjusting 1 MΩ Compensation Attenuator Follow this procedure to adjust the 1 MΩ compensation attenuator of the PXIe-5164. Connect the calibrator test head to the specified channel of the PXIe-5164. -
Page 45: Adjusting 50 Ω Dc Reference
Follow this procedure to adjust the DC gain and offset of the 50 Ω DC reference of the PXIe-5164. Connect the calibrator test head to the specified channel of the PXIe-5164. Call the niHsai Group B External Cal API v1 Host.lvclass:DC Reference Cal Initialize VI with the following settings: •... -
Page 46: Adjusting 50 Ω Passband Amplitude Flatness And Bandwidth
Follow this procedure to adjust the 50 Ω passband amplitude flatness and bandwidth of the PXIe-5164. Connect splitter output 2 of the power sensor assembly from the Test System Characterization section to the specified channel of the PXIe-5164. Note The power sensor assembly must match the configuration used in the... - Page 47 Initialize VI with the following settings: • channel: The specified channel • input impedance: 50 Ω Configure the power sensor with the following settings: • Power measurement: continuous average • Path selection: automatic PXIe-5164 Calibration Procedure | © National Instruments | 47...
-
Page 48: Adjusting 1 Mω Passband Amplitude Flatness And Bandwidth
• actual amplitude generated (dBm): The corrected input power of the sine waveform present on the specified channel of the PXIe-5164 11. Repeat steps 4 through 10 until the passband flatness cal complete indicator from the niHsai Group B External Cal API v1 Host.lvclass:Passband Flatness Cal Adjust VI returns TRUE. - Page 49 2. BNC (f)-to-N (f) Adapter 7. SMA (m)-to-SMA (m) Cable 3. SMA (m)-to-BNC (m) Adapter 8. SMA (f)-to-N (m) Adapter 4. Power Splitter 9. Signal Generator 5. 50 Ω SMA Feed-Thru Terminator PXIe-5164 Calibration Procedure | © National Instruments | 49...
- Page 50 • actual amplitude generated (dBm): The corrected input power of the sine waveform present on the specified channel of the PXIe-5164 11. Repeat steps 4 through 10 until the passband flatness cal complete indicator from the niHsai Group B External Cal API v1 Host.lvclass:Passband Flatness Cal Adjust VI returns TRUE.
-
Page 51: Reverification
PXIe-5164. Note If any test fails reverification after performing an adjustment, verify that you have met the test conditions before returning your PXIe-5164 to NI. Refer to the Worldwide Support and Services section for information about support resources or service requests. - Page 52 NI trademarks. Other product and company names mentioned herein are trademarks or trade names of their respective companies. For patents covering NI products/technology, refer to the appropriate location: Help»Patents in your software, the file on your media, or the National Instruments Patent Notice at . You can find patents.txt ni.com/patents...