Table of Contents
Advertisement
Quick Links
Advertisement
Table of Contents

Related Manuals for Makita DLS610


Summary of Contents for Makita DLS610
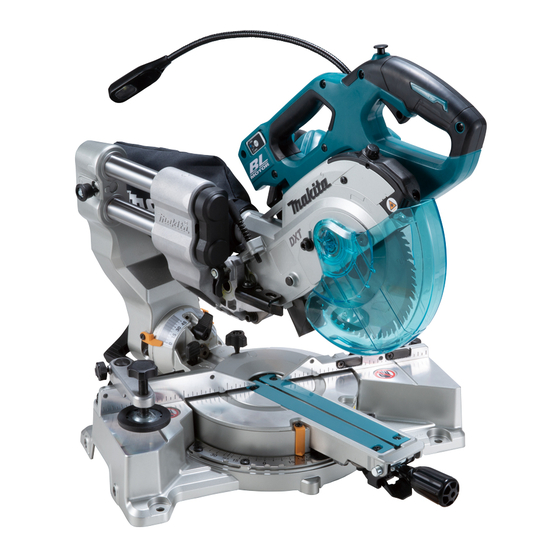
- Page 1 INSTRUCTION MANUAL Cordless Slide Compound Miter Saw DLS610 Read before use.
-
Page 2: Specifications
SPECIFICATIONS Model: DLS610 Blade diameter 165 mm Hole (arbor) diameter (country specific) 20 mm Max. kerf thickness of the saw blade 1.9 mm Max. miter angle Left 47°, Right 57° Max. bevel angle Left 46°, Right 46° No load speed... -
Page 3: Intended Use
Do not abuse the cord. Never use the cord for Never look into the laser beam. Direct laser carrying, pulling or unplugging the power tool. beam may injure your eyes. Keep cord away from heat, oil, sharp edges or moving parts. Damaged or entangled cords Only for EU countries Ni-MH Do not dispose of electric equipment or... -
Page 4: Safety Instructions For Mitre Saws
Battery tool use and care Recharge only with the charger specified by the manufacturer. A charger that is suitable for one type of battery pack may create a risk of fire when used with another battery pack. Use power tools only with specifically desig- nated battery packs. - Page 5 Push the saw through the workpiece. Do not 12. Provide adequate support such as table exten- pull the saw through the workpiece. To make sions, saw horses, etc. for a workpiece that is a cut, raise the saw head and pull it out over wider or longer than the table top.
- Page 6 Do not operate saw without guards in place. 22. Some material contains chemicals which may be Check blade guard for proper closing before toxic. Take caution to prevent dust inhalation and each use. Do not operate saw if blade guard skin contact.
- Page 7 16. Always close the lid of the slot when causing fires, personal injury and damage. It will operating. also void the Makita warranty for the Makita tool and 17. Do not remove the wireless unit from the slot charger. while the power is being supplied to the tool.
-
Page 8: Parts Description
PARTS DESCRIPTION Adjusting screw (for Stopper lever (for car- Slide pole Stopper pin (for carriage lower limit position) riage elevation) sliding) Releasing lever (for 46° Vertical vise Guide fence Releasing lever (for right bevel angle) side bevel angle) Adjusting knob (for miter Miter angle scale Pointer (for miter angle) Releasing button (for... -
Page 9: Installation
Lock-off button Switch trigger Hole for padlock Bevel angle scale Pointer (for bevel angle) 45° adjusting bolt (for 0° adjusting bolt (for Lever (for bevel angle bevel angle) bevel angle) adjustment) Dust bag Battery cartridge Lamp Lamp switch Laser switch Shaft lock Mode indicator Battery indicator... - Page 10 When the cut is completed, switch off the tool and Cutting the kerf board wait until the circular saw blade has come to a complete stop before returning the carriage to its fully elevated NOTICE: Finish installing the circular saw blade position.
-
Page 11: Functional Description
12. Perform the cutting procedure in the same way as To install the battery cartridge, align the tongue on the step 3 to 6. battery cartridge with the groove in the housing and slip it into place. Insert it all the way until it locks in place with a little click. - Page 12 When you pull the switch trigger, the battery indicator NOTE: Depending on the conditions of use and the indicates the remaining battery capacity. ambient temperature, the indication may differ slightly from the actual capacity. Battery indicator status Remaining battery Automatic speed change function capacity Blinking 50% to 100%...
-
Page 13: Blade Guard
Do not remove spring holding removed guard may result in serious personal injury. blade guard. If guard becomes damaged in course of time or UV light exposure, contact a Makita ser- CAUTION: Always maintain the blade guard vice center for replacement. DO NOT DEFEAT OR in good condition for safe operation. - Page 14 Pull the carriage toward you fully. Maintaining maximum cutting Adjust the kerf boards so that the kerf boards just capacity contact the sides of the blade teeth. This tool is factory adjusted to provide the maximum cutting capacity for a 165 mm saw blade. When installing a new circular saw blade, always check the lower limit position of the circular saw blade, and if necessary, adjust it as follows:...
-
Page 15: Adjusting The Miter Angle
Rotate the blade by hand while holding the handle Small sub-fence all the way down to be sure that the circular saw blade does not contact any part of the lower base. Re-adjust CAUTION: slightly, if necessary. When performing right side bevel cuts, fold the small sub-fences. -
Page 16: Adjusting The Bevel Angle
To tilt the circular saw blade to the left, hold the handle NOTE: The releasing button enables you to turn the and tilt the carriage. Use the bevel scale and the pointer turn base without pulling the lock lever. To engage the as a guide. -
Page 17: Switch Action
A switch in need of repair may result in unintentional operation and serious CAUTION: Do not look in the light or see the personal injury. Return tool to a Makita service center source of light directly. for proper repairs BEFORE further usage. 17 ENGLISH... -
Page 18: Electronic Function
To turn on the light, press the upper position (I) of the Laser line can be shifted to either the left or right side lamp switch. To turn off the light, press the lower posi- of the circular saw blade by turning the adjusting screw tion (0) of the lamp switch. - Page 19 Accidental start up of the tool may result in serious personal injury. WARNING: Use only the Makita wrench pro- vided to install or remove the circular saw blade. Failure to use the wrench may result in overtightening or insufficient tightening of the hex socket bolt and serious personal injury.
- Page 20 Press the shaft lock to lock the spindle and use To install the circular saw blade, perform the following the hex wrench to loosen the hex socket bolt clockwise. steps: Then remove the hex socket bolt of the spindle, outer Mount the circular saw blade carefully onto the flange and circular saw blade.
- Page 21 For tool with the ring Connecting a vacuum cleaner When you wish to perform clean cutting operation, connect a Makita vacuum cleaner. ► 1. Outer flange 2. Circular saw blade 3. Inner flange 4. Hex socket bolt (left-handed) 5. Ring 6. Spindle...
-
Page 22: Securing Workpiece
Securing workpiece WARNING: It is extremely important to always secure the workpiece correctly with the proper type of vise. Failure to do so may result in serious personal injury and cause damage to the tool and/or the workpiece. WARNING: When cutting a workpiece that is longer than the support base of the saw, sup- port the entire length of the material beyond the support base and at the same height to keep the... - Page 23 Make sure that the groove on the rod cannot be Sub base seen and then secure the rod using the clamping screw supplied with the sub base set as illustrated. Optional accessory NOTE: The sub base can be installed on either side of the tool.
-
Page 24: Attaching The Shoulder Strap
: Optional accessory — Aluminum products Refer to our website or contact your local Makita dealer CAUTION: Be sure to remove the shoulder for the correct circular saw blades to be used for the strap before operating the tool. The shoulder material to be cut. -
Page 25: Miter Cutting
Press cutting WARNING: Always lock the sliding movement of the carriage when performing a press cutting. Cutting without lock may cause possible kickback which may result in serious personal injury. Workpieces up to 46 mm high and 92 mm wide can be cut in the following manner. -
Page 26: Bevel Cut
Bevel cut Compound cutting Compound cutting is the process in which a bevel WARNING: After setting the circular saw angle is made at the same time in which a miter angle blade for a bevel cut, ensure that the carriage and is being cut on a workpiece. - Page 27 In the case of left bevel cut (a) (b) (c) (d) 1. Inside corner 2. Outside corner 1. Inside corner 2. Outside corner Measuring Table (A) Measure the wall width, and adjust the width of the workpiece according to it. Always make sure that width –...
- Page 28 In the case of right bevel cut Cutting aluminum extrusion (a) (b) (c) (d) 1. Inside corner 2. Outside corner Table (A) – Molding Bevel angle Miter angle position 52/38° 45° type 52/38° 45° type in the ► 1. Vise 2. Spacer block 3. Guide fence 4. Aluminum type type figure...
-
Page 29: Carrying Tool
Carrying tool Before carrying the tool, be sure to remove the battery cartridge and all movable parts of the miter saw are secured. Always check the following: 40-50 • The battery cartridge is removed. • The carriage is at 0° bevel angle position and secured. - Page 30 Open the lid on the tool as shown in the figure. WIRELESS ACTIVATION FUNCTION What you can do with the wireless activation function The wireless activation function enables clean and com- fortable operation. By connecting a supported vacuum cleaner to the tool, you can run the vacuum cleaner automatically along with the switch operation of the tool.
- Page 31 Tool registration for the vacuum cleaner NOTE: A Makita vacuum cleaner supporting the wireless activation function is required for the tool registration. NOTE: Finish installing the wireless unit to the tool before starting the tool registration.
- Page 32 Push the wireless activation button on the tool NOTE: The wireless activation lamps finish blinking briefly. The wireless activation lamp will blink in blue. in green after 20 seconds elapsed. Press the wireless activation button on the tool while the wireless acti- vation lamp on the cleaner is blinking.
- Page 33 Description of the wireless activation lamp status ► 1. Wireless activation lamp The wireless activation lamp shows the status of the wireless activation function. Refer to the table below for the meaning of the lamp status. Status Wireless activation lamp Description Color Duration...
- Page 34 If the cancellation is performed successfully, the wire- Cancelling tool registration for the less activation lamps will light up in red for 2 seconds vacuum cleaner and start blinking in blue. NOTE: The wireless activation lamps finish blinking in Perform the following procedure when cancelling the red after 20 seconds elapsed.
- Page 35 Before asking for repairs, conduct your own inspection first. If you find a problem that is not explained in the manual, do not attempt to dismantle the tool. Instead, ask Makita Authorized Service Centers, always using Makita replace- ment parts for repairs.
-
Page 36: Maintenance
To maintain product SAFETY and RELIABILITY, repairs, any other maintenance or adjustment should ► 1. Triangular rule be performed by Makita Authorized or Factory Service Centers, always using Makita replacement parts. Bevel angle Adjusting the cutting angle 0°... - Page 37 NOTICE: Have the tool repaired by a Makita autho- rized service center for any failure on the laser unit. The movable range of laser line is decided by the range adjustment screws on both sides.
-
Page 38: After Use
Install the battery cartridge and turn on the laser Slide the adjusting screw to the position that the switch. laser line comes onto the cutting line and then tighten it. Loosen the adjusting screw. To move the laser line NOTE: The movable range of laser line is factory away from the circular saw blade, turn the range adjust- adjusted within 1 mm from the side surface of saw ment screws counterclockwise. -
Page 39: Optional Accessories
OPTIONAL ACCESSORIES WARNING: These Makita accessories or attachments are recommended for use with your Makita tool specified in this manual. The use of any other accessories or attachments may result in serious personal injury. WARNING: Only use the Makita accessory or attachment for its stated purpose. - Page 40 Makita Corporation 3-11-8, Sumiyoshi-cho, Anjo, Aichi 446-8502 Japan 885740-922 www.makita.com 20191022...