Table of Contents
Advertisement
Quick Links
Advertisement
Table of Contents

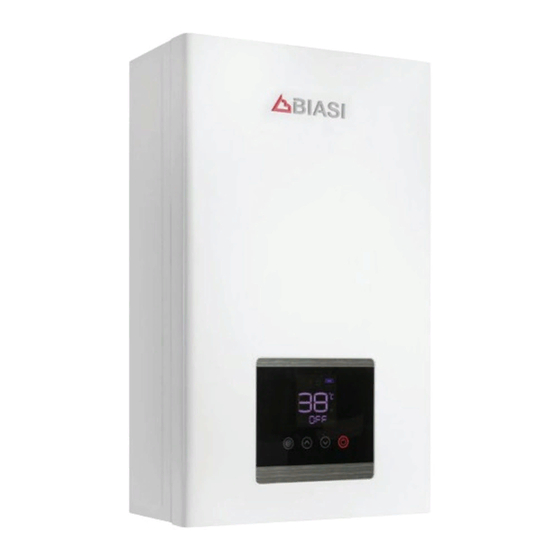
Summary of Contents for Biasi MULTIPOINT 14S
- Page 1 MULTIPOINT User manual and installation instructions...
- Page 2 WARNING This manual contains data and information for both the user and the installer. The user should look at the following chapters in particular: General warnings and safety, Flue gas device, Control panel. Please keep these instructions safe near the unit or gas meter for future use. DANGER: Instructions marked with this symbol must be observed to prevent me- chanical or generic accidents (e.g.
- Page 3 The instructions manual forms an integral part of the product and therefore must be carefully re- tained and always kept with the unit; if lost or damaged, a copy of these may be downloaded from the manufacturers web site www.Biasi.co.uk. Installation of the unit and any other service or maintenance operation must be carried out by a Gas Safe registered installer.
- Page 4 EC CERTIFICATE for the products listed below, DECLARES THAT THE UNITS Instant gas water heater Model Certification code MULTIPOINT 14S SV14S MULTIPOINT 16S SV16S whose registration numbers are shown on the unit's data plate, comply with the following Euro- pean Directives: •...
-
Page 5: Table Of Contents
Service record ....... . 35 Model Certification code MULTIPOINT 14S SV14S MULTIPOINT 16S... -
Page 6: Features And Benefits
DESCRIPTION OF UNIT FEATURES AND BENEFITS Energy saving Micro-computer intelligent control system This product has advanced technologies The core component of the gas water heater called Strengthened Combustion and Forced is a micro computer intelligent control system, Combustion. which is one of today’s most advanced mecha- These features aim to make the best use of tronic technology. -
Page 7: Technical Specifications
DESCRIPTION OF UNIT TECHNICAL SPECIFICATIONS 2.1 Technical Data Model MULTIPOINT 14S MULTIPOINT 16S Nominal heat input (Hi) 28.0 30.0 Minimum heat input (Hi) 25.4 27.4 Nominal heat output 25.4 27.8 25.4 27.8 Minimum heat output Appliance type C13-33 Gas type... - Page 8 Hot water outlet joint G 1/2 G 1/2 Flue duct diameter Ø 60 x Ø 100 Ø 60 x Ø 100 ErP Data MULTIPOINT 14S MULTIPOINT 16S Declare load profile 84.0 80.5 Water heating energy efficiency (η Water heating energy efficiency class Daily gas consumption (corrected) 23.583...
-
Page 9: Electrical Diagram
DESCRIPTION OF UNIT 2.2 Electrical diagram Figure 2.1 1 Gas separate valve 1 9 Earth 2 Gas proportional valve 10 Display 3 Thermostat 11 Water inlet temperature sensor 4 Main board 12 Water outlet temperature sensor 5 Direct current fan 13 Water flow sensor 6 Power cord 14 Gas separate valve 3... -
Page 10: Parts 14S - 16S
DESCRIPTION OF UNIT 2.3 Parts 14S - 16S Figure 2.2 1 Flue duct connector 6 Gas inlet 2 Front panel 7 Cold water inlet 3 Display and control panel 8 Cold water inlet filter 4 Safety valve discharge 9 Power cord 5 Hot water outlet - 10 -... -
Page 11: Dimensions 14S - 16S
DESCRIPTION OF UNIT 2.4 Dimensions 14S - 16S Figure 2.3 A Hot water outlet 1/2” B Gas inlet 1/2” C Cold water inlet 1/2” F Safety valve discharge G Cold water inlet filter - 11 -... -
Page 12: How To Use
USER INSTRUCTIONS HOW TO USE 3.1 Display operation Display info Fan icon Dynamic display when fan in operation. Flame feedback icon Working mode icon When the water heater is working, this flame Show the current operating mode. icon will display. Inlet water flow Adjust temperature adjustment icon:... -
Page 13: Preparation Before Ignition
USER INSTRUCTIONS 3.2 Preparation before ignition increase the temperature before turning on again. • Make sure that the gas used is in accordance When a water outlet is open, but the switch with the gas stipulated on the data label. stays in the OFF position, the water heater •... -
Page 14: Use Function Mode
USER INSTRUCTIONS 3.5 Use function mode by mode and press the function key again to change modes. In standby mode (ie, no water status), press the function (@) key, you can select "Auto", "Eco", "normal” in turn. The system default mode is 3.6 Instant hot water production set to normal. -
Page 15: Check The Cumulative Amount Of Gas
USER INSTRUCTIONS • The total amount of gas and water consump- Real-time gas consumption tion is shown in m . When the counter has reached 999 m it will automatically reset to 0. • Cumulative gas consumption and cumula- tive amount of water is automatically cleared after power failure. -
Page 16: Gas Accident Prevention
USER INSTRUCTIONS Figure 4.1 1 Gas valve 4 Control valve 2 Water volume knob 5 Drain valve 3 Water volume 4.2 Gas accident prevention not be used. • If the flame goes unsteady, stop using the wa- • Check if the burner is out after use and do not ter heater and contact your qualified gas safe forget to turn off the gas valve and power if the registered installer or service engineer for re-... -
Page 17: Fire Prevention
USER INSTRUCTIONS 4.3 Fire prevention 4.5 Abnormal conditions • Do not leave the water heater unattended • If there is abnormal operation such as: (flame whilst in operation. light-back, flame lift, yellow tip or black smoke, • In case of power failure or water failure, turn off etc), smell or noise, or other emergent situa- the gas valve and water inlet valve. -
Page 18: Installation
INSTALLATION INSTALLATION • The gas water heater installed in a suitably ventilated room, in accordance with the reg- ulations in force. Contact your local gas safe registered install- er who must also be qualified to work on gas • The flue of the heater cannot be connected water heaters (users are recommended not to to a common flue (Figure 5.2). -
Page 19: Installation Method
INSTALLATION • The gas water heater should be kept away between the gas water heater and other from combustible materials with the dis- electric equipment should be more than tance shown in Figure 5.4 at least. 400 mm. • The power socket must have a reliable earth Combustible materials wire to improve safety. - Page 20 INSTALLATION heater reaches the rated heat input, the gas pressure must reach the rated heat input in the technological parameter form. MULTIPOINT 14S - 16S A Hot water outlet 1/2” B Gas inlet 1/2” C Cold water inlet 1/2” F Safety valve discharge G Cold water inlet filter Figure 5.7...
- Page 21 INSTALLATION let is on your left. Although water piping adapter (Figure 5.10). If the specified adapt- throughout your structure may be other er is used, the path of the flue gas exhaust than copper, we recommend that copper and combustion air channels must be the piping be used for at least 0.92 m before same and must leave the installation room and after the heater.
- Page 22 INSTALLATION Flue gas exhaust duct lengths Type of air suction/flue gas exhaust ducting Maximum Extension Combustion air intake from outside Pipes Exhaust-air (m) Type diameter Flue gas exhaust (mm) and air suction duct through external wall in Ø 60/100 the same range of pressure S1 = S2 Ø...
-
Page 23: Conversion Instructions
INSTALLATION 5.4 Conversion instructions Biasi UK supply this water heater pre-set as a Natural Gas or LPG. Please ensure you have the cor- rect model for your requirements. MULTIPOINT 14S - MULTIPOINT 16S Figure 5.15 Figure 5.16 - 23 -... - Page 24 INSTALLATION Technical instruction Step 1 1. Screw off the front panel and disconnect the display and control unit Open front cover terminal. Step 2 1. Screw off the gas tube assembly (1) and take it out (2). Replace gas tube 2.
- Page 25 3. After finish replacing the conversion kits,replace the corresponding labels on the appliance,for example, data plate. 4. This instruction is for reference only,take the material object as the standard. MULTIPOINT 14S Replaced part list Replaced part Diagram Gas type Figure No.
- Page 26 INSTALLATION MULTIPOINT 16S Replaced part list Replaced part Diagram Gas type Figure No. Specification Note name The nozzle size Hole Ø 0.74 is the same in JSQ16L7_06_01B2 Hole Ø 1.28 the same row. The low line Nozzle is the smaller size nozzle;...
- Page 27 INSTALLATION Gas type setting Model Gas type 1070 ± 20 Pa 250 ± 10 Pa 1150 ± 20 Pa 250 ± 10 Pa 1340 ± 20 Pa 250 ± 10 Pa 950 ± 20 Pa 250 ± 10 Pa 1080 ± 20 Pa 250 ±...
-
Page 28: Maintenance
MAINTENANCE MAINTENANCE be flameout or can not be ignited, please choose the suitable shower function. • The residual water in the heater may be fro- • The appliances should be checked and main- zen in the winter, this is bad for the heater, tained periodically by a competent person. -
Page 29: Trouble-Shooting Guidance
MAINTENANCE 6.1 Trouble-shooting guidance Errors Solutions Causes Turn on the main gas valve or • Main gas valve off check you have gas supply to another appliance • • Main gas valve half on Turn on the main gas valve fully Constantly continue to turn on •... -
Page 30: Explanation Of The Error Codes
MAINTENANCE 6.2 Explanation of the Error Codes If during operation the water heaters display shows a flashing fault code, then please follow the below actions. Fault code will be flashing when there is a fault. On such occasions, please turn off the hot water outlet and then turn on or turn off/then on the monitor, and then turn back on the outlet valve and try a hot water outlet once or twice. -
Page 31: Boiler Disposal And Recycling
BOILER DISPOSAL AND RECYCLING BOILER DISPOSAL AND RECY- CLING The boiler and any accessories must be dis- posed of correctly, separating the different materials for recycling where possible. The installer must dispose of the packaging used to transport the boiler. Recycle and dispose of the boiler and any accessories in line with the regulations in force. -
Page 32: Warranty Conditions
GUARANTEE CONDITIONS Biasi U.K. Ltd products are designed, manufactured and tested to high standards. BIasi U.K. Ltd will replace (or at their discretion repair) any part found to be defective within two years of the original purchase date providing that: a) The guarantee is registered within 30 days of purchase;... -
Page 33: Benchmark Commissioning
Benchmark Commissioning & Warranty Validation Service Record It is a requirement that the boiler is installed and commissioned to the manufacturers’ instructions and the data fields on the commissioning checklist completed in full. To instigate the boiler warranty the boiler needs to be registered with the manufacturer within one month of the installation. -
Page 34: Record
GAS FIRED CONTINUOUS FLOW WATER HEATER COMMISSIONING CHECKLIST This Commissioning Checklist is to be completed in full by the competent person who commissioned the water heater as a means of demonstrating compliance with the appropriate Building Regulations and then handed to the customer to keep for future reference Failure to install and commission according to the manufacturer’s instructions and complete this Benchmark Commissioning Checklist will invalidate the warranty. -
Page 35: Service Record
SERVICE RECORD It is recommended that your heating system is serviced regularly and that the appropriate Service Interval Record is completed. Service Provider Before completing the appropriate Service Interval Record below, please ensure you have carried out the service as described in the manufacturer’s instructions. - Page 36 *1796233511* 17962.3351.1 1022 36A5 Biasi UK Ltd Commercial Road Leamore Enterprise Park WALSALL WS2 7NQ Sales Tel. 01922 714600 Tech. Service Tel. 01922 714636 www.biasi.co.uk...