Harman Kardon AVR 1565 Owner's Manual
Audio/video receiver
Hide thumbs
Also See for AVR 1565:
- Specifications (2 pages) ,
- Quick start manual (8 pages) ,
- Owner's manual (42 pages)
Table of Contents
Advertisement
Advertisement
Table of Contents
Troubleshooting

Related Manuals for Harman Kardon AVR 1565


Summary of Contents for Harman Kardon AVR 1565
- Page 1 AVR 1565/AVR 1566 Audio/video receiver Owner’s Manual...
-
Page 2: Table Of Contents
INTRODUCTION SUPPLIED ACCESSORIES IMPORTANT SAFETY INFORMATION PLACE THE AVR FRONT-PANEL CONTROLS REAR-PANEL CONNECTORS SYSTEM REMOTE CONTROL FUNCTIONS INTRODUCTION TO HOME THEATER TYPICAL HOME THEATER SYSTEM MULTICHANNEL AUDIO SURROUND MODES PLACE YOUR SPEAKERS PLACING THE LEFT, CENTER AND RIGHT SPEAKERS PLACING THE SURROUND SPEAKERS PLACING THE SUBWOOFER TYPES OF HOME THEATER SYSTEM CONNECTIONS SPEAKER CONNECTIONS... -
Page 3: Introduction
Introduction Thank you for choosing this Harman Kardon product! For more than fifty years, the Harman Kardon mission has been to share a passion for music and entertainment, using leading-edge technology to achieve premium performance. Sidney Harman and Bernard Kardon invented the receiver, a single component designed to simplify home entertainment without compromising performance. -
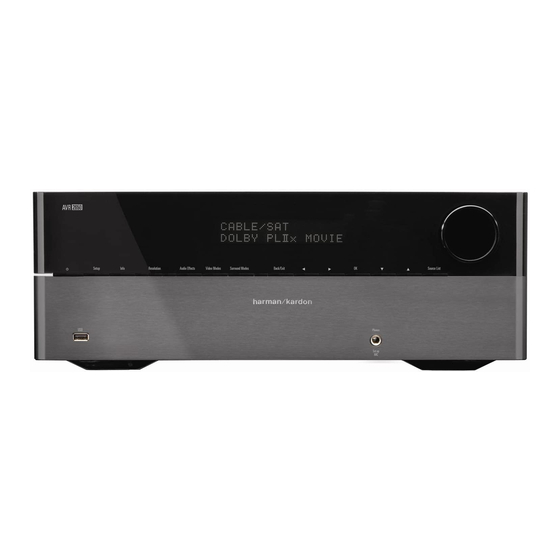
Page 4: Front-Panel Controls
AVR 1565/AVR 1566 Front-Panel Controls Front-Panel Controls Power Message Surround Mode Volume Indicator Sensor Button Display Select Buttons Knob Power Channel Left/Right Up/Down Buttons/ Headphone Jack Aux Analog Button Level Control Buttons Tuning Buttons Port Audio Input Button Connector Tuning Mode... - Page 5 (the “+” and “–” conductors touching each other or both touching the same piece of metal). If a short circuit is not found, bring the unit to an authorized Harman Kardon service center for inspection and repair before using it again.
-
Page 6: Rear-Panel Connectors
Rear-Panel Connectors HDMI ® Monitor Out Connector HDMI Input Radio Antenna Connectors Connectors Analog Audio Input/Output Connectors Subwoofer Connector Composite Video Monitor Input Connector DVD Composite Video Input Connector Digital Audio Input Connectors Speaker Connectors Rear-Panel Connectors Video 2 Out Connector Composite Video Input... - Page 7 Rear-Panel Connectors, continued Radio Antenna connectors: Connect the included AM and FM antennas to their respective terminals for radio reception. HDMI Monitor Out connector: If your TV has an HDMI connector and you have HDMI or component video source devices, use an HDMI cable (not included) to connect it to the AVR’s HDMI Monitor Out connector.
-
Page 8: System Remote Control Functions
System Remote Control Functions IR Transmitter Lens Program Indicator LED Power On Button Power Off Button AVR Button Test Tone Button Sleep/CH Up/Down Buttons OSD Button Channel Level Control Button Digital Input Button Tuning Mode Button Direct Station Entry Button Tuning Up/Down Buttons Tone Control Button Night Mode Button... - Page 9 Transport Control buttons: These buttons have no effect on the AVR but are used to control many source components. By default, when the remote is operating the AVR, these buttons will control a Harman Kardon Blu-ray Disc player or DVD player.
-
Page 10: Introduction To Home Theater
AVR. Typical Home Theater System A home theater typically includes an audio/video receiver (AVR), which controls the system and supplies amplification for the loudspeakers; a disc player; a source component for television broadcasts (cable box, satellite dish AVR, HDTV tuner or antenna connected to the TV);... -
Page 11: Types Of Home Theater System Connections
Types of Home Theater System Connections There are different types of audio and video connections used to connect the AVR to your speakers, your TV or video display, and your source devices. The Consumer Electronics Association has established the CEA ®... -
Page 12: Video Connections
AVR 1565/AVR 1566 Digital Audio Connections – Optical Optical digital audio connectors are normally covered by a shutter to protect them from dust. The shutter opens as the cable is inserted. Analog Audio Connections Two-channel analog connections require a stereo audio cable, with one connector for the left channel (white) and one for the right channel (red). -
Page 13: Making Connections
Making Connections CAUTION: Before making any connections to the AVR, ensure that the AVR’s AC cord is unplugged from the AVR and the AC outlet. Making connections with the AVR plugged in and turned on could damage the speakers. Connect Your Speakers After you have placed your loudspeakers in the room as explained in Place Your Speakers, on page 10, connect each speaker to its color-coded terminal on the AVR as explained in Speaker Connections, on page 11. - Page 14 HDMI devices If any of your source devices have HDMI connectors, using those connectors will provide the best possible video and audio performance quality. Since the HDMI cable carries both digital video and digital audio signals, you do not have to make any additional audio connections for devices you connect via HDMI cables, although you can assign one of the digital audio connectors to one of the HDMI inputs.
-
Page 15: Connect The Radio Antennas
AVR 1565/AVR 1566 Audio recorders Connect an analog audio recorder’s inputs to the AVR’s analog audio Tape Out connectors. You can record any analog audio input signal. AVR Analog Audio Recorder Connectors Stereo Audio Cable (not supplied) Analog Recording Device Video recorders Connect an analog video recorder’s video input connector to the AVR’s Video 2 Out... -
Page 16: Program The Remote To Control Your Source Devices And Tv
• Press DVD to control a DVD player. • Press VID1 to control a VCR, DVR or Harman Kardon digital media center. • Press VID2 to control a cable or satellite set-top box. 4. Aim the remote at the source device and use the remote’s Number buttons to enter a code number from Step 2, above. -
Page 17: Configure The Avr For Your Speakers
Configure the AVR for Your Speakers Your AVR is flexible and may be configured to work with most speakers and to compensate for the acoustic characteristics of your room. Before beginning, place your loudspeakers as explained in the Place Your Speakers section, on page 10, and connect them to the AVR. -
Page 18: Assign The Digital Audio Connectors
After you return to the Speaker Setup menu, navigate to the Distance line and press the OK button to display the Distance menu. * DISTANCE * : 10FT CEN : 10FT SUB : 10FT : 10FT : 10FT DELAY RESET : OFF UNIT : FEET A/V SYNC DELAY : 0mS BACK TO SPEAKER SETUP... -
Page 19: Additional Input Setup Menu Items
AVR 1565/AVR 1566 5. For each source device you connected to a digital audio input: a) Use the remote’s Up and Down arrow buttons to select “Source.” Use the Left and Right arrow buttons to change the listed source to one of the sources you connected to a digital audio input connector. -
Page 20: Listening To Fm And Am Radio
AVR 1565/AVR 1566 Listening to FM and AM Radio Select the AM/FM source. Use the Tuning Up/Down buttons to tune a station, which will be shown on the front-panel display and the TV screen. The AVR defaults to automatic tuning, meaning each press of the Tuning Up/Down buttons scans until a station with acceptable signal strength is found. - Page 21 Surround Modes Surround-mode selection depends upon the format of the incoming audio signal as well as your personal taste. Although there is never a time when all of the AVR’s surround modes are available, there is usually a wide variety of modes available for a given input.
-
Page 22: System Setup
System Setup The AVR’s System Setup menu lets you customize in what way many of the AVR’s features operate. Press the OSD button and navigate to the System Setup line. Press the OK button to display the System Setup menu. VFD Fade Time Out: Some people find the brightness of the AVR’s front-panel display distracting during movies or listening sessions. -
Page 23: Sleep Timer
RESET message appears on the front-panel Message display. If the AVR does not function correctly after a processor reset, contact an authorized Harman Kardon service center for assistance. Authorized service centers may be located by visiting our Web site at www.harmankardon.com. -
Page 24: Troubleshooting
• Turn up Volume control • Check all speaker wires at speaker and AVR connections for crossed wires • Contact your local Harman Kardon service center • Select a surround mode other than stereo • Mono programs contain no surround information •... -
Page 25: Specifications
Specifications Audio Section Stereo power: Multichannel power: Input sensitivity/impedance: Signal-to-noise ratio (IHF-A): Surround system adjacent-channel separation: Frequency response (@1W): High instantaneous-current capability (HCC): Transient intermodulation distortion (TIM): Slew rate: FM Tuner Section Frequency range: Usable sensitivity IHF: Signal-to-noise ratio (mono/stereo): Distortion (mono/stereo): Stereo separation: Selectivity (±400kHz):... -
Page 26: Appendix
Appendix – Default settings, worksheets, remote product codes Table A1 – Recommended Source Component Connections Device Type Cable TV, Satellite, HDTV or other device that deliv- ers television programs VCR, DVR, PVR, or other audio/video recorder DVD player, Blu-ray Disc player HDMI-capable disc player, game console or other audio/video device HDMI-capable disc player, game console or... - Page 27 Table A3 – Speaker/Channel Setting Defaults Source All Sources Left/Right Speaker Center Speaker Surround Speaker Surround Back Speaker Subwoofer 100Hz Left/Right Speaker Crossover 100Hz Center Speaker Crossover 100Hz Surround Speaker Crossover 100Hz Surround Back Speaker Crossover PRESENT Sub Mode Table A4 – Distance Settings Speaker Positions Your Distances From Speaker to Listening Position Front Left...
- Page 28 Table A5 – Source Settings Source HDMI 1 Title Video Input Component Video Input Digital Audio Input Analog Audio Input Auto Poll Table A6 – Speaker/Channel Settings Front Left Number of Speakers Crossover Distance Channel Level Adjust HDMI 2 HDMI 3 Video 1 Video 2 VIDEO 1...
- Page 29 Table A7 – Remote Control Codes Source Input Product Type (circle one) VCR, PVR, DMC Video 1 Video 2 Cable, Satellite HDMI 1 DVD, Blu-ray Disc player, VCR/PVR/DMC, Cable/Satellite DVD, Blu-ray Disc player, VCR/PVR/DMC, Cable/Satellite HDMI 2 DVD, Blu-ray Disc player, VCR/PVR/DMC, Cable/Satellite HDMI 3 DVD, Blu-ray Disc player, VCR/PVR/DMC, Cable/Satellite CD, CD-R...
- Page 30 Table A9 – Surround Modes Surround Mode Description Dolby Digital Provides up to five separate main audio channels and a dedicated low-frequency effects (LFE) channel. Dolby Digital Plus An enhanced version of Dolby Digital encoded more efficiently, Dolby Digital Plus has the capacity for additional discrete channels and for streaming audio from the Internet, all with enhanced audio quality.
- Page 31 Table A9 – Surround Modes (cont.) Surround Mode Description Using a different encoding/decoding method from Dolby Digital, DTS Digital DTS Digital also provides up to five discrete main channels, plus an LFE channel. DTS-HD DTS-HD is a high-definition audio format that complements the high-definition video found on Blu-ray Disc and HD-DVD discs.
- Page 32 AVR 1565/AVR 1566 Appendix Refer to the numbered buttons when using the Function List Remote Control...
- Page 33 Table A10 – Remote Control Function List No. Button Name AVR Function Power On Power On Power On Power Off Power Off Power Off Mute Mute Mute AVR Select AVR Select DVD Select DVD Select VID 1 (VCR) Video 1 Select VCR Select HDMI 1 HDMI 1 Select...
- Page 34 Table A10 – Remote Control Function List (cont.) No. Button Name AVR Function Chapter+ or Tun-M Tuner Mode Zoom Memory Memory Audio or Playlist Tuning Up Tuning Up Next Chapter Direct Direct Tuner Entry Angle Clear Clear Clear Preset Up Preset Tune Up Slow Forward Tuning Down...
- Page 35 045 123 128 132 139 157 158 159 162 205 FUNAI FUJITSU 041 042 FUTURETECH 029 087 121 123 128 133 145 159 163 GRUNDIG HALLMARK HARMAN KARDON HITACHI 123 128 132 144 147 HYTEK INKEL JC PENNEY 115 123 128 132 145 JENSEN...
- Page 36 DAEWOO 017 094 104 DAYTRON 018 048 DYNATECH EMERSON 013 040 042 110 112 FISHER FUNAI 076 095 124 HARMAN KARDON 002 003 018 049 HITACHI 040 048 JC PENNEY 018 045 JENSEN 018 048 111 132 KENWOOD 020 048...
- Page 37 DENON 187 188 213 EMERSON 052 093 108 FISHER 055 095 FUNAI HAITAI 099 214 HARMAN KARDON 001 002 025 054 190 HITACHI INKEL JC PENNEY 098 147 JENSEN 176 195 196 KENWOOD 030 062 078 079 148 151 176 178 181...
- Page 38 Table A14 – Remote Control Product Codes: DVD DVD Manufacturer/Brand Setup Code Number APEX DIGITAL DENON 019 020 051 004 103 HARMAN KARDON 001 002 003 LG/GOLDSTAR 005 010 055 064 066 MAGNAVOX MARANTZ Table A14 – Remote Control Product Codes: DVD (cont.)
- Page 39 359 384 385 387 394 419 488 Table A16 – Remote Control Product Codes: Tape Cassette Deck Setup Code Number Manufacturer/Brand HARMAN KARDON Table A17 – Remote Control Product Codes: Cable Cable Manufacturer/Brand Setup Code Number 001 011 ALLEGRO AMERICAST...
- Page 40 Table A17 – Remote Control Product Codes: Cable (cont.) Cable Manufacturer/Brand Setup Code Number PHILIPS 013 019 020 085 090 PIONEER 001 041 119 171 209 215 216 RADIO SHACK 111 112 213 053 214 RECOTON REGAL 056 099 100 101 208 REMBRANDT SAMSUNG 003 072 186...
- Page 41 8500 Balboa Boulevard, Northridge, CA 91329 USA © 2011 HARMAN International Industries, Incorporated. All rights reserved. Harman Kardon and Logic 7 are trademarks of HARMAN International Industries, Incorporated, registered in the United States and/or other countries. Apple, iPhone, iPod, iPod touch, iPod nano and iPod classic are trademarks of Apple Inc., registered in the U.S. and other countries.