Table of Contents
Advertisement
Advertisement
Table of Contents

Related Manuals for HP Photosmart R742


Summary of Contents for HP Photosmart R742
- Page 1 HP Photosmart R740 series Digital Camera User Guide...
- Page 2 Nothing herein should be construed as constituting an additional warranty. HP shall not be liable for technical or editorial errors or omissions contained herein. Windows® is a U.S. registered trademark of Microsoft Corporation.
-
Page 3: Table Of Contents
Contents Getting started Camera top and back ...3 Camera front, side, and bottom...4 Before taking pictures...4 Charge the battery...4 Install the battery...5 Turn on the camera...5 Choose the language...5 Set the region...5 Set the date and time...5 Install and format an optional memory card...6 Install the software...7 Using your camera...7 Taking pictures and recording video clips... - Page 4 Cropping images...23 Transferring and printing images Transferring images with HP Photosmart Software...24 Transferring images without HP Photosmart Software...25 Connecting to the computer...25 Using a memory card reader...26 Printing images directly to a printer...26 Using HP Photosmart Express Using the Photosmart Express Menu...28 Marking images for printing...28...
-
Page 5: Getting Started
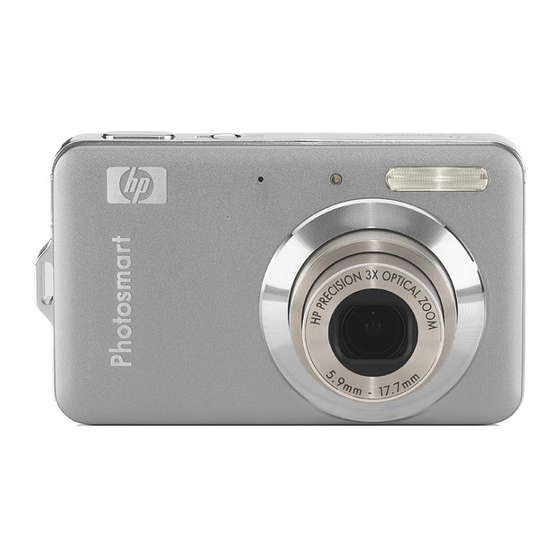
Getting started Use this section to get familiar with camera controls, set up your digital camera for use, and begin taking pictures. Camera top and back button. Power light. Shutter button. selector—Switches between Playback (see “Reviewing images and video clips” on page Zoom lever—Accesses /... -
Page 6: Camera Front, Side, And Bottom
Before using the battery for the first time, fully charge it using the charger that came with your camera. NOTE: Your camera uses a rechargeable HP Photosmart LI40 battery. Do not charge any other battery in the charger. 1. Plug the charger into an electrical outlet, then insert the battery into the charger as shown. -
Page 7: Install The Battery
Install the battery 1. Open the Battery/Memory Card door by sliding the latch as indicated on the Battery/Memory Card door. 2. Insert the battery in the larger slot, pushing the battery in until the latch catches 3. Close the Battery/Memory Card door. To remove the battery, move the battery latch as shown until the battery springs free. -
Page 8: Install And Format An Optional Memory Card
date and time imprint feature. See Date & Time Imprint under and Video Record menus” on page 1. Use to adjust the highlighted value. 2. Use to move to the other selections and repeat Step 1 until the date and time are set correctly. -
Page 9: Install The Software
1. Close all programs and temporarily disable any virus protection software. 2. Insert the HP Photosmart Software CD into the CD drive and follow the on-screen instructions. If the installation screen does not appear, click Start, click Run, type D: \Setup.exe, where D is the letter of your CD drive, then click OK. - Page 10 Getting started “Reviewing images and video clips” on page 18 “Using the Design Gallery Menu” on page 22 “Transferring images with HP Photosmart Software” on page 24 “Printing images directly to a printer” on page 26 Picture Capture, Video Record, and...
-
Page 11: Taking Pictures And Recording Video Clips
Taking pictures and recording video clips You can take pictures when you are in when you are in video clips. The Image Display resembles the following: 0:15 Taking pictures You can take a picture when the camera is set to 1. -
Page 12: Recording Video Clips
Recording video clips You can record a video clip when the camera is set to 1. Slide 2. Frame the subject in the Image Display. 3. Press the Shutter button halfway down to measure focus and exposure. The focus brackets in the Image Display turn solid green when focus is locked (see and exposure”... -
Page 13: Focusing On The Subject
Focusing on the subject When you press the Shutter button halfway down, the camera searches for focus within the focus brackets. When it finds focus, the focus brackets turn green. If the focus brackets do not frame your subject, use Focus Lock (see on page 12). -
Page 14: Using Focus Lock
Using Focus Lock Use Focus Lock to focus on a subject that is not in the center of the picture, to capture action shots more quickly by pre-focusing in the area where the action will occur, or to focus in low light or low contrast situations. 1. -
Page 15: Optical Zoom
Optical zoom Optical zoom moves the lens between wide angle (1x) and telephoto (3x). While in Picture Capture or buttons on the Zoom lever to control zoom. Press to zoom out. NOTE: You can set the optical zoom to the position you want just before recording video clips. -
Page 16: Setting Options For Taking Pictures And Recording Video Clips
Setting options for taking pictures and recording video clips Your camera's default settings work well for most shooting situations. For some situations, however, the features described in this chapter can improve the pictures you take and the video clips you record. In addition to setting features that optimize the camera for lighting and motion, you can also set the camera to take a series of pictures rapidly or take images 10 seconds after you press the Shutter button, giving you time to place yourself in the image. -
Page 17: Using The Picture Capture And Video Record Menus
Using the Picture Capture and Video Record menus Picture Capture and settings that affect the characteristics of the pictures and video clips you capture. The Picture Capture Menu displays only those features available for taking pictures while Video Record Menu displays only features available for recording video clips. 1. -
Page 18: Using The Self-Timer Setting
(continued) Date & Time Imprint ( remains in effect until it is changed, even when you turn off the camera. • Off (Default)—No date or time imprinted on the image. • Date Only—Date permanently imprinted. • Date & Time—Date and time permanently imprinted. Camera Setup...—Displays the (see “Using the Camera Setup Menu”... - Page 19 Burst setting remains in effect until it is changed again, or until you turn off the camera. Using the Picture Capture and Video Record menus...
- Page 20 Reviewing images and video clips You can review and manipulate images and video clips in here. For information about enhancing images, see on page 1. Slide 2. Use to scroll through your images and video clips. Press to view video clips. Press playing the video clip, or press During Playback, the Image Display also indicates additional information about each...
-
Page 21: Reviewing Images And Video Clips
Deleting images To delete a displayed image during 1. Press 2. Use to select an option, then press • This Image—Deletes the image or video clip. • All Except Favorites—Deletes all images except those tagged as Favorites. This menu option only appears if you have images tagged as Favorites (see “Tagging images as Favorites”... -
Page 22: Removing Red Eyes
“Removing red eyes” on page “Using the Design Gallery Menu” on page “Using HP Photosmart Express” on page 21). Camera Setup Menu for setting camera behavior Remove Red Eyes, the camera processes the current picture to Playback Menu. -
Page 23: Tagging Images As Favorites
3. For each additional image you want to tag as a Favorite, use then repeat Step 2. 4. To exit the If you have the HP Photosmart Software installed on your computer, tagged images retain the tag when transferred to your computer (see on page 24). -
Page 24: Using The Design Gallery Menu
Using the Design Gallery Menu You can use the 1. While in Playback, use 2. Use to highlight 3. Use to highlight an option, then press Modify Color—Allows you to apply a color effect to an image (see on page 22). -
Page 25: Cropping Images
Add Borders allows you to add one or more predefined borders to the displayed image. To add a border: 1. While in the press 2. Use to select a border type and preview the effect it has on the image. •... -
Page 26: Transferring And Printing Images
You can transfer pictures and video clips with or without the HP Photosmart Software that came with your camera. However, the HP Photosmart Software has several features for transferring and managing your images and also guides you through the transfer process. -
Page 27: Transferring Images Without Hp Photosmart Software
After you have transferred the images, you can then use the HP Photosmart Software to edit, print, or send the images from your computer. Transferring images without HP Photosmart Software If you do not install the HP Photosmart Software: •... -
Page 28: Using A Memory Card Reader
NOTE: You cannot print video clips using the method described in this section. You can, however, print a frame from a video clip using the HP Photosmart Software. For more information, see Help in the HP Photosmart Software. 1. Check that the printer is turned on, there is paper in the printer, and there are no printer error messages. - Page 29 5. After the printer has printed all the images you selected, disconnect the camera from the printer. NOTE: If you connect the camera to a non-HP printer and encounter problems with printing, contact your printer manufacturer. HP does not provide customer support for non-HP printers.
-
Page 30: Using Hp Photosmart Express
“Buying prints online” on page images” on page 30) the next time you connect the camera to your computer or printer. You must have the HP Photosmart Software installed on your computer to use some features in the software, see “Install the software”... - Page 31 6. To print the marked images directly to a printer, see printer” on page 26. To print them from a computer connected to a printer, see “Transferring images with HP Photosmart Software” on page 21). . This option is “Tagging 21).
-
Page 32: Buying Prints Online
Buying prints online You can mark images you want to order as prints. The next time you connect the camera to a computer with the HP Photosmart Software installed, you can order prints of the marked images online. 1. While in the Online, then press 2. -
Page 33: Sending Images To Online Destinations
“Setting up online 30). You . This option is available only if you have 21). . This option is available only if you have more “Transferring images with HP Photosmart to highlight Share, then to select each destination. “Tagging images as to select each destination. -
Page 34: Using The Camera Setup Menu
USB Configuration—Specifies how a computer recognizes the camera. See “Connecting to the computer” on page • Digital Camera (Default)—Recognizes the camera as a digital camera using PTP (Picture Transfer Protocol). • Disk Drive—Recognizes the camera as a disk drive using MSDC (Mass Storage Device Class). -
Page 35: Troubleshooting
Known issues are often fixed with new releases of firmware. To optimize your digital photography experience, periodically check the Hewlett-Packard Technical Support website (www.hp.com/support) for updates to your camera's firmware, software, and drivers. How can I get professional-quality prints if I don’t have a photo printer? - Page 36 I have to recharge the Lithium Ion battery frequently. • “Extending battery life” on page • A battery that is new or has not been charged recently must be recharged to reach full capacity. • If you have not used the battery for two months or longer, recharge it. The Lithium Ion battery will not charge.
- Page 37 (see Move Images to Card under Playback Menu” on page 19). 12). 15). Flash On and set the shooting mode to 14). www.hp.com/ “Setting the flash” on page “Digital zoom” My image is blurry. “Using the Picture “Setting the flash” 14), or wait for 15).
- Page 38 I have two memory cards that are the same size, but one stores many more pictures than the other. • Your memory card may contain files that are not images or videos recognized by the camera. Save any data on the memory card that you want to keep, then format the memory card (see •...
- Page 39 (see “Transferring images with HP Photosmart Software” on page The HP Photosmart Software takes a long time before it is ready to transfer images from my camera. Having a large number of files stored on an optional memory card affects the amount of time it takes for the HP Photosmart Software to start transferring images.
-
Page 40: Camera Error Messages
• Recharge the battery. • Replace the battery. I am having a problem installing or using the HP Photosmart Software. • Make sure your computer meets the minimum system requirements as stated on the camera packaging. •... -
Page 41: 10 Product Support
Support; firmware, software, and driver updates; support information Windows Vista support Getting assistance To get the best from your HP product, consult the following standard HP support offerings: 1. Consult the product documentation. • Review “Troubleshooting” on page 33 •... -
Page 42: A Managing Batteries
Managing batteries Your camera uses an HP Photosmart LI40 battery (Q6277A), a rechargeable Lithium Ion battery. Top points about batteries • Use only an HP Photosmart LI40 battery with your camera. • Always insert the battery in the camera correctly (see •... -
Page 43: Power Indicators
NOTE: For more information about batteries, go to code R-400. Recharging the HP Photosmart LI40 battery You can recharge the HP Photosmart LI40 battery using the charger that came with your camera (see “Charge the battery” on page Description Battery has more than 70 percent energy remaining. -
Page 44: Safety Precautions For Recharging Batteries
Safety precautions for recharging batteries You can recharge an HP Photosmart LI40 battery in the charger that came with your camera. The charger may be warm while charging the battery. This is normal. However, you should follow the safety precautions below. -
Page 45: B Specifications
6.35 cm (2.5 in) color LTPS TFT LCD with backlight, 153,600 pixels (640 by 240) total pixel count • 16MB internal flash memory. • Slot for memory card. • This camera supports standard, high speed, and high capacity Secure Digital (SD and SDHC) memory cards, 32MB to 8GB. www.hp.com/ Specifications... -
Page 46: Memory Capacity
96.16 mm (W) by 25.8 mm (D) by 62.2 mm (H) (3.78 in by 1.01 in by 2.44 128.5 grams (4.53 ounces) without battery Typical power usage: 1500 mW (with Image Display on) Power sources include: • One rechargeable HP Photosmart LI40 battery for HP Photosmart R-series cameras • Battery charger included with camera Operational: 0°... -
Page 47: Index
10 brackets 10 focus lock 12 optimizing 11 format memory card 6 getting assistance 39 HP Photosmart Express 28 HP Photosmart LI40 battery 40, 42 HP Photosmart Software 7 Image Display 3 Image Quality 15, 44 images Date &... - Page 48 Playback 18 Playback Menu 19 Portrait mode 15 power indicators 41 light 3 ON/OFF button 3 print images 26, 28 prints, buy online 30 problems and solutions 33 record video clips 10 red-eye removal 20 Region 5 remaining pictures count 9 removing red eyes 20 reset camera 33 resolution 43...
- Page 49 L2507A, L2508A, L2509A, L2510A, L2783A, L2784A, L2785A, L2786A Regulatory model: SNPRB-0706 Charger and AC adapter: HP Photosmart LI40 battery charger, (Product number L2508-80001, Regulatory model SNPRB-0708) AC power adapter plug (Product numbers L2508-80002, L2508-80003, L2508-80004, L2508-80005) Conforms to the following Product Specifications:...