Dell PowerVault MD3060e Setting Up
Hide thumbs
Also See for PowerVault MD3060e:
- Installation and configuration manual (63 pages) ,
- Administrator's manual (48 pages) ,
- Owner's manual (40 pages)
Advertisement
Quick Links
Setting Up Your Dell PowerVault MD3060e Storage Enclosure
Racking Your Storage Enclosure
Notes, Cautions, and Warnings
A
NOTE
indicates important information that helps you make better use of your
system.
A
CAUTION:
indicates either potential damage to hardware or loss of data and tells
you how to avoid the problem.
A
WARNING
indicates a potential for property damage, personal injury, or death.
WARNING: Before you set up and operate your Dell PowerVault system, review the
safety instructions that shipped with your system.
Verify Storage Array Components
Your system is shipped with enclosure management modules, power supplies, and fan
components already installed in the enclosure. Make sure that all components are
properly seated and are not dislodged and/or damaged during shipping.
Install the Enclosure in a Rack
The storage enclosure requires a compatible rack and a rack installation kit. For information
about installing the rails for the storage enclosure, see the rack installation instructions that
shipped with your enclosure.
WARNING: Do not plug the enclosure into a standard power outlet. Your storage
array is shipped with two IEC C19 to C20 jumper cords. Plug the C19 plug into the
array's power supplies and the C20 plug into the power distribution unit (PDU) in
the rack cabinet. For power redundancy, split the power connections from each
enclosure into separate PDUs and connect the PDUs to external power receptacles
on different circuits. The enclosure supports only 200 V to 240 V input sources.
Physical-Disk Drawers
The MD Series Dense storage enclosure contains five physical-disk drawers accessible
from the front of the enclosure. Each drawer holds up to 12 physical disks.
To open a drawer:
1.
Flip both latches outward.
2.
Pull the drawer out.
NOTE: When a drawer is opened, the enclosure cooling fan RPM increases
significantly to ensure optimal airflow. This is normal and does not indicate
a problem.
CAUTION:
If a drawer is not completely inserted into the enclosure, other drawers
will be locked. Do not force a drawer open as it may damage the physical disk or the
drawer itself.
To close a drawer:
3.
Push the drawer into the enclosure until the release latch clicks into place.
4.
Close the latches on each side of the drawer.
NOTE: Ensure that the drawer is pushed in and closed completely.
WARNING: Do not install physical disks in the enclosure before installing the
enclosure in the rack. This adds substantial weight to the enclosure and makes lifting
and installing the enclosure in the rack unsafe. For more information, see the rack
installation instructions shipped with your enclosure.
Locate Your System Service Tag
Your system is identified by a unique Express Service Code and Service Tag.
This information is used by Dell to route support calls to the appropriate personnel.
Physical-Disk Carriers
Physical disks are preinstalled in their carriers and shipped separately in anti-static
packaging. For information on installing and removing the physical disks from the
physical-disk carriers, see Dell PowerVault MD3060e Owner's Manual at
dell.com/powervaultmanuals.
Physical Disk Installation Guidelines
•
To maintain proper airflow, install physicals disks from left to right and front to back in
each drawer.
•
A minimum of four disks must be installed in each drawer, filling slots 0, 3, 6, and 9
respectively.
•
Keep all drawers closed unless you need to access the physical disks. The storage array
operates normally with a drawer open, but it is designed for optimal cooling with all
drawers closed.
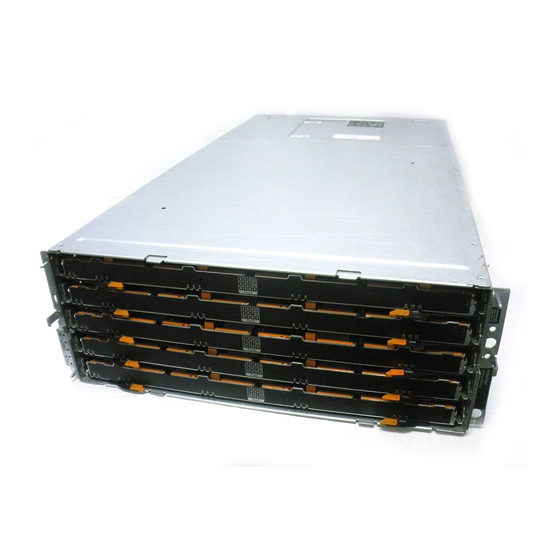
About the Storage Enclosure
The MD3060e Dense storage enclosure is a five-drawer, 60-physical disk chassis (4U)
managed by two enclosure management modules (EMMs).
Fan Modules (2)
Power Supplies (2)
Enclosure Management Modules (2)
Enclosure Management Modules
Each storage enclosure must contain two EMMs.
Enclosure Management Module
Installing Physical Disks
To install a physical disk into a drawer:
1.
Open the physical-disk drawer.
2.
Rotate the physical disk carrier handle upward to the vertical position.
3.
Align the two raised buttons on the disk carrier with the notches on the
physical-disk drawer.
CAUTION:
Do not install disks randomly. Fill disk slots 0, 3, 6, and 9 first.
4.
Lower the physical disk into the drawer slot.
5.
Rotate the physical disk carrier handle downward until the physical disk is properly
seated in the connector and the physical-disk carrier handle snaps into place.
CAUTION:
Check that the disk is not raised up at the back of the drawer slot,
which would indicate that it is not properly seated. Closing the drawer with an
improperly seated disk will damage both the drawer and the physical disk.
6.
Close the physical-disk drawer.
WARNING: Do not plug the enclosure into a standard power outlet.
Your storage array is shipped with two IEC C19 to C20 jumper cords. Plug the
C19 plug into the array's power supplies and the C20 plug into the power
distribution unit (PDU) in the rack cabinet. For power redundancy, split the
power connections from each enclosure into separate PDUs and connect
the PDUs to external power receptacles on different circuits. The enclosure
supports only 200 V to 240 V input sources.
Follow these steps to power on your storage array:
1.
Turn on any network switches, routers, or other standalone components.
2.
Power on the MD3060e storage enclosure.
NOTE:
Wait for the enclosure status LED to turn blue before proceeding to the
next step.
3.
Power on the attached MD Series Dense storage array or server.
NOTE:
Wait for the storage array status LED to turn blue before attempting to
discover or manage the array.
2
3
1
4 4
5
1. physical disk
2. physical-disk carrier handle
3. notches on physical-disk drawers
4. buttons on disk carrier
5. drawer latches (2)
Advertisement

Related Manuals for Dell PowerVault MD3060e


Summary of Contents for Dell PowerVault MD3060e
- Page 1 Your system is identified by a unique Express Service Code and Service Tag. properly seated and are not dislodged and/or damaged during shipping. This information is used by Dell to route support calls to the appropriate personnel. Install the Enclosure in a Rack Enclosure Management Modules The storage enclosure requires a compatible rack and a rack installation kit.
- Page 2 Copyright © 2014 Dell Inc. All rights reserved. This product is protected by U.S. and international copyright and intellectual property laws. Dell™ and the Dell logo are trademarks of Dell Inc. in the United States and/or other jurisdictions. All other marks and names mentioned herein may be trademarks of their respective companies.