Table of Contents
Advertisement
APRILIA WOULD LIKE TO THANK YOU
for having chosen one of its products. We have compiled this booklet to provide a comprehensive overview of your vehicle's quality features. Please
read it carefully before riding the vehicle for the first time. It contains information, tips and precautions for using your vehicle. It also describes features,
details and devices to assure you that you have made the right choice. We believe that if you follow our suggestions, you will soon find yourself in
harmony with your new vehicle, and ride it fully satisfied for a long time. This booklet forms an integral part of the vehicle; should the vehicle be sold, it
must be transferred to the new owner.
SR 50
Ed. 04_10/2018 Cod. 2Q000358 (IT-DE-FR-ES), 2Q000359 (EN-NL-EL-DA-FI-FR)
Advertisement
Table of Contents

Related Manuals for APRILIA SR 50 2018


Summary of Contents for APRILIA SR 50 2018
- Page 1 APRILIA WOULD LIKE TO THANK YOU for having chosen one of its products. We have compiled this booklet to provide a comprehensive overview of your vehicle's quality features. Please read it carefully before riding the vehicle for the first time. It contains information, tips and precautions for using your vehicle. It also describes features, details and devices to assure you that you have made the right choice.
- Page 2 The instructions given in this manual are intended to provide a clear, simple guide to using your vehicle; it also describes routine maintenance procedures and regular checks that should be carried out on the vehicle at an Aprilia Dealer or Authorised Workshop. The booklet also contains instructions for simple repairs.
- Page 3 Personal safety Failure to completely observe these instructions will result in serious risk of personal injury. Safeguarding the environment Sections marked with this symbol indicate the correct use of the vehicle to prevent dam- aging the environment. Vehicle intactness The incomplete or non-observance of these regulations leads to the risk of serious damage to the vehicle and sometimes even the invalidity of the guarantee The symbols illustrated above are very important.
-
Page 5: Table Of Contents
INDEX GENERAL RULES............... Stopping the engine..............52 Foreword................Catalytic silencer............... 54 Motorcycle care..............Stand..................54 Carbon monoxide..............11 Safe driving................55 Fuel..................12 MAINTENANCE................57 Hot components..............12 Hub oil level................58 Coolant.................. 13 Tyres..................59 Brake fluid................13 Spark plug dismantlement............61 Battery hydrogen gas and electrolyte........ -
Page 7: General Rules
SR 50 Chap. 01 General rules... -
Page 8: Foreword
TIONS, OFF ROAD. Motorcycle care Aprilia recommends using quality products for cleaning the vehicle. The use of un- suitable products can damage vehicle components. For cleaning do not use solvents such as "nitro thinner", "cold cleaning agents", fuels or the like, or cleaning products that contain alcohol. - Page 9 USE OF HOT WATER INTENSIFIES THE EFFECT OF THE SALT. USE ONLY PLENTY OF COLD WATER TO WASH AND REMOVE ANTI-ICING SALT USE OF HIGH PRESSURE WASHING SYSTEMS (OR STEAM CLEANERS) CAN DAMAGE THE SEALS, OIL SEALS, BRAKING SYSTEM, ELECTRICAL SYSTEM AND THE SADDLE.
- Page 10 OF PLASTIC PARTS. ROTARY BRUSHES OR SPONGES WITH HARD SURFA- CES CAN MAKE SCRATCHES CHROME PARTS AND POLISHED METAL TREAT THE PARTS MADE OF CHROME, ALUMINIUM OR POLISHED STEEL IN A SPECIAL MANNER. WASH THEM WITH PLENTY OF WATER AND CAR SHAM- POO, POLISH AND REGULARLY BRIGHTEN THEM WITH POLISH PASTE, PRO- TECT THEM WITH WAXES OR SUITABLE ACID-FREE PRODUCTS (E.G.
-
Page 11: Carbon Monoxide
THE USE OF SILICONE SPRAY TO CLEAN THE RUBBER SEALS MAY CAUSE DAMAGE. DO NOT USE OTHER PRODUCTS CONTAINING SILICON FOR CLEANING THE MOTORCYCLE Carbon monoxide If you need to keep the engine running while working on the vehicle, please ensure that you do so in an open or very well ventilated area. -
Page 12: Fuel
Fuel CAUTION FUEL USED TO DRIVE EXPLOSION ENGINES IS HIGHLY INFLAMMABLE AND CAN BECOME EXPLOSIVE UNDER SPECIFIC CONDITIONS. IT IS THEREFORE RECOMMENDED TO CARRY OUT REFUELLING AND MAINTENANCE PROCE- DURES IN A VENTILATED AREA WITH THE ENGINE SWITCHED OFF. DO NOT SMOKE DURING REFUELLING OR NEAR FUEL VAPOUR. -
Page 13: Coolant
Coolant Coolant contains ethylene glycol, which may be flammable in certain conditions. Eth- ylene glycol burns with an invisible flame which may still cause burns. CAUTION TAKE PARTICULAR CARE NOT TO SPILL COOLANT ONTO HOT PARTS OR THE ENGINE AND EXHAUST SYSTEM; THE FLUID MAY CATCH FIRE AND BURN WITH INVISIBLE FLAMES. -
Page 14: Battery Hydrogen Gas And Electrolyte
Battery hydrogen gas and electrolyte CAUTION THE BATTERY ELECTROLYTE IS TOXIC, CORROSIVE AND AS IT CONTAINS SULPHURIC ACID, IT CAN CAUSE BURNS WHEN IN CONTACT WITH THE SKIN. WHEN HANDLING BATTERY ELECTROLYTE, WEAR TIGHT-FITTING GLOVES AND PROTECTIVE APPAREL. IN THE EVENT OF SKIN CONTACT WITH THE ELECTROLYTIC FLUID, RINSE WELL WITH PLENTY OF CLEAN WATER. -
Page 15: Precautions General Advice
Precautions general advice Unless otherwise specified in this Use and Maintenance Manual, do not remove any mechanical or electrical component. CAUTION SOME CONNECTORS IN THE VEHICLE MAY BE ACCIDENTALLY SWAPPED AND MAY COMPROMISE NORMAL VEHICLE OPERATION IF INCORRECTLY IN- STALLED. -
Page 17: Vehicle
SR 50 Chap. 02 Vehicle... -
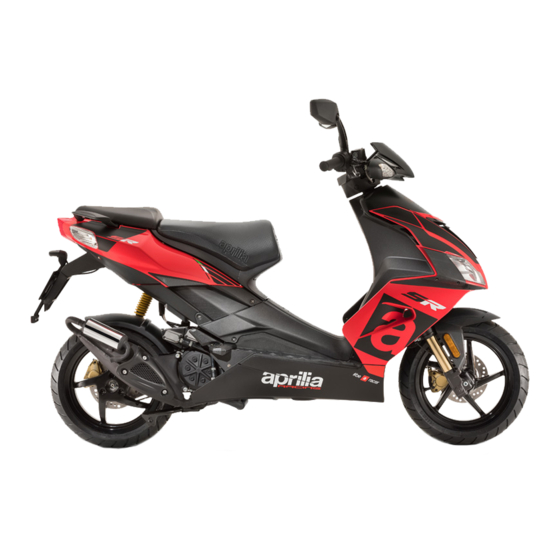
Page 18: Arrangement Of The Main Components
Arrangement of the main components (02_01, 02_02) 02_01... - Page 19 02_02 Key: 1. Coolant reservoir 2. Oil mixer reservoir 3. Rear brake fluid reservoir 4. Glove-box 5. Helmet compartment / glove-box 6. Fuel tank cap 7. Fuses...
-
Page 20: Dashboard
8. Front brake fluid tank 9. Ignition switch /steering lock 10. Glove box/battery/fuse/spark plug cover 11. Battery 12. Spark plug Dashboard (02_03) 02_03... -
Page 21: Analogue Instrument Panel
Key: 1. Rear brake lever 2. Left light switch 3. Instrument panel 4. RH light switch 5. Front brake lever 6. Throttle grip 7. Ignition switch/steering lock (ON - OFF - LOCK) 8. MODE button 9. Horn button 10. Turn signal switch 11. - Page 22 02_04 Key: 1. Rpm indicator 2. Fuel gauge 3. Turn signal indicator lamp (green) 4. High beam indicator lamp (blue) 5. Low fuel warning light (yellow) 6. Service indicator symbol 7. Mixer oil reserve indicator symbol...
- Page 23 8. Digital clock 9. Coolant temperature indicator. 10. Multifunction indicator: total odometer (ODO) / trip odometer (TRIP) / battery volt- 11. Mixer oil in reserve warning light (red) INSTRUMENTS AND GAUGES - DESCRIPTION NOTE WHEN THE KEY IS TURNED TO THE "ON" POSITION, FOR THE FIRST THREE SECONDS ALL THE INDICATOR LIGHTS ARE SWITCHED ON, TOGETHER WITH THE INSTRUMENT CLUSTER AND THE DIGITAL DISPLAY INDICATORS, THUS PERFORMING AN INITIAL INSTRUMENT CHECK.
- Page 24 • Switched on when the front high beam light is activated. Fuel reserve warning light (5) • Switched on when the fuel gauge reference marks are no longer visible on the digital display and the quantity of fuel remaining in the tank is 1.2 l (0.26 UK gal;...
- Page 25 Digital clock (8) • Shows current hours and minutes. Coolant temperature indicator (9) • Shows the approximate temperature of the coolant in the engine. When the first segment turns on, the temperature is adequate to ride the vehicle. The normal operating temperature is reached when the needle is at central area of the scale.
-
Page 26: Digital Lcd Display
• It is switched on for a few seconds when the ignition switch is set to the "ON" position. Digital lcd display (02_05, 02_06) MULTIFUNCTION DIGITAL COMPUTER Functions of the multifunction indicator: • Press the MODE button (2), positioned on the left hand side of the handle- bars, to select the various functions: the clock adjustment, the trip odometer (TRIP), battery voltage readings and trip odometer reset. -
Page 27: Mode" Button
Set clock NOTE FOR SAFETY REASONS, ADJUST THE CLOCK ONLY WHEN YOUR VEHICLE IS STOPPED. • Press the MODE button (2) for more than three seconds • The colon dividing hours-minutes starts flashing. • Set the hours by pressing the MODE button (2) repeatedly until the desired value is displayed. -
Page 28: Key Switch
Key switch (02_08) The ignition switch is located on the right hand side, near the headstock. NOTE THE KEY OPERATES THE IGNITION SWITCH/STEERING LOCK AND THE SAD- DLE LOCK. The vehicle is supplied with two keys (one is the spare key). NOTE KEEP THE SPARE KEY IN DIFFERENT PLACE, NOT WITH THE VEHICLE. -
Page 29: Switch Direction Indicators
OPERATION To lock the steering: • Turn the handlebar fully to the left. • Turn the key (1) to the "OFF" position, and press it. NOTE TURN THE KEY AND MOVE THE HANDLEBAR AT THE SAME TIME. 02_09 • Turn the key (1) counterclockwise (to the left), and rotate the handlebar slowly until the key (1) is in the "LOCK"... -
Page 30: Horn Button
Horn button (02_11) • Press the button to activate the horn. NOTE THE ELECTRICAL COMPONENTS FUNCTION ONLY WHEN THE IGNITION KEY IS SET TO "ON" 02_11 Light switch (02_12) If the column light switch is in position (A), the high beam light is activated; in position (B), the low beam light is activated. -
Page 31: Start-Up Button
Start-up button (02_13) • Press the button and the starter motor spins the engine. NOTE THE ELECTRICAL COMPONENTS FUNCTION ONLY WHEN THE IGNITION KEY IS SET TO "ON" 02_13 Opening the saddle (02_14, 02_15) To unlock and lift the saddle: •... -
Page 32: Lifting The Helmet Bay
• To lock the saddle, lower and press it (without forcing it) to trip the lock. CAUTION BEFORE SETTING OFF, MAKE SURE THAT THE SADDLE IS CORRECTLY LOCKED INTO POSITION. 02_15 Lifting the Helmet Bay (02_16, 02_17, 02_18) • Thanks to the helmet compartment/ glove-box it is not necessary to carry the helmet with you after parking your vehicle. -
Page 33: Identification
GLOVE-BOX The vehicle is equipped with a glove-box located in the front part of the saddle. Press the lever on the glove box to open it. 02_17 DOCUMENT HOLDER To access these compartments: • Insert the key (1) in the slot, turn it clockwise and pull on it in order to raise the cover (2) and access the glove box (3). - Page 34 NOTE ALTERING IDENTIFICATION NUMBERS CAN BE SERIOUSLY PUNISHED BY LAW, PARTICULARLY MODIFYING THE CHASSIS NUMBER WILL IMMEDIATE- LY INVALIDATE THE WARRANTY. Frame number The chassis number is stamped on the chassis central bar. To read the number, re- move the cover. Chassis No.
-
Page 35: Bag Clip
Bag clip (02_21) • The bag support hook (1) is located at the front of the internal leg shield CAUTION DO NOT HANG BULKY BAGS OR PACKAGES ON THE HOOK TO AVOID OB- STRUCTING VEHICLE HANDLING AND FEET MOVEMENT. 02_21 Characteristic Maximum allowed weight 1.5 kg (3.31 lb) -
Page 37: Use
SR 50 Chap. 03... -
Page 38: Checks
THE VEHICLE, FOR CORRECT AND SAFE OPERATION. FAILURE TO DO SO MAY LEAD TO SEVERE PERSONAL INJURY OR VEHICLE DAMAGE. CONTACT AN Authorised Aprilia Dealer IMMEDIATELY IF IN ANY DOUBT ABOUT THE FUNCTIONS OF ANY CONTROLS OR IF ANY MALFUNCTIONS ARE FOUND OR SUSPECTED. - Page 39 Remove any possible strange body that might be stuck in the tread design. Brake levers Check they function smoothly. Lubricate the joints if necessary. Steering Check that the rotation is uniform, smooth and there are no signs of clearance or slackness. Centre stand Check that it operates smoothly and that the tension on the spring...
-
Page 40: Refuelling
Replace the light bulbs or repair the failure, if necessary. Refuelling (03_01, 03_02, 03_03, 03_04) CAUTION FUEL USED TO DRIVE EXPLOSION ENGINES IS HIGHLY INFLAMMABLE AND CAN BECOME EXPLOSIVE UNDER SPECIFIC CONDITIONS. CARRY OUT REFILLING AND MAINTENANCE PROCEDURES IN A WELL-VEN- TILATED PLACE AND WITH THE ENGINE OFF. - Page 41 CAUTION DO NOT DISPOSE OF FUEL INTO THE ENVIRONMENT. CAUTION KEEP OUT OF THE REACH OF CHILDREN. Use premium unleaded petrol as per DIN 51 607, minimum octane rating of 95 (NORM) and 85 (NOMM). To refuel: • Lift the saddle. •...
- Page 42 DAMAGE THE ENGINE. IN CASE THERE IS NO MORE OIL IN THE MIXER RESERVOIR OR THE MIXER OIL PIPE HAS BEEN REMOVED, CONTACT AN Official aprilia Dealer TO HAVE THE SYSTEM PURGED. THIS OPERATION IS ESSENTIAL AS THE ENGINE CAN BE SERIOUSLY DAM-...
- Page 43 To add mixer oil to the reservoir: • Rest the vehicle on its centre stand. • Unscrew and remove the two screws (2). • Press upwards to release the front case of the front shield. • Remove the bonnet support grille (3). NOTE 03_03 UPON REFITTING, INSERT THE FITTING TABS CORRECTLY IN THEIR SLOTS.
-
Page 44: Running In
CAUTION MAKE SURE THE CAP IS COMPLETELY CLOSED. Running in Running the engine in correctly is essential for ensuring engine longevity and func- tionality. If possible, ride on roads with lots of bends and/or slopes to test that the engine, suspensions and brakes perform efficiently. For the first 1,000 km (621 miles) travelled, observe the following indications: •... -
Page 45: Starting Up The Engine
Starting up the engine (03_05, 03_06, 03_07, 03_08, 03_09) CAUTION EXHAUST FUMES CONTAIN CARBON MONOXIDE, AN EXTREMELY HARMFUL SUBSTANCE IF INHALED. NEVER START THE ENGINE IN CLOSED OR NOT WELL-VENTILATED ROOMS. FAILURE TO OBSERVE THIS WARNING COULD LEAD TO UNCONSCIOUSNESS 03_05 AND EVEN DEATH CAUSED BY SUFFOCATION. - Page 46 CAUTION PRESS THE STARTER BUTTON (4) WITHOUT ACCELERATING, AND RELEASE IT AS SOON AS THE ENGINE STARTS. NOTE TO PREVENT EXCESSIVE BATTERY CONSUMPTION, DO NOT PRESS THE STARTER BUTTON (4) FOR MORE THAN FIVE SECONDS. IF THE ENGINE DOES NOT START WITHIN THIS TIME INTERVAL, WAIT TEN SECONDS THEN PRESS THE STARTER BUTTON AGAIN (4).
- Page 47 CAUTION IF THE FUEL RESERVE WARNING LAMP ILLUMINATES WHILE RIDING, THIS INDICATES THAT THE FUEL LEVEL IS LOW AND ONLY LIMITED RANGE IS RE- MAINING. REFUEL AS SOON AS POSSIBLE. CAUTION REFERENCES TO RIDING WITH PASSENGER INTENDED ONLY FOR COUN- TRIES WHERE THIS IS PERMITTED.
- Page 48 CAUTION WITH THE VEHICLE AT STANDSTILL, PRACTICE USING THE REAR-VIEW MIR- RORS. • To set off, release the brake lever and accelerate, gradually twisting the throttle grip (Pos. B); the vehicle will start moving forward. CAUTION DO NOT SET OFF SUDDENLY WHEN THE ENGINE IS COLD. RIDE AT LOW SPEED FOR SEVERAL KILOMETRES.
- Page 49 IN CASE OF STOP IN ASCENT, FULLY DECELERATE AND ONLY USE THE BRAKES TO KEEP THE VEHICLE STOPPED. USING THE ENGINE TO KEEP THE VEHICLE STOPPED MAY CAUSE THE CLUTCH AND THE VARIATOR TO OVER- HEAT. BEFORE GETTING INTO A BEND, REDUCE SPEED AND BRAKE; WHILE BEND- ING, RIDE AT THE SAME MODERATE AND CONSTANT SPEED OR SLIGHTLY ACCELERATE;...
- Page 50 CAUTION ALWAYS SIGNAL CHANGES IN DIRECTION WITH THE APPROPRIATE DEVICES AND WELL IN ADVANCE, AVOID ABRUPT AND DANGEROUS MANOEUVRES. TURN OFF THE DEVICES IMMEDIATELY AFTER THE CHANGE IN DIRECTION IS COMPLETED. WHEN OVERTAKING OR BEING OVERTAKEN BY OTHER VEHICLES RIDE WITH EXTREME CAUTION.
-
Page 51: Difficult Start Up
Difficult start up (03_10) COLD START If the ambient temperature is low (near or below 0°C), there may be problems with the first start-up. In this case: • Continue pressing the starter button (1) for five seconds while rotating the throttle grip (2) slightly (Pos.A). -
Page 52: Stopping The Engine
Stopping the engine (03_11, 03_12, 03_13) CAUTION WHENEVER POSSIBLE, AVOID ROUGH BRAKING, SUDDEN DECELERATION AND BRAKING IN EXCESS. • Release the throttle grip (Pos. A) and operate the brakes (1) gradually to bring the vehicle to a halt. • While at a temporary halt, keep at least one brake operated.. 03_11 PARKING CAUTION... - Page 53 DO NOT SEAT ON THE MOTORCYCLE WHEN THE STAND IS LOWERED. • Stop the vehicle. • Turn the key (2) and set the ignition switch to the "OFF" position. • Rest the vehicle on its stand. 03_12 • Lock the steering but do not remove the key (2). 03_13...
-
Page 54: Catalytic Silencer
Catalytic silencer (03_14) CAUTION TAMPERING WITH THE CATALYTIC SILENCER MAY CAUSE SEVERE DAMAGE TO THE ENGINE. CAUTION 03_14 DUE TO THE HIGH TEMPERATURES THAT CAN BE REACHED IN THE CATA- LYTIC CONVERTER, WHEN PARKING THE VEHICLE, PAY ATTENTION TO THE MUFFLER: TO AVOID SERIOUS BURNS OR FIRE, THE MUFFLER SHOULD NEV- ER COME INTO CONTACT WITH FLAMMABLE MATERIALS. -
Page 55: Safe Driving
• Push on the stand lever (3). 03_16 Safe driving Some simple tips are provided below that will enable you to use your vehicle on a daily basis in greater safety and peace of mind. Your mechanical knowledge and ability are the foundation for safe driving. - Page 56 CAUTION ALWAYS RIDE WITHIN YOUR LIMITS. RIDING UNDER THE INFLUENCE OF AL- COHOL OR OTHER DRUGS AND CERTAIN MEDICINES IS EXTREMELY DAN- GEROUS. CAUTION ANY ELABORATION THAT MODIFIES THE VEHICLE'S PERFORMANCES, SUCH AS TAMPERING WITH ORIGINAL STRUCTURAL PARTS IS STRICTLY FORBID- DEN BY LAW, AND RENDERS THE VEHICLE NO LONGER CONFORMING TO THE APPROVED TYPE AND DANGEROUS FOR RIDING.
-
Page 57: Maintenance
SR 50 Chap. 04 Maintenance... -
Page 58: Hub Oil Level
Hub oil level (04_01, 04_02) Make sure there is oil in the rear hub according to the intervals specified in the sched- uled maintenance table. Do the following in order to check the hub oil level: 1. Place the vehicle on its stand on flat ground. 2. -
Page 59: Tyres
CAUTION AN EXCESSIVE QUANTITY OF OIL CAN LEAD TO SPILLAGES, WHICH MAY CAUSE THE ENGINE AND THE WHEEL TO GET DIRTY. TO REPLACE THE OIL, CONTACT ANY AUTHORISED SERVICE CENTRE AS THEY ARE EQUIPPED TO DISPOSE OF USED OILS IN AN ENVIRONMENTALLY FRIENDLY AND LEGAL WAY. - Page 60 THE TYRE MIGHT SLIP ON OR GET DETACHED FROM THE WHEEL RIM, RE- SULTING IN LOSS OF CONTROL OVER THE VEHICLE. EVENTUALLY THE VEHICLE MIGHT SKID IN A BEND. CHECK THE SURFACE CONDITION AND WEAR BECAUSE POOR TYRE CON- DITION COULD COMPROMISE GRIP AND HANDLING OF THE VEHICLE. SOME TYRE TYPES APPROVED FOR THIS VEHICLE FEATURE WEAR INDICA- TORS.
-
Page 61: Spark Plug Dismantlement
Minimum tread depth: front and rear 2 mm (0.079 in) (USA 3 mm) (USA 0.118 in) and anyway not lower to what it is specified in the current legislation in the country in which the vehicle is used. 04_04 Spark plug dismantlement (04_05, 04_06) Check the spark plug following the instructions in the scheduled maintenance table. - Page 62 • Remove the battery compartment cover. • Remove the glove compartment. • Remove the spark plug tube (1). • Remove all traces of dirt from the base of the spark plug, then unscrew it and extract it from the seat, make sure that no dust or other substances enter the cylinder.
-
Page 63: Removing The Air Filter
Locking torques (N*m) Spark plug tightening torque: 20 Nm (14.75 lb ft) • Connect the spark plug tube (1). • Replace the glove compartment. • Refit the battery compartment cover. Removing the air filter (04_07, 04_08) The air filter should be inspected and cleaned in accordance with the scheduled main- tenance table. -
Page 64: Air Filter Cleaning
Air filter cleaning • Wash the sponge with water and neutral soap. • Dry with a clean cloth and short blasts of compressed air. • Impregnate it with the specified oil. • Gently squeeze the filtering element with your hands without wringing it; let it drip dry and then refit. -
Page 65: Cooling Fluid Level
NOTE CONTACT AN Authorised Aprilia Dealer WHEN IT IS NECESSARY TO CARRY OUT THIS OPERATION. Cooling fluid level (04_10, 04_11, 04_12, 04_13) CAUTION DO NOT USE YOUR MOTORCYCLE IF THE COOLANT LEVEL IS BELOW THE MINIMUM LEVEL MARKED "MIN". Check the coolant level and change it following the instructions in the scheduled maintenance table, also after long trips, at an Official aprilia Dealer. - Page 66 NENTS; IT MAY CATCH FIRE PRODUCING INVISIBLE FLAMES. WHEN CARRY- ING OUT MAINTENANCE OPERATIONS, IT IS ADVISABLE TO WEAR LATEX GLOVES. CONTACT AN Official aprilia Dealer FOR REPLACEMENT. Coolant solution is 50% water and 50% antifreeze fluid. This is the ideal mixture for most operating temperatures and provides good corrosion protection.
- Page 67 CAUTION WAIT FOR THE ENGINE TO COOL DOWN BEFORE CHECKING OR TOPPING- UP THE COOLANT LEVEL. • Shut off the engine and wait until it cools off. NOTE PARK THE MOTORCYCLE ON SAFE AND LEVEL GROUND. 04_11 • Rest the vehicle on its centre stand. •...
- Page 68 • Make sure the coolant level in the expansion tank «4» is between the «MIN» and «MAX» reference marks. MIN = minimum level. MAX = maximum level. TOPPING-UP • Loosen but do not remove the filler cap «1» (by rotating it twice anticlock- wise).
-
Page 69: Checking The Brake Oil Level
UNEXPECTED CLEARANCE VARIATIONS OR ELASTIC RESISTANCE IN THE BRAKE LEVER ARE DUE TO FAILURE IN THE HYDRAULIC CIRCUIT. CONTACT AN Official Aprilia Dealer IN CASE OF DOUBTS ON THE CORRECT OPERATION OF THE BRAKING SYSTEM OR WHEN UNABLE TO CARRY OUT ROUTINE 04_14 CHECK PROCEDURES. - Page 70 DIRTY PADS AND CLEAN AGAIN THE DIRTY DISC USING A TOP QUALITY DE- 04_16 GREASING PRODUCT. BRAKE FLUID MUST BE REPLACED EVERY TWO YEARS BY AN Official Aprilia Dealer. DO NOT HESITATE TO CONTACT AN Official Aprilia Dealer, FOR ANY DOUBTS...
- Page 71 When the friction pads wear out, the brake fluid level in the reservoir goes down to automatically compensate for that wear. The brake fluid reservoirs are located on the handlebar, near the brake lever attach- ments. Check frequently the brake fluid level in the reservoirs and the brake pad wear. CAUTION DO NOT USE YOUR MOTORCYCLE IF A FLUID LEAK IN THE BRAKING CIRCUIT IS DETECTED.
-
Page 72: Battery
Check brake pads for wear. If pads and/or the disc need not to be replaced: • Take your vehicle to an Official aprilia Dealer to carry out the top-up. CAUTION CHECK BRAKING EFFICIENCY. IN THE EVENT OF EXCESSIVE TRAVEL OF THE... - Page 73 WHEN RECHARGING OR USING THE BATTERY, BE CAREFUL TO HAVE THE ROOM ADEQUATELY AIRED. DO NOT BREATH GASES RELEASED WHEN THE BATTERY IS BEING RECHARGED. KEEP OUT OF THE REACH OF CHILDREN. PAY ATTENTION NOT TO TILT THE MOTORCYCLE EXCESSIVELY TO AVOID DANGEROUS SPILLS OF BATTERY FLUID.
- Page 74 CAUTION ONCE REMOVED, THE BATTERY MUST BE PUT AWAY IN A SAFE PLACE OUT OF THE REACH OF CHILDREN. • Replace the glove compartment. • Replace the battery/glove compartment cover. BATTERY CHARGER • Remove the battery from its housing. • Unscrew and remove the cell caps.
-
Page 75: Use Of A New Battery
CAUTION WHEN RECHARGING OR USING THE BATTERY, BE CAREFUL TO HAVE THE ROOM ADEQUATELY AIRED. DO NOT BREATH GASES RELEASED WHEN THE BATTERY IS RECHARGING. Use of a new battery • Remove the battery/glove compartment cover. • Remove the glove compartment. •... -
Page 76: Long Periods Of Inactivity
• Restore the level adding distilled water only. • Refit the cell caps. CAUTION AFTER TOPPING-UP, REFIT THE CELL CAPS ADEQUATELY. Long periods of inactivity If the vehicle is not used longer than fifteen days, it is necessary to recharge the battery to avoid sulphation, •... - Page 77 NOTE A FUSE THAT BLOWS FREQUENTLY MAY INDICATE A SHORT CIRCUIT OR OVERLOAD. IF THIS OCCURS, CONSULT AN Aprilia Official Dealer. Checking the fuses is necessary whenever an electrical component fails to operate or is not working properly or when the engine does not start.
-
Page 78: Lamps
FUSE DISTRIBUTION (1) 7.5A Fuse From main switch instrument panel live power supply (stop lights, mix oil reserve sensor, fuel level sensor, coolant temperature sensor), turn indicator circuit, horn, diagnostic circuit. (2) 15A Fuse From the battery to: adjustment/ recharge circuit, ignition switch, permanent positive at instrument panel. -
Page 79: Front Light Group
DO NOT FORCE ELECTRICAL CABLES. BULBS AND WARNING LIGHTS Low beam light bulbs 12V - 35W High/low beam light bulbs 12V - 35W Turn indicator bulb 12V - 10W Rear stop light/stop light bulb 12V - 5/21W Instrument panel lighting bulbs 12 V - LED High beam warning light 12 V - LED... -
Page 80: Headlight Adjustment
CAUTION FIRST REMOVE THE BULB, THEN DISCONNECT THE WIRING BY LIFTING THE LOCKING TAB. 04_21 • Install a bulb of the same type adequately. Headlight adjustment (04_22, 04_23) NOTE IN COMPLIANCE WITH LOCAL LEGAL REQUIREMENTS, SPECIFIC PROCE- DURES MUST BE FOLLOWED WHEN CHECKING LIGHT BEAM ADJUSTMENT. 04_22... -
Page 81: Front Direction Indicators
For a quick check of the correct direction of the front light beams, place the vehicle ten metres from a vertical wall and make sure the ground is level. Turn on the low beam light, sit on the vehicle and check that the light beam projected to the wall is a little below the headlight horizontal straight line (about 9/10 of the total height). - Page 82 • Remove the cover «2». • Undo and remove the two screws «3». 04_24 • Remove the complete turn indicator assembly «4». • Remove the protective glass. • Press the bulb «5» slightly and turn it anticlockwise. • Extract the bulb from its fitting. NOTE INSERT THE BULB «5»...
-
Page 83: Rear Optical Unit
Rear optical unit (04_27, 04_28) NOTE BEFORE REPLACING A BULB, CHECK THE FUSES AND THE STOP LIGHT EF- FICIENCY. For replacement: • Rest the vehicle on its centre stand. • Undo and remove the screw «1». • Use a screwdriver as a lever on the locking tongue «2». 04_27 NOTE REMOVE THE PROTECTION GLASS WITH CAUTION SO AS NOT TO BREAK... -
Page 84: Rear Turn Indicators
• Install a bulb of the same type adequately. 04_28 Rear turn indicators (04_29, 04_30, 04_31) • Park the vehicle on its centre stand. NOTE BEFORE REPLACING A BULB, CHECK THE FUSES. • Unscrew and remove the screw «1». NOTE REMOVE THE PROTECTION GLASS WITH CAUTION SO AS NOT TO BREAK THE FITTING TOOTH. - Page 85 • Extract the bulb «3» from its fitting. NOTE INSERT THE BULB IN THE BULB HOLDER SO THAT THE TWO GUIDING PINS COINCIDE WITH THEIR GUIDES ON THE BULB HOLDER. • Install a bulb of the same type adequately. 04_30 NOTE IF THE BULB HOLDER «4»...
-
Page 86: Idle Adjustment
Idle adjustment (04_32) Adjust idle speed following the instructions in the scheduled maintenance table and each time it appears irregular. To carry out this operation: • Ride a few kilometres until the regular working temperature is reached, then stop the engine. •... -
Page 87: Front And Rear Disc Brake
Accelerate and decelerate some times with the throttle grip to check its cor- rect functioning and that the idle speed is stable. NOTE TAKE YOUR MOTORCYCLE TO AN OFFICIAL APRILIA DEALER IF NECESSA- Front and rear disc brake (04_33, 04_34, 04_35) Pad wear check... - Page 88 Check brake pads for wear and replace them following the instructions in the sched- uled maintenance tables. Disc brake pad wear depend on the use, the riding style and the roads. CAUTION CHECK BRAKE PADS FOR WEAR MAINLY BEFORE EACH RIDE. To perform a quick pad wear check: •...
-
Page 89: Inactivity Of The Vehicle
Front pads (1). • Rear pads (2) CAUTION TAKE YOUR MOTORCYCLE TO AN Official Aprilia Dealer TO HAVE DISCS RE- PLACED. 04_35 Inactivity of the vehicle (04_36) Take some measures to avoid the side effects of not using the scooter. -
Page 90: Cleaning The Vehicle
• Cover the vehicle (do not use plastic or waterproof materials). NOTE PLACE A CLEAN CLOTH ON THE CYLINDER NEXT TO THE SPARK PLUG SEAT TO PROTECT IT FROM POSSIBLE OIL SPLASHES. AFTER STORAGE • Uncover and clean the vehicle. •... - Page 91 WARNING IN ORDER TO AVOID RISE OF OXIDATION, WASH THE VEHICLE EVERY TIME IT IS USED IN AREAS OR SPECIAL CONDITIONS OF: • ENVIRONMENTAL / SEASONAL CONDITIONS: USE OF SALT, ANTI-ICE CHEMICALS ON ROADS DURING WINTER. • AIR POLLUTION: CITIES AND/OR INDUSTRIAL AREAS. •...
- Page 92 CAUTION DO NOT USE A HIGH-PRESSURE WATER JET MACHINE TO CLEAN THE EN- GINE AND/OR VEHICLE; HOWEVER, IF NO OTHER MEANS ARE AVAILABLE, IT IS THEN NECESSARY TO: • ONLY USE A FAN-LIKE SPRAY JET. • DO NOT HOLD THE NOZZLE NEARER THAN 60 cm (23.62 in) FROM THE VE- HICLE.
- Page 93 WARNING CLEAN YOUR SCOOTER FREQUENTLY SO AS TO AVOID POSSIBLE DIRT OR MUD DEPOSITS THAT COULD CAUSE MALFUNCTIONING IN THE THROTTLE GRIP TRANSMISSION AND/OR OTHER COMPONENTS. CAUTION DURING VEHICLE CLEANING, WITH WATER JET UNDER PRESSURE, KEEP THE SADDLE CLOSED, AVOIDING TO DIRECT THE JET IN THE HELMET COM- PARTMENT.
- Page 94 DO NOT USE ABRASIVE CLEANERS; FAILURE TO FOLLOW THE ABOVE GIVEN ADVICE, COMPROMISES THE HAZE OF THE PAINTING; DO NOT APPLY ADHESIVE ELEMENTS TO THE BODYWORK; DO NOT POLISH OTHER VEHICLES CLOSE TO THE ONE WITH SATIN-FINISH- ING; AVOID CONTACT AND/OR RUBBING OF CLOTHING WITH BUTTONS, BUCK- LES, RINGS AND/OR NECKLACES ON SATIN-FINISHED SURFACES SINCE THIS MAY INDUCE DAMAGE AND/OR CHANGES IN HAZE OF SATIN-FINISHED PAINT;...
-
Page 95: Transport
Transport NOTE BEFORE TRANSPORTING THE VEHICLE, CAREFULLY EMPTY THE FUEL TANK AND CHECK THAT IT IS COMPLETELY DRY. WHILE IT IS BEING MOVED, THE VEHICLE MUST REMAIN IN THE VERTICAL POSITION AND BE FIXED SECURELY IN POSITION IN ORDER TO AVOID SPILL- ING FUEL, OIL OR COOLANT. -
Page 97: Technical Data
SR 50 Chap. 05 Technical data... - Page 98 VEHICLE TECHNICAL DATA Max. length (with rear mudguard 1860 mm (73.23 in) extension) Max width (between brake levers) 710 mm (27.95 in) Max. height (to top fairing) 1120 mm (44.09 in) Wheelbase 1260 mm (49.61 in) Kerb weight (in running order) 107 kg (235.89 lb) Fuel tank capacity (including 7.65 +/- 0.5 l (1.68 +/- 0.11 UK gal;...
- Page 99 Primary drive V-belt Minimum engine total ratio for 3.07 continuous transmission Maximum engine total ratio for 1.016 continuous transmission Secondary transmission Gear reduction unit Chassis Split single spar Front suspension Telescopic fork Front suspension travel 90 mm (3.54 in) Rear suspension Hydraulic single shock absorber Rear suspension travel 69 mm (2.72 in)
- Page 100 Rear tyre pressure with passenger 2.2 bar (220 kPa) (31.91 PSI) (in countries where passenger transport is allowed) Battery 12V -4 Ah Sealed battery Fuses 7.5 A - 15 A Alternator (permanent magnet 12 V - 120 W type) ENGINE TECHNICAL DATA Engine type 2-stroke Engine...
- Page 101 Throttle body diffuser Ø 17.5 mm (0.69 in) Fuel system Premium unleaded petrol as per DIN 51607, with minimum octane rating of 95 (NORM) and 85 (NOMM). Ignition type Electronic capacitive discharge ignition (CDI) and variable advance, with separate HV coil. Spark plug CHAMPION RN3C Spark plug electrode gap...
-
Page 103: Programmed Maintenance
SR 50 Chap. 06 Programmed maintenance... -
Page 104: Scheduled Maintenance Table
Scheduled maintenance table (06_01) Adequate maintenance is fundamental to ensure long-lasting, optimum operation and performance of your vehicle. For this reason a series of checks and maintenance services has been prepared, available for purchase separately, listed together in the chart on the following page. It is a good idea to report small performance anomalies right away to an Authorised Service Centre, without waiting for the next scheduled service, so they can be re- paired immediately. - Page 105 SCHEDULED MAINTENANCE TABLE EVERY 12 EVERY 24 km x 1,000 MONTHS MONTHS Safety fasteners Spark plug Centre stand Idle speed Drive belt Mixer belt Throttle control - mixer Diagnosis by tool Air filter SAS filter Solenoid filter Electrical system and battery Braking system Brake fluid Coolant...
-
Page 106: Recommended Products
EVERY 12 EVERY 24 km x 1,000 MONTHS MONTHS Brake pads Sliding shoes / CVT rollers Tyre pressure and wear Vehicle road test Odometer gear Suspensions Steering Transmission Mixer oil pipes Recommended products (06_02) Piaggio Group recommends the products of its "Castrol Official Partner" for the scheduled maintenance of its vehicles. - Page 107 TABLE OF RECOMMENDED PRODUCTS Product Description Specifications 2-stroke oil for mixer Low smoking lubricant for 2-stroke engines API TC; JASO FC; ISO-L-EGD with synthetic bases and additives. Transmission oil 80W-90 Lubricant for gearboxes and transmissions. SAE 80W-90; API GL-4 Fork oil 7.5W Fork oil.
- Page 109 TABLE OF CONTENTS Air filter: 63, 64 Headlight: 80 Recommended products: Horn: 30 Hub oil: 58 Battery: 14, 72, 75 Brake: 13, 69, 87 Saddle: 31 Brake fluid: 13 Identification: 33 Scheduled maintenance: Instrument panel: 21 Secondary air system: 64 Spark plug: 61 Stand: 14, 54 coolant: 13...
- Page 110 Only by requesting original aprilia spare parts can you be of purchasing products that were developed and tested during the design and development of the vehicle itself. All Aprilia original spare parts undergo quality control procedures to guarantee reliability and durability.