Table of Contents
Advertisement
Quick Links
Advertisement
Table of Contents

Related Manuals for AEG L8FBK966E2


Summary of Contents for AEG L8FBK966E2
- Page 1 L8FBK966E2 User Manual Washing Machine USER MANUAL...
-
Page 2: Table Of Contents
17. QUICK GUIDE....................42 FOR PERFECT RESULTS Thank you for choosing this AEG product. We have created it to give you impeccable performance for many years, with innovative technologies that help make life simpler – features you might not find on ordinary appliances. Please spend a few minutes reading to get the very best from it. -
Page 3: Safety Information
ENGLISH SAFETY INFORMATION Before the installation and use of the appliance, carefully read the supplied instructions. The manufacturer is not responsible for any injuries or damage that are the result of incorrect installation or usage. Always keep the instructions in a safe and accessible location for future reference. -
Page 4: Safety Instructions
– working environments; by clients in hotels, motels, bed & breakfast and – other residential type environments; areas for communal use in blocks of flats or in – launderettes. The appliance maximum load is 9 kg. Do not exceed •... - Page 5 ENGLISH • Follow the installation instructions access to the mains plug after the supplied with the appliance. installation. • Do not install or use a damaged • Do not touch the mains cable or the appliance. mains plug with wet hands. •...
-
Page 6: Product Description
• Do not touch the glass door while a repairers, and that not all spare parts programme operates. The glass can are relevant for all models. -
Page 7: Technical Data
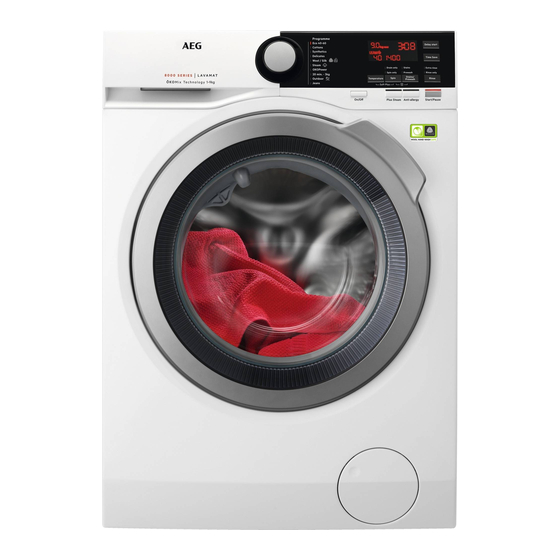
ENGLISH in the laundry and deeply penetrates the fabric fibres favouring a perfect softness. 3.2 Appliance overview 11 12 Worktop Drain hose Detergent dispenser Inlet hose connection Control panel Mains cable Door handle Transit bolts Rating plate Hose support Drain pump filter Feet for levelling the appliance The rating plate reports the model name (A), product number (B), electrical ratings... -
Page 8: Installation
Level of protection against ingress of solid particles and IPX4 moisture ensured by the protective cover, except where the low voltage equipment has no protection against mois‐ ture Water supply pressure Minimum 0.5 bar (0.05 MPa) Maximum 8 bar (0.8 MPa) - Page 9 ENGLISH 5. Carefully put the appliance down on It is possible to see its rear side. water flowing from the 6. Put the front polystyrene packaging drain hose. This is due element on the floor under the to the testing with water appliance.
- Page 10 Make sure that carpets do not stop the air circulation below the appliance. Make sure that the appliance does not touch the wall or other units. 2. Loosen or tighten the feet to adjust the level. WARNING! Do not put cardboard, wood 5.3 The inlet hose...
- Page 11 ENGLISH CAUTION! Make sure that there are no leaks from the couplings. Do not use an extension hose if the inlet hose is too short. Contact the service centre for the replacement of the inlet hose. 2. On the edge of a sink - Fasten the guide to the water tap or to the wall.
-
Page 12: Accessories
6. ACCESSORIES 6.1 Available in Only appropriate www.aeg.com/shop or from accessories approved by authorised dealer AEG ensure the safety standards of the appliance. If Read carefully the instructions supplied unapproved parts are used, with the accessory. any claims will be... - Page 13 If you install the appliance on a plinth accessory. that is not an accessory supplied by WARNING! AEG, secure the appliance in the fixing Do not put the tumble dryer plates. under the washing machine. Read carefully the instructions supplied with the accessory.
-
Page 14: Control Panel
7. CONTROL PANEL 7.1 Control panel description 11 10 Programme dial Anti-Allergy touch button (Anti- Allergy) Display Steam Plus touch button (Plus Delay start touch button (Delay Start) Steam) Time saving touch button (Time Spin reduction touch button (Spin) Save) •... - Page 15 ENGLISH 7.2 Display Maximum load indicator. The indicator flashes during the laundry load estimation (refer to ProSense load detection paragraph) . Maximum laundry indicator. It blinks if the laundry amount exceeds the declared load. Door locked indicator. Delay start indicator. The digital indicator can show: •...
-
Page 16: Dial And Buttons
Spin speed indicator. Rinse hold indicator. Extra Silent indicator. Temperature indicator. The indicator appears when a cold wash is set. 7.3 Multilingual badges Adhesive badges in different languages are supplied with the appliance. The desired badge can be glued next to the programme dial. - Page 17 ENGLISH 8.4 Spin • Activate the drain-only option (Skipping the wash, rinse and spin When you set a programme, the phases): Only drain. appliance automatically sets the The appliance performs the only maximum spin speed allowed. draining phase of the selected washing programme.
- Page 18 Use this option to add a prewash This option adds a few rinses phase at 30 °C before the washing according to the selected washing phase. programme. This option is recommended for Use this option for persons allergic to...
-
Page 19: Programmes
ENGLISH 8.11 Start/Pause This option ensures also a proper reduction of pollens/allergenic items. Touch the Start/Pause button to start, Tested for Staphylococcus pause the appliance or interrupt a aureus, Enterococcus running programme. faecium, Candida albicans, Pseudomonas aeruginosa and MS2 Bacteriophage in external test performed by Swissatest Testmaterialien AG in 2021 (Test Report No. - Page 20 Programme Programme description Washing programmes Cotton and fast-coloured synthetic items. Complete wash‐ ing programme that, in only 59 minutes, washes the daily OKOPower soiled laundry intensively and ensures a good washing per‐ formance in a short time. Cotton and synthetic items . Lightly soiled or worn only once.
- Page 21 ENGLISH Programme Default tempera‐ Reference spin speed Maximum ture Spin speed range load Temperature range Eco 40-60 1600 rpm 9 kg 40 °C 1600 rpm - 400 rpm 40 °C 1600 rpm 9 kg 95 °C - Cold 1600 rpm - 400 rpm Cottons 40 °C 1200 rpm...
- Page 22 Programme options compatibility ■ ■ ■ ■ ■ ■ ■ ■ ■ Spin ■ ■ ■ ■ ■ ■ ■ ■ Rinse Hold ■ ■ ■ ■ Extra Silent ■ ■ ■ ■ ■ ■ ■ ■ ■ Only drain ■...
-
Page 23: Settings
ENGLISH Programme Universal Liquid Uni‐ Liquid for Delicates Special versal coloureds woollens powder Cottons ▲ ▲ ▲ Synthetics ▲ ▲ ▲ Delicates ▲ ▲ Wool/Silk ▲ ▲ OKOPower ▲ ▲ 20 Min. - 3 kg ▲ ▲ Outdoor ▲ ▲ Jeans ▲... -
Page 24: Before First Use
• You activate the appliance (special • To activate/deactivate this option short tune). touch the Stains/Prewash button and • You deactivate the appliance (special the Rinse button simultaneously until short tune). the indicator of the Extra Rinse button • You touch the buttons (click sound). - Page 25 ENGLISH 12.3 Filling the detergent and 3. Press the On/Off button for a few seconds to activate the appliance. additives A short tune sounds (if activated). The appliance automatically proposes a default programme. The relevant indicator illuminates. The display shows the maximum load, the default temperature, the default spin speed, the indicators of the phases making up the programme and the cycle...
- Page 26 With the flap in the position DOWN: • Do not use gelatinous or thick liquid detergents. • Do not put more liquid detergent than the limit shown on the flap. • Do not set the prewash phase. • Do not set the delay start function.
- Page 27 ENGLISH Changing the delay start after In case a selection is not possible, no indicator the countdown has started comes on and an acoustic To change the delay start: signal sounds. 1. Touch the Start/Pause button to 12.6 Starting a programme pause the appliance.
- Page 28 12.10 Interrupting a this case, it will be not possible to guarantee the best washing results. programme and changing the options About 20 minutes after the programme start, the When the programme is running, you programme duration could can change only some options:...
- Page 29 ENGLISH 2. Open the appliance door. If • The display shows the indicator , the necessary, add or remove the items. option indicator and the 3. Close the door and touch the button Start/Pause. door locked indicator . The The programme or the delay start indicator of the running phase continues.
-
Page 30: Hints And Tips
If you set a programme or an option that ends with water in the drum, the Stand-by function doesn't deactivate the appliance to remind you to drain the water. 13. HINTS AND TIPS WARNING! Refer to Safety chapters. 13.1 The laundry load •... -
Page 31: Care And Cleaning
ENGLISH 13.3 Detergent type and • sudsing, • reduced washing effect, quantity • inadequate rinsing, • a greater impact for the environment. The choice of detergent and use of correct quantities not only affects your 13.4 Ecological hints wash performance, but also helps to avoid waste and protect the environment: To save water, energy and to help •... - Page 32 14.1 Periodic cleaning 14.3 External cleaning schedule Clean the appliance with mild soap and warm water only. Fully dry all the Periodic cleaning helps to extend the surfaces. life of your appliance. Do not use a scouring pads or any After each cycle, keep the door and the scratching material.
- Page 33 ENGLISH available, run the Machine Clean Always follow the programme. instructions that you find on the packaging of the 14.6 Door seal product. 2. Run a short cotton programme at This appliance is designed with a self high temperature with empty drum cleaning draining system, allowing light and with a small quantity of powder fluff fibers that fall off the clothes to be...
- Page 34 3. Make sure that all detergent residue WARNING! is removed from the upper and lower • Do not remove the filter part of the recess. Use a small brush while the appliance to clean the recess. operates. • Do not clean the pump if the water in the appliance is hot.
- Page 35 ENGLISH 11. Put the filter back into the special guides by turning it clockwise. Make sure that you tighten the filter correctly to prevent leakages. 5. When the bowl is full of water, turn the filter back and empty the container.
- Page 36 1. Remove the inlet hose from the tap and clean the filter. 45° 20° 14.11 Emergency drain If the appliance cannot drain the water, carry out the same procedure, described 2.
-
Page 37: Troubleshooting
ENGLISH 15. TROUBLESHOOTING WARNING! Refer to Safety chapters. 15.1 Alarm Codes and Possible failures The appliance does not start or it stops during operation. First try to find a solution to the problem (refer to the tables). WARNING! Deactivate the appliance before carrying out any check. With some problems, the display shows an alarm code and the Start/Pause button may flash continuously: If the appliance is overloaded, remove some items... - Page 38 • Make sure that the sink spigot is not clogged. • Make sure that the drain hose has no kinks or bends. The appliance does • Make sure that the drain filter is not clogged. Clean the filter, if not drain the water.
- Page 39 ENGLISH Problem Possible solution • Set the spin programme. The spin phase does • Make sure that the drain filter is not clogged. Clean the filter, if not operate or the necessary. Refer to "Care and cleaning". washing cycle lasts •...
-
Page 40: Consumption Values
After the check, activate the appliance. The programme continues from the point of interruption. If the problem occurs again, contact the Authorised Service Centre. The necessary data for the service centre are on the rating plate. 15.2 Emergency door... - Page 41 ENGLISH The QR code on the energy label supplied with the appliance provides a web link to the information related to the performance of the appliance in the EU EPREL database. Keep the energy label for reference together with the user manual and all other documents provided with this appliance.
-
Page 42: Quick Guide
16.4 Common programmes These values are indicative only. Programme Litres h:mm °C Cottons 2.15 3:35 1600 95°C Cottons 1.55 3:50 1600 60°C Cottons 0.35 3:10 1600 20°C Synthetics 0.80 2:25 1200 40°C Delicates 0.30 1:10 1200 30°C Wool 0.25... - Page 43 ENGLISH • Pour the detergent and other • At the and of the programme, remove treatment in the proper compartment the laundry. of the detergent dispenser. • Push the On/Off button to turn the • To start the programme, touch the appliance off.
- Page 44 Programmes Load Product description 2.5 kg Modern outdoor sporting garments. Outdoor 1 kg 9 kg Denim clothing and jersey items. Jeans 1) Washing programme. 2) Washing programme and waterproofing phase. 18. ENVIRONMENTAL CONCERNS appliances marked with the symbol Recycle materials with the symbol with the household waste.
- Page 48 www.aeg.com/shop...