Table of Contents
Advertisement
Quick Links
DX-C390̲En.book Page 1 Wednesday, August 27, 2003 5:49 PM
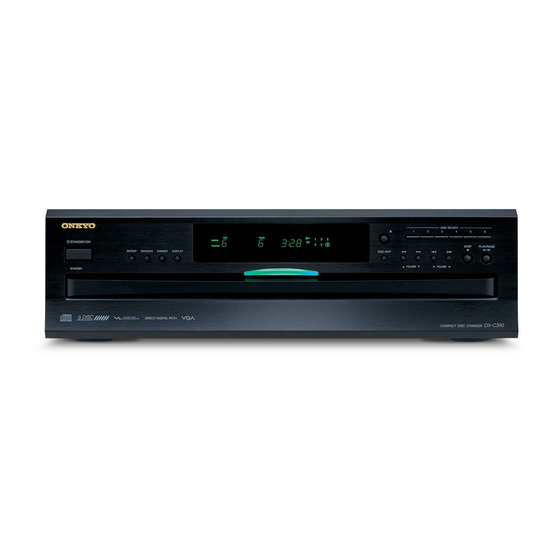
Compact Disc Changer
DX-C390
Instruction Manual
Thank you for purchasing an Onkyo Compact
Disc Changer.
Please read this manual thoroughly before mak-
ing connections and turning on the power.
Following the instructions in this manual will
enable you to obtain optimum performance and
listening enjoyment from your new Compact
Disc Changer.
Please retain this manual for future reference.
Getting Started
Connection
Basic Operation
Advanced Operation
Others
2
12
14
20
25
E
n
Advertisement
Table of Contents

Related Manuals for Onkyo DX-C390


Summary of Contents for Onkyo DX-C390
- Page 1 DX-C390̲En.book Page 1 Wednesday, August 27, 2003 5:49 PM Compact Disc Changer Getting Started DX-C390 Instruction Manual Connection Basic Operation Thank you for purchasing an Onkyo Compact Advanced Operation Disc Changer. Please read this manual thoroughly before mak- ing connections and turning on the power.
-
Page 2: Important Safety Instructions
DX-C390̲En.book Page 2 Wednesday, August 27, 2003 5:49 PM WARNING: WARNING AVIS TO REDUCE THE RISK OF FIRE OR ELECTRIC RISK OF ELECTRIC SHOCK RISQUE DE CHOC ELECTRIQUE DO NOT OPEN NE PAS OUVRIR SHOCK, DO NOT EXPOSE THIS APPARATUS TO RAIN OR MOISTURE. -
Page 3: Precautions
For North American model let. Setting the [STANDBY/ON] switch to STANDBY does not fully shutdown the DX-C390. If you do not intend to use the DX-C390 for an extended period, This unit contains a semiconductor laser system and is remove the power cord from the AC outlet. - Page 4 DX-C390̲En.book Page 4 Wednesday, August 27, 2003 5:49 PM Precautions —Continued • Connect the equipment into an outlet on a circuit dif- Declaration of Conformity ferent from • that to which the receiver is connected. We, ONKYO EUROPE ELECTRONICS GmbH •...
-
Page 5: Table Of Contents
DX-C390̲En.book Page 5 Wednesday, August 27, 2003 5:49 PM Introduction Table of Contents Important Safety Instructions....2 DX-C390 Features Precautions ..........3 • 6-disc CD changer Introduction..........5 • MP3 playback DX-C390 Features.............5 • Multi-bit D/A converter Supplied Accessories..........5 • 128-times oversampling Disc Notes ...........6 •... -
Page 6: Disc Notes
However, some CD-R and CD-RW discs may not work properly for any of the following reasons: disc • The DX-C390 supports up to 499 MP3 files and up to burner characteristics, disc characteristics, the disc is 99 folders per disc. Files and folders in excess of this damaged or dirty. - Page 7 DX-C390̲En.book Page 7 Wednesday, August 27, 2003 5:49 PM Disc Notes —Continued Handling Discs • The following ID3 tags are supported: versions 1.0/1.1 and 2.3/2.4. Versions 2.2/2.5 and later are not sup- • Never touch the underside of a disc. Always hold discs ported.
-
Page 8: Controls & Connectors
STANDBY/ON button (14) PLAY/PAUSE [ ]/[ ] button (15, 16) This button is used to set the DX-C390 to On or This button is used to start and pause playback. Standby. For models with a POWER switch, this... -
Page 9: Display
DX-C390̲En.book Page 9 Wednesday, August 27, 2003 5:49 PM Controls & Connectors —Continued Display DISC FLDR NEXT TRACK NAME TOTAL REMAIN REPEAT MEMORY RANDOM MP 3 For detailed information, refer to the pages in parenthe- TRACK indicator sis. While stopped, the total number of tracks on the current disc are displayed. -
Page 10: Remote Controller
ON button (14) This button is used to turn on the DX-C390. STANDBY button (14) This button is used to set the DX-C390 to Standby. STANDBY OPEN / CLOSE Number buttons (18) These buttons are used to enter track and MP3 folder numbers. -
Page 11: Before Using The Dx-C390
DX-C390̲En.book Page 11 Wednesday, August 27, 2003 5:49 PM Before Using the DX-C390 Installing the Remote Controller’s Using the Remote Controller Batteries To use the remote controller, point it at the DX-C390’s remote control sensor, as shown. Remove the battery compartment cover, DX-C390 as shown. -
Page 12: Connecting The Dx-C390
DX-C390̲En.book Page 12 Wednesday, August 27, 2003 5:49 PM Connecting the DX-C390 Audio Connections • Read the manuals supplied with your other audio DIGITAL AUDIO OUTPUT equipment. If your CD-R, MiniDisc, or DAT recorder has a digital • Don’t connect the power cord until you’ve completed input, use a commercially available coaxial or optical all audio connections. -
Page 13: Connections
Onkyo AV component, the displays on all other AV components connected via are dimmed as well. To use you must make an analog audio connection (RCA/phono) between the DX-C390 and your other Onkyo equipment even if they are connected digitally. Disconnect the power cord before making any connections! -
Page 14: Turning On The Dx-C390
STANDBY indicator goes off. Notes: When the DX-C390 is turned on, it • The DX-C390 supports 8 cm and 12 cm discs. To checks the carousel for discs and selects avoid damaging your discs or DX-C390, be sure to put the first disc that it finds. -
Page 15: Starting Playback
Selecting Discs Note: The section explains how to select discs. • The DX-C390 cannot play the next disc while the disc tray is open. Be sure to close the disc tray as soon as you’ve finish loading discs. When playback is stopped... -
Page 16: Basic Operation
DX-C390̲En.book Page 16 Wednesday, August 27, 2003 5:49 PM Basic Playback —Continued I Selecting the Next or Previous Track To select the next track, press STANDBY OPEN / CLOSE ] button. Remote controller To select the previous track, REPEAT press [ ] button. -
Page 17: Selecting Mp3S
DX-C390̲En.book Page 17 Wednesday, August 27, 2003 5:49 PM Basic Playback —Continued I Selecting MP3 Tracks in All Folder Mode Selecting MP3s With All Folder mode you don’t have to navigate the There are two modes for selecting MP3 tracks: Naviga- folder hierarchy to find an MP3 track because all folders... -
Page 18: Selecting Tracks By Number
DX-C390̲En.book Page 18 Wednesday, August 27, 2003 5:49 PM Basic Playback —Continued Selecting MP3 Folders & Tracks by Number STANDBY OPEN / CLOSE This section explains how to select MP3 folders and tracks by number. REPEAT Number buttons RANDOM Press the [SEARCH] (>10) button... -
Page 19: Displaying Information
“TRACK n” or “FOLDER n,” “n” being the track or folder number. You can set the DX-C390 so that it displays under- scores in place of any undisplayable characters (see page 24). -
Page 20: Advanced Playback
DX-C390̲En.book Page 20 Wednesday, August 27, 2003 5:49 PM Advanced Playback Press the [NEXT SELECTION] button again to set the Next Remote Selection function. controller STANDBY OPEN / CLOSE The specified disc, folder, or track will NEXT SELECTION be played when, if you specified a disc,... -
Page 21: Playing All Discs Repeatedly
DX-C390̲En.book Page 21 Wednesday, August 27, 2003 5:49 PM Advanced Playback —Continued Playing All Discs Repeatedly Using Random Playback This section explains how to play all loaded discs repeat- With the Random function you can enjoy a random edly. selection of tracks from all loaded discs. -
Page 22: Using Memory Playback
DX-C390̲En.book Page 22 Wednesday, August 27, 2003 5:49 PM Advanced Playback —Continued Press the [MEMORY] button to add the selected track or folder to Remote controller the playlist. STANDBY OPEN / CLOSE MEMORY TRACK REPEAT CLEAR RANDOM SEARCH MEMORY MEMORY >10... - Page 23 DX-C390̲En.book Page 23 Wednesday, August 27, 2003 5:49 PM Advanced Playback —Continued Checking What’s in the Playlist Deleting the Last Item in the Playlist Remote While playback is stopped, press To delete the last item in the play- controller the [DISPLAY] button repeatedly list, while playback is stopped, until “P-n”...
-
Page 24: Mp3 Preferences
MP3 discs. Preferences are divided into two groups: FOLDER NAME preferences. Basic and Extra. Extra Items You must use the buttons on the DX-C390 to set the MP3 preferences, not the remote controller. ID3 VER 1 (READ/NOT READ) 1. Stop playback. -
Page 25: Troubleshooting
DX-C390̲En.book Page 25 Wednesday, August 27, 2003 5:49 PM Troubleshooting If you have any trouble using your DX-C390, check the following table for possible causes and remedies. If you still can’t resolve the issue yourself, please contact your Onkyo dealer. -
Page 26: Specifications
DX-C390̲En.book Page 26 Wednesday, August 27, 2003 5:49 PM Specifications DX-C390 (Compact Disc Changer) Signal readout system Optical non-contact Frequency response 5 Hz–20 kHz SN ratio 98 dB Audio Dynamic range 96 dB THD (Total harmonic distortion) 0.005% (at 1 kHz) Audio output (Digital/Optical) –22.5 dBm... - Page 27 DX-C390̲En.book Page 27 Wednesday, August 27, 2003 5:49 PM MEMO...
- Page 28 DX-C390̲En.book Page 28 Wednesday, August 27, 2003 5:49 PM Sales & Product Planning Div. : 2-1, Nisshin-cho, Neyagawa-shi, OSAKA 572-8540, JAPAN Tel: 072-831-8023 Fax: 072-831-8124 ONKYO U.S.A. CORPORATION 18 Park Way, Upper Saddle River, N.J. 07458, U.S.A. Tel: 201-785-2600 Fax: 201-785-2650 http://www.onkyousa.com...