Onkyo DX-C390 Instruction Manual
Onkyo instruction manual compact disc changer dx-c390
Hide thumbs
Also See for DX-C390:
- Brochure & specs (8 pages) ,
- Specification sheet (10 pages) ,
- Service manual (64 pages)
Table of Contents
Advertisement
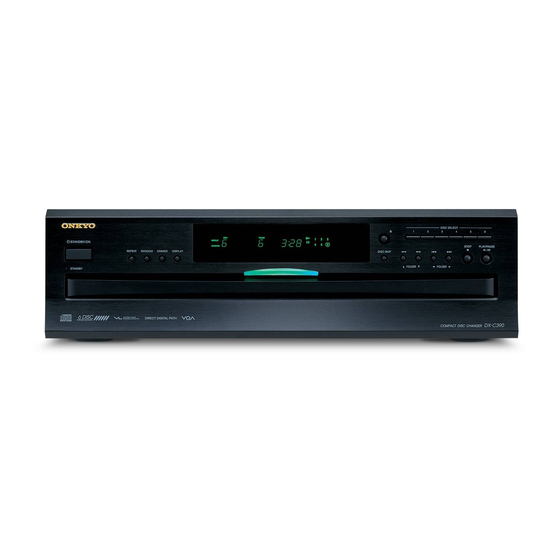
Compact Disc Changer
DX-C390
Instruction Manual
Thank you for purchasing an Onkyo Compact
Disc Changer.
Please read this manual thoroughly before mak-
ing connections and turning on the power.
Following the instructions in this manual will
enable you to obtain optimum performance and
listening enjoyment from your new Compact
Disc Changer.
Please retain this manual for future reference.
Getting Started
Connection
Basic Operation
Advanced Operation
Others
2
12
14
20
25
E
n
Advertisement
Table of Contents

Related Manuals for Onkyo DX-C390


Summary of Contents for Onkyo DX-C390
- Page 1 Compact Disc Changer DX-C390 Instruction Manual Thank you for purchasing an Onkyo Compact Disc Changer. Please read this manual thoroughly before mak- ing connections and turning on the power. Following the instructions in this manual will enable you to obtain optimum performance and listening enjoyment from your new Compact Disc Changer.
-
Page 2: Important Safety Instructions
WARNING: TO REDUCE THE RISK OF FIRE OR ELECTRIC SHOCK, DO NOT EXPOSE THIS APPARATUS TO RAIN OR MOISTURE. CAUTION: TO REDUCE THE RISK OF ELECTRIC SHOCK, DO NOT REMOVE COVER (OR BACK). NO USER-SERVICEABLE PARTS INSIDE. REFER SERVICING QUALIFIED PERSONNEL. -
Page 3: Precautions
(i.e., AC 120 V, 60 Hz or AC 230 V, 50 Hz). For North American model Setting the [STANDBY/ON] switch to STANDBY does not fully shutdown the DX-C390. If you do not intend to use the DX-C390 for an extended period, remove the power cord from the AC outlet. - Page 4 We, ONKYO EUROPE ELECTRONICS GmbH LIEGNITZERSTRASSE 6, 82194 GROEBENZELL, GERMANY declare in own responsibility, that the ONKYO product described in this instruction manual is in compliance with the corresponding technical standards such as EN60065, EN55013, EN55020 and EN61000-3-2, -3-3. GROEBENZELL, GERMANY ONKYO EUROPE ELECTRONICS GmbH For U.S.
-
Page 5: Table Of Contents
Remote controller (RC-547C) and two (AA/R6) batteries * In catalogs and on packaging, the letter added to the end of the product name indicates the color of the DX-C390. Specifications and operation are the same regardless of color. Table of Contents Important Safety Instructions...2... -
Page 6: Disc Notes
To prevent noise and malfunction, do not use these extensions for other types of files. • The DX-C390 supports up to 499 MP3 files and up to 99 folders per disc. Files and folders in excess of this cannot be played. - Page 7 Disc Notes • The following ID3 tags are supported: versions 1.0/1.1 and 2.3/2.4. Versions 2.2/2.5 and later are not sup- ported. Normally, version 2.3/2.4 tags have priority and will be displayed regardless of the ID3 VER 1 preference on page 24. •...
-
Page 8: Controls & Connectors
For detailed information, refer to the pages in parenthe- sis. STANDBY/ON button (14) This button is used to set the DX-C390 to On or Standby. For models with a POWER switch, this button has no effect unless that POWER switch is set to ON. -
Page 9: Display
(Remote Interactive) connectors can be connected to the Onkyo AV components for interactive control. To use you must also make analog audio con- nections (RCA/phono) between the DX-C390 and your other Onkyo equipment. MP 3 indicator connectors on your other... -
Page 10: Remote Controller
ON button (14) This button is used to turn on the DX-C390. STANDBY button (14) This button is used to set the DX-C390 to Standby. OPEN/CLOSE Number buttons (18) These buttons are used to enter track and MP3 folder numbers. -
Page 11: Before Using The Dx-C390
• Flat batteries should be removed as soon as possible to prevent damage from leakage or corrosion. Using the Remote Controller To use the remote controller, point it at the DX-C390’s remote control sensor, as shown. Remote control sensor 30°... -
Page 12: Connecting The Dx-C390
• Don’t connect the power cord until you’ve completed all audio connections. The DX-C390 has analog and digital (coaxial and opti- cal) audio outputs. The digital outputs offer the best audio quality, so if your digital recorder or amp has a digital input you should use it. -
Page 13: Connections
To use you must make an analog audio connection (RCA/phono) between the DX-C390 and your other Onkyo equipment even if they are connected digitally. Coaxial cable (not supplied) RCA/phono audio connecting cable To use the functions, you need to connect one of the DX-C390’s... -
Page 14: Turning On The Dx-C390
POWER Loading Discs Notes: • The DX-C390 supports 8 cm and 12 cm discs. To avoid damaging your discs or DX-C390, be sure to put discs in the centers of the disc bays. • Only load discs that are supported by the DX-C390 (see page 6). -
Page 15: Starting Playback
Note: • The DX-C390 cannot play the next disc while the disc tray is open. Be sure to close the disc tray as soon as you’ve finish loading discs. -
Page 16: Basic Operation
Basic Playback STANDBY SEARCH >10 10/0 CLEAR FOLDER FOLDER FOLDER NEXT SELECTION DISC 1 DISC 2 DISC 3 DISC 4 DISC 5 DISC 6 Basic Operation ■ Stopping Playback To stop playback, press the Remote controller STOP [ ] button. Playback stops and the Play tor disappears. -
Page 17: Selecting Mp3S
To cancel Navigation mode or All Folder mode while selecting MP3 tracks, press the STOP [ ] button. While playback is stopped, press the FOLDER [ ] button. The DX-C390 enters All Folder mode and the name of the first folder appears on the display. DISC... -
Page 18: Selecting Tracks By Number
Basic Playback STANDBY Number buttons SEARCH SEARCH (>10) >10 10/0 FOLDER NEXT SELECTION DISC 1 DISC 2 DISC 4 DISC 5 Selecting Tracks by Number This section explains how to select tracks by number. Use the remote controller’s num- ber buttons to enter the number of the track that you want to play. -
Page 19: Displaying Information
“TRACK n” or “FOLDER n,” “n” being the track or folder number. You can set the DX-C390 so that it displays under- scores in place of any undisplayable characters (see page 24). -
Page 20: Advanced Playback
Advanced Playback STANDBY SEARCH >10 10/0 CLEAR FOLDER NEXT NEXT SELECTION SELECTION DISC 1 DISC 2 DISC 3 DISC 4 DISC 5 DISC 6 DISC 1–6 Cuing Up the Next Track, Folder, or Disc With the Next Selection function you can cue up the track, folder, or disc that you want to play next. -
Page 21: Playing All Discs Repeatedly
Advanced Playback Playing All Discs Repeatedly This section explains how to play all loaded discs repeat- edly. Press the [REPEAT] button. Remote The REPEAT indicator appears. controller REPEAT REPEAT Press the PLAY [ ] button. Remote All loaded discs are played repeatedly. controller Repeat playback can be used with ran- dom and memory playback. -
Page 22: Using Memory Playback
Advanced Playback STANDBY SEARCH >10 10/0 CLEAR FOLDER NEXT SELECTION DISC 1 DISC 2 DISC 3 DISC 1–6 DISC 4 DISC 5 DISC 6 Using Memory Playback With the Memory function you can create a playlist of up to 40 of your favorite tracks, discs, or folders. While playback is stopped, press the [MEMORY] button. - Page 23 Advanced Playback Checking What’s in the Playlist While playback is stopped, press the [DISPLAY] button repeatedly until “P-n” appears on the dis- play (“n” being the item number). On the following display, the playlist contains a total of 16 tracks, the last one being track #8 in folder #12 of disc #1.
-
Page 24: Mp3 Preferences
This section explains how to set various preferences for MP3 discs. Preferences are divided into two groups: Basic and Extra. You must use the buttons on the DX-C390 to set the MP3 preferences, not the remote controller. 1. Stop playback. -
Page 25: Troubleshooting
Troubleshooting If you have any trouble using your DX-C390, check the following table for possible causes and remedies. If you still can’t resolve the issue yourself, please contact your Onkyo dealer. Trouble No power. The power cord is not connected properly. -
Page 26: Specifications
Specifications DX-C390 (Compact Disc Changer) Signal readout system Frequency response SN ratio Audio Dynamic range THD (Total harmonic distortion) Audio output (Digital/Optical) Audio output/Impedance (Digital/Coaxial) Audio output/Impedance (Analog) Power supply rating Power consumption Standby power consumption × × Dimensions (W... - Page 27 MEMO...
- Page 28 Tel: +49-8142-4401-0 Fax: +49-8142-4401-555 http://www.onkyo.net ONKYO CHINA LIMITED Units 2102-2107, Metroplaza Tower I, 223 Hing Fong Road, Kwai Chung, N.T., HONG KONG Tel: 852-2429-3118 Fax: 852-2428-9039 SN 29343568 (C) Copyright 2003 ONKYO CORPORATION Japan. All rights reserved. HOMEPAGE http://www.onkyo.com/ I0308-1...