Table of Contents
Advertisement
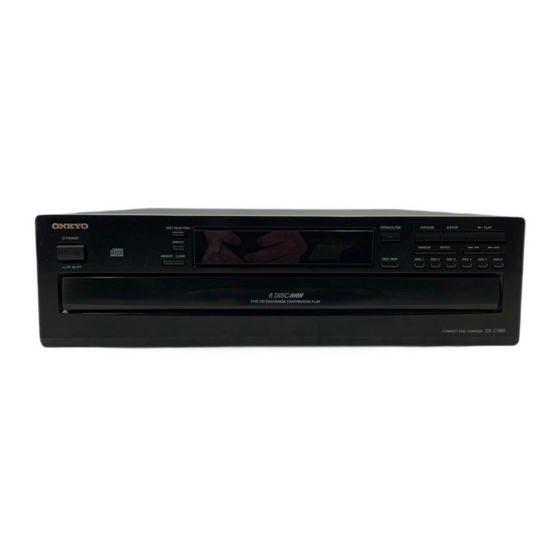
DX-C380
Compact Disc Changer
Instruction Manual
POWER
ON
OFF
Thank you for purchasing the Onkyo Compact Disc
Changer.
Please read this manual thoroughly before making
connections and plugging in the unit.
Important Safeguards ................................... 2
Precautions .................................................. 3
Features ........................................................ 4
Control positions and names ....................... 5
Supplied accessories .................................... 5
Remote controller ........................................ 6
NEXT SELECTION
DISPLAY
MEMORY CLEAR
6 DISC
FIVE CD EXCHANGE CONTINUOUS PLAY
Following the instructions in this manual will en-
able you to obtain optimum performance and lis-
tening enjoyment from your new Compact Disc
Changer.
Please retain this manual for future reference.
CONTENTS
System Connections .................................... 7
Playing CDs ................................................. 8
Using memory functions ........................... 14
Troubleshooting Guide .............................. 16
Specifications ............................................. 16
OPEN/CLOSE
PAUSE
STOP
PLAY
RANDOM
REPEAT
/
/
DISC SKIP
DISC 1
DISC 2
DISC 3
DISC 4
DISC 5
DISC 6
DX-C380
COMPACT DISC CHANGER
Advertisement
Table of Contents

Related Manuals for Onkyo DX-C380


Summary of Contents for Onkyo DX-C380
-
Page 1: Table Of Contents
DX-C380 Compact Disc Changer Instruction Manual POWER Thank you for purchasing the Onkyo Compact Disc Changer. Please read this manual thoroughly before making connections and plugging in the unit. Important Safeguards ... 2 Precautions ... 3 Features ... 4 Control positions and names ... 5 Supplied accessories ... -
Page 2: Important Safeguards
WARNING: TO REDUCE THE RISK OF FIRE OR ELECTRIC SHOCK, DO NOT EXPOSE THIS APPLIANCE TO RAIN OR MOISTURE. CAUTION: TO REDUCE THE RISK OF ELECTRIC SHOCK, DO NOT REMOVE COVER (OR BACK). NO USER-SERVICEABLE PARTS INSIDE. REFER SERVICING TO QUALIFIED SERVICE PERSONNEL. -
Page 3: Precautions
ELECTRONICS GmbH INDUSTRIESTRASSE 20 82110 GERMERING, GERMANY declare in own responsibility, that the ONKYO product described in this instruction manual is in compliance with the corresponding technical standards such as EN60065, EN55013, EN55020 and EN61000-3-2, -3-3 (or EN60555-2, -3) GERMERING, GERMANY ONKYO EUROPE ELECTRONICS GmbH K.OTSU... -
Page 4: Features
Precautions 1. Warranty Claim You can find the serial number on the rear panel of this unit. In case of warranty claim, please report this number. 2. Power WARNING BEFORE PLUGGING IN THE UNIT FOR THE FIRST TIME, READ THE FOLLOWING SECTION CAREFULLY. The voltage of the available power supply differs according to country or region. -
Page 5: Control Positions And Names
RANDOM REPEAT DISC SKIP DISC 1 DISC 2 DISC 3 DISC 4 DISC 5 DISC 6 DX-C380 COMPACT DISC CHANGER 15 16 1 2 3 4 5 6 Display a. PAUSE indicator b. REPEAT indicator c. RANDOM indicator d. MEMORY indicator e. -
Page 6: Remote Controller
Using the remote controller Point the remote controller toward the remote control sensor. Notes DX-C380 Place the unit away from strong light such as direct sunlight or inverted fluorescent light which can prevent proper operation of the remote controller. -
Page 7: System Connections
DAT, MD recorder or Digital amplifier Connections for remote controller ( When connecting Onkyo products, it is necessary to attach the cable to be able to use the remote controller of the main component to control the entire system. 1. To use this CD changer with an amplifier (or receiver), cassette... -
Page 8: Playing Cds
Playing CDs OPEN/CLOSE OPEN/CLOSE TRACK TOTAL REMAIN PLAY PAUSE SINGLE ELAPSED TRACK 1, 3 Normal playback 1. Press the drawer. 2. Place the disc(s) in the disc trays with the label(s) fac- Front disc tray ing up. Pressing the DISC SKIP button rotates the carousel so that you can load disc(s) in other disc trays. - Page 9 Playing CDs PAUSE STOP PLAY SINGLE ELAPSED TRACK DISPLAY SINGLE TRACK REMAIN DISPLAY TRACK TOTAL REMAIN DISPLAY PAUSE Stopping playback temporarily Press the The PAUSE indicator will light up. To resume playback, press The CD changer starts playing again from exactly the point at which it stopped.
- Page 10 Playing CDs DISC 1 DISC 2 REMOTE CONTROLLER RC-331C REMOTE CONTROLLER RC-331C DISC 3 DISC 4 DISC 5 DISC 6 DISC 1 DISC 2 DISC 3 DISC 4 DISC 5 DISC 6 PLAY PLAY Starting playback from a given disc Press the Direct Play button of a disc you wish to play back (DISC 1-DISC 6) on the front panel or the remote control- ler.
- Page 11 Playing CDs STOP TRACK SINGLE REMAIN TRACK SINGLE REMAIN TRACK SINGLE REMAIN REMOTE CONTROLLER RC-331C Skip playback Use the You can also use the remote controller to operate the unit by using the REMOTE CONTROLLER RC-331C During playback, press the The CD changer will stop playing the current Track and will begin playing the next track from the beginning.
- Page 12 Playing CDs NEXT SELECTION TRACK DISC 1 DISC 2 DISC 3 DISC 4 TRACK NEXT SELECTION REMOTE CONTROLLER RC-331C NEXT SELECTION REMOTE CONTROLLER RC-331C 1 2 3 NEXT DISC No. 4 5 6 DISC 5 DISC 6 1 2 3 NEXT DISC No.
- Page 13 Playing CDs RANDOM TRACK SINGLE ELAPSED RANDOM RANDOM TRACK SINGLE ELAPSED REMOTE CONTROLLER RC-331C REMOTE CONTROLLER RC-331C REPEAT REPEAT TRACK TOTAL REMAIN PLAY REPEAT SINGLE ELAPSED TRACK RANDOM Playing back tracks at random Press the RANDOM button on the unit or the remote con- troller to enter random mode.
-
Page 14: Using Memory Functions
Using memory functions MEMORY CLEAR DISC 1 DISC 2 DISC 3 REMOTE CONTROLLER RC-331C REMOTE CONTROLLER RC-331C PLAY MEMORY REMOTE CONTROLLER RC-331C DISC 4 DISC 5 DISC 6 DISC 1 DISC 2 DISC 3 DISC 4 DISC 5 DISC 6 MEMORY CLEAR MEMORY REMOTE CONTROLLER RC-331C... - Page 15 Using memory functions TRACK After two seconds TRACK TOTAL MEMORY CLEAR MEMORY CLEAR TRACK REMOTE CONTROLLER RC-331C Notes about the time display In the following cases, the time display may indicate “– – : – –” due to the memory limitations. •...
-
Page 16: Troubleshooting Guide
Sales & Product Planning Div. : 2-1, Nisshin-cho, Neyagawa-shi, OSAKA 572-8540, JAPAN Tel: 072-831-8111 Fax: 072-833-5222 ONKYO U.S.A. CORPORATION 200 Williams Drive, Ramesy, N.J. 07446, U.S.A. Tel: 201-825-7950 Fax: 201-825-8150 E-mail: onkyo@onkyousa.com ONKYO EUROPE ELECTRONICS GmbH Industriestrasse 20, 82110 Germering, GERMANY Tel: 089-849-320 Fax: 089-849-3265 E-mail: info@onkyo.de...