Table of Contents
Advertisement
Available languages
Available languages
Quick Links
D
B
® Motion Sensing
ual
rite
Decorative Light
Model
4293
Motion Decorative Light
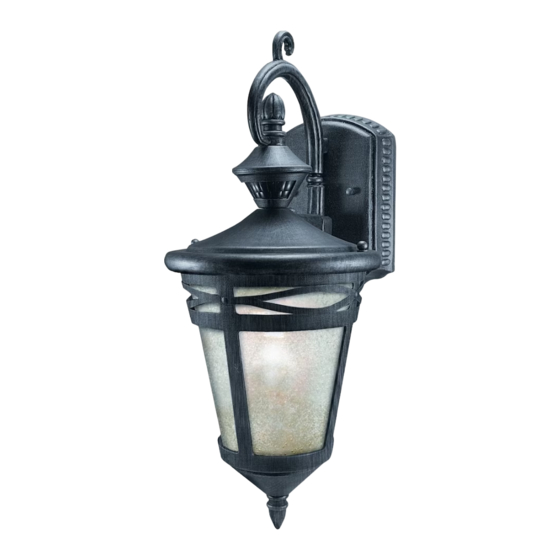
* Note: Illustrations may vary from actual unit .
For a description of the DualBrite® technology, see page 7 .
© 2015 HeathCo LLC
INSTALLATION AND OPERATING
INSTRUCTIONS
SAFETY INFORMATION . . . . . . . . . . . . . . . . . . . . . . . . . . . . . . . . . . . . . .2
PREPARATION . . . . . . . . . . . . . . . . . . . . . . . . . . . . . . . . . . . . . . . . . . . . . . .2
HARDWARE CONTENTS . . . . . . . . . . . . . . . . . . . . . . . . . . . . . . . . . . . . . .2
FINIAL INSTALLATION . . . . . . . . . . . . . . . . . . . . . . . . . . . . . . . . . . . . . . .3
GLASS GLOBE INSTALLATION . . . . . . . . . . . . . . . . . . . . . . . . . . . . . . . .3
LIGHT FIXTURE INSTALLATION . . . . . . . . . . . . . . . . . . . . . . . . . . . . . . .3
WIRING THE LIGHT FIXTURE . . . . . . . . . . . . . . . . . . . . . . . . . . . . . . . . .4
OPTIONAL WIRING . . . . . . . . . . . . . . . . . . . . . . . . . . . . . . . . . . . . . . . . . .5
MOUNTING THE LIGHT FIXTURE . . . . . . . . . . . . . . . . . . . . . . . . . . . . .6
TESTING AND ADJUSTMENTS . . . . . . . . . . . . . . . . . . . . . . . . . . . . . . . .6
CARE AND MAINTENANCE . . . . . . . . . . . . . . . . . . . . . . . . . . . . . . . . . . .7
BULB REPLACEMENT . . . . . . . . . . . . . . . . . . . . . . . . . . . . . . . . . . . . . . . .8
TROUBLESHOOTING GUIDE . . . . . . . . . . . . . . . . . . . . . . . . . . . . . . . . . .8
SPECIFICATIONS . . . . . . . . . . . . . . . . . . . . . . . . . . . . . . . . . . . . . . . . . . . . .8
TECHNICAL SERVICE . . . . . . . . . . . . . . . . . . . . . . . . . . . . . . . . . . . . . . . . .9
TWO YEAR LIMITED WARRANTY . . . . . . . . . . . . . . . . . . . . . . . . . . . . .9
Questions?
Please refer to the troubleshooting guide in this manual
or call our technical service department (English speak-
ing only) at 1-800-858-8501, 8:00 a . m . - 5:00 p . m . , CST,
Monday - Friday before returning to your retailer .
Keep this manual for future reference.
ATTACH YOUR RECEIPT HERE
Receipt is required for all warranty requests .
Purchase Date
208153-01A
Advertisement
Chapters
Table of Contents

Related Manuals for Heath Zenith DualBrite 4293


Summary of Contents for Heath Zenith DualBrite 4293
-
Page 1: Table Of Contents
® Motion Sensing INSTALLATION AND OPERATING rite INSTRUCTIONS Decorative Light SAFETY INFORMATION . . . . . . . . . . . . . . . . . . . . . . . . . . . . . . . . . . . . . .2 PREPARATION . -
Page 2: Safety Information
HARDWARE CONTENTS SAFETY INFORMATION Lantern Installation Hardware Pack Please read and understand this entire manual before at- Note: Illustrations may vary from actual unit. tempting to assemble, operate, or install the product. This light fixture requires 120-volts AC. All wiring must be in accordance with the National Electrical Code (Canadian Electrical Code in Canada). -
Page 3: Finial Installation
FINIAL INSTALLATION LIGHT FIXTURE INSTALLATION 1. Remove the finial from the hardware pack. For best performance, mount the fixture about 6 feet (1.8 m) 2. Securely tighten the finial to the bottom of the globe above the ground. housing. 1. Remove two decorative nuts. 2. -
Page 4: Wiring The Light Fixture
WIRING THE LIGHT FIXTURE Connect the fixture wires to the wires in the junction box. Twist the wires together and secure with wire connectors. WARNING: Turn power off at circuit breaker or fuse. Note: All wiring must be run in accordance with the Na- tional Electrical Code through conduit or another accept- able means. -
Page 5: Optional Wiring
OPTIONAL WIRING This fixture is provided with a sensor rated for 360 Watts. Since the fixture is only rated 100 Watts, 260 Watts of ad- ditional lighting may be controlled by this sensor. When determining what a fixture is rated for, do not simply look at the rating on the light bulb in the fixture. Look at the marking which specifies the maximum bulb wattage for which the fixture is suitable. -
Page 6: Mounting The Light Fixture
MOUNTING THE LIGHT FIXTURE 1. Turn the DualBrite control to OFF. 2. Set the ON-TIME control to TEST. 1. Make sure wire connectors and wires are inside the 3. Turn on the circuit breaker or fuse and the light switch. junction box. -
Page 7: Care And Maintenance
Final Setup • Optional DualBrite® Control – This optional feature allows the light fixture to turn on at a lower light level 1. Adjust the sensitivity (SENS) to increase or decrease after dusk (sunset) for the amount of time selected. When the range as needed. -
Page 8: Bulb Replacement
BULB REPLACEMENT 1. While holding the globe assembly with one hand, Decorative remove the two decorative screws on top of fixture cap Screw with the other. 2. Replace bulb (tungsten incandescent, medium base, type “A”, 100 watt maximum). Fixture Cap 3. -
Page 9: Technical Service
TECHNICAL SERVICE Please call 1-800-858-8501 (English speaking only) for assistance before returning product to store. If you experience a problem, follow this guide. You may also want to visit our Web site at: www.hzsupport.com. If the problem persists, call* for assistance at 1-800-858-8501 (English speaking only), 8:00 AM to 5:00 PM CST (M-F). You may also write* to: HeathCo LLC P.O. - Page 10 Luz decorativa detectora de INSTRUCCIONES PARA SU INSTALACIÓN Y FUNCIONAMIENTO movimiento D ® rite INFORMACIÓN SOBRE LA SEGURIDAD . . . . . . . . . . . . . . . . . . . . . 11 PREPARACIÓN .
-
Page 11: Información Sobre La Seguridad
FERRETERÍA OFRECIDA INFORMACIÓN SOBRE LA Paquete de ferretería para la instalación del SEGURIDAD farol Por favor lea y comprenda todo el manual antes de intentar Nota: Las ilustraciones pueden ser diferentes de la unidad ensamblar, operar o instalar el producto. comprada. -
Page 12: Instalación Del Remate
INSTALACIÓN DEL APARATO DE LUZ INSTALACIÓN DEL REMATE 1. Quite el remate del paquete de ferretería. Para un mejor funcionamiento, instale el aparato a casi 2. Apriete bien el remate a la parte inferior de la carcasa 1.8 m del suelo. de la esfera. -
Page 13: Cableado Del Aparato De Luz
CABLEADO DEL APARATO DE LUZ Conecte los alambres del aparato a los alambres de la caja de empalme. Tuerza juntos los alambres y asegúrelos con conectores de alambre. ADVERTENCIA: Desconecte la alimentación en el disyuntor o en el fusible. Nota: Todo el cableado debe realizarse de acuerdo con el Código Eléctrico Nacional usando tubería o algún otro medio aceptable. -
Page 14: Conexión Alterna
CONEXIÓN ALTERNA Este aparato viene con un detector con una potencia de 360 Vatios. Puesto que este aparato tiene sólo una potencia de 100 vatios, 260 vatios de luz adicional pueden ser controlados por este detector. Cuando desee determinar la clasificación de un aparato no vea tan sólo la potencia de la lámpara. Mire la indicación que especifique el voltaje máximo de la lámpara que el aparato puede aceptar. -
Page 15: Montaje Del Aparato De Luz
MONTAJE DEL APARATO DE LUZ 1. Gire el control DualBrite a OFF. 2. Fije el control ON-TIME a TEST. 1. Asegúrese que los conectores de alambre y los alambres 3. Encienda el disyuntor o fusible y el interruptor de la luz. estén dentro de la caja de empalme. -
Page 16: Cuidado Y Mantenimiento
Configuración final el frente del detector de movimiento. La luz se apagará automáticamente después de un determinado tiempo. 1. Regule la sensibilidad (SENS) para aumentar o dis- El control ON-TIME se debe fijar a 1, 5 o 10 minutos minuir el alcance según lo que necesite. Demasiada y al interruptor de pared se lo debe dejar siempre en la sensibilidad puede ocasionar falsas alarmas debido a posición ON. -
Page 17: Reemplazo De La Bombilla
REEMPLAZO DE LA BOMBILLA Tornillo decorativo 1. Mientras sostiene el conjunto del globo con una mano, quite con la otra mano los dos tornillos decorativos de la parte superior de la tapa del aparato. Tapa del aparato 2. Reemplace la bombilla (tungsteno incandescente, de base mediana, de tipo "A", 100 vatios máximo). -
Page 18: Servicio Técnico
SERVICIO TÉCNICO Favor de llamar al 1-800-858-8501 (sólo para hablar en inglés) para pedir ayuda antes de devolver el producto a la tienda. Si tiene algún problema, siga esta guía. Usted puede también visitar nuestro sitio Web: www.hzsupport.com. Si el problema continúa, llame al 1-800-858-8501 (sólo para hablar en inglés), de 8:00 AM a 5:00 PM CST (L-V). - Page 19 Luminaire décoratif à INSTRUCTIONS D’INSTALLATION ET MODE D’EMPLOI détecteur de mouvement et RENSEIGNEMENTS DE SÉCURITÉ . . . . . . . . . . . . . . . . . . . . . . . . . . . 20 fonction D PRÉPARATION .
-
Page 20: Renseignements De Sécurité
QUINCAILLERIE FOURNIE RENSEIGNEMENTS DE SÉCURITÉ Jeu de quincaillerie d’installation de la Veuillez lire et bien comprendre le guide avant de tenter lanterne d’assembler, d’utiliser ou d’installer le produit. Remarque : Les illustrations peuvent être différentes de Ce luminaire exige une alimentation de 120 volts c.a. Tout l’appareil acheté. -
Page 21: Installation Du Épi
INSTALLATION DU ÉPI INSTALLATION DU LUMINAIRE 1. Retirez l'épi du jeu de quincaillerie. Pour un rendement optimal, montez le luminaire à environ 2. Fixez solidement l'épi sous le boîtier du globe. 1,8 m au-dessus du sol. 1. Retirez les deux écrous décoratifs. 2. -
Page 22: Branchement Du Luminaire
BRANCHEMENT DU LUMINAIRE Branchez les fils du luminaire aux fils dans la boîte de raccordement. Torsadez ces fils ensemble, puis ajoutez-y un connecteur de fils. MISE EN GARDE : Coupez l’alimentation au disjoncteur ou au fusible. Remarque : Le câblage doit être conforme aux exigences du Code national de l’... -
Page 23: Câblage Facultatif
CÂBLAGE FACULTATIF Ce luminaire est pourvu d’un capteur de 360 W. Comme ce luminaire ne consomme que 100 W, le capteur peut com- mander 260 W d’ é clairage supplémentaire. Lorsque vous déterminez l’intensité que peut supporter un luminaire, ne vous contentez pas de simplement lire l’intensité indiquée sur l’ampoule. -
Page 24: Montage Du Luminaire
MONTAGE DU LUMINAIRE 1. Placez la commande DualBrite à OFF. 2. Placez la commande ON-TIME à TEST. 1. Assurez-vous que les capuchons de connexion et les fils 3. Réenclenchez le disjoncteur ou le fusible et placez sont bien insérés dans la boîte de jonction. l’interrupteur à... -
Page 25: Entretien Et Maintenance
Réglage final automatiquement après le délai de fonctionnement fixé. La commande ON-TIME devrait être réglée à 1, 5 ou 10 1. Régler la sensibilité (SENS) selon les besoins. Une trop minutes et l’interrupteur devrait être constamment placé grande sensibilité pourrait entraîner des déclenchements en position ON. -
Page 26: Remplacement De L'ampoule
REMPLACEMENT DE L’AMPOULE décorative 1. En maintenant le globe d'une main, retirez les deux vis décoratives sur le dessus du capuchon du luminaire de Capuchon l'autre main. de Luminaire 2. Remplacez l’ampoule (lampe incandescente au tungs- tène, culot moyen, de type A, 100 W maximum). Globe 3. -
Page 27: Service Technique
SERVICE TECHNIQUE Veuillez faire le 1 800 858-8501 (service en anglais seulement) pour obtenir de l’aide avant de retourner l’article au magasin. En cas de problème, suivez ce guide. Vous pouvez aussi visiter notre site Web à www.hzsupport.com. Si le problème persiste, composez* le 1 800 858-8501 (service en anglais seulement), entre 8 h 00 et 17 h 00, HNC, du lundi au vendredi. - Page 28 Purchase Information Información de la compra Renseignements d’achat Model #: ________________________ Date of Purchase: _____________________ Nº de modelo / N° de modèle Fecha de compra / Date d’achat Staple Purchase Receipt Here Engrape aquí el recibo de compra Agrafez le reçu d’achat ici PLEASE KEEP YOUR DATED SALES RECEIPT, IT IS REQUIRED FOR ALL WARRANTY REQUESTS.