Table of Contents
Advertisement
Advertisement
Table of Contents

Related Manuals for LG WM3850HVA


Summary of Contents for LG WM3850HVA
- Page 1 OWNER'S MANUAL WASHING MACHINE Read this owner's manual thoroughly before operating the appliance and keep it handy for reference at all times. ENGLISH WM3850H*A www.lg.com MFL70701237 Copyright © 2020 LG Electronics Inc. All Rights Reserved. Rev.00_112520...
-
Page 2: Table Of Contents
Sorting Laundry Loading the Washer Adding Cleaning Products Control Panel Wash Cycles Cycle Modifiers Options and Extra Functions 32 SMART FUNCTIONS Using LG ThinQ Application Smart Diagnosis Function 35 MAINTENANCE Regular Cleaning Periodic Maintenance Care in Cold Climates 41 TROUBLESHOOTING... -
Page 3: Important Safety Instructions
IMPORTANT SAFETY INSTRUCTIONS IMPORTANT SAFETY INSTRUCTIONS READ ALL INSTRUCTIONS BEFORE USE Safety Messages Your safety and the safety of others are very important. We have provided many important safety messages in this manual and on your appliance. Always read and follow all safety messages. - Page 4 • Use this appliance only for its intended purpose. • If the product has been submerged in water, sitting in standing water, or waterlogged, do not come in contact with the product and immediately contact an LG Electronics Customer Information Center for instructions before resuming use.
-
Page 5: Caution Statements
IMPORTANT SAFETY INSTRUCTIONS • Do not store or use gasoline or other flammable vapors and liquids in the vicinity of this or any other appliance. • Do not mix chlorine bleach with ammonia or acids such as vinegar. Follow package directions when using laundry products. - Page 6 IMPORTANT SAFETY INSTRUCTIONS Installation • Install the product on a firm and level floor. Operation • Do not place objects on top of the appliance. • Turn off the water faucets and unplug the appliance if the appliance is to be left for an extended period of time, such as during vacations.
-
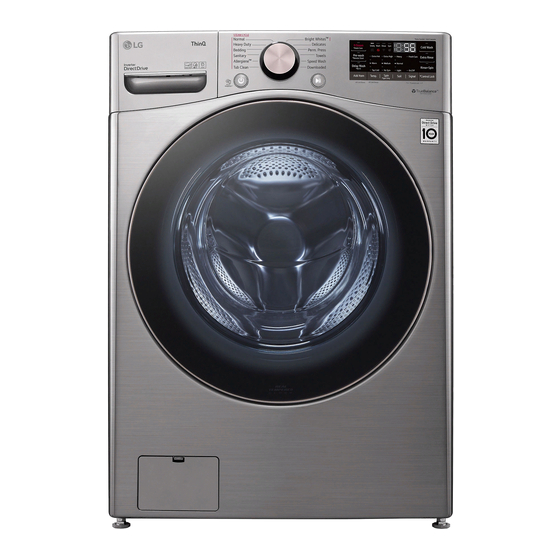
Page 7: Product Overview
• For your safety and for extended product life, use only authorized components. The manufacturer is not responsible for product malfunction, property damage or bodily injury caused by the use of separately purchased unauthorized components, parts, or non-LG products. Front View... - Page 8 PRODUCT OVERVIEW Accessories Product Specifications Model WM3850H*A Included Accessories Electrical 120 V~, 60 Hz Requirements Min. / Max. Water 20 - 120 psi (138 - 827 Pressure kPa) Dimensions (Width X 27'' X 39'' X 30 1/4'' (70 Height X Depth) cm X 99 cm X 77 cm) Maximum Depth with 55'' (139.6 cm)
-
Page 9: Installation
INSTALLATION INSTALLATION Before Installing Installation Overview Please read the following installation instructions first after purchasing this washer or transporting it to another location. Choosing the Proper Location Unpacking and Removing Shipping Material Connecting the Inlet Hoses Connecting the Drain Hose Leveling the Washer Final Installation Check WARNING... -
Page 10: Choosing The Proper Location
10 INSTALLATION WARNING • Certain internal parts are intentionally not grounded and may present a risk of electric shock only during servicing. Service personnel- Do not contact the following parts while the appliance is energized: pump, valve, motor, control board. Tools Needed •... -
Page 11: Unpacking And Removing Shipping Material
INSTALLATION Unpacking Shipping Material Dimensions and Clearances * This feature is only available on some models. 27'' (70 cm) Lift the washer off the foam base. 1/4'' (0.5 cm) • After removing the carton and shipping material, lift the washer off the foam base. Stacking or Pedestal Installation •... -
Page 12: Connecting The Water Inlet Hoses
• Do not reuse old hoses. Use only new hoses faucet. when installing the washer. Old hoses could leak or burst causing flooding and property damage. Contact an LG Customer Information Center for assistance in buying hoses. NOTE • Periodically check the hoses for cracks, leaks, and wear, and replace the hoses every five years. -
Page 13: Connecting The Drain Hose
INSTALLATION • Let the water drain into a bucket, and check • Never create an airtight seal between the hose the water temperature to make sure you’ve and the drain with tape or other means. If no air connected the hoses to the correct faucets. gap is present, water can be siphoned out of the drum resulting in poor wash/rinse performance or clothing damage. -
Page 14: Leveling The Washer
14 INSTALLATION Leveling the Washer The drum of the washer spins at very high speeds. To minimize vibration, noise, and unwanted movement, the floor must be a solid, level surface. 29.5 - 96 " 29.5 - 96 " (75 - 244 cm) (75 - 244 cm) CAUTION •... -
Page 15: Final Installation Check
INSTALLATION Adjust the leveling feet. leveling feet, place them under the back leveling feet. • Turn all 4 leveling feet in one direction to raise the washer or the other direction to lower it. This side up Remove backing Recheck the washer’s levelness. Check the level again. - Page 16 16 INSTALLATION WARNING • Do not use an adapter or extension cord. Doing so may result in serious injury, fire, electric shock, or death. • For best performance, plug the appliance into its own individual outlet. This helps prevent overloading house wiring circuits which could cause a fire hazard from overheated wires.
-
Page 17: Operation
OPERATION OPERATION Before Use WARNING • To reduce the risk of fire, electric shock, or injury to persons, read the SAFETY INSTRUCTIONS before operating this appliance. Operation Overview Sort laundry and load the washer. • Sort laundry by fabric type, soil level, color and load size as needed. Open the door and load items into the washer. -
Page 18: Sorting Laundry
18 OPERATION • Check around the door seal when removing the load for small items that may be caught in the seal. NOTE • The washer rotates the laundry in a way that allows it to use less water while still fully saturating the clothing. -
Page 19: Loading The Washer
OPERATION By Colors By Soil By Fabric By Lint Darks Light Sturdy Fabric Care Labels Many articles of clothing include a fabric care label. Using the chart below, adjust the cycle and option selections to care for your clothing according to the manufacturer’s recommendations. Category Label Directions... -
Page 20: Adding Cleaning Products
20 OPERATION • The washer can be fully loaded, but the drum oversudsing, poor rinsing, detergent buildup in should not be tightly packed with items. The clothing, and residue buildup that can contribute door of the washer must close easily. to odors in the washer. - Page 21 OPERATION • The amount of detergent added for the Pre- wash option is 1/2 the amount recommended for the main wash cycle. For example, if the main wash cycle requires one measure of detergent, add 1/2 measure for the Pre-wash option. Main Wash Detergent Compartment This compartment holds laundry detergent for the main wash cycle.
- Page 22 22 OPERATION NOTE • Follow the manufacturer’s recommendations when adding bleach. Never add more than one cup, and do not exceed the maximum fill line or the bleach may be dispensed immediately and damage fabrics. Using too much bleach can also damage fabrics.
-
Page 23: Control Panel
OPERATION Control Panel Control Panel Features Power On/Off Button • Press this button to turn the washer on or off. • Pressing this button during a cycle will cancel that cycle and any load settings will be lost. • The door will unlock after a brief pause. NOTE •... - Page 24 24 OPERATION Time and Status Display Cycle Status Indicators • These LEDs will blink when a cycle is selected to indicate which stages will run. • When a cycle is running, the LED for the active stage will blink, and the LEDs for the remaining stages will remain steady.
-
Page 25: Wash Cycles
OPERATION Wash Cycles The wash cycles are designed for specific types of wash loads. Select the cycle that best matches the load contents for maximum wash performance and fabric care. See Sorting Laundry section for best results, and follow the fabric care labels on your garments. For a guide to fabric care symbols, see Sorting Laundry section. - Page 26 26 OPERATION Cycle Bedding Wash Temp. Default: Warm Available: Hot, Warm, Cold, Tap Cold Spin Speed Default: Medium Available: Medium, Low, No Spin Soil Level Default: Normal Available: All Cycle Sanitary Description Washes clothes at a high temperature. Wash Temp. Default: Extra Hot Available: Extra Hot Spin Speed...
- Page 27 • The default cycle is Small Load, used for normally soiled loads with a few items. This cycle is also available for download. • Refer to the LG ThinQ application to see the cycles available for download. Wash Temp. Default: Warm...
- Page 28 28 OPERATION Cycle Steam Cold Wash Pre-wash Bedding Sanitary † Allergiene Bright Whites Perm. Press Delicates Towels Speed Wash Downloaded default: Small Load...
-
Page 29: Cycle Modifiers
OPERATION Cycle Modifiers Spin Higher spin speeds extract more water from clothes, reducing drying time and saving energy. About Modifier Buttons • Press the Spin button repeatedly until the Each cycle has default settings that are selected desired speed is selected. automatically. - Page 30 When the washer is connected to a home Wi-Fi hours to prevent wrinkles. network, the icon on the control panel is lit. • To connect the washer to the LG ThinQ Turn on the power. application, press and hold the Delay Wash button for 3 seconds.
- Page 31 OPERATION • To preserve wash performance, wash time may • When the controls are locked, and the be extended depending on when garments are remaining time are alternately shown on the added to a cycle. display during the wash cycle. •...
-
Page 32: Smart Functions
Internet service provider or refer to your • Settings wireless router manual. - Set various options on the appliance and in the • LG ThinQ is not responsible for any network application. connection problems or any faults, malfunctions, or errors caused by network connection. - Page 33 (2) This device must accept any interference, seconds to enable the remote control including interference that may cause undesired function. operation of the device. Start a cycle from the LG ThinQ application on IC Radiation Exposure Statement your smartphone. This equipment complies with IC radiation NOTE exposure limits set forth for an uncontrolled •...
-
Page 34: Smart Diagnosis Tm Function
20 cm (7.8 inches) LG ThinQ application. between the antenna and your body. • Launch the LG ThinQ application and select the Smart Diagnosis feature in the menu. Follow NOTE the instructions provided in the LG ThinQ •... -
Page 35: Maintenance
MAINTENANCE MAINTENANCE • Wipe with a damp cloth. WARNING • Do not touch the surface or the display with • To reduce the risk of fire, electric shock, or injury sharp objects. to persons, read this entire owner’s manual, including the SAFETY INSTRUCTIONS, before operating this appliance. - Page 36 36 MAINTENANCE Leaving the Door Open • Do not exceed the maximum fill line when adding bleach or powdered cleaners. After you finish using the washer, leave the door Powdered cleaners may remain in the drum open overnight to allow air to circulate and dry the after cleaning.
- Page 37 MAINTENANCE Replace the drawer. CAUTION • Do not use the washer without the inlet filters. Doing so will cause leaks and malfunction. • If you use the washer in an area with hard water, the inlet filter may clog due to lime buildup and require more frequent cleaning.
- Page 38 38 MAINTENANCE Cleaning the Drain Pump Filter The washer fails to drain if the drain pump filter is clogged. Periodically clean the drain filter to prevent clogging with foreign objects. WARNING • Opening the drain filter will result in water overflowing if there is water in the drum.
-
Page 39: Care In Cold Climates
MAINTENANCE Care in Cold Climates Dry the drum interior with a soft cloth, and close the door. Storing the Washer Store the washer in an upright position. If the washer will not be used for an extended period of time and is in an area that could be exposed to freezing temperatures, follow these Remove the inserts from the dispenser. - Page 40 40 MAINTENANCE When the Drain Hose is Frozen Pour hot water in the washer drum and close the door. Wait for 1 - 2 hours. Press the Power button. Press the Spin button to operate spin only cycle for draining and spinning. Press the Start/Pause button to make sure the water drains.
-
Page 41: Troubleshooting
TROUBLESHOOTING TROUBLESHOOTING Before Calling for Service The washer is equipped with an automatic error-monitoring system to detect and diagnose problems at an early stage. If the washer does not function properly or does not function at all, check the following before you call for service. - Page 42 42 TROUBLESHOOTING Problem Possible Cause & Solution The load is too small. • Add additional items to allow the washer to balance the load. UNBALANCE ERROR Heavy articles are mixed with lighter items. • Always try to wash articles of somewhat similar weight to allow the washer to evenly distribute the weight of the load for spinning.
- Page 43 TROUBLESHOOTING Problem Possible Cause & Solution Vibration sensor malfunctions. • Call for service. VIBRATION SENSOR ERROR Noises Problem Possible Cause & Solution Clicking Door lock sounds when the door locks or unlocks. • Normal operation Spraying or hissing Water spraying or circulating during the cycle •...
- Page 44 44 TROUBLESHOOTING Problem Possible Cause & Solution Banging noise when Plumbing in the home moves or flexes when the water valves in the washer shut off. the washer is filling • Water hammer is not caused by a defect in the washer. Install water hammer arrestors with water.
- Page 45 TROUBLESHOOTING Problem Possible Cause & Solution Incomplete or no Detergent compartments clogged from incorrect filling. dispensing of • Make sure that detergent and additives are put into the correct dispenser compartments. detergent • For all detergent types, always make sure that the dispenser drawer is fully closed before the start of the cycle.
- Page 46 46 TROUBLESHOOTING Problem Possible Cause & Solution Washer is not filling Filter is clogged. properly. • Make sure that inlet filters on the fill valves are not clogged. Refer to Cleaning the Water Inlet Filters in MAINTENANCE. Inlet hoses may be kinked. •...
- Page 47 TROUBLESHOOTING Performance Problem Possible Cause & Solution Wrinkling Washer is not unloaded promptly. • Always remove items from the washer as soon as the cycle is complete. Washer is overloaded. • The washer can be fully loaded, but the drum should not be tightly packed with items. The door of the washer should close easily.
- Page 48 48 TROUBLESHOOTING Odor Problem Possible Cause & Solution Odor Some odor is caused by the rubber attached to the washing machine. • This odor is normal for new rubber and will disappear after the machine has been run a few times. If the rubber door gasket and door seal area are not cleaned regularly, odors can occur from mold or foreign substances.
-
Page 49: Limited Warranty
ARE NOT PERMITTED. PLEASE SEE THE SECTION TITLED “PROCEDURE FOR RESOLVING DISPUTES” BELOW. Should your LG Washer ("Product") fail due to a defect in materials or workmanship under normal and proper use, during the warranty period set forth below, LG Electronics Canada, Inc. (“LGECI”) will, at its option, repair or replace the Product upon receipt of proof of the original retail purchase. - Page 50 (ASC), as determined by LG Canada. If your Product is located outside a 150 km radius from a ASC, as determined by LG Canada, it will be your responsibility to bring the Product, at your sole expense, to the ASC for in-warranty repair.
- Page 51 If you and LG are unable to resolve the dispute within 30 days of LG’s receipt of the Notice of Dispute, the dispute shall be resolved by binding arbitration in accordance with the procedure set out herein.
- Page 52 Except as otherwise provided for, LG waives any rights it may have to seek attorneys’ fees and expenses from you if LG prevails in the arbitration.
- Page 53 Memo...
- Page 54 54 Memo...
- Page 55 Memo...
- Page 56 LG Customer Information Center For inquiries or comments, visit www.lg.com or call: U.S.A. 1-800-243-0000 1-888-542-2623 CANADA Register your product Online! www.lg.com...