Table of Contents
Advertisement
Quick Links
Operating Instructions
Smart Handheld
EB-3901
Operating Instructions
Tablet Computer
FZ-E1
Model No.
series
Thank you for purchasing a Panasonic product.
Please read this document carefully before using the product
and keep this document in a safe place for future reference.
For detailed information about this product, refer to the Reference
Manual, which is available by flicking the Start screen to the left,
then tapping [Online Manual] in the App list. (Download required.)
Advertisement
Table of Contents

Related Manuals for Panasonic FZ-E1 Series


Summary of Contents for Panasonic FZ-E1 Series
- Page 1 FZ-E1 Model No. series Thank you for purchasing a Panasonic product. Please read this document carefully before using the product and keep this document in a safe place for future reference. For detailed information about this product, refer to the Reference Manual, which is available by flicking the Start screen to the left, then tapping [Online Manual] in the App list.
-
Page 2: Table Of Contents
Table of Contents Introduction.............. 3 Safety precautions ............3 Regulatory information..........12 Handling cautions ............22 Trademark and license information ......25 Terms and illustrations in this document ..... 27 Disclaimers ..............28 Getting Started............29 Confirming the included items ........29 Description of parts............ -
Page 3: Introduction
Introduction Safety precautions Safety precautions To reduce the risk of injury, loss of life, electric shock, fire, malfunction, and damage to equipment or property, always observe the following safety precautions. Explanation of symbol word panels The following symbol word panels are used to classify and describe the level of hazard, injury, and property damage caused when the denotation is disregarded and improper use is performed. - Page 4 DANGER When using the product for extended periods, do not expose your skin to the product or AC adaptor for a prolonged period. Generated heat can cause low-temperature burns. WARNING Do not disassemble, repair, or modify the product. These may cause electric shock or fire. Do not insert foreign objects into the product.
- Page 5 Stop using the product if any of the following occurs. – Product emits smoke, unusual sound, or unusual smell – Water or foreign object enters the product – Product is damaged – Product becomes unusually hot Failure to do so may result in fire or electric shock. Turn the product off, disconnect it from the power supply, and then remove the battery.
- Page 6 Stop using the product immediately and consult your doctor if you feel any discomfort when staring at flashing lights on the screen. A very small percentage of individuals may experience seizures or blackouts when exposed to certain light patterns or flashing lights for extended periods. Do not use the product near automatic control equipment such as automatic doors, fire alarms, etc.
- Page 7 Clean dust and other debris on the AC plug regularly. If dust or other debris accumulates on the plug, humidity, etc. may cause a defect in the insulation, which may result in a fire. • Pull the plug, and wipe it with a dry cloth. Pull the plug if the computer is not being used for a long period of time.
- Page 8 CAUTION If glass components are damaged, be careful of broken glass or internal components that may become exposed. Failure to do so can cause injury. Do not place the product on an unstable surface. The product may drop, resulting in injury. Take a 10–15 minute break every hour when using the product.
- Page 9 Turn down the volume before connecting headphones. After connecting the headphones, increase the volume gradually. If you connect headphones when the volume is set too high, your ears may be exposed to excessively high volume which may damage your hearing. Do not stack the product.
- Page 10 NOTICE Do not place objects on the surface of the product or press down hard on the product with sharp objects. The screen surface could be scratched. When in low-temperature environments, dry off the product if it becomes wet. If the product becomes wet in temperatures of 0 °C (32 °F) or below, freeze damage may occur.
- Page 11 Do not crush, bend, deform, puncture, shred, throw, or apply high pressure to the battery. These may cause a short circuit, electric shock, electrolyte leakage, overheating, rupture, or fire. Do not use the battery if it becomes noticeably damaged or deformed. Electrolyte leakage, overheating, smoke, rupture, or fire may result.
-
Page 12: Regulatory Information
Do not charge the battery using methods other than those specified. Improper battery use may cause electrolyte leakage, overheating, rupture, or fire. If electrolyte from the battery comes into contact with the eyes, skin, or clothing, rinse it off thoroughly. Electrolyte may cause blindness if it comes into contact with the eyes. - Page 13 • In any other environment where the risk of interference to other devices or services is perceived or identified as harmful. If you are uncertain of the policy that applies on the use of wireless devices in a specific organization or environment (e.g. airports), you are encouraged to ask for authorization to use this product prior to turning on the product.
- Page 14 – Should turn off the product immediately if there is any reason to suspect that interference is taking place. Hearing aids • Some digital wireless products may interfere with some hearing aids. In the event of such interference, consult the manufacturer of your hearing aid to discuss alternatives.
- Page 15 shielded against the RF signals from this product. Therefore, the use must be restricted in certain situations to avoid interference. Driving • Give full attention to driving. Driving safely is your first responsibility. • Pull off the road and park before placing or answering a call. It is unsafe to operate the product while driving.
- Page 16 Volume • Do not turn the volume up too loud when using headphones. Exposure to excessive sound pressure levels for extended periods may cause hearing damage. Additionally, being unable to hear sounds in your environment may lead to accidents. Laser device caution (for models with an optional barcode reader) CAUTION! THIS PRODUCT UTILIZES A LASER.
- Page 17 , medical devices or accessories life-support systems or other equipment/devices/systems that are involved with ensuring human life or safety. Panasonic will not be responsible for any liability resulting from the use of this product arising out of the foregoing uses.
- Page 18 Panasonic cannot be held responsible in any way for any damages or loss resulting from the use of this unit in these types of equipment, devices or systems, etc. This product has been designed so as to minimize shock to the LCD, the leakage of liquid (e.g., water) on to the buttons, etc., but no...
- Page 19 0.530 W/kg. For body-worn operation, this product has been tested and meets FCC RF exposure guidelines when used with a Panasonic accessory designated for this product and when used with an accessory that contains no metal and that positions the mobile device a minimum of 1.0 cm from the body.
- Page 20 The FCC has granted an Equipment Authorization for this product with all reported SAR levels evaluated as in compliance with the FCC RF emission guidelines. SAR information on this product is on file with the FCC and can be found by searching for the product’s FCC ID number at http://www.fcc.gov/oet/ea/fccid.
- Page 21 Panasonic Corporation of North America Two Riverfront Plaza, Newark, NJ 07102 Support contact: http://www.panasonic.com/contactinfo Disposal USA Only: Disposal may be regulated in your community due to environmental considerations. For disposal or recycling information, please visit Panasonic website: http://www.panasonic.com/environmental or call 1-888-769-0149. Introduction...
-
Page 22: Handling Cautions
Caution Risk of explosion if battery is replaced by an incorrect type. Dispose of used batteries according to the instructions. Recycle information A lithium ion battery that is recyclable powers the product you have purchased. Please call 1-800-8-BATTERY for information on how to recycle this battery. - Page 23 this occurs, the battery should be replaced with a new one. Contact your technical support representative. • The battery may become warm during charging and during normal use. This is normal. • Charge the battery in environments with an ambient temperature of 10 °C to 35 °C (50 °F to 95 °F).
- Page 24 • For typical cleaning, wipe the product with a soft, dry cloth, such as gauze. An alcohol-based disinfectant may be used if necessary. You may also dip a soft cloth in water-diluted detergent and wring it thoroughly before wiping the product. •...
-
Page 25: Trademark And License Information
Bluetooth SIG, Inc., and any use of such marks by Panasonic Corporation is under license. • microSDXC Logo is a trademark of SD-3C, LLC. • The N-Mark logo is a trademark or registered trademark of NFC Forum. - Page 26 technology outside of this products is prohibited without a license from Microsoft or an authorized Microsoft subsidiary and third parties.
-
Page 27: Terms And Illustrations In This Document
Terms and illustrations in this document Terms and illustrations in this document • Panasonic Corporation and/or its affiliates are referred to collectively as “we” or “Panasonic”. • This product supports microSD, microSDHC, and microSDXC memory cards. In this document, the term “SD card” is used as a generic term for any supported memory card. -
Page 28: Disclaimers
Disclaimers Disclaimers Panasonic shall not be liable for loss of data or other incidental or consequential damages resulting from the use of this product. This product can download, store, forward, and receive additional content, such as applications, ringtones, contact information, and media files. -
Page 29: Getting Started
Getting Started Confirming the included items Confirming the included items The following items are included. If any items are missing, please contact your technical support representative. – Main unit ×1 – Battery ×1 – Battery cover ×1 – Operating Instructions (this document) ×1 *1 Please read the separate Windows Embedded 8.1 Handheld Software License Terms before using this product. -
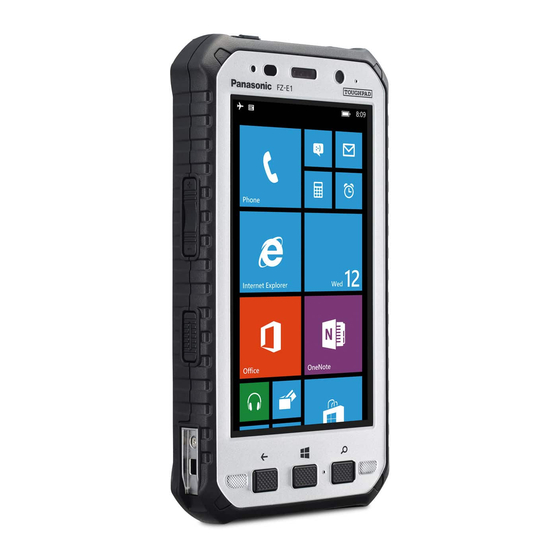
Page 30: Description Of Parts
Description of parts Description of parts Front view A Indicator Orange, lit: Battery is charging Green, lit: Battery charging is complete Red, lit: Battery level is 10 % or less of a full charge... - Page 31 B Ambient light sensor, proximity sensor The ambient light sensor automatically adjusts the screen brightness. The proximity sensor prevents accidental operations on the touch panel during phone calls. C Earpiece D Front camera E Microphone F NFC antenna (internal) When using an NFC card or other NFC device, touch the card/ device to this area of the unit.
- Page 32 Rear view The battery cover and battery are omitted in this illustration. A Microphone B Flash Can be used when taking pictures. Also lights if you open the battery cover while the unit is turned on. C Rear camera D Card access cover E Cover latch F Cover latch lock switch G Expansion bus connector...
- Page 33 H GPS antenna (internal) I Wi-Fi, Bluetooth antenna (internal) J Volume buttons K Side button Used when using the barcode reader (certain models only). L Cradle rail Used when connecting the unit to an optional cradle. M Cellular antenna (internal) *1 The registered function can be changed.
-
Page 34: Opening And Closing The Interface Cover
Opening and closing the interface cover Opening and closing the interface cover Opening the interface cover Unlock the cover by sliding 2. Open the cover by pulling the switch away from . the top edge of the cover (i.e., the edge closest to the top of the unit) away from the unit. -
Page 35: Removing The Battery Cover
Removing the battery cover Removing the battery cover 1. Unlock the cover latch by sliding the switch (circled in the illustration) away from (A), and then open the cover latch by sliding it toward (B). 2. While holding the bottom corners of the battery cover (circled in the illustration), lift the battery cover (A) and then remove the cover (B). -
Page 36: Attaching The Battery Cover
Attaching the battery cover Attaching the battery cover 1. Insert the tabs on the battery cover into the corresponding slots in the battery chamber (A), and then lower the battery cover into place (B). • The edge of the battery cover with two tabs (circled in the illustration) should face the bottom of the unit. - Page 37 3. Make sure that the battery cover is properly sealed. • Two red lines are painted on the inside edges of the battery cover. If the red lines (circled in the illustration) are visible from the side of the unit after the battery cover is closed, the cover is not properly sealed.
-
Page 38: Installing Sim Cards (Certain Models Only)
Installing SIM cards (certain models only) Installing SIM cards (certain models only) You can install up to two SIM cards. 1. Remove the battery cover (page 35) and battery if necessary. • To remove the battery, lift the battery by pulling on the yellow tab and then remove the battery. -
Page 39: Installing An Sd Card
Note • See the Reference Manual (flick the Start screen to the left, and then tap [Online Manual] in the App list) for information on selecting the active SIM card slot and the preferred mobile network mode. Installing an SD card Installing an SD card 1. -
Page 40: Installing The Battery
Installing the battery Installing the battery 1. Remove the battery cover (page 35) if necessary. 2. Insert the terminal end of the battery into the battery chamber. • Insert the battery so that the battery label and the yellow tab are facing up, and that the terminals on the battery line up with the terminals inside the battery chamber. -
Page 41: Turning The Unit On And Off
Note • When connecting a USB cable, note the shape of the micro USB plug and the micro USB port. Do not attempt to connect the USB cable upside down. • Remove any dust or water droplets from plugs before connecting them. -
Page 42: Screen Display
Turning the unit off 1. Press and hold until [slide down to power off] is displayed. 2. Tap the screen and slide your finger down. Turning the screen on and off • To turn the screen off Press • To turn the screen on 1. - Page 43 Start screen App list • Tap any letter on the App list to jump to that letter's section. Using the status bar The status icons displayed on the status bar at the top of the screen indicate the current status of the device. •...
-
Page 44: Basic Operations
displayed apps. Tap [ALL SETTINGS] to switch to the [Settings] app. Basic operations Basic operations Adjusting the volume 1. Press [+] or [-] of the Volume button. • The volume bar is displayed at the top of the screen. (It disappears after several seconds.) Volume bar 2. - Page 45 the app bar to display explanations for each icon, the operation menu, and so on. Using the context menu Some items have context menus. The context menu is similar to the right click menu on a computer. Context menus can be opened by tapping and holding an item.
-
Page 46: Troubleshooting
Troubleshooting If you experience any trouble while using the unit, refer to the information in this section for troubleshooting. See the Reference Manual (flick the Start screen to the left, and then tap [Online Manual] in the App list) for additional troubleshooting information. Starting up The unit does not turn on. - Page 47 Nothing appears on the screen. • The screen may have turned off to save power. Press (power button) or (start button). • Charge the battery. • Install the battery correctly. • Replace the battery with a fully-charged one. • The screen is too dark. See “The screen is too dark.” (page 48). Other startup problems •...
- Page 48 The screen is too dark. • The [Automatically adjust] setting reduced the brightness according to the ambient brightness. Manually adjust the screen brightness. 1. Flick the Start screen to the left, and then in the App list, tap [Settings] → [brightness]. 2.
- Page 49 The indicator does not light during charging. Battery charging ends quickly, or the battery cannot be charged at all. • The AC adaptor cable or USB cable is not connected properly. Confirm all connections, remove the AC adaptor cable or USB cable, and then insert it again.
- Page 50 The screen freezes and no operations can be performed. • Press and hold (power button) and [-] of the Volume button for at least 10 seconds to restart the unit, and then try again.
-
Page 51: Appendix
Appendix Replacing the battery Replacing the battery Place the unit on a flat, stable surface such as a table when replacing the battery. 1. Turn off the unit (page 42). 2. Remove the battery cover (page 35). 3. Lift the battery by pulling on the yellow tab, and then remove the battery. -
Page 52: Factory Data Reset
Factory data reset Factory data reset CAUTION • The following procedure resets all settings and erases any data you have stored in the unit. Back up important data before performing this procedure. 1. Flick the Start screen to the left, and then in the App list, tap [Settings] →... - Page 53 Wi-Fi IEEE802.11 a/b/g/n/ac ® Qualcomm WCN3680 Data transfer rate IEEE 802.11a: up to 54 Mbps IEEE 802.11b: up to 11 Mbps IEEE 802.11g: up to 54 Mbps IEEE 802.11n: • HT20: up to 72.2 Mbps • HT40: up to 150 Mbps IEEE 802.11ac: •...
- Page 54 Bluetooth Version 4.0, Class 1 Transmission method FHSS system Wireless channels used 1 - 79 ch (Low energy: 0 - 39 ch) RF frequency band 2400-2483.5 MHz (including guard bands) Mobile networking LTE, HSPA+, UMTS, EDGE, GPRS, CDMA (certain models 1x, EVDO Rev.A only) SIM card slot...
- Page 55 Sensors Ambient light sensor, digital compass, gyro sensor, acceleration sensor Type A, B, Felica compatible Card slots SD memory card micro SDXC card slot ×1 Magnetic stripe reader (optional) Via gadget interface USB 2.0 port ×1 Interfaces , gadget interface, headset ×1, cradle interface ×1 Touchscreen 10-point capacitive touchscreen with glove...
- Page 56 *1 1 MB = 1,048,576 bytes, 1 GB = 1,073,741,824 bytes *2 Operation has been tested and confirmed using the following Panasonic brand memory cards: SD (up to 2 GB), SDHC (up to 32 GB), SDXC (up to 64 GB). Compatibility with other SD devices is not guaranteed.
- Page 57 *10 When the battery is fully charged (or not being charged) and the unit is off. *11 Rated power consumption *12 Average weight. Actual weight may vary by unit configuration. *13 For models without an optional barcode reader. Weight for models with an optional barcode reader is 435 g (0.96 lb).
-
Page 58: Accessories
Accessories Accessories Product name Model number AC Adaptor CF-AA6373A Car Adaptor CF-AAV1601AW Battery Pack FZ-VZSUX100J Cradle FZ-VEBX111U Holster FZ-VSTX111U... -
Page 59: Limited Warranty
PSCNA, referred hereafter as “Panasonic” will repair the products listed below with new or refurbished parts, free of charge in the Global Panasonic approved location for the period specified below from the date of original purchase in the event of a defect in materials or workmanship. - Page 60 Complete unit replacement fulfills the full obligation and is at the discretion of Panasonic and is limited to once during the coverage term. Refer to the Panasonic web site for full terms and conditions on the above programs. Options and Accessories Warranties...
- Page 61 Panasonic or an Authorized Integrator. Section 2: Limited Warranty - Software Panasonic warrants to you only that the disk(s) or other media on which the Programs are furnished will be free from defects in material and workmanship under normal use for a period of sixty (60) days from the date of delivery thereof to you, as evidenced by your purchase receipt.
- Page 62 This limited warranty only covers failures due to defects in materials or workmanship which occur during normal use. If a unit is sent to a Panasonic Authorized Service Center and no hardware failure is found, the customer will be billed for labor to correct a software issue or reimage the hard drive plus shipping and applicable administrative fees at the current rates set by the service provider.
- Page 63 This limited warranty gives you specific legal rights, and you may also have other rights which vary from state to state. For technical support or to arrange for service on your Panasonic computer product, call our toll-free hotline at 1-855-PSC-TECH (1-855-772-8324).
- Page 64 Two Riverfront Plaza, Newark, NJ 07102, USA © Panasonic System Networks Co., Ltd. 2014 *PGQX1603ZAJ1* PGQX1603ZAJ1 C0714-0074 Printed in Japan...