Panasonic CF-P1 Series Operating Instructions Manual
Panasonic pda user manual
Hide thumbs
Also See for CF-P1 Series:
- Service manual (42 pages) ,
- Supplementary instructions manual (16 pages) ,
- Instruction manual (4 pages)
Table of Contents
Advertisement
Quick Links
OPERATING INSTRUCTIONS
CE
Model No.
Getting Started
Read Me First ......................................................... 3
Precautions............................................................. 5
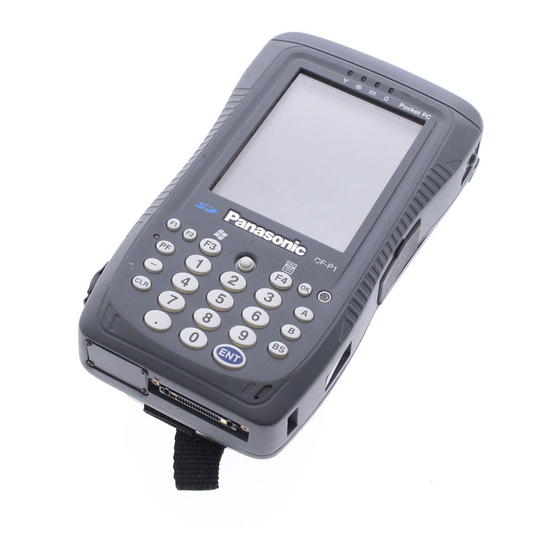
Names and Functions of Parts ............................... 8
First-time Operation .............................................. 11
Operation
Starting Up/Shutting Down ................................... 13
LCD (Touchscreen) ............................................... 15
Keyboard .............................................................. 18
Program Buttons ................................................... 20
Battery Power ....................................................... 21
SD/Multi Media Cards ........................................... 22
Pocket Internet Explorer ....................................... 23
Connecting to Your Computer ............................... 24
Customizing the Computer ................................... 26
Troubleshooting
Dealing with Problems .......................................... 28
Appendix
For Effective Use .................................................. 31
Specifications ....................................................... 32
LIMITED USE LICENSE AGREEMENT ............... 34
LIMITED WARRANTY .......................................... 36
Handheld Computer
CF-P1
Contents
®
Series
Advertisement
Table of Contents

Related Manuals for Panasonic CF-P1 Series


Summary of Contents for Panasonic CF-P1 Series
-
Page 1: Table Of Contents
Connecting to Your Computer ... 24 Customizing the Computer ... 26 Troubleshooting Dealing with Problems ... 28 Appendix For Effective Use ... 31 Specifications ... 32 LIMITED USE LICENSE AGREEMENT ... 34 LIMITED WARRANTY ... 36 Handheld Computer CF-P1 Model No. Contents ® Series... - Page 2 Model No.* Serial No. Code No. Date of Purchase Introduction Illustrations and Terminology in this Manual NOTE CAUTION WARNING What’s in the Box? AC Adaptor ... 1 Model No: CF-AA1527 Cradle ... 1 Model No: CF-VEBP1 Customer's Record Dealer's Name Dealer's Address NOTE CAUTION...
-
Page 3: Read Me First
Read Me First For U.S.A. Federal Communications Commission Radio Frequency Interference Statement Warning Notice for the products using LCD... - Page 4 Read Me First For Canada Lithium Battery Lithium Battery! Pile au lithium!
-
Page 5: Precautions
Precautions Handling... - Page 6 Precautions Peripherals Battery Pack...
- Page 7 NOTE...
-
Page 8: Names And Functions Of Parts
Names and Functions of Parts Internal Microphone Cursor Control Program Buttons Cursor Control LED Indicators Stylus LCD (Touchscreen) SD/Multi Media Card Slot Power Switch Infrared Communication Port LED Indicators Keyboard... - Page 9 Attaching the Strap CAUTION Speaker Battery Pack Headphone Jack Reset Switch DC-IN Jack Expansion Connector...
- Page 10 Names and Functions of Parts Connecting/Removing the Cradle Connecting the Cradle DC-IN Jack Removing the Cradle Press the release lever. While firmly holding the cradle and pressing down on the release lever with one hand, lift the computer up with the other hand. DC-IN Jack Cover Release Lever...
-
Page 11: First-Time Operation
First-time Operation Install the battery pack. NOTE NOTE Connect your computer to a power outlet. NOTE Battery Pack Cover Latch Arrow Mark Latch... - Page 12 First-time Operation CAUTION Reset Switch Turn your computer on This concludes the first-time use operation guidelines.
-
Page 13: Starting Up/Shutting Down
Starting Up/Shutting Down Starting Up (from the second time) Power Switch NOTE To turn only the LCD backlight on: To turn both the LCD backlight and keyboard backlight To turn the backlights off: Power Switch... - Page 14 Starting Up/Shutting Down [Start] Menu and Taskbar [Start] Button Task Tray Shutting Down (power off) Power Switch...
-
Page 15: Lcd (Touchscreen)
LCD (Touchscreen) Using the Stylus Tapping Double-Tapping Dragging Handling the Stylus... -
Page 16: Calibrating The Screen
LCD (Touchscreen) Handling the Touchscreen Calibrating the Screen Tap [Start] - [Settings] - [Control Panel] in or- der, and then double-tap [Stylus]. Tap [Calibration] - [Recalibrate]. "+" is displayed in the center, upper left, lower left, lower right, and upper right portions of the screen, in that order. - Page 17 LCD Backlight ON/OFF Setting the Timeout Function of the LCD Backlight Tap [Start] - [Settings] - [Control Panel] in order, and then double-tap [Back- light]. Battery use setting: AC adaptor use setting: Tap the [External] tab. Tap [OK]. Tap the [Battery] tab.
-
Page 18: Keyboard
Keyboard Alphabet Keys Mode Key (Shift) Key Mode Key Example (Shift) Key Cancel Key Backspace Key Enter Key " SOFT SPACE Cancel Key Backspace Key Enter Key Delete Key CAP (Shift) Key SPACE/SOFT Key... - Page 19 Delete Key CAP (Shift) Key Inputting non-capital characters in the caps lock mode: SPACE/SOFT Key Changing the Keyboard Repeat Settings Tap [Start] - [Settings] - [Control Panel] in order, and then double-tap [Key- board]. Tap the [Repeat] tab and choose each setting. Tap [OK].
-
Page 20: Program Buttons
Program Buttons NOTE Changing the Assignment of a Program Button Tap [Start] - [Settings] - [Control Panel] in order, and then double-tap [But- tons]. Choose each setting. Tap [OK]. Program Buttons Option Button... -
Page 21: Battery Power
Battery Power Remaining Battery Tap [Start] - [Settings] - [Control Panel] in order, and then double-tap [Power]. Tap the [Battery] tab. When the Remaining Battery Charge Becomes Low Replacing the Battery Pack CAUTION... -
Page 22: Sd/Multi Media Cards
SD/Multi Media Card NOTE Installing/Removing an SD/Multi Media Card Open the SD/Multi Media card slot cover. Installing Removing Close the SD/Multi Media card slot cover. CAUTION SD/Multi Media Card Slot... -
Page 23: Pocket Internet Explorer
Pocket Internet Explorer Getting Connected To run Pocket Internet Explorer... -
Page 24: Connecting To Your Computer
Install ActiveSync in your computer and make your connection settings on the computer. (You can download ActiveSync from the WEB.) Follow the steps below when using the USB autosync cable to sync. After the "Hardware Setup Wizard" is complete CF-P1 sync by using the ActiveSync program. CAUTION... - Page 25 When Connecting the CF-P1 Directly with a Computer Expansion Connector of the CF-P1 USB Autosync Cable Removing Serial Autosync Cable When Connecting the CF-P1 with a Computer via the Cradle Expansion Connector of the Cradle Removing Using the Infrared Communication Port Infrared Communication Port...
-
Page 26: Customizing The Computer
Customizing the Computer Backlight Buttons Communications Date/Time Dialing Display Input Panel Keyboard Network Owner... - Page 27 Password Power Regional Settings RF Serial Stylus System Volume & Sounds...
-
Page 28: Dealing With Problems
Dealing with Problems Resetting Your Computer Performing a Reset Reset Switch Performing an All Reset... - Page 29 Troubleshooting Starting Up The computer does not turn on. Or, there is no dis- play when the computer is turned on. The date and time are in- correct. The computer shuts down automatically. Application Software The computer locks up during the execution of an application, or the execu- tion speed becomes notice- ably slower.
- Page 30 Dealing with Problems Display It is hard to view the LCD. The cursor cannot be con- trolled. The cursor does not prop- erly correspond to a stylus tap.
-
Page 31: For Effective Use
For Effective Use Maintenance Areas excluding the LCD CAUTION... -
Page 32: Specifications
Specifications Model No. Memory (RAM/ROM) Video Memory LCD Type Displayed Colors Keyboard Pointing Device Slots Interface Speaker/Microphone Sound Battery Pack Battery Sub-Battery AC Adaptor* Power Consumption* Operating System CF-P1S3BZZ3M Intel ® StrongARM* SA-1110 Microprocessor 206 MHz Instruction Cache Memory: 16 Data Cache Memory: 8 / 32 MB (Flash) 256 KB... - Page 33 Environment Physical Dimensions (W x H x D) Weight In use Temperature -20 ° to 50 ° {-4 ° to 122 ° } Humidity Not in use Temperature -25 °C to 60 °C {-13 °F to 140 °F} Humidity x 41 x 173 (excluding the strap) Approx.
-
Page 34: Limited Use License Agreement
LIMITED USE LICENSE AGREEMENT THE SOFTWARE PROGRAM(S) (“PROGRAMS”) FURNISHED WITH THIS PANASONIC (“PRODUCT”) ARE LICENSED ONLY TO THE END-USER (“YOU”), AND MAY BE USED BY YOU ONLY IN ACCORDANCE WITH THE LICENSE TERMS DESCRIBED BELOW. YOUR USE OF THE PROGRAMS SHALL BE CONCLUSIVELY DEEMED TO CONSTITUTE YOUR ACCEPTANCE OF THE TERMS OF THIS LICENSE. - Page 35 Contrat de licence d’usage limité Le(s) logiciel(s) (les “Logiciels”) fournis avec ce produit Panasonic concédés en licence à l’utilisateur ultime (“vous”), et ils ne peuvent être utilisés que conformément aux clauses contractuelles ci-dessous. En utilisant les logiciels, vous vous engagez de manière définitive à...
-
Page 36: Limited Warranty
God. In addition, Panasonic shall have no obligation for any defects in the disk(s) or other media if you have modified, or attempted to modify any Program. - Page 37 No Coverage – This limited warranty does not apply if the disk(s) or other media has been used in other than a Panasonic product, or in environmental conditions other than those specified by PCI or the manufacturer, or if subjected to misuse, neglect, mishandling, modification or attempted modification of the program, or if damaged by accident or act of God.
- Page 38 Memo...
- Page 39 Copyright Disclaimer Trademarks...
- Page 40 Panasonic Computer Solution Company 50 Meadowlands Parkway, Panazip 2F-5, Secaucus, NJ 07094 © 2001 Matsushita Electric Industrial Co., LTD. All Rights Reserved. Printed in Japan Panasonic Canada Inc. 5770 Ambler Drive Mississauga, Ontario L4W 2T3 SS0901-1121 DFQX5273ZC...