Table of Contents
Advertisement
Operating Instructions
Smart Handheld
EB-3901
Operating Instructions
Tablet Computer
FZ-E1
Model No.
series
Thank you for purchasing a Panasonic product.
Please read this document carefully before using the product
and keep this document in a safe place for future reference.
For detailed information about this product, refer to the Reference
Manual, which is available by flicking the Start screen to the left,
then tapping [Online Manual] in the App list. (Download required.)
Advertisement
Table of Contents

Related Manuals for Panasonic FZ-E1 series


Summary of Contents for Panasonic FZ-E1 series
- Page 1 FZ-E1 Model No. series Thank you for purchasing a Panasonic product. Please read this document carefully before using the product and keep this document in a safe place for future reference. For detailed information about this product, refer to the Reference Manual, which is available by flicking the Start screen to the left, then tapping [Online Manual] in the App list.
-
Page 2: Table Of Contents
Table of Contents Introduction.............. 3 Safety precautions ............3 Regulatory information..........13 Handling cautions ............23 Trademark and license information ......26 Terms and illustrations in this document ..... 27 Disclaimers ..............28 Getting Started............29 Confirming the included items ........29 Description of parts............ -
Page 3: Introduction
Introduction Safety precautions Safety precautions To reduce the risk of injury, loss of life, electric shock, fire, malfunction, and damage to equipment or property, always observe the following safety precautions. Explanation of symbol word panels The following symbol word panels are used to classify and describe the level of hazard, injury, and property damage caused when the denotation is disregarded and improper use is performed. - Page 4 WARNING When using the product for extended periods, do not expose your skin to the product or AC adaptor for a prolonged period. Generated heat can cause low-temperature burns. Do not disassemble, repair, or modify the product. These may cause electric shock or fire. Do not insert foreign objects into the product.
- Page 5 Do not touch the product or cables during lightning storms if the product is connected to an AC adaptor. There is a remote chance of electric shock. Close the headset jack cover and interface cover when using the product near water or other liquids, and in areas with a high concentration of moisture, steam, dust, oily vapors, etc.
- Page 6 Do not leave any water droplets on the product. Water droplets may cause the DC input jack, micro USB port, or headset jack to short circuit. Do not puncture the product with a sharp object. This may cause overheating or fire. Do not turn the volume up too loud when using headphones.
- Page 7 Do not do anything that may damage the AC cord, the AC plug, or the AC adaptor. Do not damage or modify the cord, place it near hot tools, bend, twist, or pull it forcefully, place heavy objects on it, or bundle it tightly.
- Page 8 Do not place the product on an unstable surface. The product may drop, resulting in injury. Take a 10–15 minute break every hour when using the product. Using the product continuously for extended periods may cause strain injuries and may have detrimental health effects on your eyes, hands, or other parts of your body.
- Page 9 Do not stack the product. If balance is lost, the product may fall over or drop, resulting in an injury. For models with an optional barcode reader: Do not look directly at the white beam for an extended period or point the barcode reader at another person's eyes. This may damage the eyes.
- Page 10 Confirm the safety and security of software before downloading or installing it on the product. Installing malware or viruses can cause malfunction and the disclosure of any private information stored in the product, or may cause excessive sound volume. Turn off the product before removing the SIM card or SD card. Failure to do so can result in data loss or damage to the SIM card, the SD card, or the product.
- Page 11 Do not short the positive (+) and negative (–) contacts. Do not carry the battery around or store it together with necklaces, hairpins, etc. Overheating, fire, or rupture may result. Do not throw the battery into a fire or expose it to excessive heat.
- Page 12 If the battery smells or leaks electrolyte, keep the battery away from fire. Overheating, fire, or rupture may result. Do not place the battery in microwave ovens or pressurized containers. Sudden application of heat may damage the battery’s case, resulting in electrolyte leakage, overheating, smoke, rupture, or fire.
-
Page 13: Regulatory Information
Regulatory information Regulatory information This product and your health This product, like other radio devices, emits radio frequency electromagnetic energy. Because this product operates within the guidelines found in radio frequency safety standards and recommendations, we believe this product is safe for use by consumers. - Page 14 Information for Users on Collection and Disposal of Old Equipment and used Batteries These symbols on the products, packaging, and/or accompanying documents mean that used electrical and electronic products and batteries should not be mixed with general household waste. For proper treatment, recovery and recycling of old products and used batteries, please take them to applicable collection points, in accordance with your national legislation and...
- Page 15 Note for the battery symbol (bottom two symbol examples): This symbol might be used in combination with a chemical symbol. In this case it complies with the requirement set by the Directive for the chemical involved. Additional safety precautions Posted facilities •...
- Page 16 shielded from external RF energy. Your physician may be able to assist you in obtaining this information. Aircraft • Turn off the product after boarding an aircraft, when instructed by flight staff. Obey instructions from flight staff regarding the use of the product in flight.
- Page 17 • Only qualified personnel should install the product in a vehicle. Check regularly that the product is securely mounted in your vehicle and operating properly. • Do not place or install the product in the area over the air bag or in the air bag deployment area.
- Page 18 Laser device caution (for models with an optional barcode reader) CAUTION! THIS PRODUCT UTILIZES A LASER. USE OF CONTROLS, ADJUSTMENTS OR PERFORMANCE OF PROCEDURES OTHER THAN THOSE SPECIFIED HEREIN MAY RESULT IN HAZARDOUS RADIATION EXPOSURE. DO NOT OPEN COVERS AND DO NOT REPAIR YOURSELF. REFER SERVICING TO QUALIFIED PERSONNEL.
-
Page 19: Intended Use
, life- support systems or other equipment/devices/systems that are involved with ensuring human life or safety. Panasonic will not be responsible for any liability resulting from the use of this product arising out of the foregoing uses. - Page 20 Panasonic cannot be held responsible in any way for any damages or loss resulting from the use of this unit in these types of equipment, devices or systems, etc.
- Page 21 Operation of the device in the 5 GHz frequency band is restricted to indoor use only. Declaration of Conformity (DoC) Hereby, Panasonic declares that this Tablet Computer is in compliance with the essential requirements and other relevant provisions of Radio & Telecommunications Terminal Equipment (R&TTE) Directive 1999/5/EC.
- Page 22 Ecodesign information Ecodesign information under EU Regulation (EC) No.1275/2008 amended by (EU) Regulation No.801/2013. From 1 January 2015. please visit here: www.ptc.panasonic.eu click [Downloads] → Energy related products information (Public) Power consumption in networked standby and guidance are mentioned in the web site above.
-
Page 23: Handling Cautions
There is a danger of severe electrical shock if the cut off plug is inserted into any 13-ampere socket. How to replace the fuse The location of the fuse differs according to the type of AC mains plug (figures A and B). Confirm the AC mains plug fitted and follow the instructions below. - Page 24 While taking usage conditions and safety into consideration, if the unit becomes hot, the unit may stop certain functions or restart. This is not a malfunction. • If the product’s operating system is upgraded, product functions and operating procedures may change and certain apps may not function any longer.
- Page 25 • Store the battery in environments with an ambient temperature of -20 °C to 35 °C. If the battery is stored in other environments, battery performance and battery life may be reduced. • If battery charging is not completed after the specified charging time has passed, remove the battery from the unit.
-
Page 26: Trademark And License Information
Bluetooth SIG, Inc., and any use of such marks by Panasonic Corporation is under license. • microSDXC Logo is a trademark of SD-3C, LLC. • The N-Mark logo is a trademark or registered trademark of NFC Forum. -
Page 27: Terms And Illustrations In This Document
Terms and illustrations in this document Terms and illustrations in this document • Panasonic Corporation and/or its affiliates are referred to collectively as “we” or “Panasonic”. • This product supports microSD, microSDHC, and microSDXC memory cards. In this document, the term “SD card” is used as a generic term for any supported memory card. -
Page 28: Disclaimers
Disclaimers Disclaimers Panasonic shall not be liable for loss of data or other incidental or consequential damages resulting from the use of this product. This product can download, store, forward, and receive additional content, such as applications, ringtones, contact information, and media files. -
Page 29: Getting Started
Getting Started Confirming the included items Confirming the included items The following items are included. If any items are missing, please contact your technical support representative. – Main unit ×1 – Battery ×1 – Battery cover ×1 (Certain models only) –... -
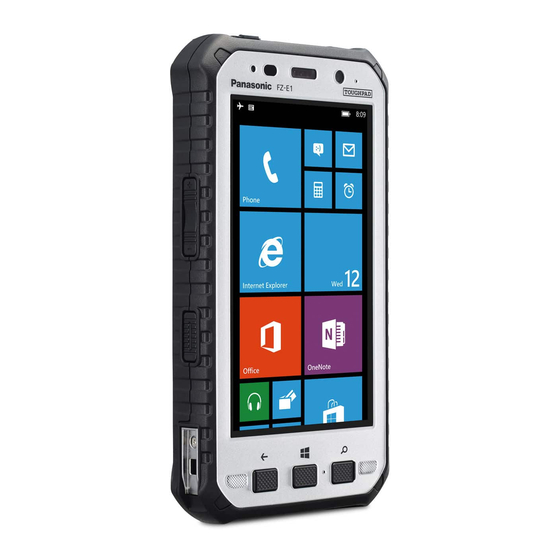
Page 30: Description Of Parts
Description of parts Description of parts Front view A Indicator Orange, lit: Battery is charging Green, lit: Battery charging is complete Red, lit: Battery level is 10 % or less of a full charge... -
Page 31: Start Button
B Ambient light sensor, proximity sensor The ambient light sensor automatically adjusts the screen brightness. The proximity sensor prevents accidental operations on the touch panel during phone calls. C Earpiece D Front camera E Microphone F NFC antenna (internal) When using an NFC card or other NFC device, touch the card/ device to this area of the unit. -
Page 32: Rear View
Rear view The battery cover and battery are omitted in this illustration. A Microphone B Flash Can be used when taking pictures. Also lights if you open the battery cover while the unit is turned on. C Rear camera D Card access cover E Cover latch F Cover latch lock switch G Expansion bus connector... - Page 33 I Wi-Fi, Bluetooth antenna (internal) J Volume buttons K Side button Used when using the barcode reader (certain models only). L Cradle rail Used when connecting the unit to an optional cradle. M Cellular antenna (internal) *1 The registered function can be changed. See the Reference Manual.
-
Page 34: Opening And Closing The Interface Cover
Opening and closing the interface cover Opening and closing the interface cover Opening the interface cover Unlock the cover by sliding 2. Open the cover by pulling the switch away from . the top edge of the cover (i.e., the edge closest to the top of the unit) away from the unit. -
Page 35: Removing The Battery Cover
Removing the battery cover Removing the battery cover 1. Unlock the cover latch by sliding the switch (circled in the illustration) away from (A), and then open the cover latch by sliding it toward (B). 2. While holding the bottom corners of the battery cover (circled in the illustration), lift the battery cover (A) and then remove the cover (B). -
Page 36: Attaching The Battery Cover
Attaching the battery cover Attaching the battery cover 1. Insert the tabs on the battery cover into the corresponding slots in the battery chamber (A), and then lower the battery cover into place (B). • The edge of the battery cover with two tabs (circled in the illustration) should face the bottom of the unit. - Page 37 3. Make sure that the battery cover is properly sealed. • Two red lines are painted on the inside edges of the battery cover. If the red lines (circled in the illustration) are visible from the side of the unit after the battery cover is closed, the cover is not properly sealed.
-
Page 38: Installing A Sim Card (Certain Models Only)
Installing a SIM card (certain models only) Installing a SIM card (certain models only) 1. Remove the battery cover (page 35) and battery if necessary. • To remove the battery, lift the battery by pulling on the yellow tab and then remove the battery. 2. -
Page 39: Installing An Sd Card
Installing an SD card Installing an SD card 1. Remove the battery cover (page 35) and battery if necessary. • To remove the battery, lift the battery by pulling on the yellow tab and then remove the battery. 2. Open the card access cover. 3. -
Page 40: Installing The Battery
Installing the battery Installing the battery 1. Remove the battery cover (page 35) if necessary. 2. Insert the terminal end of the battery into the battery chamber. • Insert the battery so that the battery label and the yellow tab are facing up, and that the terminals on the battery line up with the terminals inside the battery chamber. -
Page 41: Charging The Battery
Charging the battery Charging the battery You can charge the unit by connecting it to a power outlet using an AC adaptor (page 58), and also by connecting it to the USB port of a computer or other device using a USB cable. The indicator lights in orange while the battery is charging, and lights in green when charging is complete. -
Page 42: Turning The Unit On And Off
Confirming the battery level The battery level is displayed in the upper-right corner of the screen, in the status bar. Fully Charging Very low charged You can also confirm the specific amount of battery level remaining. Flick the Start screen to the left, and then in the App list, tap [Settings] →... -
Page 43: Screen Display
Configuring the unit for the first time The first time you turn the unit on, you will be prompted to configure different settings. Follow the on-screen instructions and configure each item as needed. An Internet connection is required to configure certain items. - Page 44 Using the status bar The status icons displayed on the status bar at the top of the screen indicate the current status of the device. • See the Reference Manual for an explanation of the icons. Status bar Using the action center Detailed information about incoming calls, text messages, and app update information is displayed in the action center.
-
Page 45: Basic Operations
Basic operations Basic operations Adjusting the volume 1. Press [+] or [-] of the Volume button. • The volume bar is displayed at the top of the screen. (It disappears after several seconds.) Volume bar 2. Press [+] or [-] to set the volume at an appropriate level. •... - Page 46 tapping and holding an item. To close the menu, tap any place outside of the menu. Displaying the App switcher When multiple apps are active, press and hold (back button) to display the App switcher. Flick between the screens and tap one to switch to that screen.
-
Page 47: Troubleshooting
Troubleshooting If you experience any trouble while using the unit, refer to the information in this section for troubleshooting. See the Reference Manual (flick the Start screen to the left, and then tap [Online Manual] in the App list) for additional troubleshooting information. Starting up The unit does not turn on. - Page 48 Nothing appears on the screen. • The screen may have turned off to save power. Press (power button) or (start button). • Charge the battery. • Install the battery correctly. • Replace the battery with a fully-charged one. • The screen is too dark. See “The screen is too dark.” (page 49). Other startup problems •...
- Page 49 The screen is too dark. • The [Automatically adjust] setting reduced the brightness according to the ambient brightness. Manually adjust the screen brightness. 1. Flick the Start screen to the left, and then in the App list, tap [Settings] → [brightness]. 2.
- Page 50 The indicator does not light during charging. Battery charging ends quickly, or the battery cannot be charged at all. • The AC adaptor cable or USB cable is not connected properly. Confirm all connections, remove the AC adaptor cable or USB cable, and then insert it again.
- Page 51 The screen freezes and no operations can be performed. • Press and hold (power button) and [-] of the Volume button for at least 10 seconds to restart the unit, and then try again. Troubleshooting...
-
Page 52: Appendix
Appendix Replacing the battery Replacing the battery Place the unit on a flat, stable surface such as a table when replacing the battery. 1. Turn off the unit (page 42). 2. Remove the battery cover (page 35). 3. Lift the battery by pulling on the yellow tab, and then remove the battery. -
Page 53: Specifications
2. Tap [reset your phone] → [yes]. • The unit restarts when the factory data reset is complete. Specifications Specifications Typical unit specifications and certain options are described below. Unit configuration may vary. Model No. FZ-E1 ® Qualcomm MSM8974AB 2.3 GHz quad-core CPU Memory 2 GB Storage... - Page 54 Wi-Fi Transmission method OFDM system, DSSS system Wireless channels used IEEE 802.11a / IEEE 802.11n (5 GHz) / IEEE 802.11ac • W52 (36, 38, 40, 42, 44, 46, 48 ch) • W53 (52, 54, 56, 58, 60, 62, 64 ch) •...
- Page 55 Camera Front 1.3 megapixels Video: 1280×720 pixels, 30 fps Still: 1280×960 pixels Rear 8 megapixels Video: 1280×720 pixels, 30 fps Still: 3264×2448 pixels GPS 2 m CEP50 (±2 m to 4 m), GLONASS Barcode reader 1D, 2D compatible (certain models only) Enhanced data FIPS 140-2 level-1 compliant...
- Page 56 Specifications are subject to change without notice. *1 1 MB = 1,048,576 bytes, 1 GB = 1,073,741,824 bytes *2 Operation has been tested and confirmed using the following Panasonic brand memory cards: SD (up to 2 GB), SDHC (up to...
- Page 57 32 GB), SDXC (up to 64 GB). Compatibility with other SD devices is not guaranteed. *3 Does not guarantee operation of all USB-compatible peripherals. *4 Single-point operation when rain sensing touch mode is enabled. *5 The AC adaptor is designed for use with power sources that supply up to 240 V AC.
-
Page 58: Accessories
Accessories Accessories Product name Model number AC Adaptor CF-AA6373A Car Adaptor CF-AAV1601AW Battery Pack FZ-VZSUX100J Cradle FZ-VEBX111U Holster FZ-VSTX111U... -
Page 59: Standard Limited Warranty
This warranty only applies to new Panasonic Toughbooks or Toughpads purchased in the EEA and Switzerland and Turkey. - Page 60 We strongly recommend that customers backup their data before sending back their unit to an Authorised Service Provider. Panasonic shall not be liable for loss of data or other incidental or consequential damages resulting from the use of this product, or arising out of any breach of this warranty.
- Page 61 God. In addition, Panasonic shall have no obligation for any defects in the disk(s) or other media if you have modified, or attempted to modify any Program.
- Page 62 Panasonic assumes no risk of and shall not in any case be liable for any damages, including, without limitation, any special, incidental, consequential, or...
- Page 63 Italy: +39 800986915 Spain: +34(0)901101157 +44(0) 8000884324 e-mail: toughbooksupport@eu.panasonic.com Czech speaking service 0800 143234 (in country only) Hungarian speaking service 06800 163 67 (in country only) Polish speaking service 00800 4911558 (in country only) Romanian speaking service 0800 894 743 (in country only)
- Page 64 Web Site : http://panasonic.net/ © Panasonic System Networks Co., Ltd. 2014 CPE02903ZA C1014-0 Printed in UK...