Table of Contents
Advertisement
Advertisement
Table of Contents

Related Manuals for Blanco BOSE99XP


Summary of Contents for Blanco BOSE99XP
- Page 1 Instruction Manual for 90cm Electric Oven BOSE99XP...
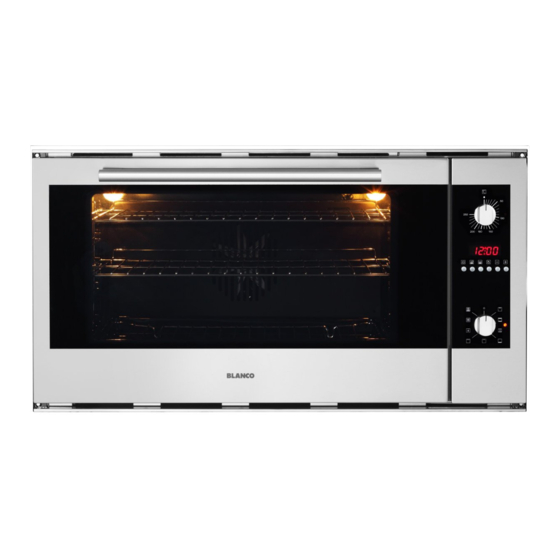
- Page 2 You will find that the clean lines and modern look of your Blanco oven blends in perfectly with your kitchen décor. It is easy to use and performs to a high standard.
-
Page 3: Table Of Contents
Table of Contents Safety Instructions Warnings Maintenance and cleaning Installation of your Oven Electrical Installation Oven Racks Accessories Oven Presentation Cooking Functions Instructions for Use Oven Door Removal Replacement of the Oven Light Self-Cleaning Catalytic Liners Guidance Temperature and Time Temperature for Cooking Cooking Recipes... -
Page 4: Safety Instructions
Safety Instructions Important - When you receive the appliance, unpack it or have it unpacked immediately. Give it an overall inspection. Make note of any concerns or reservations on the delivery slip and make sure to keep a copy of this form. Keep this user guide with your appliance. If the appliance is ever sold or transferred to another person, ensure that the new owner receives the user guide. -
Page 5: Maintenance And Cleaning
- Never place aluminium foil directly in contact with the floor of the oven, as accumulated heat may cause deterioration of the enamel. - Do not place heavy weights on the open oven door, and make sure that children are able neither to climb nor sit on it. -
Page 6: Installation Of Your Oven
Installation of your oven TALLATION OF YOUR OV To install the oven into the kitchen a cut out should be made in accordance with the dimensions shown in below. Please allow for 3/ 4mm of a difference in the dimensions provided below. Please measure the original product to ensure that the cut out details are correct. -
Page 8: Electrical Installation
Electrical Installation BOSE99XP is a 15 amp appliance which is supplied with a cord. It requires hard wiring. WARNING This apparatus must be earthed. The oven is only for domestic use. The feed voltage and the absorbed power are as indicated on the data plate attached to the left-hand side upright, which can be seen when the oven door is open. -
Page 9: Oven Racks
Oven Racks WARNING Never use aluminum foil to cover the oven racks or to line the oven. It can cause damage to the oven liner if heat is trapped under the foil. WARNING Make sure you do not force it to avoid damage to the enamel. The oven has rack guides at five levels as per the below image. -
Page 10: Accessories
Accessories BOSE99XP Accessories which are provided with this oven are as follows: 2 x shelves 1 x grill pan 1 x grill pan insert... -
Page 11: Oven Presentation
Oven Presentation The oven control panel is made up of 2 knobs and one touch control timer display. - 1 knob for the temperature control - 1 knob for the oven functions – Touch control timer display as per the below image. 6 Key Electronic Timer Please note that the meaning of the 6 keys are as follows: Timer key. - Page 12 Luminous Symbols When ‘AUTO’ blinks, this means that the timer is in automatic mode but no setting has yet been made. When ‘AUTO’ remains permanently alight, this means that the timer is in automatic mode and already programmed. Automatic cooking Timer in operation Plus ‘AUTO’...
- Page 13 This done the display will revert to the current time and ‘AUTO’ reappears, confirming that the settings have been acknowledged and memorized. At 13.30 (14.00 minus 30 minutes) the oven switches on automatically and the symbol ‘AUTO’ will appear for as long as cooking continues.
-
Page 14: Cooking Functions
Cooking Functions BOSE99XP This oven has 9 specific cooking functions as follows: Symbol Description Light Top and bottom elements/Traditional /Conventional Traditional with fan ( Fan assist) Bottom element only Half grill Full grill Half grill with fan... - Page 15 Fan forced Fan forced with lower element...
-
Page 16: Instructions For Use
Instructions for Use Top and bottom elements only A classic system also known as conventional cooking that uses upper and lower heat suitable for cooking a single dish. It is a good idea to insert the food when the oven has reached the pre-set temperature. -
Page 17: Oven Door Removal
Oven Light Control In order to achieve the best results in terms of performance and energy consumption, this function is automatically managed by the oven during its functioning. If you want to turn it on at any time, just turn the function knob on the control panel. Oven Door Removal WARNING Make sure that:... -
Page 18: Replacement Of The Oven Light
Replacement of the Oven Light WARNING Make sure that: The oven and lights are cool and power to the oven has been turned off before replacing the light bulb(s). Failure to do so could result in electrical shock or burns. The lenses must be in place when using the oven. -
Page 19: Self-Cleaning Catalytic Liners
Self-Cleaning Catalytic Liners Our smooth walled ovens are fitted with self-cleaning panels to cover the walls on the rear and sides. These special panels are simply hooked on to the walls before the side frames are fitted. They are coated in special, micro-porous catalytic enamel which oxidises and gradually vaporises splashes of grease and oil at cooking temperatures above 200°... -
Page 20: Guidance Temperature And Time Temperature For Cooking
Guidance Temperature and Time Temperature for Cooking Every function has a set temperature chosen on the basis of cooking tests using frequently used recipes and can easily be adjusted to suit personal preference. The following table contains the results of the cooking tests carried out in our laboratories by a professional chef. -
Page 22: Cooking Recipes
Cooking Recipes Beef Wellington Preheat oven to 180-190°C on Fan Assist or 200ºC on Fan Forced Ingredients: 2 tablespoons extra virgin olive oil 4 pieces of beef fillet (150g each) 2 tablespoons brandy 150g mushrooms, finely chopped 2 tablespoons chopped spring onion 4 sheets puff pastry 4 tablespoons fresh breadcrumbs 50g chicken liver pate- Optional... - Page 23 Berry and Ricotta Tart Preheat oven 170-180 ‘C on Bottom Element and Fan. Ingredients: Pastry Filling 125g butter, chilled and cubed 200g fresh ricotta 1 egg lightly beaten ½ cup cream 1/3 cup icing sugar 2 eggs ½ cup group almonds 2/3 cup castor sugar 1 ½...
- Page 24 Mediterranean Pizza Preheat oven to 180’ C on Fan Forced. Method: Bake for 15-20 min Ingredients: 1 uncooked Pizza Base Marinated artichokes 2 tablespoons of pasta sauce Kalamata olives Chargrilled eggplant Sundried tomatoes Chargrilled capsicum Zucchini diced 1 cup pizza cheese Mushrooms sliced 2 tablespoons parmesan cheese Onion diced...
- Page 25 Spinach, Ricotta and Goats Cheese Muffins Preheat oven to 170°C on Fan Forced. Ingredients: 30g butter 1 cup milk 70g baby spinach 1 ½ cups plain flour 1 tablespoons baking powder 1 tablespoon chopped rosemary 1 tablespoon chopped chives 1 garlic clove crushed 2 tablespoons parmesan cheese (finely grated) 150g goats cheese fetta 1 egg, lightly whisked...
- Page 26 We appreciate your feedback. Please review our products on www. blanco-australia.com...