Table of Contents
Advertisement
Quick Links
Advertisement
Table of Contents
Troubleshooting

Related Manuals for GoVideo D2730


Summary of Contents for GoVideo D2730
-
Page 2: Insert Remote Control Batteries
Macrovision Corporation. Reverse engineering or disassembly is prohibited. GoVideo shall not be liable for any errors contained herein or for any damages arising out of or related to this document or the information contained herein, even if GoVideo has been advised of the possibility of such damages. -
Page 3: Table Of Contents
1 - Getting Started Welcome ... 5 • Features... 5 • Compatible Discs... 5 Player Overview... 6 • Front Panel Controls... 6 • Front Panel Display ... 7 • Remote Control ... 8 • Rear Panel... 10 2 - Basic Setup Step 1 - Set Up Your Network ... - Page 4 • Disc Menu Navigation... 32 • Additional Disc Playback Options ... 32 Special Disc Features... 33 • Title... 33 • A-B Repeat ... 33 • Zoom/View... 33 • Angle ... 33 • Subtitle... 34 • Audio ... 34 • Enhance ... 34 •...
-
Page 5: Getting Started
:: Welcome Congratulations on your purchase of the D2730, the world’s first networked DVD player. Now you can enjoy premium DVD playback, plus all your favorite digital media files, including music, movies, and pictures—all in the comfort of your living room. -
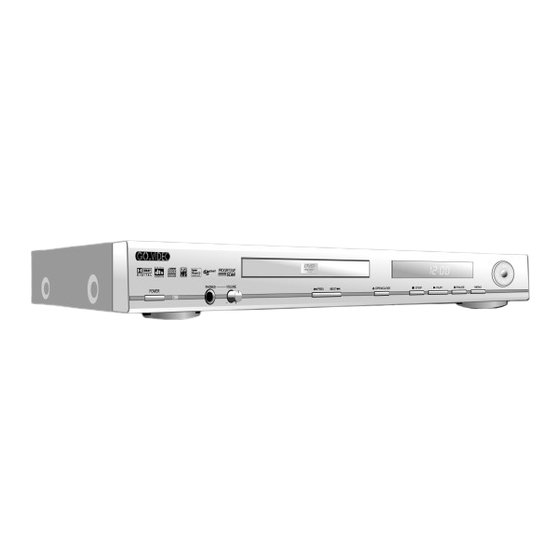
Page 6: Player Overview
:: Player Overview Front Panel Controls 1 POWER Press to power the player on and off. • When this button is pressed, the red Power LED is lit and the unit enters Standby/On mode. Use the STANDBY/ON key on the remote control to switch between On (fully operational) and Standby (low power) modes. -
Page 7: Front Panel Display
Front Panel Display 1 DVD Indicator Lights if a DVD disc is loaded. 2 Play Status Indicator Rotates during disc playback. 3 PBC Indicator Lights if a VCD disc is loaded with PBC (Playback Control). 4 Track Indicator Displays the current track number. 5 Time Indicator Displays the current playback time in hours, minutes and seconds. -
Page 8: Remote Control
Remote Control 1 STANDBY/ON Press to switch the player between Standby (low power) and On (fully operational) modes. • The blue LED behind the front panel arrow keys glows when the unit is On. • This key is only functional when the front panel POWER button is pressed and the red Power LED is lit. - Page 9 17 A-B Press to repeat an audio or video segment between two points (A and B) during disc playback. 18 TITLE Press to display DVD title menus for discs with multiple titles. If a disc has a single title, TITLE functions like MENU. 19 ANGLE Press to view alternate angles during DVD playback (if available).
-
Page 10: Rear Panel
Rear Panel 1 Network Card Slot Insert the supplied PCMCIA to 10/100 Mbps Ethernet card. For wireless operation, use a 16-bit PCMCIA 802.11b wireless net- work card (sold separately); performance may vary by brand of card. 2 5.1-channel Audio Outputs Connect to the analog audio inputs of a 5.1-channel amplifier. -
Page 11: Basic Setup
This chapter includes everything you need to get started using your networked DVD player. First, you will confirm that your home network is working, then you will set up the Media Server software on your PC, and finally you will connect the D2730 to your television and home net- work. -
Page 12: Step 1 - Set Up Your Network
If you do not already have a network installed, you will need to purchase the network components of your choice and follow the installation instructions provided by the manufacturer. The D2730 easily connects to all three major types of home networks, including: Wired Ethernet Network •... -
Page 13: Step 2 - Set Up The Media Server
Microsoft Windows 98 SE, Me, 2000 or XP Install Media Server Software The GoVideo D5 Media Server software maintains a library of all the music, movie, and picture files stored on your PC. To install the Media Server software: 1 Turn on your PC and close all open programs. -
Page 14: Import Your Media Files
You must use either this basic TV connection or the Progressive/Com- ponent Video connection (see page 15) the first time you hook up your D2730. The S-Video connection will not be visible unless you enable it in the menu system (see page 43). -
Page 15: Optional Video Connections
Optional Video Connections To connect your DVD player to a TV equipped with S-Video, Com- ponent Video, or Progressive Video inputs: S-Video Connect an S-Video cable (not included) from the S-VIDEO jack on the back panel of the player to the S-Video input on your TV. -
Page 16: Install Network Card
4 Turn on your audio system (if applicable), and select the input connected to the DVD player. 5 The GoVideo splash screen will appear on your TV. • Basic Setup is complete! Please refer to Chapters 3 and 4 to begin enjoying the networking and DVD playback features of your D2730. -
Page 17: Network Operations
Playing Media Files on TV To stream media files from your PC to your TV: 1 Make sure your PC is on and the GoVideo D5 Media Server software is installed before turning on the DVD player. 2 Press NETWORK on the remote control to enter Network mode. -
Page 18: Playing Music
Playing Music To play MP3 or WMA music files: 1 From the Network menu, select My Music. 2 Select a category (e.g., Artists). 3 Select the desired artist. 4 Select a song by the artist. 5 Press ENTER to play just the selected song, or press PLAY songs in the selected folder in a continuous loop. -
Page 19: Viewing Pictures
Viewing Pictures To view JPEG image files: 1 From the Network main menu, select My Pictures. 2 Select a category (e.g., Albums). 3 Select the desired Album. 4 Select the desired picture from the list. 5 Press ENTER on the remote control to view the selected picture, or press PLAY view a slideshow of all pictures in the selected folder in a continuous loop. -
Page 20: Exiting Network Mode
:: Updating Network Skins The D2730 allows you to change the “skin” (the graphical look and feel) of the Network interface. You will need to insert the installation disc in the DVD player to browse and select the desired skin. -
Page 21: Using The Media Server Software
• You can also right-click the icon and select Open. • If there is no Media Server icon in the system tray, select Start>Programs>GoVideo D5 Media Server > GoVideo D5 Media Server to add the icon. 2 The Media Server software launches and displays the following tabs: •... -
Page 22: About Tab
:: About Tab The About tab is displayed when the Media Server software opens. This tab includes the software version number and copyright information. The version number is important should you require technical assistance. :: Media Files Tab The Media Files tab displays the audio, video, and image files that have been imported from your hard drive or media application. -
Page 23: Revealing Media Files
Revealing Media Files To reveal media files that were previously hidden. 1 Click the Media Files tab. 2 Click Reveal Media types 3 Select the desired media type from the Name 4 Select the desired file(s) from the pane. 5 Click Reveal •... -
Page 24: Media Import Tab
:: Media Import Tab Use the Media Import tab to import audio, video, or image files into your Media Server database. You can import files from media file applications, such as Windows Media Player, or directly from your hard drive. •... -
Page 25: Importing Using Plugins
Importing Using Plugins Use the Plugins option to manually scan files in an external media file applica- tion and import them into the Media Server database. 1 Click the Media Import tab. 2 Click Plugin Import • The Plugins window opens. 3 Click the row containing the desired plugin to select it. -
Page 26: List Manager Tab
:: List Manager Tab Use the List Manager tab to manage music playlists and picture slideshows. Working with Playlists You can create, edit, rename, or delete music playlists. Playlists can also be imported from other media file applications. Creating a New Playlist To create a new playlist: 1 Click the List Manager tab. -
Page 27: Renaming A Playlist
Renaming a Playlist To rename a playlist: 1 Click the List Manager tab. Music Playlist Available Playlists 2 Select from the 3 Click the desired playlist to select it. 4 Click Rename 5 Type the new name and press ENTER on your computer keyboard. Deleting a Playlist To delete a playlist: 1 Click the List Manager tab. -
Page 28: Working With Slideshows
Working with Slideshows You can create slideshows consisting of images and background music. You can even import and play slideshows created in other media file applications. Creating a New Slideshow You can also create slideshows consisting of images and background music (only one song can be selected). -
Page 29: Editing A Slideshow
Editing a Slideshow To edit an existing slideshow: 1 Click the List Manager tab. Slideshow Available Playlists 2 Select from the • The list of available slideshows is displayed. 3 Click the desired slideshow to select it. Edit 4 Click •... -
Page 30: System Tab
:: System Tab The System tab displays information about your D2730 networked DVD player, including server name, network address, network status, and more. Changing the Server Name To change the server (PC) name: 1 Click the System tab. 2 Click Change •... -
Page 31: Dvd Operations
Chapter 4 :: Basic Disc Playback Playing a DVD, CD, or VCD Before you begin: • Turn on the DVD player using the front panel POWER button. If the unit is in Standby mode, press STANDBY/ON on the remote control to power on the unit. -
Page 32: Disc Menu Navigation
Disc Menu Navigation DVD disc menus allow you to select chapters for playback, change the disc’s default playback settings (such as Audio format and Subtitle language), and access any special features on the disc. Use the following keys to navigate DVD disc menus. MENU Press to display the disc menu for the currently loaded disc. -
Page 33: Special Disc Features
:: Special Disc Features Title When you play a DVD that contains multiple titles, you can select the title you want using the TITLE key. 1 Press TITLE to display the disc’s title menu. • If there is no title menu, the key is invalid. 2 Press the arrow keys or the 0-9 keys to select a title for playback. -
Page 34: Subtitle
Subtitle Many DVDs contain subtitles in multiple languages. To select among all available subtitle languages: 1 Press SUBTITLE during DVD playback. 2 Continue to press SUBTITLE to select among all available subti- tle languages (or Off). Audio Many DVDs contain multiple audio formats, such as Dolby Digital 5.1- or 2-channel stereo, or soundtracks in multiple languages. -
Page 35: Ps/Is
PS/IS If you connected the DVD player to your TV using the Pro- gressive/Component Video Output, you can use the PS/IS key to switch to Progressive Scan for superior video quality. 1 While playback is stopped, press PS/IS twice to switch to Progres- sive Scan mode. -
Page 36: Play Mode
:: Play Mode Pressing PLAY MODE allows you to set Program Playback and Repeat options. Program Playback Program Playback allows you to play DVD chapters or CD tracks in a custom order. You can program up to 12 chapters or tracks at a time. 1 While playback is fully stopped (press STOP 2 Select Mode and press ENTER. -
Page 37: Mp3 Playback
:: MP3 Playback MP3 is a popular music format which allows you to compress music tracks up to 1/12 of their original size while retaining near CD quality sound. Your DVD player can playback MP3 files burned onto a CD-R or CD-RW disc. 1 Insert a CD-R/CD-RW disc with MP3 files into the DVD disc tray. -
Page 38: Photo Cd Playback
:: Photo CD Playback Photo CDs, including Kodak Picture CDs, contain JPEG images that you can view and manipu- late on your television screen. 1 Insert a Photo CD into the DVD disc tray. 2 The first image on the disc will display automatically. 3 To browse images: •... -
Page 39: Advanced Settings
Chapter 5 :: Setup Menu Overview Setup Menu Categories The Setup Menu provides advanced settings for your D2730 networked DVD player. The factory default settings are appropriate for the majority of users. • For Network settings; see page 40. •... -
Page 40: Network Setup
Network setup menus, select Help and press ENTER. IP Address The D2730 automatically obtains an IP (Internet Protocol) address when connected to a network by using DHCP (Dynamic Host Configuration Protocol). It is not recom- mended that you change this setting unless you are an experienced network user. To change the method by which the IP address is obtained: 1 From Stop mode, press SETUP (located under the remote control flap door). -
Page 41: Wireless Network Settings
Wireless Network Settings To configure the DVD player for a wireless network: 1 From Stop mode, press SETUP. 2 Select Network and press ENTER to search for a network. “Searching for wireless networks” is displayed followed by a list of available networks. •... -
Page 42: Language Setup
:: Language Setup The Language menu allows you to set your language preferences for on-screen displays (OSD), DVD subtitles, DVD audio soundtracks, and DVD disc menus. 1 From Stop mode, press SETUP. 2 Select Language and press ENTER. Language Setup Menus 3 Use the keys to select each of the following: OSD Menu Language... -
Page 43: Video Setup
:: Video Setup The Video menu allows you to set your preferred aspect ratio for DVD movies and specify your video connection method. 1 From Stop mode, press SETUP. 2 Select Video and press ENTER. Video Setup Menu 3 Use the keys to select each of the following: TV Aspect Sets your preferred format for DVD movies to match the shape of... -
Page 44: Digital Audio Setup
:: Digital Audio Setup The Digital audio menu allows you to set the format of the audio sig- nal from the coaxial and optical digital audio outputs. For example, if you connected the DVD player to an external amplifier with a Dolby Digital decoder, you should set Dolby Digital and DTS settings to Bit- stream. -
Page 45: Lpcm Setting
Disables VCD audio output. Speaker Test Adjusts the sound balance of your speakers. Use only if you con- nected the D2730 to a 5.1-channel amplifier: • Select More and press ENTER. • Select Speaker Test and press ENTER. -
Page 46: Analog Audio Setup
Pro Logic, speaker delays, and speaker sizes/configurations. The Center Delay, Surround Delay, and Speaker Set options need only be used when connecting the D2730 via the 5.1 Channel outputs. 1 From Stop mode, press SETUP. 2 Select Analog and press ENTER. -
Page 47: Speaker Set
Speaker Set Use to identify the type and size of speakers in your audio setup: 1 From Stop mode, press SETUP. 2 Select Analog and press ENTER. 3 Use the keys to select Speaker Set and press ENTER. • Note that the active speakers are listed in the Speaker Set field. The default setup is LR (Left and Right) only. 4 Select each of the following speakers and use the / keys to turn them On or Off: Subwoofer Indicates whether or not your audio setup includes a Subwoofer (SW). -
Page 48: Parental Controls Setup
:: Parental Controls Setup The Parental menu allows you to block playback of DVDs based on their ratings. Setting the Password & Rating Level The DVD player allows you to block playback of inappropriate content with a password-protected Parental Control system (not all discs are rated). 1 From Stop mode, press SETUP on the remote control. -
Page 49: Help
• Make sure the GoVideo D5 Media Server software is installed and running on the PC. • Reset the DVD player. • Reset the PC. No songs found. • Add music files into a media file application (such as Windows Media Player) and import into the GoVideo D5 Media Server software. Help... -
Page 50: Dvd Troubleshooting
Unable to see all pictures. • Verify that they are JPEG format. No movies found. • Add movie files into a media file application (such as Windows Media Player) and import into the GoVideo D5 Media Server software. Unable to see all movies. - Page 51 Picture noise. • Make sure the disc is not dirty or flawed. • If the picture output from your DVD player goes through your VCR to get to your TV, the copy-protection sig- nal applied to some DVD programs could affect picture quality. If you still experience problems even when you connect your player directly to your TV, try connecting your player to your TV’s S-Video input.
-
Page 52: Technical Specifications
:: Technical Specifications Video Video Out Ω 1.0Vp-p 75 , sync, negative polarity, RCA pin jack x 1 S-Video Out (separate Y and C signal output connec- tor) Ω • Y: 1.0Vp-p 75 , sync, negative polarity Ω • C: 0.286Vp-p 75 Component Video Out (Progressive/Interlace Scan modes) Ω... -
Page 53: Warranty
What to Do If Service is Required If service under this warranty is required, contact the Go-Video Customer Service Department at (800) 736-7679 or go online to http:// www.govideo.com to determine the nearest authorized Go-Video service center. What are the Exceptions This warranty does not cover: (1) Normal maintenance service. -
Page 54: Safety
:: Safety Important Safety Instructions 1 Read Instructions All the safety and operating instructions should be read before the product is operated. 2 Retain Instructions The safety and operating instructions should be retained for future reference. 3 Heed Warnings All warnings on the product and in the operating instructions should be adhered to. 4 Follow Instructions All operating and use instructions should be followed. - Page 55 This product may be equipped with a polarized alternating–current line plug (a plug having one blade wider than the other). This plug will fit into the power outlet only one way. This is a safety feature. If you are unable to insert the plug fully into the outlet, try reversing the plug. If the plug should still fail to fit, contact your electrician to replace your obsolete outlet.
-
Page 56: Safety/Regulatory Information
• If the product does not operate normally by following the operating instructions. Adjust only those controls that are covered by the oper- ating instructions as an improper adjustment of other controls may result in damage and will often require extensive work by a qualified technician to restore the product to its normal operation, •... - Page 57 User/Installer Caution Your authority to operate this FCC certified equipment could be voided if you make changes or modifications not expressly approved by the manufacturer, who is responsible for compliance with Part 15 FCC rules. This equipment has been tested and found to comply with the limits for a Class B digital device, pursuant to Part 15 of the FCC Rules. These limits are designed to provide reasonable protection against harmful interference in a residential installation.
-
Page 58: Notes About Discs
Notes about Discs On handling discs • To keep the disc clean, handle the disc by its edge. Do not touch the surface. • Do not expose the disc to direct sunlight or heat sources such as shot air ducts, or leave it in a car parked in direct sunlight as the tempera- ture may rise considerably inside the car. -
Page 59: Index
Component Video 8, 32 Component Video Output 5.1 Channel Analog Audio Composite Video Output 5.1 Channel Audio Outputs Customer Service Information 802.11b standard Digital Audio (Coaxial) 9, 33 Digital Audio (Optical) About Tab Disc Menu Language Ad Hoc mode Disc Menu Navigation 9, 33 ANGLE Disc Tray... - Page 60 Player Name Rear Panel Playing Region 1 Remote Control Repeat Repeat Status Indicator 8, 32 Photo CD RETURN 8, 32 18, 26 Playlists Plugins 6, 8 POWER Safety Power LED Scheduler 6, 32 9, 34 PREV SEARCH 9, 39 Pro Logic Setting SETUP Program Playback Setup Menu...