Table of Contents
Advertisement
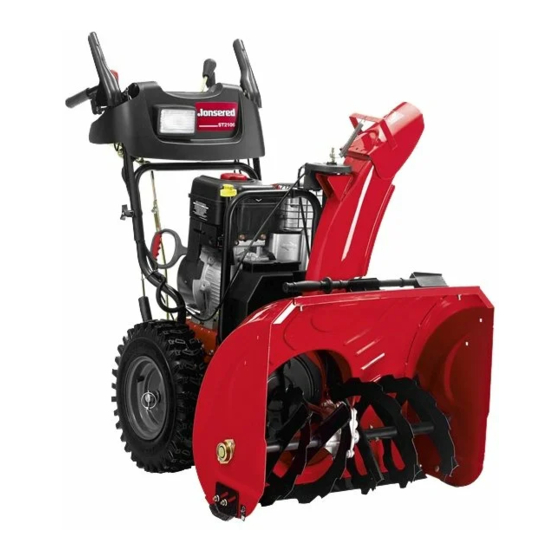
ST2109E, ST2111E
Instruction manual
Please read these in struc tions care-
ful ly and make sure you un der stand
them before using this ma chine.
Anleitungshandbuch
Bitte lesen Sie diese Anleitungen sorg-
fältig durch und vergewissern Sie sich,
daß Sie diese verstehen, bevor Sie die
Maschine in Betrieb nehmen.
ST2106,
Manuel d'instructions
Merci de lire trés attentivement le
manuel d'instructions. Assurez-vous
d'avoir tout compris avant d'utiliser ce
tracteur.
Manual de las instrucciones
Por favor lea cuidadosamente y com-
prenda estas intrucciones an tes
de usar esta maquina.
Instructieboekje
Lees deze instructies aandachtig en
zorg dat u ze begrijpt voordat u deze
ma chine gebruikt.
Manuale di istruzioni
Prima di utilizzare la macchina leggete
queste istruzioni con attenzione ed
accertatevi di averle comprese bene.
Advertisement
Table of Contents

Related Manuals for Jonsered ST2109E


Summary of Contents for Jonsered ST2109E
- Page 1 ST2106, ST2109E, ST2111E Instruction manual Manuel d’instructions Instructieboekje Please read these in struc tions care- Merci de lire trés attentivement le Lees deze instructies aandachtig en ful ly and make sure you un der stand manuel d'instructions. Assurez-vous zorg dat u ze begrijpt voordat u deze them before using this ma chine.
-
Page 2: Table Of Contents
CONTENTS INDICE SAFETY RULES ........PAGE 3-8 REGLAS DE SEGURIDAD ......SIVU 3-8 ASSEMBLY ............10-17 ENSAMBLAJE ..........10-17 OPERATION ............ 18-40 FUNCIONAMIENTO ......... 18-40 MAINTENANCE ..........40-47 MANTENIMIENTO ........... 40-47 SERVICE AND ADJUSTMENTS ..... 48-60 MANTENIMIENTO Y REGULACIONES ..48-60 STORAGE ............ -
Page 3: Operation
Safe Operation Practices Do not clear snow across the face of slopes. Exercise extreme caution when changing direction on slopes. Do for Snow Throwers not attempt to clear steep slopes. Training Never operate the snow thrower without proper guards, plates or other safety protective devices in place. Read the operating and service instruction manual 10. - Page 4 Vorsicht beim Umgang mit Benzin; es ist leicht entzündlich. 13. Lenken Sie den Auswurf nie auf nebenstehende Personen und lassen Sie niemanden vor das Gerät treten. a) Verwenden Sie einen ordnungsgemäßen Benzinkanister. 14. Unterbrechen Sie die Energieversorgung für den Sam- b) Betanken Sie den Motor nie in laufendem oder heißem mler/das Antriebsrad, wenn die Schneefräse transportiert Zustand.
- Page 5 Entretien et rangement Ajustez la hauteur du coffrage pour enlever le gravier ou la roche concassée. Vérifiez fréquemment que les protections, boulons de N’essayez jamais de faire des ajustements pendant que cisaillement, boulons de montage du moteur, etc.ne sont le moteur est en marche (sauf lorsque le fabriquant le pas desserrés pour vous assurer que l’équipement peut recommande spécifiquement).
- Page 6 Funcionamiento Veiligheidsvoorschriften voor het No meter las manos o pies cerca o debajo de partes ro- gebruik van de sneeuwruimer tantes. No acercarse nunca al área de apertura de descarga. Instructies Tener extrema cautela mientras la máquina funcione en Lees de gebruiksaanwijzing en bedieningsvoorschriften avenidas, caminos, carreteras de gravilla o los cruce.
- Page 7 Ruim geen sneeuw op glooiingsvlakken. Wees extra b) Non aggiungere mai carburante al motore in funzione o alert als u op hellende oppervlakken van richting wilt ancora caldo. veranderen. Probeer niet op steile vlakken sneeuw te c) Riempire i serbatoi di carburante all’aperto e prestando la ruimen.
- Page 8 16. Non utilizzare mai lo spazzaneve se non c’è una buona Non riporre la macchina col serbatoio pieno di carburante visibilità o in mancanza di luce. Sentirsi sempre saldi sui all’interno di un edificio in cui siano presenti possibili fonti di propri passi e impugnare con forza il manico.
- Page 9 ST2106 ST2109E ST2111E 0 – 3,6 0 – 4,2 0 – 4,2 101.8 2006/42/EC Notified Body SNCH 11, Route de Luxembourg L-5230 Sandweiler TUV Rheinland No. 0499...
- Page 10 Before the snow thrower can be used certain parts must be assembled, which for transportation reasons are en closed in the packing. The picture shows which parts must be assembled. Bevor Sie die Schneefräse verwenden können, müssen bestimmte Teile montiert werden, die zum Zwecke des Transports separat verpackt wurden.
- Page 11 How to set up your snow thrower Como preparar su máquina quita- nieves Tool box Portaherramienta A toolbox is provided on your snow thrower. The toolbox is located on top of the belt cover. Store the extra shear Con su máquina quitanieves se le proporciona un portaherra- bolts, nuts and multi-wrench provided in parts bag in the mientas.
- Page 12 Abrir la empuñadura superior Alzar la empuñadura superior (A) hasta la posición de operación y apretar fuerte los pomos (B) de la empuñadura. La bolsa de piezas contiene tornillos, arandelas y pomos adicionales. Utilice estos elementos para fijar el mango superior al inferior. Instálelos en los orificios inferiores de los mangos.
- Page 13 Install traction drive control rod The traction drive control rod (A) is installed on the snow thrower. Remove plastic tie (B) securing rod to lower handle. With top end of rod (A) positioned under left side of control panel, push rod down and insert top end of rod into hole in drive control bracket (C).
- Page 14 Install auger control rod Retrieve vinyl sleeve (B) and spring from bag of parts and retrieve the auger control rod (A) from carton chute tray. Slide straight rod end through the small hole in the vinyl sleeve. Hook spring (B) in hole in rod end (D).
- Page 15 Install discharge chute / chute rotater head NOTE: The multi-wrench provided in your parts bag may be used to install the chute rotater head. Place discharge chute assembly on top of chute base with discharge opening toward front of snow thrower. Position chute rotater head (A) over chute bracket (B).
- Page 16 ST2109E, ST2111E: Install chute deflector remote control Install remote cable bracket (A) to discharge chute with carriage bolt (B) and 5/16-18 lock nut (D) as shown. Tighten securely. Install remote cable eyelet (E) to chute deflector (F) with shoulder bolt (G), and 1/4-20 lock nut (K) as shown.
- Page 17 Check tire pressure The tires on your snow thrower were overinflated at the factory for shipping purposes. Correct and equal tire pres sure is im- portant for best snow throwing performance. • Reduce tire pressure to 14–17 PSI. Überprüfen des reifendrucks Zum Zwecke des Transports wurden die Reifen Ihrer Schneefräse ab Fabrik mit mehr Luft als nötig gefüllt.
- Page 19 A. TRACTION DRIVE CONTROL LEVER CHUTE DEFLECTOR S. POWER CORD PLUG B. AUGER CONTROL LEVER K. DEFLECTOR REMOTE CONTROL LEVER PRIMER C. THROTTLE CONTROL DRIVE SPEED CONTROL LEVER U. ELECTRIC START BUTTON D. SAFETY IGNITION KEY M. STEERING TRIGGERS RECOIL STARTER HANDLE E.
- Page 20 HOW TO USE YOUR SNOW COMO UTILIZAR SU MÁQUINA THROWER QUITANIEVES Know how to operate all controls before adding fuel or Conozca como hacer funcionar todos los mandos antes de attempting to start the engine. añadir carburante o intentar poner en marcha el motor. Stopping Pararse TRACTION DRIVE...
- Page 21 To use fuel shut-off valve (F) The fuel shut-off valve is located beneath the fuel tank on the engine. Always operate snow thrower with fuel shut-off valve in “OPEN” position. Benutzung des benzin-absperrventils (F) OPEN Das Benzin-Absperrventil befindet sich unter dem Benzintank am Motor. Verwenden Sie die Schneefräse nur dann, wenn das Benzin-Absperrventil auf Position “OPEN”...
- Page 22 To use choke control (E) The choke control is located on the engine. Use the choke control whenever you are starting a cold engine. Do not use to start a warm engine. • To engage choke, turn knob counterclockwise to “FULL ”. Slowly turn knob clockwise to disengage.
- Page 23 • ST2109E, ST2111E: Press downward on de flec tor remote control lever (K) and move lever forward to lower the deflector and decrease the distance. Move lever back to raise the deflector and increase the distance.
- Page 24 • ST2109E, ST2111E: Pressez vers le bas sur le levier de commande à distance du déflecteur (K) et déplacez le levier vers l’avant pour abaisser le déflecteur et diminuer la distance. Déplacez le levier vers l’arrière pour hisser le déflecteur et augmenter la distance.
- Page 25 To throw snow The auger rotation is controlled by the auger control lever (B) located on the right side handle. • Squeeze the auger control lever to the handle to engage the auger and throw snow. • Release the auger control lever to stop throwing snow. Das schneefräsen Die Rotation der Einzugsschnecken wird mit Hilfe des Bedienungshebels für die Einzugsschnecken (B) gesteuert, welcher sich am rechten Griff befindet.
- Page 26 Sobald der zusammengepackte Schnee entfernt ist, geben Sie das Reinigungswerkzeug wieder in seine Halterung zurück, indem Sie es in die Klemme drücken. • Vergewissern Sie sich, dass die Entladerutsche in eine sichere Richtung zeigt (dass keine Fahrzeuge, Gebäude, Menschen, oder anderen Gegenstände in Entladerichtung sind), bevor Sie die Maschine wieder starten. •...
- Page 27 Dopo aver rimosso l’accumulo di neve, riposizionare, premendo, lo strumento sul relativo gancio di fissaggio. • Prima di riavviare il motore, verificare che la bocca di scarico sia rivolta in una direzione sicura (evitare che veicoli, edifici, persone o altri oggetti siano rivolti nella direzione di scarico). •...
- Page 28 Moverse adelante y atrás El movimiento AUTO-PROPULSADO, hacia adelante y marcha atrás de la máquina quitanieves, se controla mediante la palanca de mando de la guía de tracción (A) posicionada en la empuñadura izquierda. • Apretar la palanca de mando de la guía de tracción hacia la em- puñadura para conectar el sistema de guía.
- Page 29 ST2109E, ST2111E: Power steering operation Steering triggers (M) are used to assist in steering your snow thrower. The triggers are located on the underside of each handle. When a trigger is squeezed, it disengages the drive wheel on that side of snow thrower and allows it to turn in that direction.
- Page 30 To adjust skid plates (N) NOTE: The wrench provided in your parts bag may be used to adjust the skid plates. Skid plates (N) are located on each side of the auger housing and ad- just the clearance between the scraper bar (P) and the ground surface. Adjust skid plates evenly to proper height for current surface conditions.
- Page 31 Regular las placas de deslizamiento (N) NOTA: La llave de apriete proporcionada en su bolsa de partes puede utilizarse para regular las placas de deslizamiento. Las placas de deslizamiento (N) están posicionadas a cada lado del alojamiento de la barrena y regulan la distancia entre la barra de ar- rastre (P) y el suelo.
- Page 32 ST2111E: Drift Cutters (AA) Use the drift cutters to cut through deep snowdrifts that are higher than the front of the snow thrower. • Loosen adjustment nuts (1) enough to allow drift cutter to be raised to highest position and tighten nuts securely. Repeat for opposite side of snow thrower.
- Page 33 VOR DEM MOTORSTART Überprüfen des ölstandes (Q) Der Motor Ihrer Schneefräse wurde bereits ab Fabrik mit Öl gefüllt geliefert. Überprüfen Sie den Ölstand mit der Schneefräse auf ebenerdigem Untergrund. Nehmen Sie die Ölverschlusskappe mit Messstab ab und wischen Sie den Messstab sauber. Stecken Sie den Messstab wieder in den Öltank und schrauben sie die Verschlusskappe fest zu.
- Page 34 Benzine (R) toevoegen • Vul de tank tot de onderkant van de tankvernauwing. Niet meer vullen dan tot het aangegeven niveau. Gebruik verse, schone, gewoon on- gelode benzine met een min i mum van 87 octaan. Mix de benzine niet met olie.
- Page 35 Release the recoil starter handle and let it snap back HINWEIS: Durch übermäßiges Einspritzen kann der Mo- against the starter. tor geflutet werden, woraufhin er nicht anspringt. Sollten Sie den Motor geflutet haben, warten Sie einige Minuten, If the engine still fails to start, repeat the above steps or use bevor Sie ihn erneut zu starten versuchen, und betätigen the electric starter.
- Page 36 lorsque vous mettez le moteur en marche avec le démar- El motor de su máquina quitanieves está equipado tanto reur électrique. con un arrancador eléctrico de 220 Voltios C.A. como con un arrancador de retroceso. El arrancador eléctrico Poussez le bouton de démarreur (U) jusqu’à ce que le está...
- Page 37 Tirar la empuñadura del arrancador (V) de retroceso Laat de motor eerst een paar minuten warmdraaien. De rápidamente. No soltar de golpe la cuerda del arranca- motor zal pas op volle kracht komen nadat hij een normale dor. werkingstemperatuur heeft bereikt. WARME START - ELEKTRISCHE STARTMOTOR Cuando el motor arranca, soltar la empuñadura del arrancador de retroceso y mover lentamente el mando...
- Page 38 Se il motorino di avviamento a strappo si AVVIAMENTO A FREDDO – MOTORINO DI AVVIAMENTO ELETTRICO gela Inserire la chiave per l’accensione di sicurezza (D) Se il motorino di avviamento a strappo si gela e non fa girare il (Legata al cavo di avviamento) nello slot di accensione motore, procedere nel seguente modo: fino a quando non scatterà.
- Page 39 • Halten Sie den Motor während der Benutzung von • El mejor momento para despejar la nieve es temprano Schnee sauber und frei. Dies begünstigt die Luftzufuhr por la mañana. En este momento la nieve está normal- und verlängert die Lebensdauer des Motors. mente seca y no ha sido expuesta directamente al sol y a temperaturas calientes.
- Page 40 CONSIGLI PER SPAZZARE LA NEVE • Adoperare sempre lo spazzaneve a tutto gas. In questo modo sarà possibile ottenere le prestazioni migliori. • Addentrarsi lentamente nella neve ghiacciata o molto bagnata. Per regolare la velocità, usare il comando di controllo della velocità, NON il comando del gas.
- Page 41 Anote las fechas cuando ha Antes Cada Cada Cada Informe de servicio hecho el servicio normal. del uso 25 horas 50 horas 100 horas • Controlar el nivel del aceite del motor ................. Compruebe que no haya sujeciones sueltas y asegúrese de que la •...
- Page 42 Correas en V Controlar el deterioro y el desgaste de las correas en V después de 50 horas de funcionamiento y sustituir si fuera necesario. Las correas no se pueden regular. Sustituir las correas si empiezan a resbalar debido al desgaste. (Ver “QUITAR EL CUBRE CORREAS”...
- Page 43 Traction drive system DO NOT lubricate the drive components inside the snow thrower. The sprockets, hex shafts, drive disc and friction wheel require no lubrication. The bearings and bushings are lifetime lubricated and require no maintenance. CAUTION: Any lubricating of the above com po nents can cause contamination of the friction wheel and damage to the drive system of your snow thrower.
-
Page 44: Service And Adjustments
ENGINE MOTOR See engine manual. Siehe Motorhandbuch. Lubrication Ölen Check the crankcase oil level before starting the engine and Überprüfen Sie den Ölstand des Kurbelgehäuses, bevor Sie after each five (5) hours of continuous use. Tighten oil fill cap den Motor starten, und nach jeweils fünf (5) Stunden des / dipstick securely each time you check the oil level. - Page 45 MOTEUR MOTOR Voir le manuel du moteur. Ver el manual del motor. Lubrification Lubricación Vérifiez le niveau d’huile du carter avant de mettre en marche Controlar el nivel de aceite del cárter antes de poner en marcha le moteur et après chaque (5) heures d’utilisation continuelle. el motor y después de cada cinco (5) horas de uso continuo.
- Page 46 MOTOR MOTORE Zie handleiding voor de motor. Si faccia riferimento al manuale relativo al motore. Smering Lubricazione Controleer het oliepeil van het carter voordat u de motor Prima di avviare il motore e dopo circa 5 ore di uso ininterrotto, start en elke keer na vijf (5) uur continu gebruik.
- Page 47 Cleaning IMPORTANT: For best performance, keep snow thrower housing free of any dirt or trash. Clean the outside of your snow thrower after each use. WARNING: Remove safety ignition key and disconnect spark plug wire from spark plug. Place wire where it can- not come in contact with spark plug.
- Page 48 WARNING: To avoid serious injury, before per form ing any service or adjustments: 1. Be sure throttle is in STOP position. 2. Remove safety ignition key. 3. Make sure the augers and all moving parts have completely stopped. 4. Disconnect wire from spark plug and place wire where it cannot come in con tact with plug. Snow thrower To adjust snow thrower height See “TO ADJUST SKID PLATES”...
- Page 49 ATENCIÓN: Para evitar heridas graves, antes de efectuar operaciones de mantenimiento o regulaciones: 1. Asegurarse de que el acelerador esté en la posición STOP (parado). 2. Quitar la llave de encendido de seguridad. 3. Asegurarse de que las barrenas y todas las partes en movimiento se hayan parado completamente. 4.
- Page 50 Shear bolts Auger shear bolts Both right and left-hand augers are secured to the auger shaft with a shoul- der/shear bolt and hex nut. Should a foreign object or ice become lodged in the augers, the shear bolts are designed to break, preventing damage to any other com po nents.
- Page 51 Vis de cisaillement Vis de cisaillement de la vis sans fin Les deux vis sans fin de gauche et de droite sont fixées à l’arbre des vis sans fin avec une vis à épaulement /de cisaillement et un écrou hexagonal. Si un objet étranger ou de la glace en venait à se loger dans les tarières, les vis de cisaillement sont plani- fiées pour briser, en prévenant les dommages aux autres composantes de l’appareil.
- Page 52 Schuifbouten Boorschuifbouten Zowel de rechter- als de linkerboren zijn bevestigd aan de booras met een borstbout/schuifbout en een zeskantmoer. De schuifbouten zijn zo ontworpen, dat ze breken als er voorwerpen of ijs in de boren vast te komen zitten en behoeden zo voor schade aan andere componenten.
- Page 53 To remove belt cover Remove the two (2) screws (A) securing belt cover (B) to frame (C). Remove belt cover. • Replace belt cover by installing cover and screws and tighten se cure- Entfernen der riemenabdeckung Entfernen Sie die zwei (2) Schrauben (A), mit denen die Riemenabeckung (B) am Rahmen (C) befestigt ist.
- Page 54 HINT: Insert a 3/8" drive ratchet (in the “ON” position) into the square hole in idler arm (J) and rotate ratchet clockwise to relieve tension. With tension relieved on idler, install new traction drive belt around pul- leys and inside belt keepers (L). Place auger belt (H) around and inside groove of auger pulley (E) only.
- Page 55 11. Setzen Sie die Schneefräse vollständig zusammen und stellen Sie sicher, dass die Riemen in den richtigen Bahnen laufen. Sollte sich der Einzugsschneckenriemen von der Riemenscheibe gelöst haben (indem er sich beim Zusammensetzen der Schneefräse an der Lenkzwischenhebelhalterung (M) verfangen hat), nehmen Sie die Schneefräse erneut auseinander und wiederholen Sie Schritt 10.
- Page 56 Sustituir las correas Las correas de la barrena y de la tracción no se pueden regular. Si las cor- reas están dañadas o empiezan a resbalar por el desgaste, se tendrían que sustituir. Se recomienda que la(s) correa(s) sean sustituidas por un centro de servicio calificado.
- Page 57 De V-riemen op uw sneeuwruimer zijn speciaal geconstrueerd 14. Zet de riemhuls en twee (2) schroeven terug. Maak en moeten vervangen worden door riemen van de oorspron- stevig vast. kelijke fabrikant (original equipment manufacturer - OEM), 15. HET INSTALLEREN VAN DE AFVOERTRECHTER- Zie die bij uw dealer verkrijgbaar zijn.
- Page 58 (ST2109E, ST2111E) IMPORTANTE: Cuando se monta la rueda, asegurarse de que se use el agujero más interno del eje (C) y el agujero del cubo de la rueda (D). Para desconectar el sistema de transmisión de las ruedas (para empujar o transportar la máquina quitanieves) quitar el pasador de lengüeta del cubo de la rueda e introducir el perno el agujero más externo sólo...
- Page 59 (ST2109E, ST2111E) BELANGRIJK: Als u het wiel er weer aanzet, zorg dan dat u het binnenste asgat (C) en het gat in de wiel- naaf (D) gebruikt. Om het aandrijfysteem van de wielen te ontkoppelen (voor het duwen of transporteren van de sneeuwruimer), verwijder de klinkpin van de wielnaaf en zet de pin alleen in het buitenste gat van de as (E).
- Page 60 Engine Motor See engine manual. Ver el manual del motor. Carburetor Carburador Your carburetor is not adjustable. Engine performance should Su carburador no se puede regular. Las prestaciones del not be affected at altitudes up to 2,134 meters (7,000 feet). motor no son afectadas por la altitud hasta 2,134 metros If your engine does not operate properly due to suspected (7,000 feet).
-
Page 61: Wartung
STORAGE Immediately prepare your snow thrower for storage at the WARNUNG: Lagern Sie die Schneefräse bei gefül- end of the season or if the unit will not be used for 30 days ltem Benzintank nie in einem Gebäude, in dem die or more. -
Page 62: Entretien
ENTREPOSAGE ALMACENAJE Préparez immédiatement votre souffleuse pour l’entreposage Preparar inmediatamente la máquina quitanieves para guard- à la fin de la saison ou si l’unité n’est pas en fonction pour arla al final de la temporada o si la unidad no se utilizará por 30 jours ou plus. -
Page 63: Onderhoud
OPSLAG IMMAGAZZINAGGIO Maak uw sneeuwruimer direct aan het einde van het seizoen Alla fine della stagione o se prevedete di non utilizzare la mac- klaar voor opslag of als het toestel niet meer dan 30 dagen china per almeno trenta giorni, preparatela immediatamente gebruikt gaat worden. - Page 64 Troubleshooting PROBLEM CAUSE CORRECTION Does not start 1. Fuel shut-off valve (if so equipped) in “OFF” position. Turn fuel shut-off valve to “OPEN” position. 2. Safety ignition key is not inserted. Insert safety ignition key. 3. Out of fuel. Fill fuel tank. 4.
- Page 65 Recherche des causes d’une panne PROBLÈME CAUSE CORRECTION Ne se met pas 1. Le robinet arrêt carburant (si tel qu’équipé) Tournez le robinet arrêt carburant dans la position “OPEN”. en marche dans la position “OFF”. Insérez la clé de contact de sécurité. 2.
-
Page 66: Individuazione E Soluzione Dei Problemi
Probleemoplosser HET PROBLEEM DE OORZAAK DE OPLOSSING Wil niet starten 1. De afsluitklep van de brandstoftank (als hij zo 1. Draai de afsluitkep van de brandstoftank naar “OPEN”. is uitgevoerd) in “OFF” zetten. 2. De veiligheidscontactsleutel zit niet in het contact. 2. - Page 68 532 40 60-35 Rev. 8 06.28.10 TH Printed in U.S.A.